|
Oracle® BPEL Process Manager Developer's Guide
10g Release 2 (10.1.2) Part No. B14448-01 |
|


 Previous |
 Next |
|
Oracle® BPEL Process Manager Developer's Guide
10g Release 2 (10.1.2) Part No. B14448-01 |
|
|
Previous |
Next |
This chapter discusses how to create, build, deploy, and test a simple BPEL process, a synchronous Hello World application. It accepts a name as an input message and returns the message Hello followed by the name through a synchronous reply.
The Hello World application is familiar to anyone who has taken an introductory programming class. Here it is given as an example of a BPEL process that accepts input, manipulates the input, and returns an output through a synchronous reply.
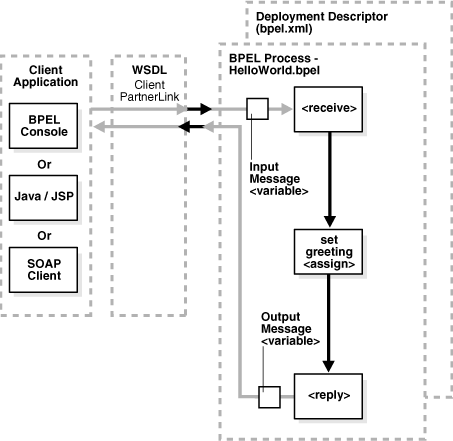
The input comes from a client application. In this case, the client application is Oracle BPEL Console, but a Java/JSP interface or a SOAP client can also serve as the client application. The client application has a partner link with the BPEL process. This defines the role of each party, what types of data each accepts and returns, and so on. The WSDL file contains the definition of the partner links.
The Hello World process accepts the input from the partner link with a receive activity, which repackages the data into a variable. The greeting is then added using an assign activity, and the result is sent back through the partner link as output using the reply activity.
The project describes how to create the Hello World process using Eclipse BPEL Designer.
Eclipse BPEL Designer includes a New Project wizard that automatically generates the skeleton of a BPEL project, including the BPEL source, a WSDL interface, a BPEL deployment descriptor, and an Ant script for compiling and deploying the BPEL process.
|
Note: Do not create a project name that begins with a number. |
To create a new BPEL project
Open Eclipse BPEL Designer.
On the File menu, click New > Project.
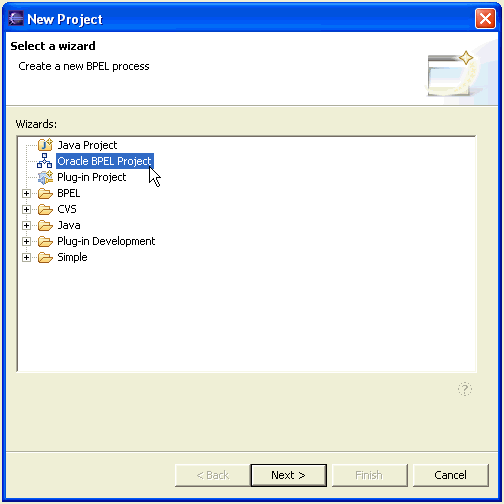
Select Oracle BPEL Project.
Click Next.
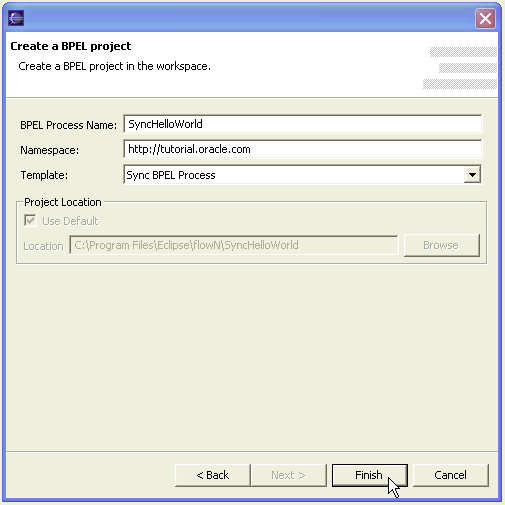
Enter SyncHelloWorld as the BPEL process name.
(Optional) Enter http://tutorial.oracle.com as the namespace (replacing the one provided by default).
Change the template to Sync BPEL Process.
Leave the Use default check box selected, and click Finish.
The New Project wizard creates a skeleton for a new synchronous BPEL process, with all the necessary source files.
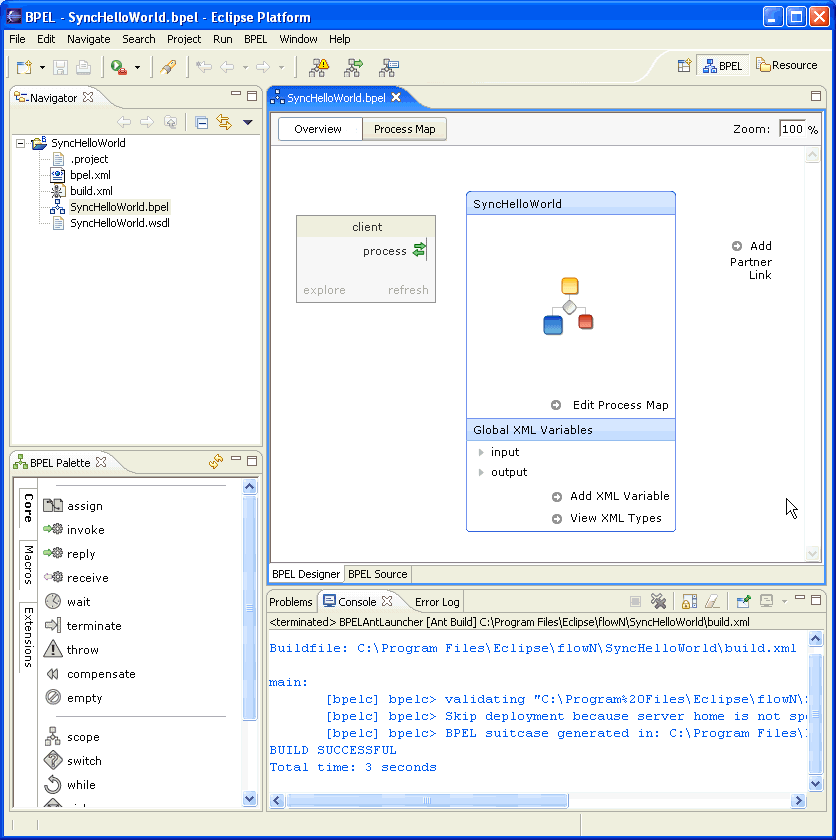
Specifically, the following files are created:
To start, you edit the WSDL file, which defines the interface to the flow, the messages that it accepts and returns, operations that are supported, and so on.
To modify the input and output messages of the BPEL process:
Expand SyncHelloWorld in the Navigator on the left and double-click the SyncHelloWorld.wsdl file.
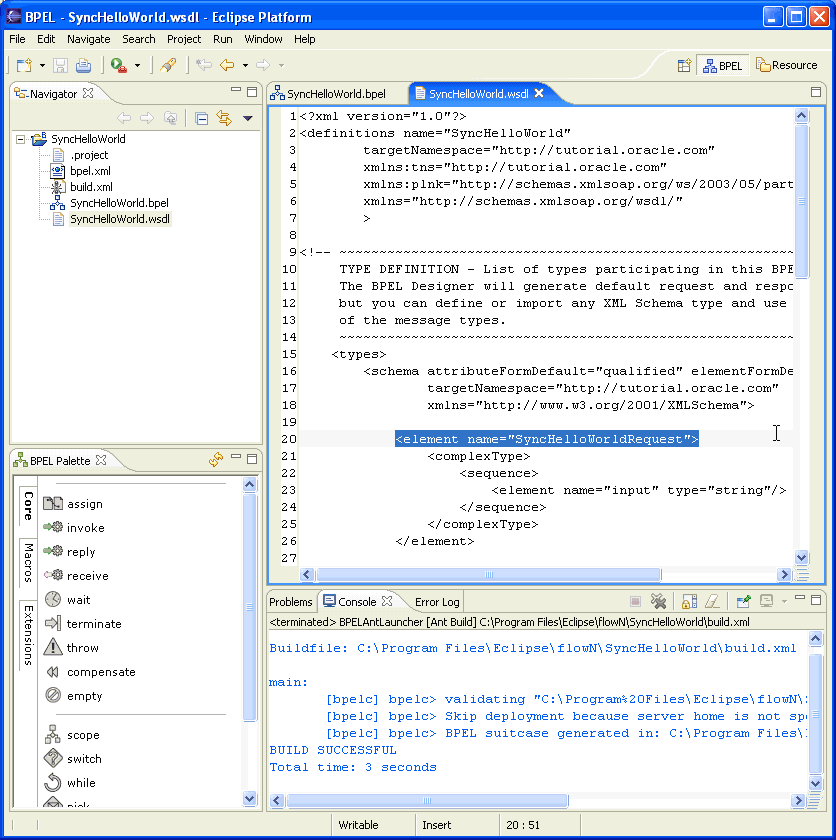
Scroll down in the WSDL file. The New Project wizard has defined both a SyncHelloWorldRequest complexType element that the flow accepts as input (in a document-literal style WSDL message) and a SyncHelloWorldResponse element that it returns.
|
Note: You can currently edit the WSDL file for the BPEL process in text mode in Eclipse BPEL Designer (or in any other text editor). If you edit the WSDL file (which you do not perform as part of this tutorial), you must refresh the client interface for the flow, if it is currently open in the designer. |
Close the (unmodified) SyncHelloWorld.wsdl window in the designer.
This section describes how to view the BPEL file in three different ways.
To view an overview of the BPEL process:
Double-click SyncHelloWorld.bpel in the Navigator if it is not already open in the designer (however, it opens by default when you create a new BPEL project, so it is likely already open).
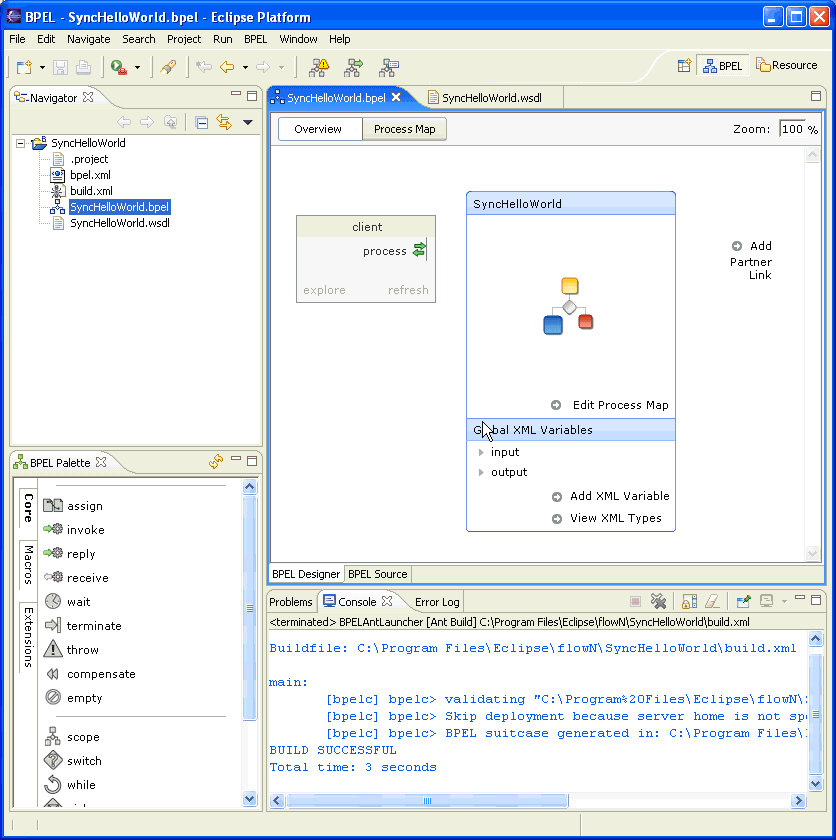
You are initially provided with a visual overview of the BPEL process file. On the left is the client interface, displaying operations exposed by the process (process in this case) and any asynchronous callback operations (there are none for this process). Note that the designer automatically puts any partner link named client on the left side of the window. All other partner links are displayed in a list on the right.
To view the detailed process map:
In the middle of the window is a link to edit the process map for the flow (visual representation of the flow logic) and a list of any global XML variables defined for the flow (input and output in this case, created by the wizard). An Inspector pane appears on the right after you drill down into the Process Map view.
At the top of the window, the Overview and Process Map links also allow you to shift from the current view (which is the Overview view) to the Process Map view, and back.
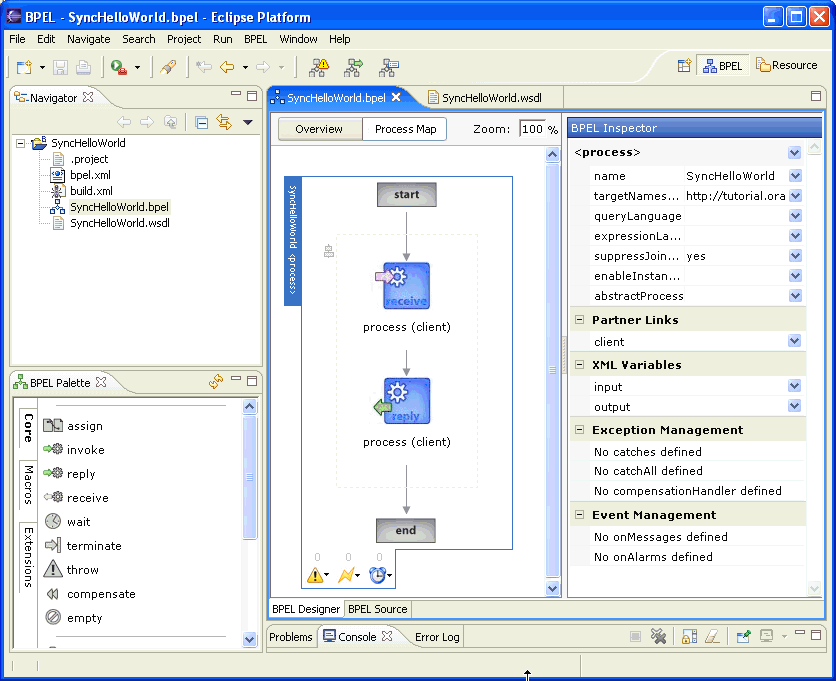
Click the Process Map button to see the visual representation of the process's flow logic.Alternatively, you can click the Edit Process Map link to access this view of the process.
To view the BPEL source code:
At the bottom of the window, the BPEL Designer and BPEL Source tabs allow you to switch between graphical editing mode (BPEL Designer) and a text-editing mode for the source code of the BPEL process (BPEL Source). Note that two-way editing is enabled; changes you make in either editing mode are reflected in both modes.
Click the BPEL Source tab of the editor window.
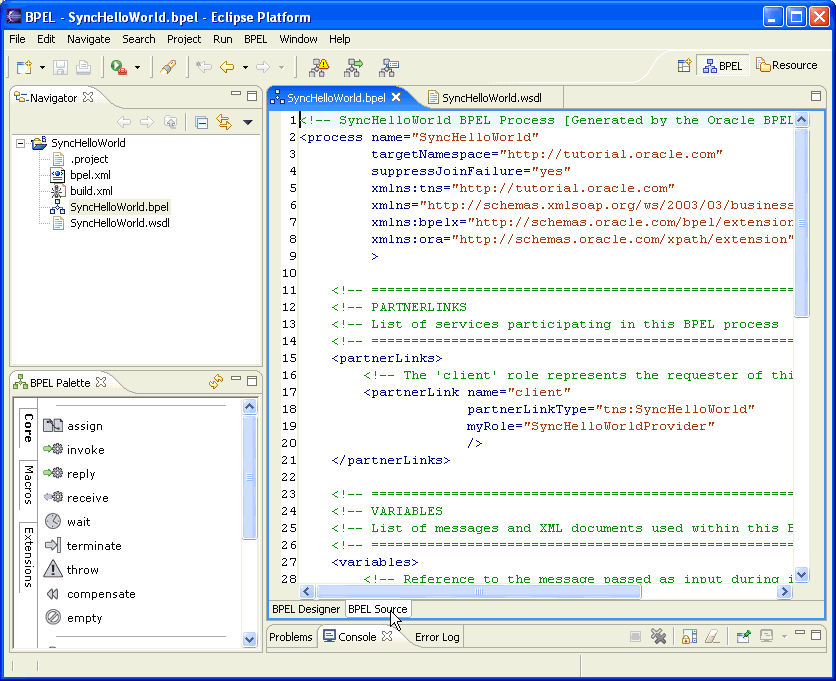
BPEL Source mode is a good way to review the BPEL code that has been generated by Eclipse BPEL Designer or by a wizard. This is a good way to understand exactly what the designer does, because everything you do in the designer is saved in standard BPEL source code. This can also be a great way to learn BPEL if you are not already familiar with it.
The New Project wizard has created a basic skeleton for you of a synchronous BPEL process. It begins with a process element defined with the name and target namespace you specified in the window.
<process name="SyncHelloWorld"
     targetNamespace="http://tutorial.oracle.com"
     suppressJoinFailure="yes" xmlns:tns="http://tutorial.oracle.com"
     xmlns="http://schemas.xmlsoap.org/ws/2003/03/business-process/"
     xmlns:bpelx="http://schemas.oracle.com/bpel/extension">
Next come the partner links, which in BPEL define the other services or processes with which the process interacts. In this case, the only partner link created automatically by the wizard is the one for the client interface to this BPEL process.
<partnerLinks>
     <partnerLink name="client"
     <!-- comments... -->
          partnerLinkType="tns:SyncHelloWorld"
</partnerLinks>
          myRole="SyncHelloWorldProvider"/>
In BPEL, following the partner links, you next define any global variables that are accessible throughout the process. The New Project wizard automatically creates global variables for the input and output messages for the process. As you saw previously, the types for these two variables are defined in the WSDL for the process itself.
<variables>     <!-- Reference to the message passed as input during initiation -->
     <variable name="input"
          messageType="tns:SyncHelloWorldRequestMessage"/>
     <!-- Reference to the message that will be returned to the
          requester
          -->
     <variable name="output"
          messageType="tns:SyncHelloWorldResponseMessage"/>
</variables>
After the global variables comes the main body of the process, which is any single BPEL activity. This is typically a compound activity that contains subactivities. When you create a new synchronous process, the New Project wizard creates a sequence (which in BPEL is a set of activities executed sequentially) that contains a receive activity to get the input message from the client to start the process, followed by a reply activity to return the result synchronously to the client.
<sequence name="main">
     <!-- Receive input from requester.
          Note: This maps to operation defined in SyncHelloWorld.wsdl
          -->
     <receive name="receiveInput" partnerLink="client"
          portType="tns:SyncHelloWorld"
          operation="process" variable="input"
          createInstance="yes"/>
     <reply name="replyOutput"
          partnerLink="client"
          portType="tns:SyncHelloWorld"
          operation="process"
          variable="output"/>
</sequence>
Finally, the process tag is closed:
</process>
That completes the code review. Next, you begin to edit this BPEL process to add logic to convert the input into a greeting.
A sequence activity contains one or more activities that are performed sequentially, in the order in which they are listed within the sequence element; that is, in lexical order. The sequence activity completes when the final activity in the sequence has completed.
 <sequence standard-attributes>
    standard-elements
    activity+
  </sequence>
Example:
<sequence>
  <flow>
    ...
  </flow>
  <scope>
    ...
  </scope>
  <pick>
    ...
  </pick>
</sequence>
The assign activity assigns values to variables. Copy rules are added to the assign to specify which data is being copied into which variable. The following code sample is from the HelloWorld.bpel file located at C:\orabpel\samples\tutorials\101.HelloWorld.
<assign>
     <copy>
        <from expression="concat('Hello ',bpws:getVariableData('input',
          'payload','/tns:name'))"/>
        <to variable="output" part="payload" query="/result"/>
     </copy>
</assign>
If you are using JDeveloper BPEL Designer, this sample is available in Oracle_Home\integration\orabpel\samples\tutorials\101.HelloWorld.
Hello World is the first sample application used in the tutorials. It accepts input from the user, then adds Hello with a trailing blank space to the beginning of the input payload and copies the result to the output payload.
In this section, you learn how to add a new activity to the BPEL process.
To view the process map:
Switch back to BPEL Designer mode and make sure you are in Process Map view. You now see a graphical representation of the flow for the BPEL process. As described previously, the initial process created by the New Project wizard for a synchronous process just receives the input for the process operation from the client and returns the response with a synchronous reply, as you saw in the code review section.
To insert an assign activity:
You now insert an assign activity into the process. A BPEL assign activity provides a mechanism for doing simple data manipulation, using XPath expressions.
You use the assign to concatenate the string ÒHello Ò with the string name input message and copy the resulting string into the output message.
To insert a new activity into the process, you find it on the BPEL Palette on the right (you can click the More Activities link to see additional activities supported in BPEL Designer mode) and drag it onto a transition arrow in the flow at the location where you want to insert it.
Drag an assign from the palette and drop it between the process receive activity and the reply response element:
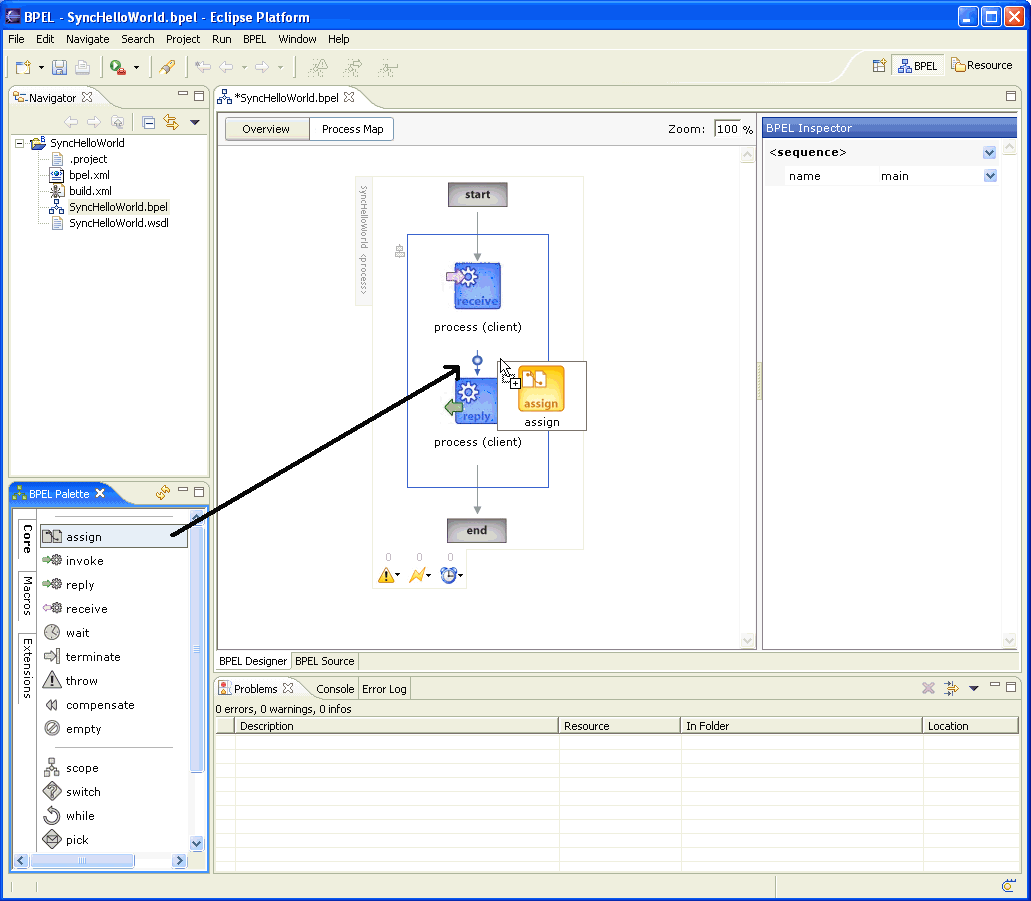
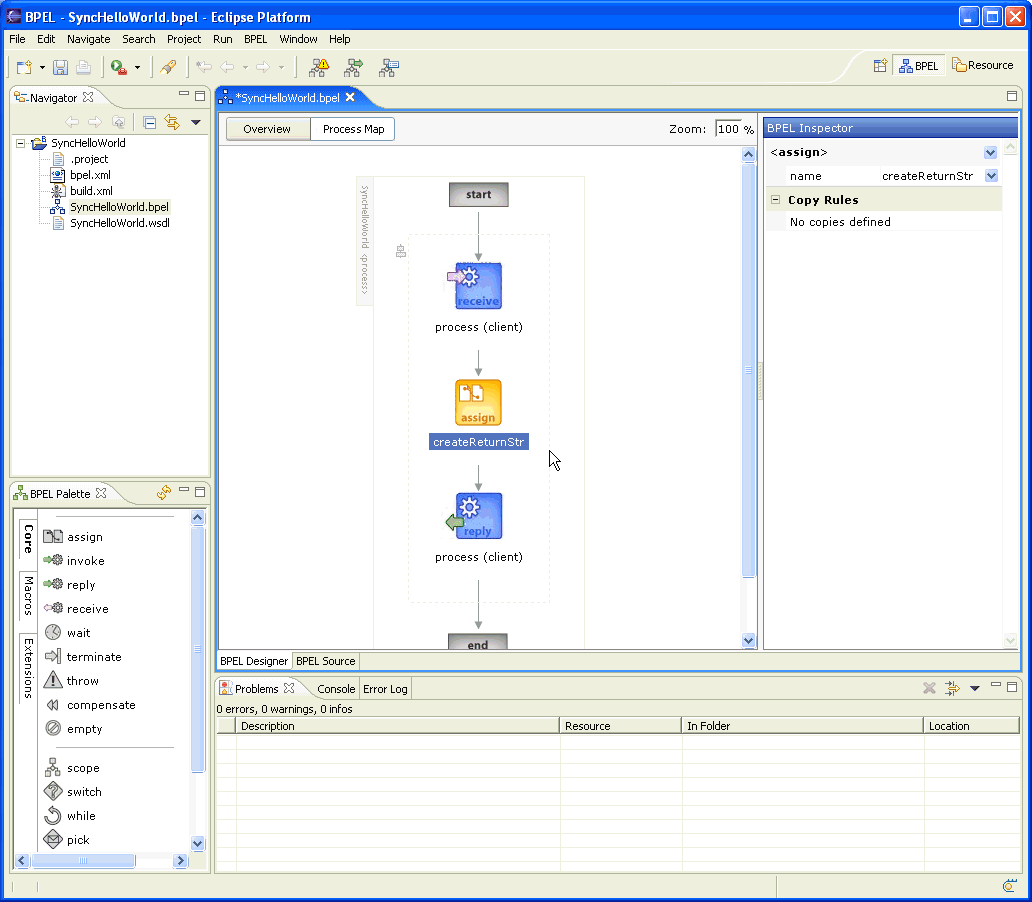
The new assign activity is initially selected. You can edit attributes for it in the BPEL Inspector window on the right.
Enter a value for the optional name attribute, such as createReturnStr (followed by the Enter key).
|
Note: The text field in which you enter the name is not selected until you click there. |
To add a copy rule:
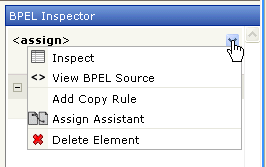
In the tasks drop-down list (the down-arrow to the right of the assign activity heading), click Add Copy Rule.
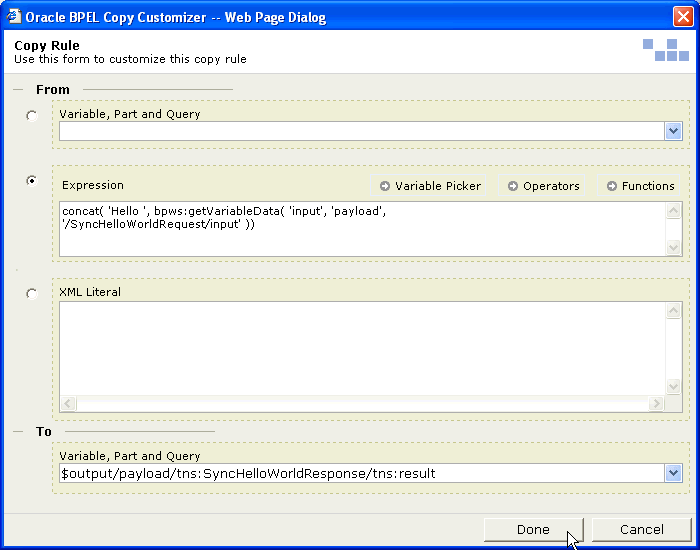
This brings up the Copy Rule window, which you now use to perform the data manipulation. In BPEL, an assign statement can have many copy rules, each using variable data, XPath queries, XPath expressions, and literals to do simple data manipulation and transformation.
|
Note: Oracle recommends that more complex data transformation be done using XQuery, XSLT, Java, commercial toolkits, or as a service. Seehttp://www.oracle.com/technology/bpel for more information.
|
Each copy rule for an assign activity has a From part, which specifies the source data, and a To part, which specifies a variable or element part as the destination for the data.
To define the From part (source) of the copy rule:
Click Expression in the From part and you can either enter the following expression in the text field:
concat( 'Hello ', bpws:getVariableData( 'input', 'payload',
 '/SyncHelloWorldRequest/input'))
Or you can use the XPath function wizard to complete this with the following steps:
Click the ... context sensitive BPEL assistant button to start the BPEL Function Wizard.
Select the contact function and click Next.
Enter "Hello " for the firstString (note the trailing space after the o).
For the nextString, click the drop-down arrow to use the XPath picker and choose the Variable input, the Part payload, and the XPath Query input.
Click Finish and you see the same concat expression described previously (except that the wizard includes the name prefix tns: for the XPath expression).
Whether you enter it directly or use the wizard, this expression says:
concatenate the literal string Hello with the string element that is accessed by the XPath query /SyncHelloWorldRequest/input within the part payload of the variable input
|
See Also: The following documentation for more information on XPath expressions and queries:
|
To define the To (destination) of the copy:
You now complete the To section of the Copy Rule form to copy the concatenated string into the helloString element in the reply message.
In the To section, click the down arrow after the field.
Select output > payload > SyncHelloWorldResponse > result string:
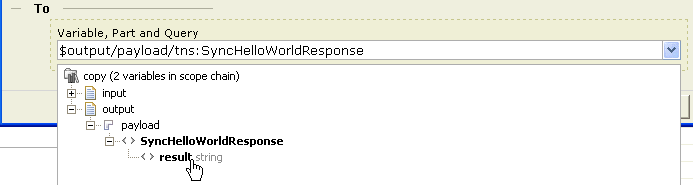
This causes the BPEL Designer to automatically generate the XPath query string $output/payload/tns:SyncHelloWorldResponse/tns:result and enter it in the field.
Again, you can always type queries directly into the field if you choose. Note that the wizard uses fully qualified names (including the namespaces) in the query string, but in both of these examples the namespaces are actually optional.
Click Done.
In this section, you learn how to compile, deploy, and test this BPEL process.
To compile:
Save the process.
Click the Build BPEL Project button on the Workbench toolbar to compile and deploy the process.
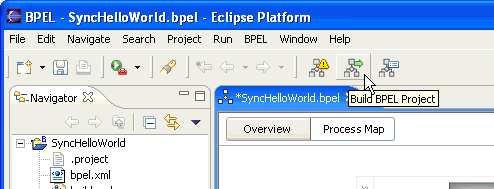
This compiles the flow, packaging all its components into a BPEL suitcase JAR file. You can then deploy this JAR file to Oracle BPEL Server by copying it into the appropriate deployment directory. The build.xml file generated by the wizard automatically deploys the suitcase to the local server's default domain, in this case C:\orabpel\domains\default\deploy. (Note that this action is the same as running obant from the command line.)
|
Note: To see the contents of the BPEL suitcase, open the fileC:\orabpel\domains\default\deploy\bpel_SyncHelloWorld_1.0.jar with any tool for opening JAR files (for example, WinZip).
|
As the final step, you test the BPEL process by using the automatically generated test interface in Oracle BPEL Console.
To initiate a test instance of the SyncHelloWorld BPEL process:
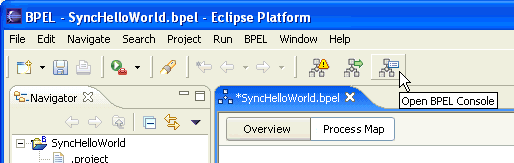
Access the console at http://localhost:9700/BPELConsole. Note that you can also click the Open BPEL Console button on the Workbench toolbar to open a browser window that points to the console.
Log in to the default domain to access the Dashboard tab:
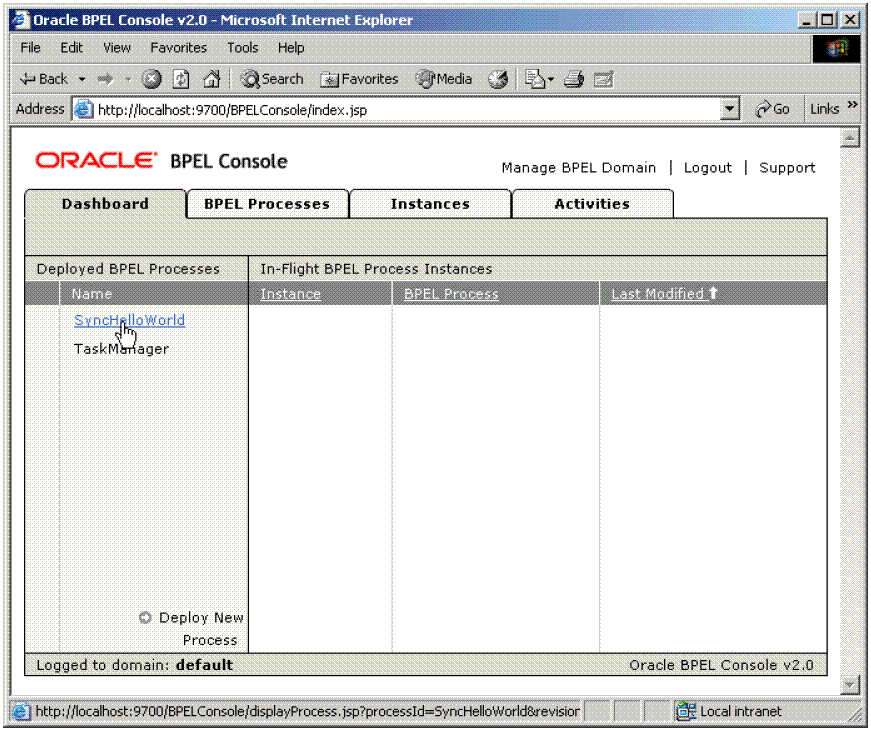
Click the SyncHelloWorld BPEL process link and then use the automatically generated HTML test form interface.
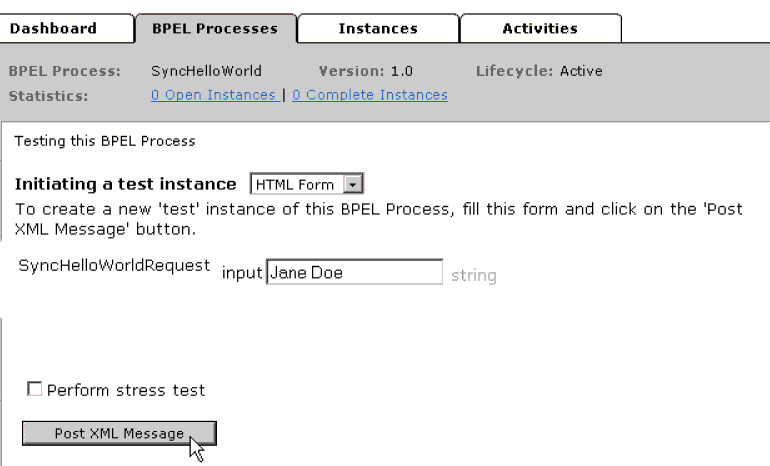
Enter the name and click Post XML Message to initiate the process:
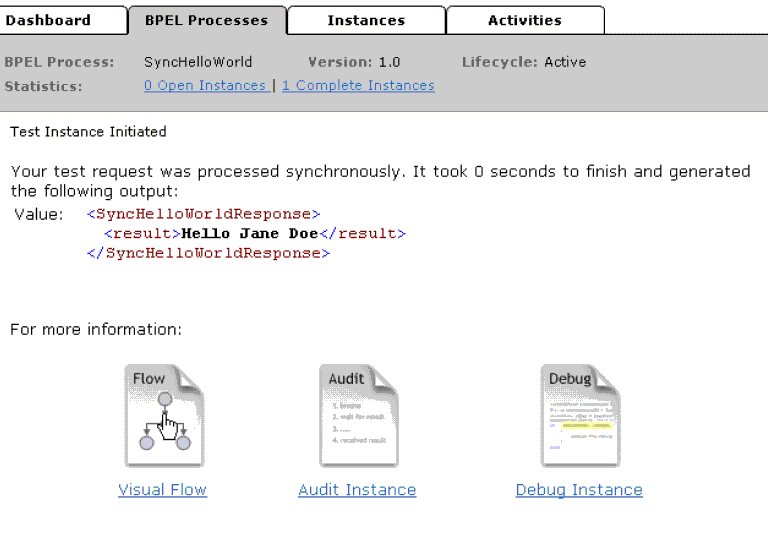
You now see the results, because it is a synchronous operation.
To see the visual audit trail for this completed instance, click the Visual Flow link.
The visual audit trail displays a representation of the current state and history of execution of the instance (which in this case has completed), with the same look and feel as Eclipse BPEL Designer. You can select activities in the audit trail to see details about them. You can also click the Audit tab to see the text audit trail or the Debug tab to see the debugger for this instance.
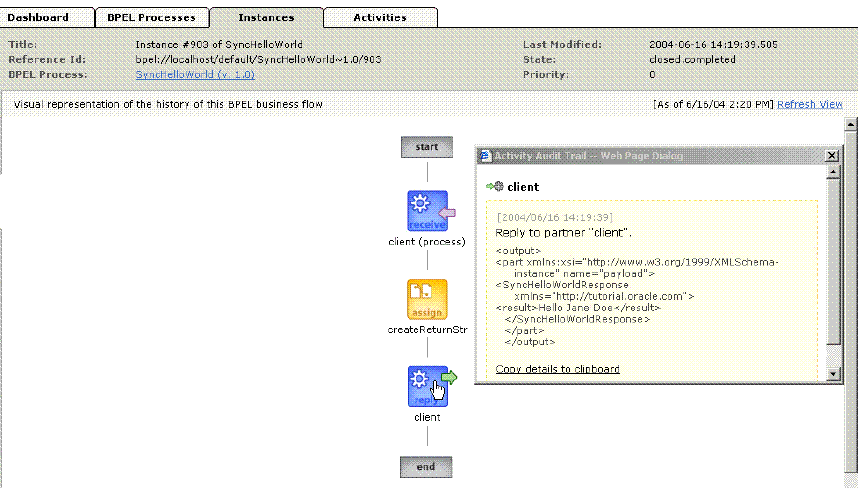
Click the reply client activity at the bottom of the audit trail to see the returned XML message for the process, as shown previously.
This chapter discusses some of the basic concepts of a BPEL process, and shows the steps necessary to create a BPEL process. These steps are shown in Eclipse BPEL Designer, but you can also use JDeveloper BPEL Designer. This process can be run from Oracle BPEL Console, and is a synchronous Web service that can be used as a building block for other BPEL processes or invoked using standard Web services interfaces.