As you design a workflow, you are likely to add steps to the canvas in a random order and rearrange them as you work on the design. This is usually how workflows are designed; however, it has an inconvenient affect on the process of setting up the workflow in Primavera Unifier. When you configure the workflow in Primavera Unifier, the steps appear on the Settings tab in the order you added them to the canvas. This is not likely the order they were in by the time the workflow design was finished, nor the chronological order the Primavera Unifier administrator needs to see them in when configuring the workflow.

To ease the configuration process, uDesigner provides a "Step Order" feature you can use to arrange the steps in chronological order for the Primavera Unifier administrator. This feature is for ease of use in Primavera Unifier; it makes no changes to the workflow itself.
The Step Order feature includes another advantage: It can organize the workflow actions into a logical, easy-to-use list for the user. The Workflow Actions option on a BP form may list an extensive number of actions.
By listing the actions in descending order by "most-used," you can increase the user’s efficiency and prevent them from scrolling through long lists for the actions they will be using most often.
To arrange the step and link order
- In the Workflow Designer window, click the Step Order button. The Step and Sub-Workflow Order window opens.
The window divides the workflow into steps, sub-workflow steps, and link actions.
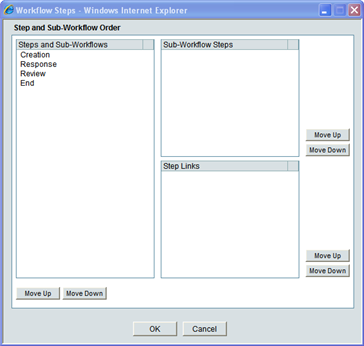
- To arrange the steps in their logical workflow order, highlight each step and use the Move Up or Move Down buttons.
- Use the Step Links section to arrange the actions into a more usable order for the list that appears when the user clicks the Workflow Actions drop-down list on the form.
- Click OK.