The resource sheets can contain large amounts of data. To make working on the sheets easier, you can create a filter to limit the amount of data they display. For example, you could filter the sheet to show only certain resource roles, such as carpenters or electricians. Once you have created a filter, Unifier includes it on a list of filters available to anyone who uses the sheet. To create a filter:
- Open the resource sheet from the log and choose View > Filters. The Set Up Filters window opens, showing a list of filters that have already been created (if any).
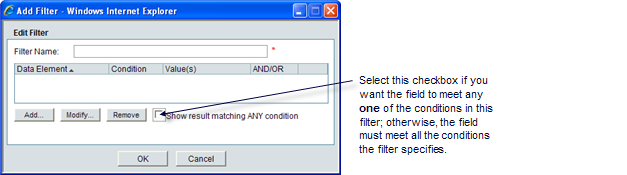
- Click the Add button. The Add Filter window opens.
- In the Filter Name field, enter a name for this filter.
- Click the Add button. The Query Condition window opens.
Use this window to create a query that will extract the data you want to see on the sheet. For information about creating a query refer to Unifier General User Guide.
- To filter the sheet, click Apply Filter.
- To save the filter, click OK.
To apply a filter to the sheet
- Open the sheet in the log.
- Click the Filtered by drop-down list and select the filter you want to use.
- Click Apply Filter.
Unifier refreshes the sheet to show the filtered records.
If you want to re-display all the rows on the sheet, you can clear the filter by choosing Clear Filters from the View menu.
To edit a filter
- Open the sheet.
- From the View menu, choose Filters. The Setup Filters window opens, showing a list of the filters that have been created for the sheet.
- Select the filter you want to edit and click Edit.