In general, most workflow business process forms consist of three major sections:
- Upper form
- Action (or Task) Details
Non-workflow business processes do not have an Action Details section.
- Line Item Details, unless otherwise noted.
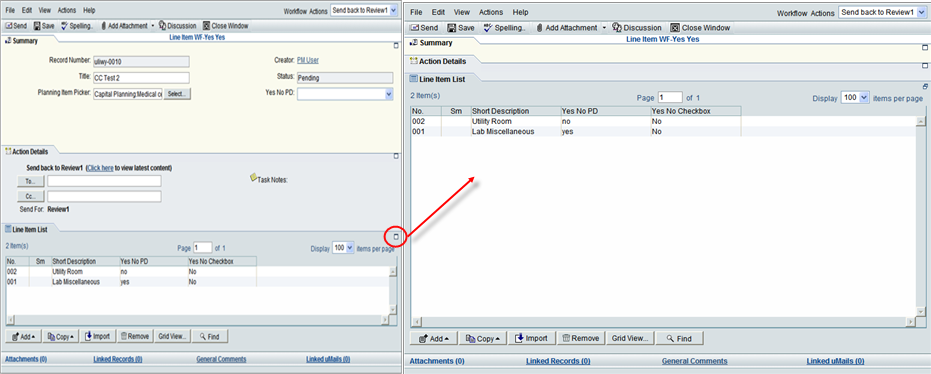
You can minimize and later expand a business process form. For example, you might want to minimize the General and workflow portions of the form to avoid scrolling through many line items.
Toolbar: The business process form has a toolbar at the top of the form, with the following buttons:
![]()
After you are done working on the business process form, click Send to route the workflow business process to the specified recipients. You can click Save to save a draft of the form, so you can work on it again. Click Spelling to check the spelling in your form. You can click Add Attachment to add attachments to the form. If the BP is designed to include discussions among members of a group, in Classic View you can click Discussion to open a discussion forum. When you have completed work on the business form, click Close Window.
Note: The Close Window action does not save the information on the form. To save the information, you must click Save before you click the Close Window button.
Collapse by Default Option in Business Process Forms
In the Block Properties window of a BP form, there is a new checkbox called Collapse by Default. If the checkbox is checked, the block is collapsed by default. If the checkbox is unchecked, the block is expanded by default.
With the Collapse by Default option, you can avoid scrolling through irrelevant information.
The Block Properties are searched during the rendering of a BP form to determine whether a block is collapsed or expanded at runtime.
Collapse by Default is applicable to Upper forms and Detail forms related to Line Item BPs. This option is also applicable to places where a preview of a BP form is displayed, such as a variety of logs, Query-Based Tabs, and Reference records among others.
Note: If you change the default behavior by performing the opposite action at runtime, the default expand or collapse option is displayed when the page is reloaded.
Additional Elements of the Form
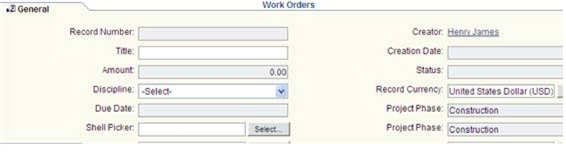
Upper Form: The upper portion of the business process contains the basic (General) information that the form is managing, such as the name of the record and its description, who created the record and when, and other general information. It may also contain fields for referencing other forms, and it may contain fields that are required for specific functionality. This is an example of an upper form for a business process type called Work Orders:
Workflow or Action Details: This section appears in the middle part of workflow business processes. It is for viewing or assigning the next assignee in the workflow or shows the last person who took action on it. Depending on how the workflow has been set up for the BP, the next assignees may be predetermined, or you may be able to choose the next assignee or send a copy of the BP to another user. You can print workflow progress using custom print.
Non-workflow business processes do not have an Action Details section.
This is an example of the Action Details section of a business process.

The To: and Cc: buttons are active after you select a workflow action in the Workflow Actions drop-down list.
Note: If there is only one possible workflow action for a step, the action is auto-populated in the field.
You can track a step through the workflow by clicking on the link "Click here" to view latest content.
In Classic View, click the notepaper icon next to Task Notes in the Action Details section to add notes to the routed task. These are notes for the task recipients.
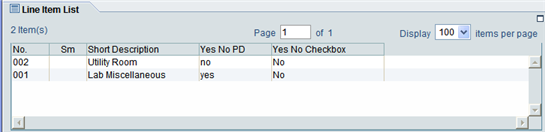
Content or Lower Form: The lower portion of the form contains the details and main content of the record, such as line items, file attachments for Document-type business processes such as transmittals or submittals, or comments or instructions in text-type BPs such as RFIs. Simple-type BPs do not have a Content section.
The lower form of certain BPs may be organized using multiple tabs. The BPs that support tabs in the lower form are:
- Line item type
- Cost type with the classification generic (line items with CBS codes, multiple codes, or account codes)
- Cost type with the classification lease, and the subtype line items with multiple codes
Tip: If the entire name is too long to appear on the tab, hover over the tab. Unifier will display the complete name in a tool tip.
There are buttons under the lower form portion of the business process form that enable you to work with line items:
![]()
Use the Add button to add detail or summary line items to the record.
Use the Copy button to copy another line item from the record, included consolidated line items.
Use the Import button to import a line item from a CSV file.
Use the Remove button to delete a line item from the record.
Use the Grid feature to enter line items directly into the Item log. (This is best used for short line items.)
Use the Find function to locate a line item in a long list of line items.
Links: Links at the bottom of the business process form allow you to access attachments, linked records, comments, and Mailbox:
![]()
About summary line item
Example
When a subcontractor wants to provide input related to the cost of a Change Order, the subcontractor can add summary line items to the change order without being able to see the cost breakdown structure that the contractor, or the owner, is using. The contractor, or the owner, can then review the summary line items and add them to the cost breakdown, for each of the summary lines added by the subcontractor.