Some managers, particularly those configured to function across shells, can accumulate a substantial amount of data. To make viewing this data easier, you can create filters to restrict the content of the sheet.
To create a filter
- Open the sheet.
- From the View menu, choose Filters.... The Setup Filters window opens.
- Click the Add button. The Add Filter window opens.
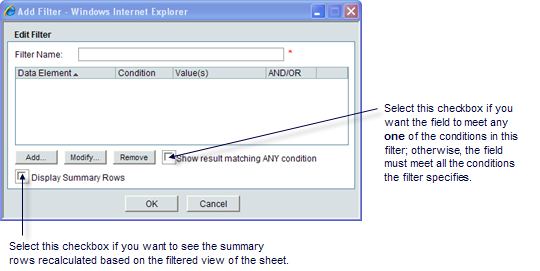
- In the Filter Name field, enter a name for this filter.
- Click the Add button. The Query Condition window opens.
- In the Data Element field, enter the name of the field you want to appear on the manager sheet.
The values in the field must meet a condition (such as "equals" or is "greater than") to be included on the sheet.
Depending on the data element you enter, the Query Condition window will display variable fields.
- Click OK, or click Apply Filter to filter the sheet content.
To apply a filter to a sheet
- Open the sheet.
- From the View menu, choose Filters.... The Setup Filters window opens, showing a list of the filters that have been created for the sheet.
- Select the filter you want to use and click Apply Filter.
Unifier displays a filtered view of the manager sheet. While in a filtered view, you can use all sheet functions except Export and Import.
If you want to re-display all the rows on the sheet, you can clear the filter by choosing ClearFilters from the View menu.
To edit a filter
- Open the sheet.
- From the View menu, choose Filters.... The Setup Filters window opens, showing a list of the filters that have been created for the sheet.
- Select the filter you want to edit and click Edit.