WebLogic Security
The AdminConsole security in version 1.0 will be a FORM based authentication and authorization using container based security model. The following document outline the security model configuration with Weblogic 12c.
Weblogic Server provides a standard security model for securing web-application deployed in Weblogic.Weblogic comes with variety of security models for application resources. Some of the common options available are:
- DD Only: Use only roles and policies that are defined in the deployment descriptors.
- Custom Roles: Use roles that are defined in the Administration Console; use policies that are defined in the deployment descriptor.
- Custom Roles and Policies: Use only roles and policies that are defined in the Administration Console.
- Advanced: Use a custom model that you have configured on the realm's configuration page.
For AdminConsole I we will be implementing default security model with Deployment Descriptor configuration out of the box, and clients can override the security model (Roles, Policies) using Advanced (custom) security model.
Before, we dive in to the details of Security model configuration and details. Let's define some of the key concepts, that will be used in this document for reference.
RBAC is made of four elements:
- Roles - Bring Users, Groups, Policies together. Roles define what users can do with a resource.
- Users - Principal that is requesting access to a resource.
- Policies - List of rules that defines access to a resource.
- Resources - Things you want to grant access to.
Role Definition for Admin Console
The roles defined for AdminConsole will be per service rather than per resource. Roles by service means that each service will define roles required to access that particular service. For instance, a Policy Service will define roles that will be used by Segments and Roles within that policy. The roles are not defined by resources or entities. Since segments and policy roles can not be accessed outside the context of a policy.
ACADMIN:
ACCYCLE:
Create Group in Weblogic Security Realm
- Navigate to <Domain>/Security Realms/myrealm/Users and Groups/Groups
- Click New option, the Create a New group page appears.
- Enter AC_ADMIN group in Name text box, and enter the description for the new group in the Description text box (Admin Console Admin) Group.
- Click OK option, a Group created successfully message appears.


Create User in Weblogic Security Realm
- Navigate to <Domain>/Security Realms/myrealm/Users and Groups/Users
- Click New option, the Create a New User page appears
- Enter acadmin group in Name text box, and enter the description for the new group in the Description text box (AdminConsole Admin) Group.
- Click OK option, a User created successfully message appears
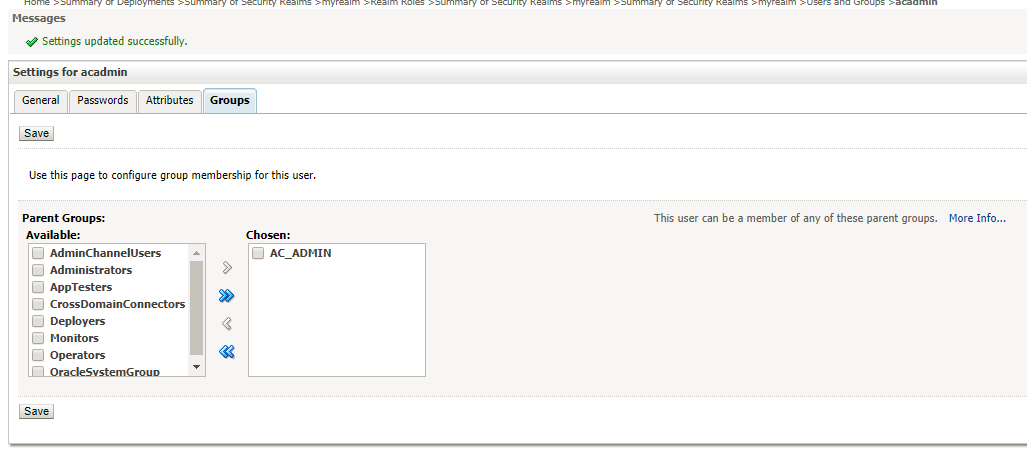
- Select the newly created user acadmin and navigate to Groups tab
- Add the group AC_ADMIN from available groups to chosen groups and click Save option

 User")


Create Global Roles in Weblogic Realm
-
- Navigate to <Domain>/Security Realms/myrealm/Roles and Policies/Realm Roles
- Expand Global Roles and click Roles link from the roles grid, then the Global Roles page appears
- Click New option to add a new Global Role called AC_ADMIN role and click OK option
- Select AC_ADMIN the newly created role.
- To add role conditions, click Add Conditions option.
- Select Group from the Predicate list and click Next
- In the Group Argument Name, enter AC_ADMIN the group name and click Add option
- Click Finish to complete the process
- In the Edit Global Role associate AC_ADMIN group with AC_ADMIN global Role. Note that both group name and role name are identical to depict the mapping between them. The group name and role name can be different. The role name must match the name defined in the deployment descriptor file of the application (web.xml and weblogic.xml). Group name could be any given name.
- Click Save.
- Now, deploy the application. Once application is deployed and active, restart the admin and managed server instances, for changes to take effect.


Global Roles Screen


9. Click Save.
| Role Name | Role Description | Role Privilege | Role Association |
|---|---|---|---|
| AC_ADMIN | Admin Console Administrator | Permit All | All Services |
| AC_CYCLE | Cycle Read Access | GET | cycle |