Entering Data on the Data Input Sheet
The data input sheet enables you to enter data into the Excel to Component Interface utility so that it can be loaded to the database by using the component interface that you've selected. You can enter data manually or you can cut and paste it from another spreadsheet or third-party application.
Access the data input tab to enter data:
Image: Data Input tab in Excel to Component Interface Utility
This example illustrates the Data Input tab of the Excel to Component Interface utility.
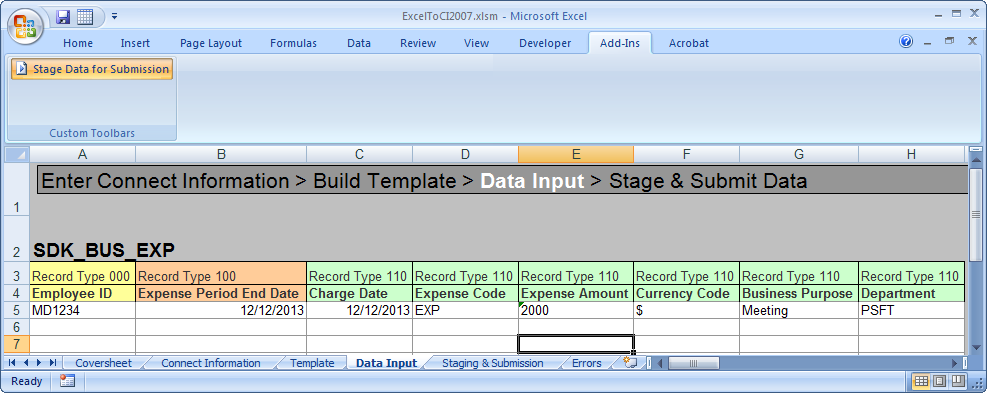
The field labels that appear on the data input sheet are those properties that you selected as input cells on the template. Each scroll level is identified by color. The record type from the template is also displayed for each property.
The system creates default date, datetime, and number formats when it creates the template. You can modify this format by using default cell formatting of Microsoft Excel when entering data, with the exception of the d/m/yy format for dates and datetimes. Instead, always use a d/m/yyyy format for dates and datetimes. To access the formatting feature, select from the Excel menu.
The data input sheet is also used to correct data that failed to submit to the database. Errors that are flagged on the Submit to Database page are posted to the data input page, and when you have corrected them, the items marked in error can be staged again to the Staging and Submission sheet.
Data Input Actions
Select the Add-Ins tab in Excel menu bar to access Stage Data for Submission button, which takes the data that you entered on the data input sheet and stages it for submission to the database. When the data is staged, it appears on the Staging and Submission sheet in the hierarchical template structure. At this point, you should check that all fields are populated as expected. When the data is staged, it displays both the data on the data input sheet and the data that you specified as default values.