Defining Cube Outlines
This topic discusses how to add cube dimensions and cube data queries to cube outline.
Use the Cube Outline page (CUB_OUTLINE) to add dimensions to the current outline.
Navigation
Image: Cube Outline page
This example illustrates the fields and controls on the Cube Outline page. Definitions for the fields and controls appear following the example.

Note: Depending on the outline type, some of the outline may not have all of the available properties or fields that are discussed in this topic.
|
Field or Control |
Definition |
|---|---|
| Outline Type |
Displays the type of outline. Available types are:
|
| Description |
Enter the description that you want to associate with the cube outline. |
| Owner ID |
Select the owner of the cube outline. The owner ID helps to determine the product, feature, or application team that last made changes to this outline. |
| Duplicate Member Allowed |
Select to indicate that duplicate member names are allowed in the dimensions. Note: To support duplicate members, users must create a data source query using the fully qualified name of each member; otherwise, the Essbase server will not be able to identify the member to load data into. See Essbase documentation for more information about Fully Qualified Name Members. |
| Auto Configure Sparsity |
Select to enable Essbase to automatically set sparsity levels. Deselect to manually set the sparsity levels. After you deselect this option, you can set the sparsity of each dimension in the template to either Sparse or Dense. Note: Dimensions marked as Sparse might take up significantly more space in the resulting cube than those marked as Dense. If you mark every dimension as sparse, you may end up with an enormous cube that is not practical or even possible to store on even the most powerful server. That is why the Time and Account dimensions are Dense level by default. You can change these settings in Essbase after you create your cube. When you change the sparsity settings from Cube Builder, be careful when adjusting them and refer to the Oracle Essbase documentation. |
| Run Default Calc (run default calculation) |
Select this option to have the system run the default calculation script in Essbase when the cube is created; Essbase aggregates the tree in the given rollups, but it does nothing else. Deselect this option to create a custom calculation script. |
| Add Cube Dimensions |
Click to access the Add Cube Dimensions page, where you can add dimensions to the current outline. Note: A dimension can be used only once in an outline. |
| Remove Cube Dimensions |
Click to access the Current Dimension List page, where you can remove dimensions from the current outline. |
| Outline Structure |
In this section, each dimension is highlighted by a bright green icon. The dimension contents are shown in the outline. |
| Member Properties |
Located at the right of the tree, this section displays the corresponding attributes. Note: You can change these values using the Dimension page. |
| Dynamic Source |
This section appears only for dynamic queries. It displays only a frame size of members with general information about the contents of the dimension. |
Inserting Cube Dimensions
Use the Add Cube Dimensions page (CUB_OUTLINE_SEC) to select dimensions to add to the current outline.
Navigation
Access the Add Cube Dimensions page by clicking the Add Cube Dimensions link on the Cube Outline page.
Image: Add Cube Dimensions page
This example illustrates the fields and controls on the Add Cube Dimensions page. Definitions for the fields and controls appear following the example.
|
Field or Control |
Definition |
|---|---|
| Search |
Click to display all dimensions that are not already inserted into the dimension. |
| Available Dimensions |
Select a dimension and click the OK button to return to the Cube Outline page. |
Deleting Cube Dimensions
Use the Current Dimension List page (CUB_OUTDIM_SEC) to remove dimensions from the current outline.
Navigation
Access the Current Dimension List page by clicking the Remove Cube Dimensions link on the Cube Outline page.
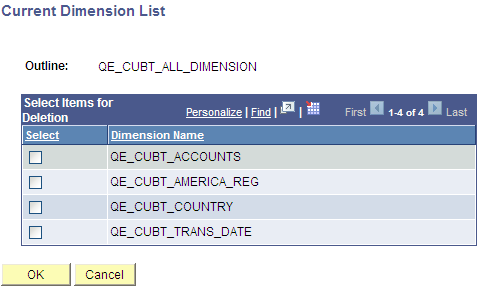
Image: Current Dimension List page
This example illustrates the fields and controls on the Current Dimension List page. Definitions for the fields and controls appear following the example.
|
Field or Control |
Definition |
|---|---|
| Select Items for Deletion |
Select a dimension that you want to delete from the cube outline. |
| OK |
Click to delete the selected dimension and return to the Cube Outline page. |
Example: Adding Cube Dimensions to a Cube Outline
Access the Outlines component by selecting
Image: Cube Outline page
This example shows the Cube Outline page with a new cube outline named OUTLINE_CUBE.
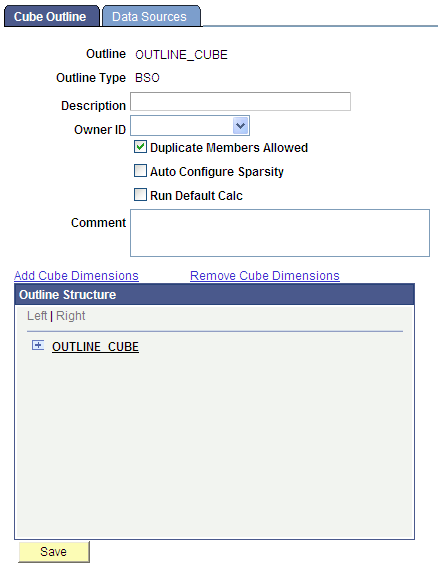
On the Cube Outline page, click the Add Cube Dimensions link to access the Add Cube Dimensions page, where you can add dimensions to the current outline. Note that a dimension can be used once in an outline.
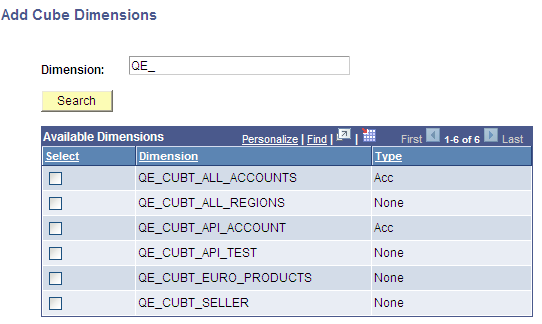
Image: Add Cube Dimensions page
This example illustrates the fields and controls on the Add Cube Dimensions page.
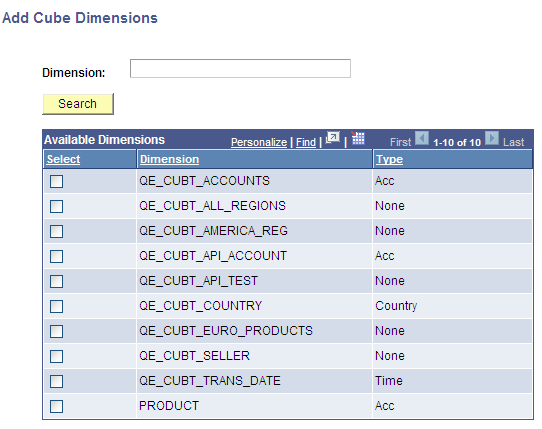
Click the Search button. The Available Dimensions section displays dimensions that are not already inserted into the dimension.
Select a dimension and click the OK button. The Cube Outline page reappears displaying the selected dimension.
Image: Cube Outline page displaying dimensions
In this example, the Cube Outline page displays the QE_CUBT_ALL_ACCOUNTS and ACCOUNTS dimensions.
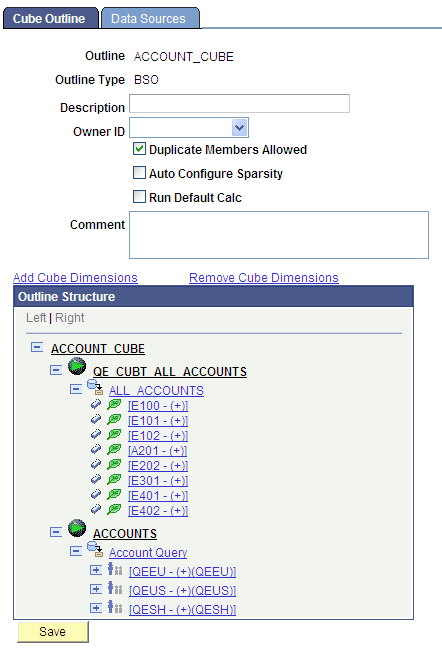
Each dimension is highlighted by a bright green icon. The dimension contents are shown in the outline.
Note: For dynamic queries, only a frame size of members is shown to give an idea of the contents of the dimension. The other frames are not viewable from this component.
Use the Data Sources page (CUB_OUTLINE2) to add the cube data query or queries. You can supply one or more queries to fill the cube.
Navigation
Access the Data Sources page by selecting the Data Sources tab on the Cube Outline page.
Image: Data Sources page
This example illustrates the fields and controls on the Data Sources page. Definitions for the fields and controls appear following the example.

|
Field or Control |
Definition |
|---|---|
| Add Query |
Click to access the Find Query page, where you can search for and select a query from available queries. Note: Each query must has one column for each dimension in the outline and one column for the measure. The measure is the numeric data that is the key piece of analysis in the online analytical processing (OLAP) cube, which is a set of multidimensional cells that hold numeric data. |
| Query Parameters |
Click to access the Query Prompt Values page, where you can view the current prompt values for a query and modify them as needed. |
| Dimension Mappings |
Displays a set of columns that will build your cube. |
| No Dimension Mapped |
Click to access the Dimension Mapping page, where you can map the column to a dimension. |
| Save |
Click to save the outlines. You can only save valid outlines that have each data source query conforming to all of the following rules:
|
Searching for Query
Use the Find Query page (CUB_QRYSEARCH_SEC) to search for available queries.
Navigation
Access the Find Query page by clicking the Add Query link on the Data Sources page.
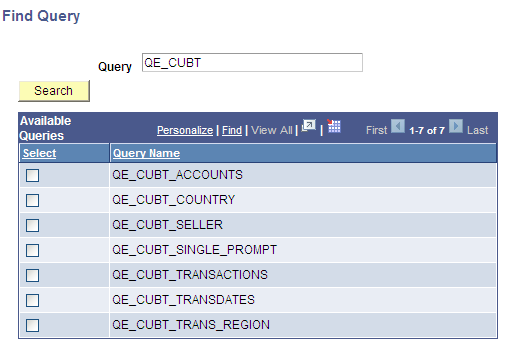
Image: Find Query page
This example illustrates the fields and controls on the Find Query page. Definitions for the fields and controls appear following the example. The Available Queries section displays a list of existing queries that are defined in the system after you click the Search button. Note that only public queries to which the current user has authorization appear in this section.
Mapping to Dimensions
Use the Dimension Mapping page (CUB_OUTLINE2_SEC) to map columns from data extraction queries to dimensions, select a column from data extraction as the measure, and unmap previously mapped columns.
Navigation
Access the Dimension Mapping page by clicking the No Dimension Mapped link for the selected outline heading on the Date Sources page.
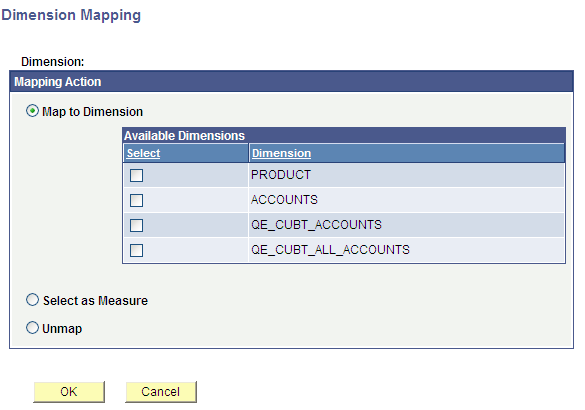
Image: Dimension Mapping page
This example illustrates the fields and controls on the Dimension Mapping page. Definitions for the fields and controls appear following the example.
|
Field or Control |
Definition |
|---|---|
| Map to Dimension |
Select to populate the Available Dimensions region, where you can select a dimension to map to your query. |
| Select as Measure |
Select to define a column as a measure. Note: Only one column can be selected as the measure. |
| Unmap |
Select to unmap a column that is already mapped to a dimension. |
| OK |
After mapping, click to return to the Data Sources page. |
Inserting Query Prompts Values
Use the Query Prompt Values page (CUB_QRYPROMPT_SEC) to view the current prompt values for a query and change them if necessary.
Navigation
Access the Query Prompt Values page by clicking the Query Parameters link for the selected outline heading on the Date Sources page.
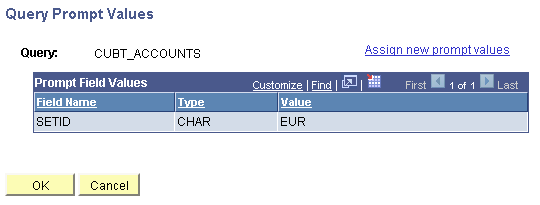
Image: Query Prompt Values page
This example illustrates the fields and controls on the Query Prompt Values page. Definitions for the field and control appear following the example.
|
Field or Control |
Definition |
|---|---|
| Assign new prompt values |
Click to access the New Prompt Values page, where you can change the input values of each query for each run. Note: All changes on the New Prompt Values page are saved in the outline definition, so all subsequent runs will always use the current set of prompt values. |
| Prompt Field Values |
Displays all data source queries that are assigned to the outline. |
Example: Adding Cube Data Queries to a Cube Outline
After entering the desired dimensions using the Cube Outline page, you need to supply one final key information: a query to use to supply the cube contents. Until now, you have provided information to build the cube structure. Now you use the Data Sources page in the outline component to add the cube data queries.
In the Data Sources page, click the Add Query link to access the Find Query page where you can select the desired query.
Note: On the Data Sources page, you can supply one or more queries to fill the cube.
Image: Data Sources page
This example shows the Data Sources page with the selected QE_CUBT_TRANSACTIONS query, which returns a full set of columns.
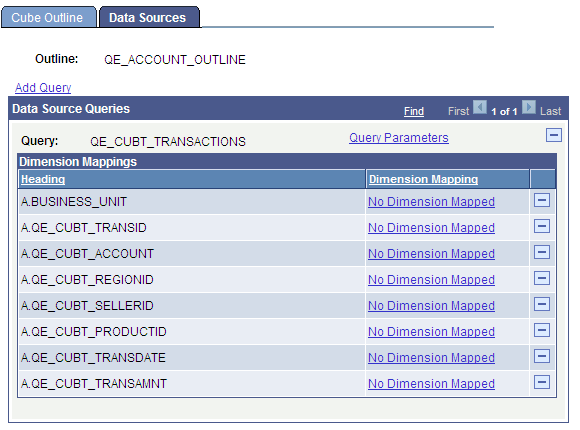
The query returns a number of columns, which would be typical for a real-life scenario. In this example, each of these columns needs a dimension:
Account—QE_CUBT_ACCOUNT
Region—QE_CUBT_REGIONID
Seller—QE_CUBT_SELLERID
Product—QE_CUBT_PRODUCTID
Time—QE_CUBT_TRANSDATE
Measure—QE_TRANSMOUNT
Click the Delete Row button (minus sign) to remove the business unit (BUSINESS_UNIT) and transaction ID (QE_CUBT_TRANSID) from the list because you do not need those two columns in this particular case.
Click the No Dimension Mapped link to access the Dimension Mapping page, where you can map the column to a dimension.
Image: Dimension Mapping page
This example illustrates the fields and controls on the Dimension Mapping page.
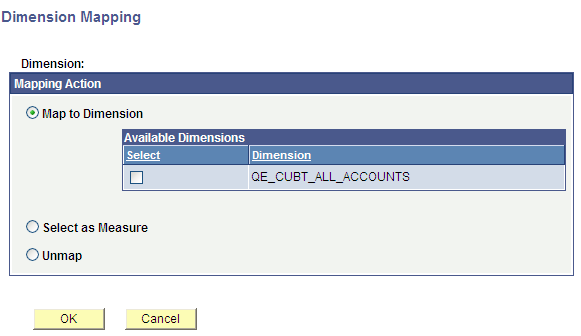
Select the Map to Dimension option to map the column to a dimension, and click the OK button. The Data Sources page reappears.
Image: Data Sources page with column mapped to dimension
This example illustrates the Data Sources page that has the QE_CUBT_ACCOUNT column mapped to the QE_CUBT_ALL_ACCOUNTS dimension and the QE_CUBT_PRODUCTID column tagged as the measure of the outline.
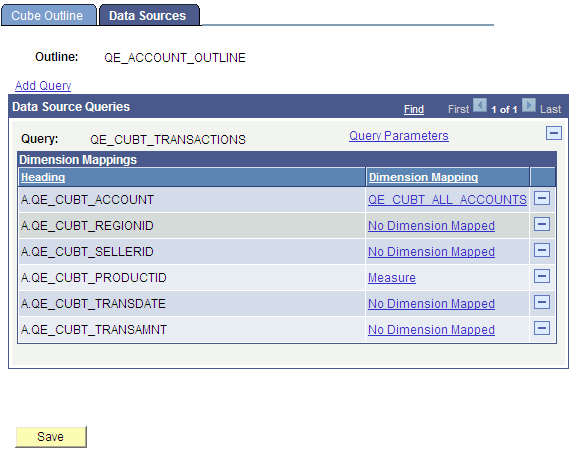
Note: Only one column can be selected as the measure. For the outline to be valid, all remaining columns in the Data Source Queries section must be mapped to a dimension or tagged as the measure.