Using the Elements Action Toolbar
These topics provide an overview of the elements action toolbar discuss how to:
Access and enable the action toolbar.
Use the action toolbar buttons.
Use the action toolbar to select element types and data types to add to a document.
The elements action toolbar appears on the Document Builder - Documents page under the document tree.
Image: Action toolbar
This example shows the action toolbar.

Hover over any button to display the element type that you can add to the system
Child Element Action Buttons
There are three buttons on the action toolbar that you can use to add child elements to a document.
Image: Action toolbar
The first set of three buttons highlighted in the following example enable you to add child element types to a document.

The following table lists the child element buttons in the order they appear on the toolbar and the action you can perform with each:
|
Field or Control |
Definition |
|---|---|
 |
Add primitive child. |
 |
Add collection child. |
 |
Add compound child. |
Peer Element Action Buttons
Use the element action toolbar to add peer element types to a document:
Image: Action Toolbar
The second set of three buttons highlighted in the following example enable you to add peer element types to a document.

The following table lists the peer element action buttons in the order they appear on the toolbar and the action you can perform with each:
|
Field or Control |
Definition |
|---|---|
 |
Add primitive peer. |
 |
Add collection peer. |
 |
Add compound peer. |
Delete and Move Element Action Buttons
Use the element action toolbar to delete elements from the document tree and move elements in a document tree.
Image: Action toolbar
The following example highlights the action toolbar buttons you can use to delete and move elements in the document tree.

The following table describes the action buttons you can use to delete and move elements in the document tree:
|
Field or Control |
Definition |
|---|---|
 |
Delete element. |
 |
Move element to the bottom of the tree. |
To access the action toolbar, select PeopleTools, Documents, Document Builder and then select a document or create a new document.
Image: Document Builder – Document page
The following example shows the action toolbar appearing under the document tree section on the Document Builder – Document page
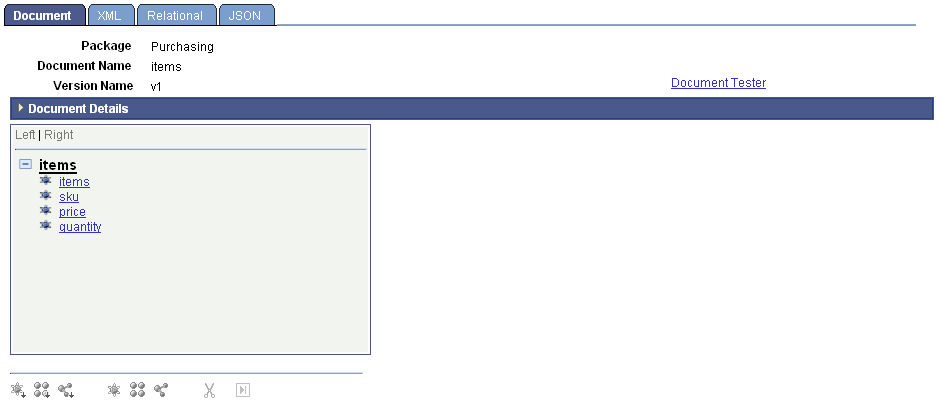
The action toolbar is not enabled until you click an element in the document tree. In the previous example, the action toolbar is not enabled since no element is selected.
Image: Action toolbar
This example shows the action toolbar enabled. The toolbar is enabled because an element in the document tree, price, is selected.
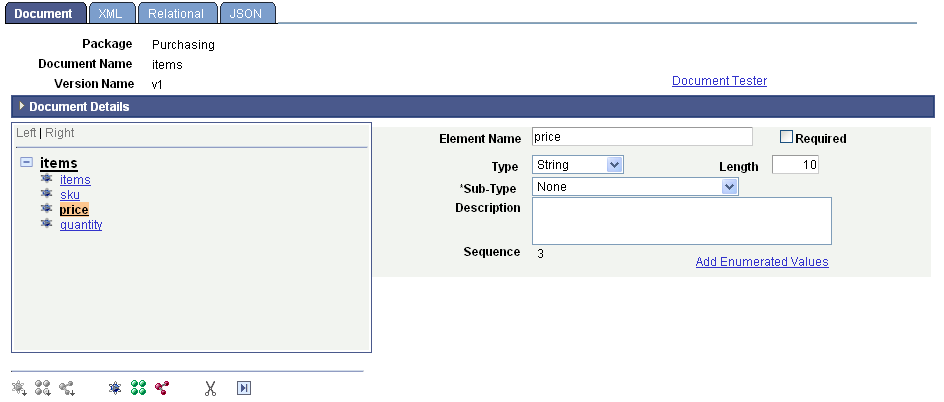
When you click an element, the element types and data types that you can add are enabled on the toolbar. If an element or data type is not enabled on the toolbar, either you have not selected an element to which to add an element or you are not allowed to add the element type or data type to the document tree at that time.
When you select the root element on the document tree, the Dependencies section appears. Document dependencies are discussed elsewhere in the product documentation.
See Viewing Document Dependencies.
When you select any other element type on the document tree, the properties defined for the element appear on the right side of the page, as shown in the previous example. Defining element properties is discussed elsewhere in this topic.