Activating and Deactivating Service Definitions in Bulk
This section describes activating and deactivating service definitions in bulk.
Note: The information in this section applies to REST and non-REST service definitions.
The Service Administration – Service Activate/Deactivate page (IB_HOME_PAGE9) in the Service Administration component enables you to activate and deactivate services in bulk.
This page enables you to quickly activate or deactivate services. If any problems occur during activation, the system displays a message indicating a problem activating a certain object, for example routing, handler, and so on. If such a message occurs, you must look at the corresponding object definition to determine the problem. This page is not intended to be used to debug activation problems or problems with integration metadata definitions.
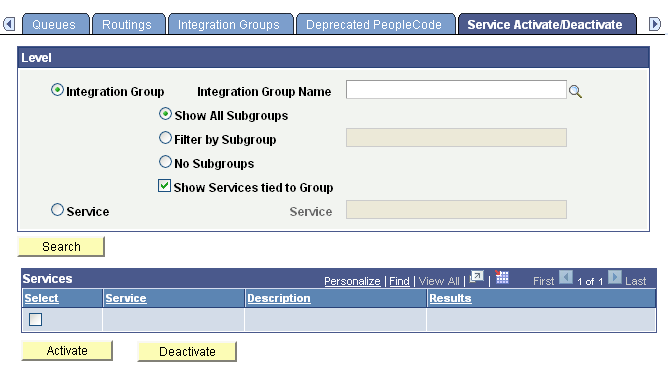
Image: Service Administration – Service Activate/Deactivate page
This example shows the Service Administration – Service Activate/Deactivate page.
When you activate one or more services, all of the default service operation associated with the services become active. In addition, the handlers, routings and queues associated with the service operations become active as well.
When you deactivate one or more services, all selected services become deactivated. The default service operations for the services become deactivated as well. In addition, the handlers and routing definitions associated with the service operations become deactivated. Queues do not become deactivated, since they can be shared with other service operations.
You can search for services to activate or deactivate by integration group name and related parameters or by service name.
The following controls appear on this page:
|
Field or Control |
Definition |
|---|---|
| Integration Group |
(Default.) Select the control to search the database for services to activate or deactivate by integration group. Use one of the following integration group filters:
|
| Integration Group Name |
If searching by integration group, enter the integration group name by which to search or click the Lookup button to search for one. |
| Service |
Select the radio button and enter the name of the service by which to search or click the Lookup button to search for one. |
| Search |
Click the button to search the database for services based on the criteria entered. |
| Services (grid) |
This grid displays the search results and features this controls:
|
| Activate |
Click the button to activate the services selected in the Services grid. |
| Deactivate |
Click the button to deactivate the services selected in the Services grid. |
To activate or deactivate services in bulk:
Access the Service Activate/Deactivate page ( and click the Service Activate/Deactivate tab).
Search for services to activate or deactivate:
To search by integration group:
Click the Integration Group control.
In the Integration Group Name field, enter or search for the integration group by which to search.
If appropriate, select additional integration groups filters as described previously in this section.
To search by service in the Service field enter or search for the service name by which to search.
Click the Search button.
Select the Select check box next to each service to activate or deactivate.
Click the Activate button to activate the selected services; click the Deactivate button to deactivate the selected services.
When the system has performed the selected action, the Results column displays Success for each service you activated or deactivated.