Instance Hooks
Beginning with Excel 97, Microsoft began using Visual Basic as the programming language to write macros. In earlier versions of Excel, you had to create a macro sheet to use the NvsInstanceHook. Now, whether recording your macro or writing Visual Basic code within the Visual Basic Editor, you can invoke the PS/nVision Instance Hook directly from the module within a Visual Basic project without having to create a macro sheet.
Note: NvsInstanceHook is not supported in OpenXML mode.
Instance hooks enable user-written macros to be executed by PS/nVision after delivering the data to a report instance but before saving the instance. Instance hooks are supported for both matrix and tabular layout sheets. With an instance hook, you can:
Refresh a pivot table based on data delivered in the instance.
Change the delivered outline level.
For example, compress reports so the user starts with the top level.
Apply subtotals or AutoFilter to data delivered in a tabular instance.
Do high-level zero-suppression or resort data.
In general, use Excel features that can't be applied in the layout because they require data.
Within an Instance Hook macro, you can call any other Visual Basic methods or functions. But you should avoid calling PS/nVision functions and closing Excel.
To use instance hooks, identify the layout sheets in the layout workbook (.XNV file) to which you want to apply post-delivery processing. For each sheet, define the name NvsInstanceHook to refer to the name of the first cell of an Excel 4 macro sheet or the name of a Visual Basic procedure.
The defined name NvsInstanceHook is sheet-specific. You need to either define the same name on multiple sheets or, the preferred method, enter the sheet name and an exclamation point (!) with the name when defining it. By doing this you can fire different macros for different layout sheets in the same workbook. The resulting name looks like Sheet1!NvsInstanceHook.
To record a macro from within Microsoft Excel, select
To write a macro from within Microsoft Excel, select
Image: A sample macro
This example shows a module that combines a recorded macro with additional code that has been added through the editor.
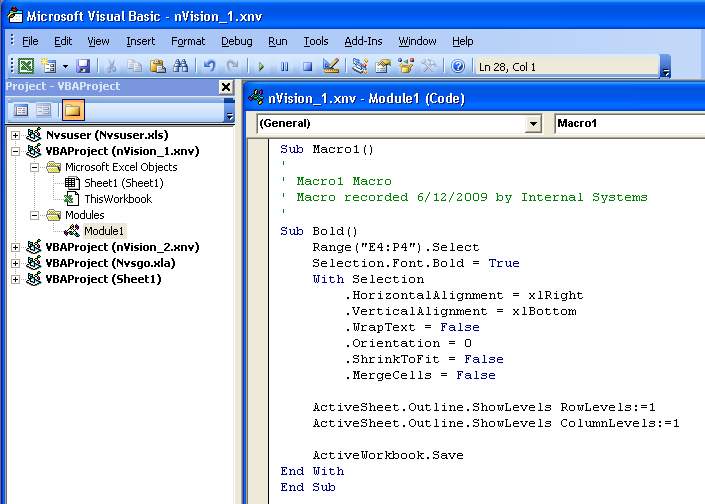
The macro applies bold and right-aligns the nPloded TimeSpan columns, collapses the outline of the nPloded rows and columns, and saves the instance.
After creating the macro module, return to your PS/nVision layout and attach it using NvsInstanceHook.
To attach a macro using NvsInstance Hook in PS/nVision:
Select the cell in the layout in PS/nVision.
Select from the toolbar.
For the name, enter the sheet name followed by an exclamation point and the text NvsInstanceHook. For example, Sheet 1!NvsInstanceHook.
Enter the name of the macro in the Refers to field.
For the name, enter the name of Excel Visual Basic Module, where the macro is located, followed by a period and the name of the Excel VB Macro. For example, Module1.MacroName.
Click the Add button.
Click the OK button.
Your macro is executed after the PS/nVision Instance is created.