Performing Mass Updates
This section describes how to use the PTF Mass Update tool.
As the applications you are testing are updated, you will find various situations where many of your tests need to be modified. The Mass Update tool provides this capability, enabling you to perform mass updates to your tests.
For example, suppose in a new release, a component name has changed, and every test you have that references that component must now be modified in order to execute successfully. Using the Mass Update tool, you retrieve the impacted tests, search for steps that include that component and replace the previous component name with the new name.
Mass Update Steps
To perform a mass update, complete these steps:
Open the Mass Update page.
Define the filter criteria.
Apply the filter to retrieve the test steps.
Find/replace the test step values that need to be modified.
Save.
To access the Mass Update page, select .
Image: Mass Update Page
This example illustrates the fields and controls on the Mass Update page.
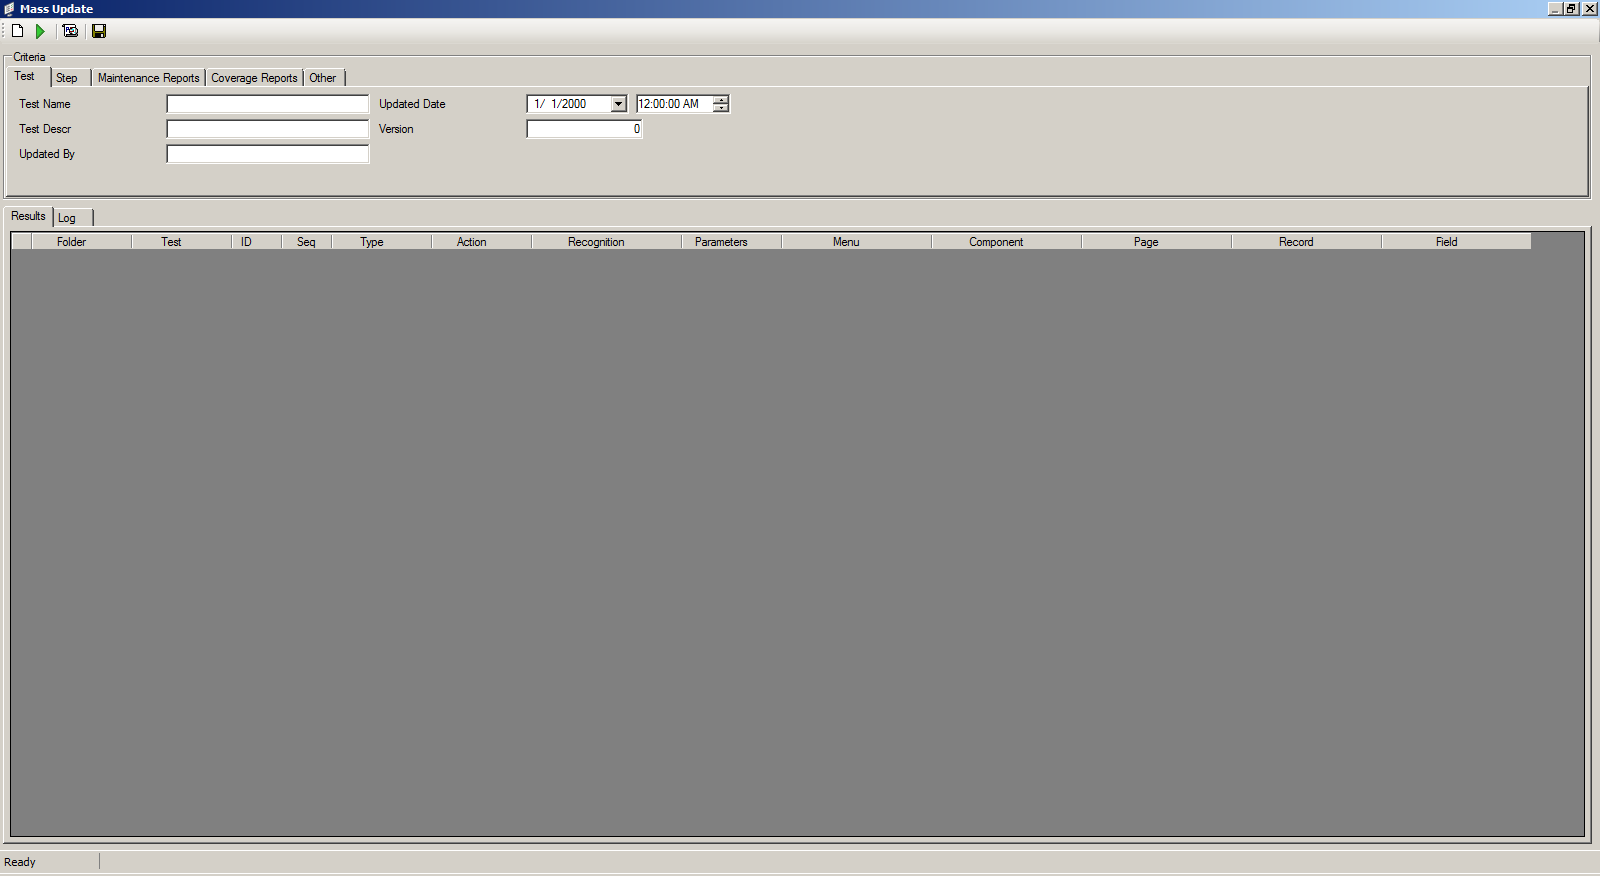
When you first open the Mass Update page, the Results grid is empty; no test records appear in the grid.
When you use the mass update tool, you define and apply a filter to retrieve tests that match specific criteria, returning the results in a grid format similar to the Test editor, but including steps for multiple tests. The grid includes two additional columns: Folder and Test so you can identify which test the steps are from. Once the grid is populated, you can use a find/replace dialog box to search for specific test step field values, modify the steps, and save your changes.
Mass Update Toolbar
The Mass Update Toolbar includes the following icons:
|
Field or Control |
Definition |
|---|---|
 |
Click to clear all criteria fields. |
 |
Click to apply the filter and populate the grid with the matching test steps. |
 |
Click to open the Find and Replace dialog box. |
 |
Click to save all modified test steps. |
Mass Update – Criteria Group Box
Use the Criteria group box to define the filter criteria. When you open the Mass Update window, if filters for the PTF Explorer Tree have been defined, they are included automatically, but you can change the filter criteria as needed; the same filter fields are used in Mass Update and the PTF Explorer Tree. For best performance, specify more criteria to reduce the number of test steps that are retrieved.
The criteria types are grouped by the following tabs: Test, Step, Maintenance Reports, Coverage Reports, Other. Click each tab to define the criteria fields for that group.
For details about the filter criteria fields, see Defining and Applying Filters.
To include test cases, select the Other tab and check the Include Test Cases check box.
Mass Update – Results Grid
Use the Results grid as a worksheet area for retrieving and modifying test steps. Initially, this grid is empty. To populate the grid, define the filter criteria, then click the Retrieve icon. A status of Processing... appears in the status bar during retrieval. Once processing is complete, the status bar states the number of records retrieved.
Image: Mass Update Page – Results Grid
This example illustrates the Results grid after applying the filter.

The grid contains the same fields as the Test Editor, with two additional columns: Folder, and Test so you can identify which test the steps are from.
|
Field or Control |
Definition |
|---|---|
| Folder |
Lists the folder hierarchy of the test the step belongs to. |
| Test |
Lists the name of the test that contains the step. |
For information about the test step fields, see Test Step Fields.
Mass Update – Log Grid
The Log grid displays a log of mass update activity.
Click the Find icon on the Mass Update toolbar to open the Find and Replace dialog box. Two tabs are available:
|
Field or Control |
Definition |
|---|---|
| Find |
Select the Find tab to find test step data. |
| Replace |
Select the Replace tab to find and replace test step data. |
Finding Test Step Data
To find test step data:
Click the Find icon on the Mass Update toolbar.
The Find and Replace dialog box appears, with the Find tab active.
Image: Mass Update - Find and Replace Dialog Box: Find Tab
This example illustrates the fields and controls on the Find and Replace Dialog Box: Find tab.
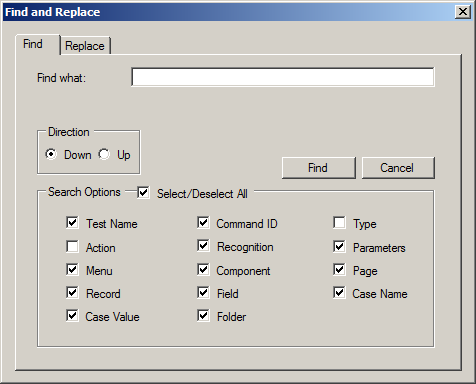
In the Search Options group box, select the test step fields to include in the search.
In the Find what edit box, specify the search value.
For text fields, enter a search string; wildcards are supported.
For Action or Type, select a value from the list.
To specify the search direction, select Down or Up; the default is Down.
Click Find to find the next match.
Review each step and make any modifications needed.
Continue to click Find to review all the matching test steps.
A message appears when there are no more matches. Click OK, then click Cancel to exit the Find dialog box.
Click the Save icon on the Mass Update toolbar to save your changes.
Replacing Test Step Data
To replace test step data:
Click the Find icon on the Mass Update toolbar.
The Find and Replace dialog box appears, with the Find tab active.
Click the Replace tab to access the Replace dialog.
Image: Mass Update - Find and Replace Dialog Box: Replace Tab
This example illustrates the fields and controls on the Find and Replace Dialog Box: Replace tab.
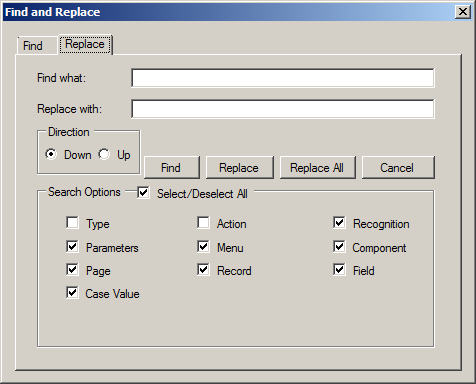
In the Search Options group box, select the test step fields to include in the search.
In the Find what edit box, specify the search value.
For text fields, enter a search string; wildcards are supported.
For Action or Type, select a value from the list.
Enter the replacement value in Replace with.
For text fields, enter the text string, for Action or Type, select a value from the list.
To specify the search direction, select Down or Up; the default is Down.
To replace all occurrences, without individually reviewing each match, click Replace All.
A message box appears indicating the number of replacements made. Click OK, then click Cancel to close the Find and Replace dialog box.
To review each match, click Find.
Either click Find to move to the next match without making any changes, or click Replace then Find to change the value and move to the next match.
Continue to click Find or Replace, as appropriate, to review all the remaining matching test steps.
A message appears when there are no more matches. Click OK, then click Cancel to exit the Find dialog box.
Click the Save icon on the Mass Update toolbar to save your changes.