Publishing Pivot Grid Fluid Views as Tiles
You can publish a Pivot Grid Fluid view as a tile (or grouplet). The tile can contain the pivot chart as dynamic tile content. Each tile is associated with the URL that corresponds to the Pivot Grid Fluid Viewer component for that model. The tile is not interactive; for example, you cannot drill to dimension from chart. However, you can click the tile to open the Fluid viewer component for the Pivot Grid model.
To publish the Pivot Grid Fluid view as a tile:
Create a new Pivot Grid model or open an existing one using Pivot Grid Wizard (by selecting .
Access the Pivot Grid Display page, Step 5 of the Pivot Grid Wizard.
Click the Publish as Tile link at the bottom of the Pivot Grid Display page.
If this is the first time you are publishing the current Pivot Grid model as a tile, the Publish as Tile Definition page appears. Otherwise, the Publish as Tile page appears listing the published content reference objects that use this Pivot Grid model as a tile.
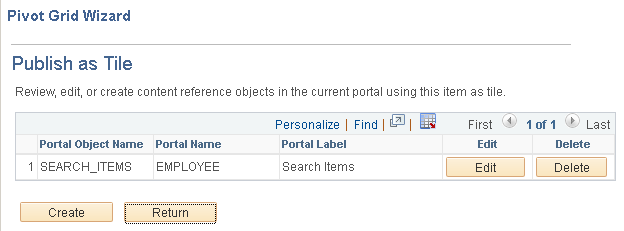
Image: Publish as Tile page
This example illustrates the fields and controls on the Publish as Tile page. You can use this page to create new tile definitions, or edit and delete the existing ones.
If applicable, click the Create button on the Publish as Tile page.
The Publish Tile Definition page appears.
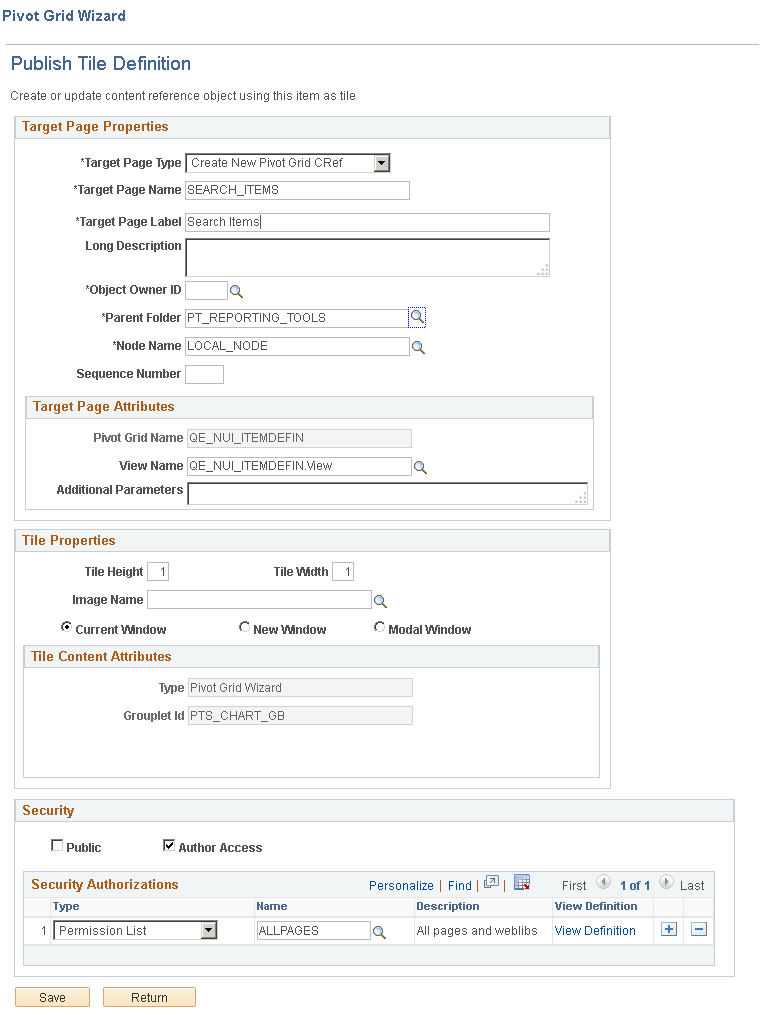
Image: Publish Tile Definition page
This example illustrates the fields and controls on the Publish Tile Definition page. The system populates the values in this page, such as the title, name, node name, and tile dimensions. The View Name field displays the default view, and you can change the default view to any other available view.
Enter the required values and save the tile.
Note: By default, the Public option in the Security section is selected and no Pivot Grid Viewer component security is enforced. You can select the Author Access option to allow only the tile creator to access the tile and select the role/permission to restrict the tile to specific set of users.
All settings in the Security section will be populated in the Content Reference Security page (PeopleTools, Portal, Structure and Content, <label name>, Edit, General, Security).
See SetGroupletActionUrl, SetGroupletDisplayIn, SetGroupletEventMsg, SetGroupletID, SetGroupletImage, SetGroupletImageUrl, SetGroupletMOptions, SetGroupletTargetID, SetGroupletTimer, SetGroupletType, andSetGroupletUrl.
Access the Fluid Homepage and click the Actions List button at the top right of the fluid window.
Select the Personalize option.
Click the Add Tile button on the Personalize Homepage page.
Navigate to the parent folder
In this example, navigate to the Procurement Operations folder. The newly created tile Search Items is available in the parent folder and you can add it to the Fluid Homepage.
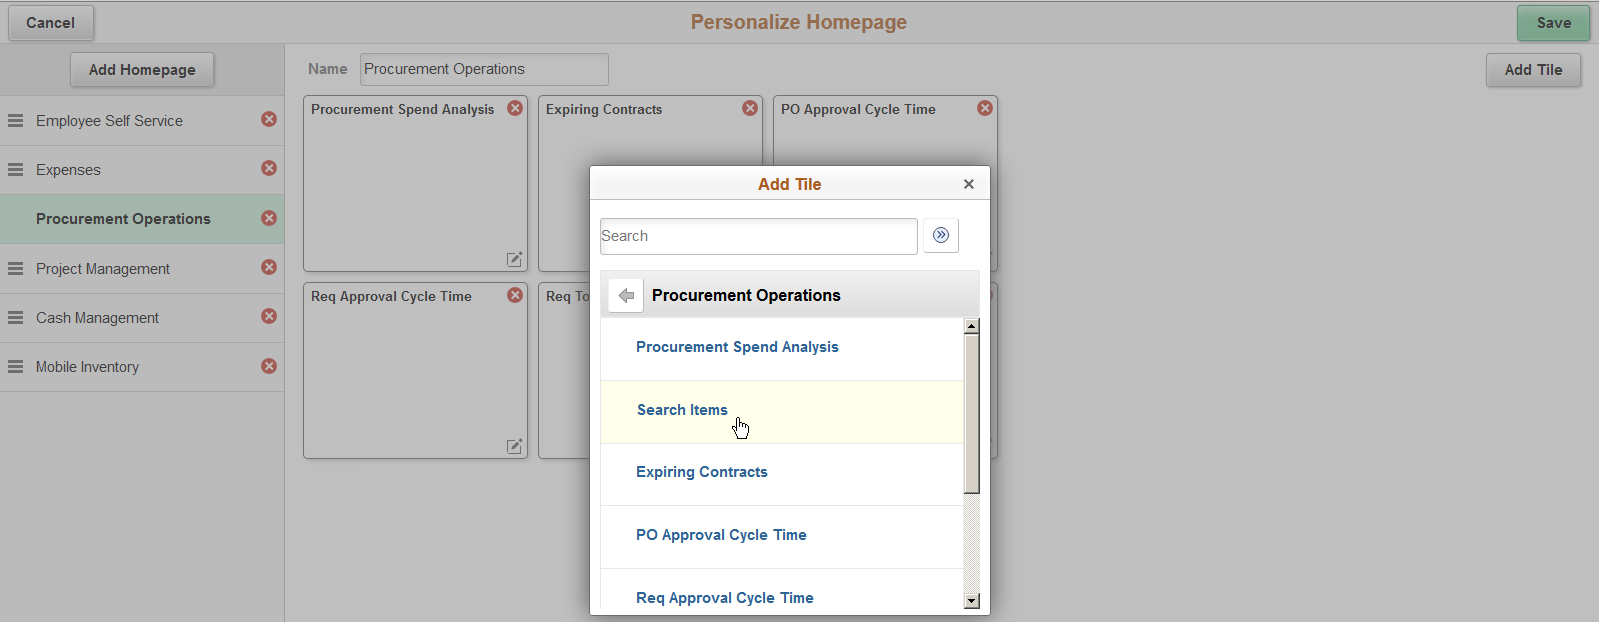
Image: Fluid homepage - Add Tile window displaying tiles
This example illustrates fluid homepage with the Add Tile window. You can add tiles in the Add Tile window to the landing homepage.
Select the tile that you just created and click the Save button.
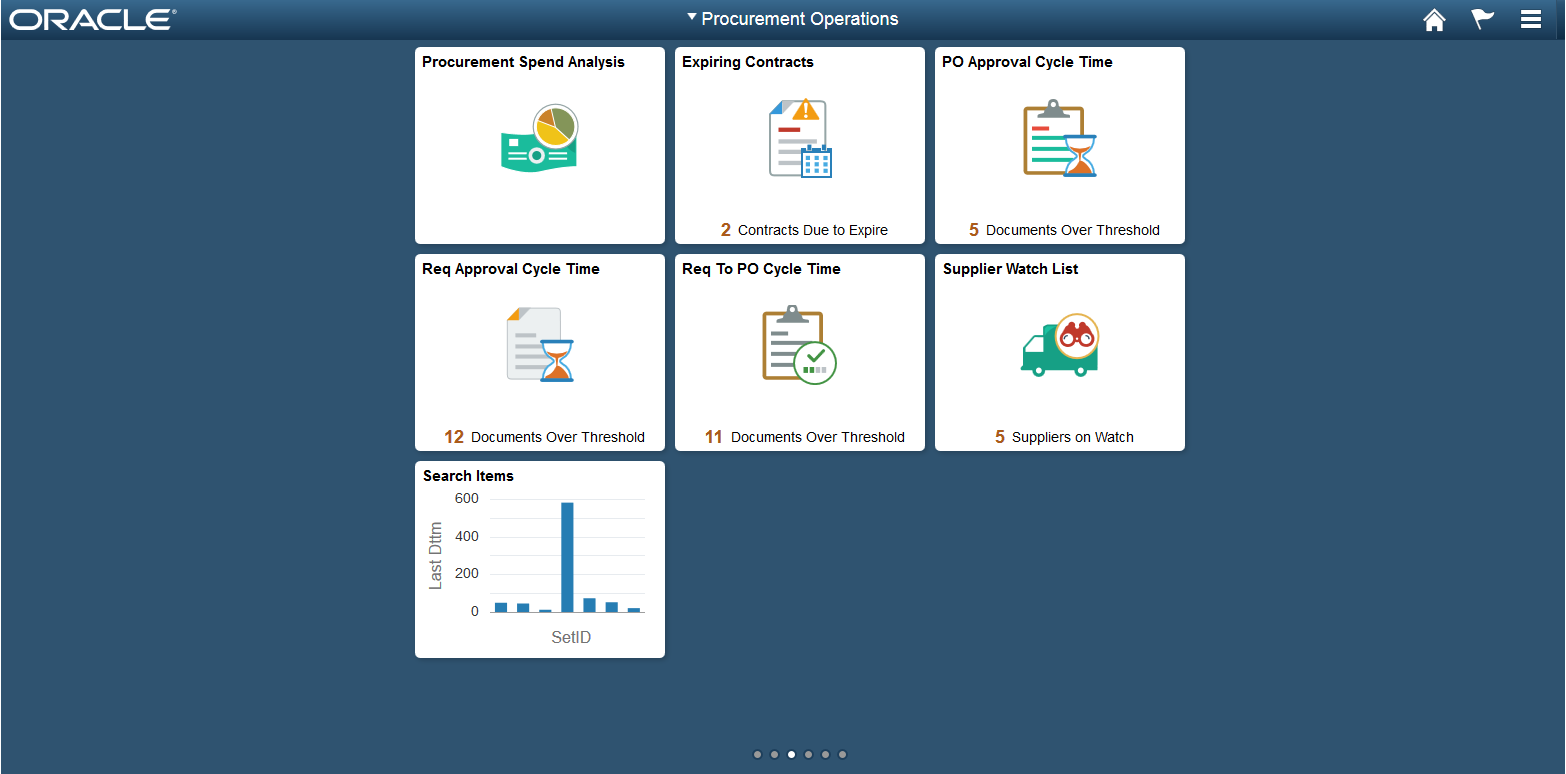
Image: Fluid homepage with a tile
This example shows fluid homepage with the added tiles. You can click the tiles in this fluid homepage to open the Pivot Grid models fully in new modal window.