2. Limits and Collaterals
The functions and actions provided by the Oracle Banking Enterprise Limits and Collateral Management are explained below. All functions explained below, come under Limits and Collaterals in the Menu Browser.
This chapter contains the following sections:
- Section 2.1, "About Privacy By Design"
- Section 2.2, "Maintaining User Data Restriction"
- Section 2.3, "Viewing User Data restriction"
- Section 2.4, "Maintaining Static Details"
- Section 2.5, "Maintaining Agency Details for Credit Rating"
- Section 2.6, "Maintaining User Defined Status"
- Section 2.7, "Liability Maintenance"
- Section 2.8, "External Customer Account Input"
- Section 2.9, "Maintaining Customer to Liability Link"
- Section 2.10, "Covenant Maintenance"
- Section 2.11, "Collateral Pool Maintenance"
- Section 2.12, "Track Exposure Maintenance"
- Section 2.13, "Exposure Analysis"
- Section 2.14, "Exposure Dashboard"
- Section 2.15, "Global Block Exposure Maintenance"
- Section 2.16, "Limit Block Maintenance"
- Section 2.17, "Global Exposure Parameter Details"
- Section 2.18, "Maintaining Rule Criteria Code"
- Section 2.19, "Defining Alerts"
- Section 2.20, "Viewing Alerts"
- Section 2.21, "Defining Alert Selection Criteria"
- Section 2.22, "ELCM - OFSAA Integration"
2.1 About Privacy By Design
Oracle Banking Enterprise Limits and Collateral Management implements ‘Privacy By Design’ by protecting PII (Personally Identifiable Information) data. In Oracle Banking Enterprise Limits and Collateral Management, ‘Privacy By Design’ is achieved by following methods.
- Data Masking
- Right To Be Forgotten
- Granular Access
- Transparent Database Encryption
- Data Portability
2.1.1 Maintaining PII data
If the data comes under the following categories for an individual user, then it is considered as PII data.
- Customer Name
- Customer Contact Information
- Demographic Information
- Financial Information
- Unique Identifiers
2.1.2 Data Masking
Oracle Banking Enterprise Limits and Collateral Management masks the PII (Personally Identifiable Information) data to protect the privacy of the customer.
2.1.3 Right to Be Forgotten
Oracle Banking Enterprise Limits and Collateral Management provides ‘Right to be Forgotten’ PII data provision, if the customers are no longer associated with the bank. Once the customer is forgotten in the system, customer data is not available for any operation (including query/re open) in ‘Detail screen’ as well as in the ‘Summary screen’.
2.1.4 Granular Access
Oracle Banking Enterprise Limits and Collateral Management provides granular access to PII data based on the access group restrictions maintained in the user definition. Each customer is mapped to the access group and each user is provided access to that group. Based on the access group, you can query, view, create, amend, re-open, and so on the customer information.
Example
For ‘USER1’, only ‘ACCGRP1’ is mapped as ‘Allowed’ in ‘Access Group Restriction’. In this case, ‘USER1’ can create, modify, view, and query only the customers under access group ‘ACCGRP1’. However, ‘USER1’ cannot create, modify, view or query the transactions for customers mapped to other access group.
For ‘USER2’, only ‘ACCGRP2’ is mapped as ‘Disallowed’ in ‘Access Group Restriction’. In this case, ‘USER2’ cannot create, modify, view, query for the customers under access group ‘ACCGRP2’. However, ‘USER2’ can create, modify, view or query the transactions for customers mapped to other access group.
2.1.5 Transparent Database Encryption (TDE)
It is required to encrypt sensitive application data on storage media completely transparent to the application itself. TDE encrypts data automatically when written to storage including backups, data dumps exports, and logs. Encrypted data is correspondingly decrypted when read from storage. Access controls that are enforced at the database and application layers remain in effect.
2.1.6 Data Portability
As part of 'Privacy By Design', data portability feature is available for the following summary screens.
- GCSCOLLT
- GESFACLT
- GESCULIK
2.2 Maintaining User Data Restriction
Apart from restricting the operations like creating new, modifying, deleting, closing, and re-opening the function ID, you can also maintain the user restrictions for the following fields.
- Category
- Liability Number
- Source
- Currency
When you try perform any operation like new, modify, delete, close, reopen, query on facility or collateral maintenance, before performing transaction in ELCM, the system checks whether the you have the rights to perform the transaction for the data. If you do not have rights, then following error appears.
"User does not have rights to perform transaction on this data."
You can maintain user restrictions in the ‘User Restriction Maintenance’ screen. You can invoke this screen by typing ‘GEDUSRES’ in the field at the top right corner of the Application tool bar and clicking the adjoining arrow button.
2.2.1 Category Restrictions Tab
You can maintain the category restriction from the ‘Category Restrictions’ tab.
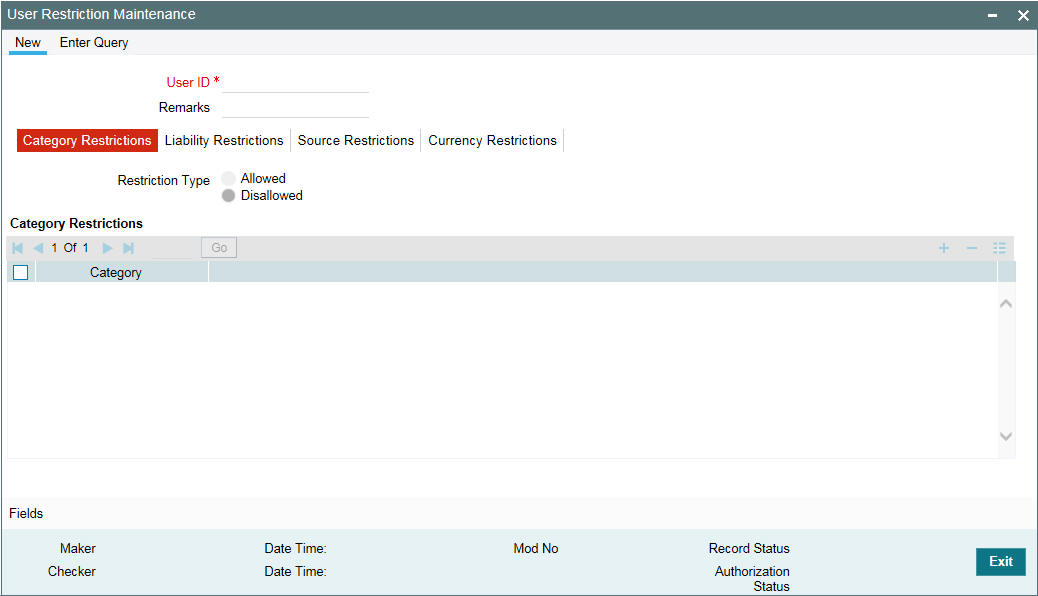
Capture the following data to maintain user restriction for specific category:
User ID
Specify the user ID for which you want to set the category restriction.
Restriction Type
Choose the ‘Allowed’ option, to maintain an allowed list of category restrictions. Choose ‘Disallowed’ option to maintain a disallowed list of category restrictions. Default value of this field will be’ Disallowed’. If you select restriction type as ‘allowed’, then you need to input at least one record.
Category Restrictions
Category Name
Specify the category for the restriction from the adjoining option list.
2.2.2 Liability Restrictions Tab
You can maintain the liability restriction from the ‘Liability Restrictions’ tab.
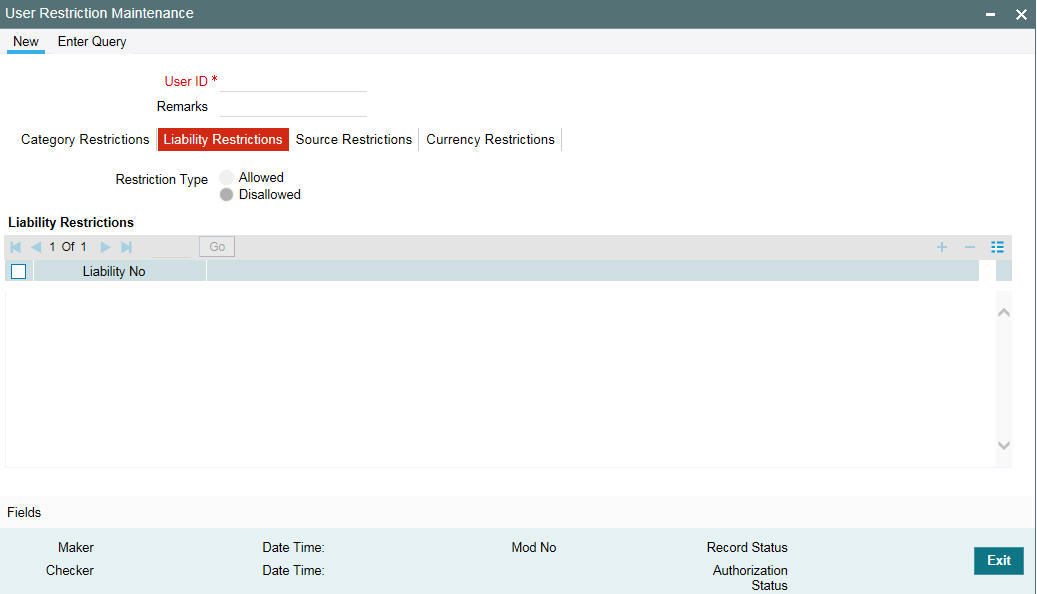
Capture the following data to maintain the user restriction for specific liability:
User ID
Specify the user ID for which you want to set the liability restriction.
Restriction Type
Choose the ‘Allowed’ option, to maintain an allowed list of category restrictions. Choose ‘Disallowed’ option to maintain a disallowed list of category restrictions.
Default value of this field will be’ Disallowed’. If you select restriction type as ‘allowed’, then you need to input at least one record.
Liability Number
Specify the liability number for the restriction from the adjoining option list.
2.2.3 Source Restrictions Tab
You can maintain the source restriction from the ‘Source Restrictions’ tab.
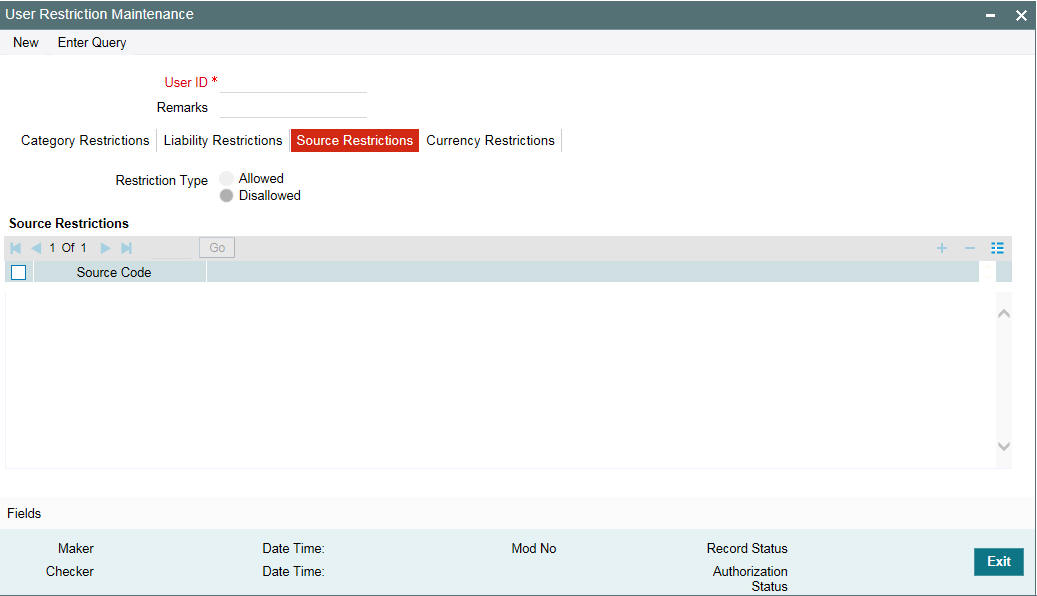
Capture the following data to maintain the user restriction for specific source:
User ID
Specify the user ID for which you want to set the source restriction.
Restriction Type
Choose the ‘Allowed’ option, to maintain an allowed list of category restrictions. Choose ‘Disallowed’ option to maintain a disallowed list of category restrictions.
Default value of this field will be’ Disallowed’. If you select restriction type as ‘allowed’, then you need to input at least one record.
Source Code
Specify the source code for the restriction from the adjoining option list.
2.2.4 Currency Restrictions Tab
You can maintain the currency restriction from the ‘Currency Restrictions’ tab.
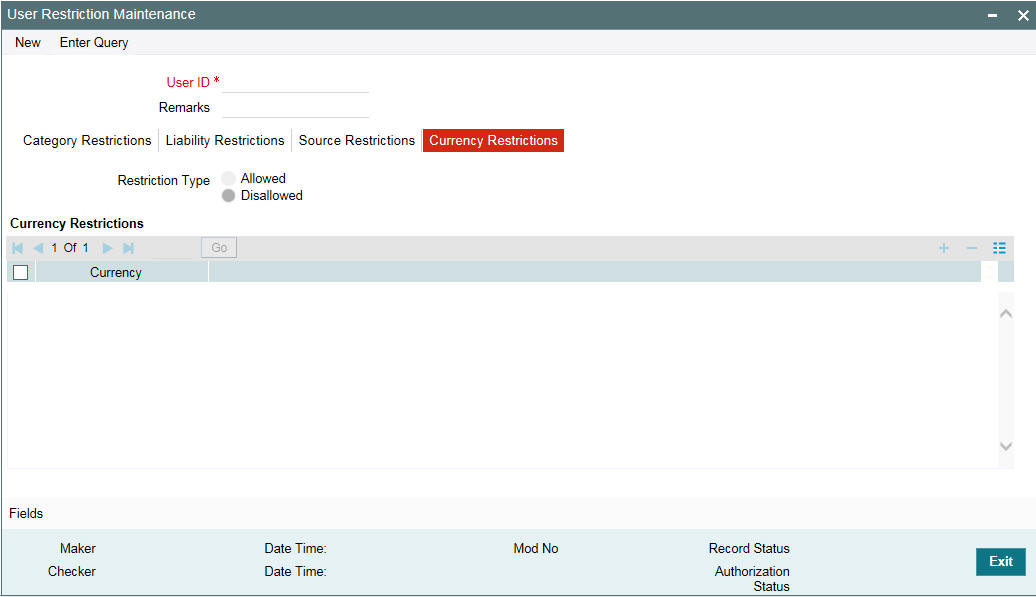
Capture the following data to maintain the user restriction for specific currency:
User ID
Specify the user ID for which you want to set the currency restriction.
Restriction Type
Choose the ‘Allowed’ option, to maintain an allowed list of category restrictions. Choose ‘Disallowed’ option to maintain a disallowed list of category restrictions.
Default value of this field will be’ Disallowed’. If you select restriction type as ‘allowed’, then you need to input at least one record.
Currency
Specify the currency for the restriction from the adjoining option list.
2.3 Viewing User Data restriction
You can view all the user data restrictions for Category, Liability, Source and Currency that have been maintained, and their status in the ‘User Restriction Summary’ screen. You can invoke this screen by typing ‘GESUSRES’ In the field at the top right corner of the Application tool bar and clicking on the adjoining arrow button.
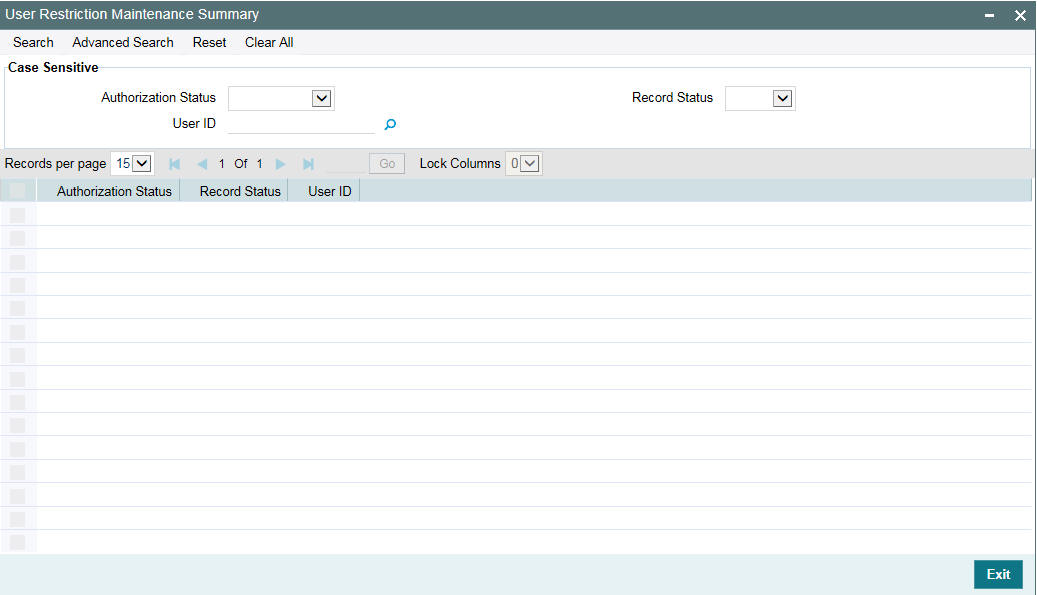
You can base your queries on any or all of the following parameters and fetch records:
- Authorization Status
- Record Status
- User ID
Select any or all of the above parameters for a query and click ‘Search’ button. The records meeting the selected criteria are displayed.
System displays the following details pertaining to the fetched records:
- Authorization Status
- Record Status
- User Id
2.4 Maintaining Static Details
Data that remains constant over a period of time is called static data. Usually, such data is commonly accessed by more than one module. The following static values can be maintained as part of the ELCM system.
- Section 2.4.1, "Maintaining Credit Score"
- Section 2.4.2, "Product Maintenance"
- Section 2.4.3, "Amount Tag Maintenance"
- Section 2.4.4, "Category Maintenance"
- Section 2.4.5, "Exposure Type Maintenance"
- Section 2.4.6, "Group Maintenance"
- Section 2.4.7, "Haircut Maintenance"
- Section 2.4.8, "Location Maintenance"
- Section 2.4.9, "Maintaining Restriction Details"
- Section 2.4.10, "Static Type Maintenance"
- Section 2.4.11, "Maintaining Sector and Industry"
2.4.1 Maintaining Credit Score
Before creating a Liability in the system, your bank assess the credit score of individual liabilities. You can create and maintain Credit Score names in the ‘Credit Score Maintenance’ screen. These credit scores can later be linked to Liability Maintenance (GEDMLIAB) for assessing the liability score.
Credit Score Maintenance is a bank level maintenance and it is accessible in all branches. You can invoke the ‘Credit Score Maintenance’ screen by typing ‘GEDCRSCR’ in the field at the top right corner of the Application tool bar and clicking the adjoining arrow button.
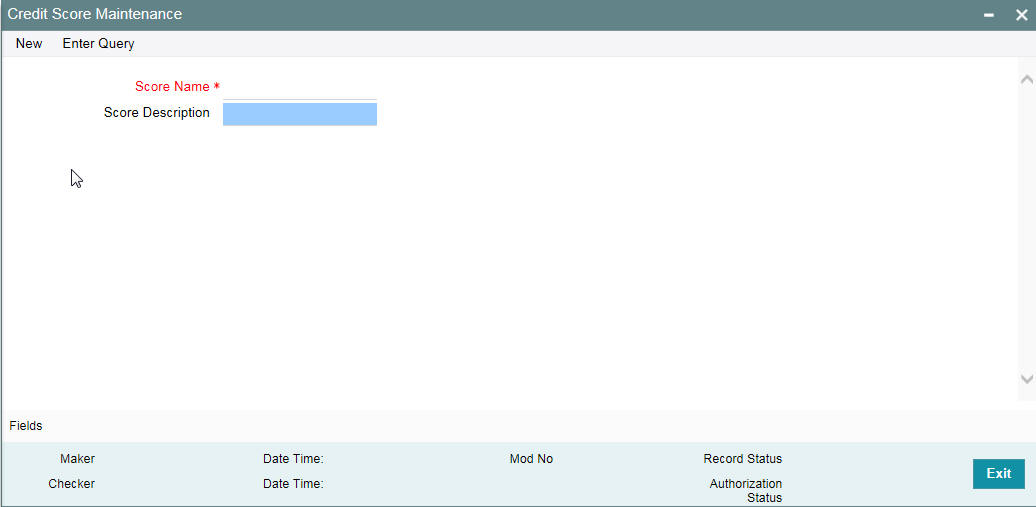
Credit Score Name
Specify a unique credit score name here.
Credit Score Description
Give a brief description of the score.
Note
This is only for information and not for processing.
2.4.2 Product Maintenance
You can maintain Product details for ELCM in the ‘Product maintenance’ screen.
You can invoke this screen by typing ‘GEDPROD’ in the field at the top right corner
of the Application tool bar and clicking the adjoining arrow button.
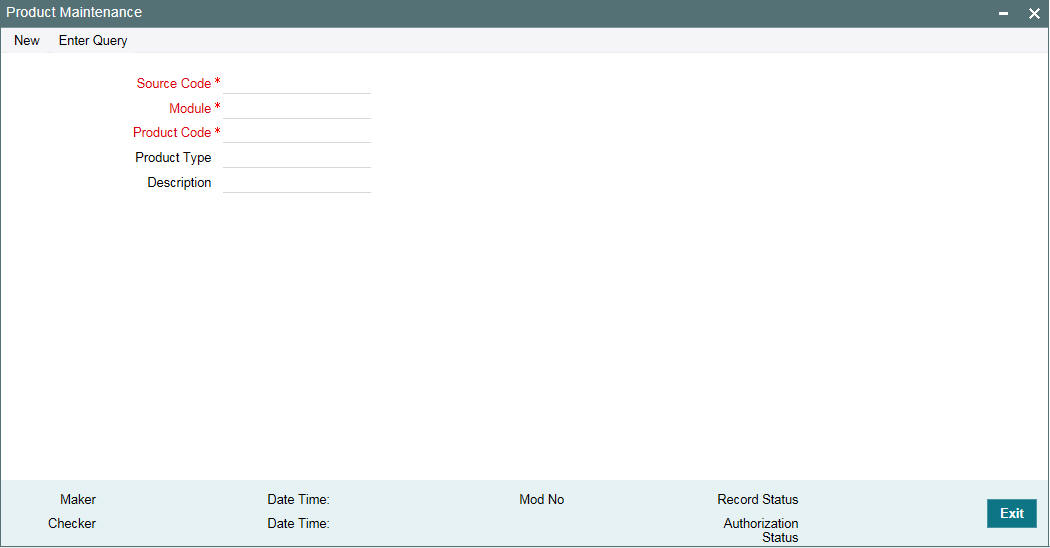
Source
Specify the associated source for the product processor from the adjoining option list.
Module
Specify the associated module for the product from the adjoining option list.
Product Code
Specify the associated product code.
Product Type
Specify the type of the product.
Description
Specify the brief description of the product
Note
Product code and source code is used in product validation as a part of product maintenance.
2.4.3 Amount Tag Maintenance
You can maintain amount tag using the ‘Amount Tag’ screen. You can invoke this screen by typing ‘ ‘GEDAMTAG’ in the field at the top right corner of the Application tool bar and clicking on the adjoining arrow button.
The ‘Amount Tag’ screen is shown below.
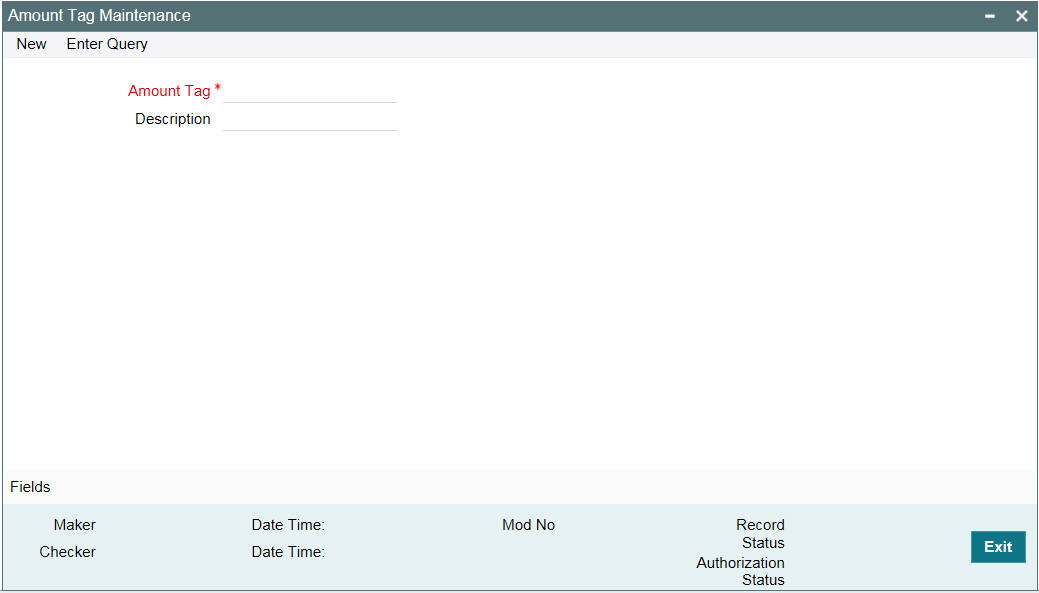
You can specify the following here:
Amount Tag
Specify the amount tag.
Description
Enter a brief description of the amount tag.
After entering the details, click the ’Save’ button.
2.4.4 Category Maintenance
You can maintain categories using the ‘Category Maintenance’ screen. You can invoke this screen by typing ’GEDCATGY’ in the field at the top right corner of the Application tool bar and clicking on the adjoining arrow button.
The ‘Category Maintenance’ screen is shown below.
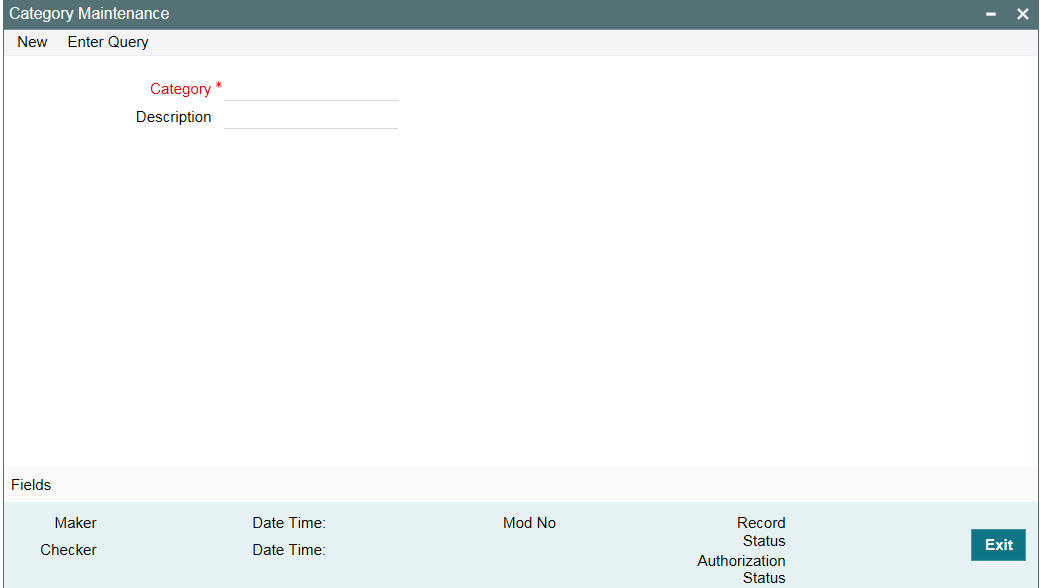
You can specify the following here:
Category Name
Specify the category name.
Description
Enter a brief description of the category.
After entering the details, click ’Save’ button.
2.4.5 Exposure Type Maintenance
You can maintain exposure types using the ‘Exposure Type Maintenance’ screen. You can invoke this screen by typing ‘GEDEXPTY’ in the field at the top right corner of the Application tool bar and clicking on the adjoining arrow button.
The ‘Exposure Type Maintenance’ screen is shown below.

You can specify the following here:
Exposure Name
Specify the exposure name.
Description
Enter a brief description for the exposure.
After entering the details, click the ’Save’ button.
2.4.6 Group Maintenance
You can invoke the ‘Group Maintenance’ screen by typing ‘GEDGROUP’ in the field at the top right corner of the Application tool bar and clicking on the adjoining arrow button.
The ‘Group Maintenance’ screen is shown below

You can specify the following here:
Type Name
Specify the type name.
Type Value
Specify the type value.
After entering the details, click ’Save’ button.
2.4.7 Haircut Maintenance
You can invoke the ‘Haircut Maintenance’ screen by typing ‘GEDHCUTT’ in the field at the top right corner of the Application tool bar and clicking on the adjoining arrow button.
The ‘Haircut Maintenance’ screen is shown below:
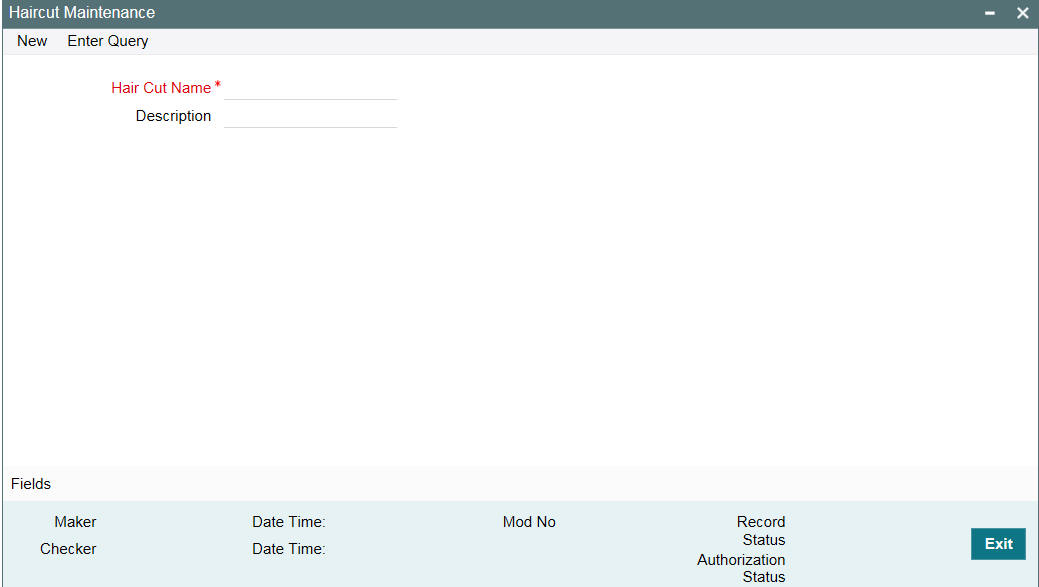
You can specify the following here:
HairCut Name
Specify the haircut name.
Description
Enter a brief description for the haircut.
After entering the details, click ’Save’ button.
2.4.8 Location Maintenance
You can maintain the location details using the ‘Location Maintenance’ screen. You can invoke this screen by typing ‘GEDLOCCD’ in the field at the top right corner of the Application tool bar and clicking on the adjoining arrow button.
The ‘Location Maintenance’ screen is shown below:
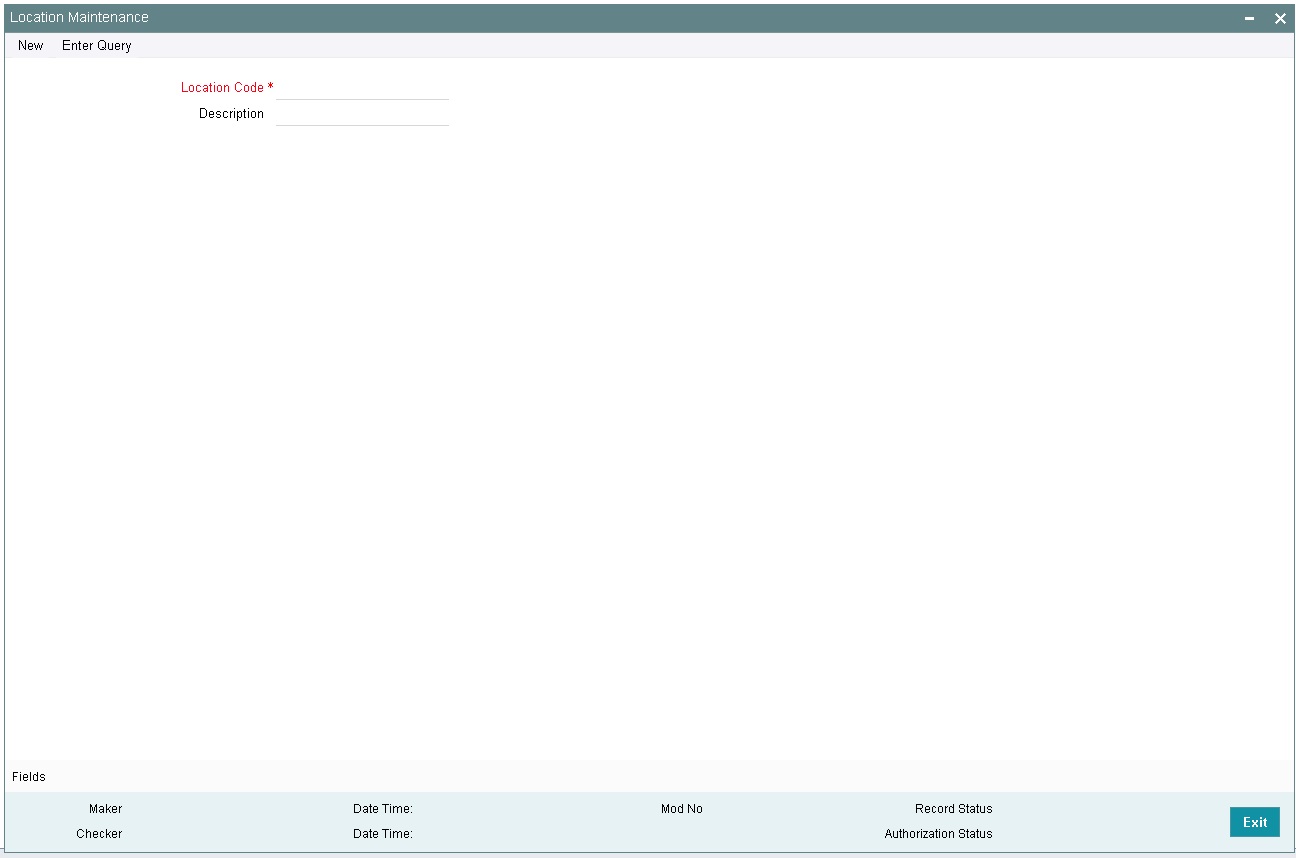
You can specify the following here:
Location Code
Specify the location code.
Description
Enter a brief description for the location.
After entering the details, click the ’Save’ button.
2.4.9 Maintaining Restriction Details
You can invoke the ‘Restriction Maintenance’ screen by typing ‘GEDRESTY’ in the field at the top right corner of the Application tool bar and clicking the adjoining arrow button.
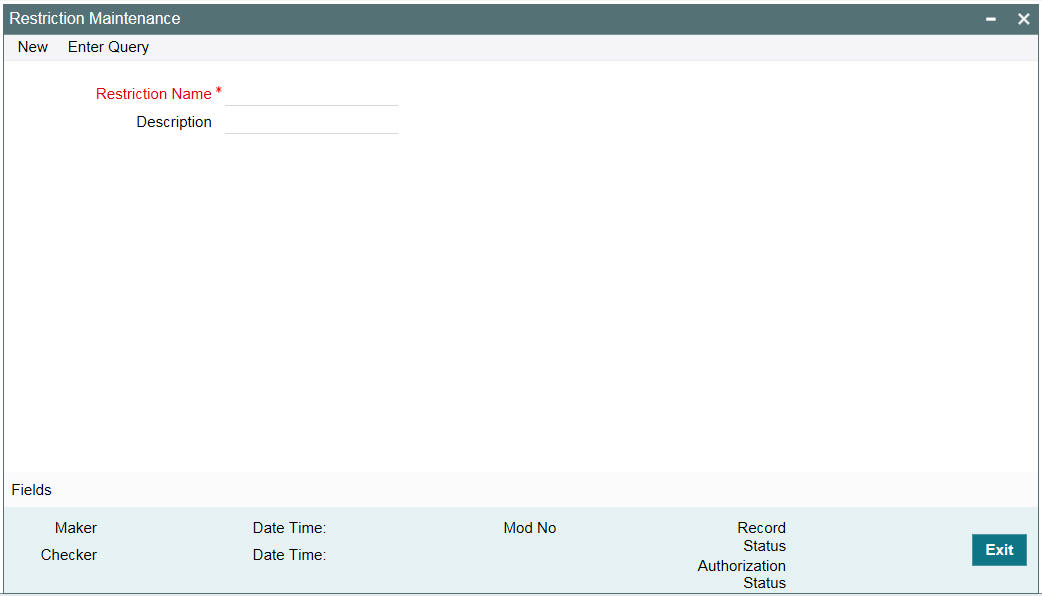
Here you can maintain Restriction names and their values.
2.4.10 Static Type Maintenance
You can maintain different type of channels in the ‘Static Type Maintenance’ screen. You can invoke the ‘Static Type Maintenance’ screen by typing ‘GEDTYPES’ in the field at the top right corner of the Application tool bar and clicking on the adjoining arrow button.
The ‘Static Type Maintenance’ screen is shown below:
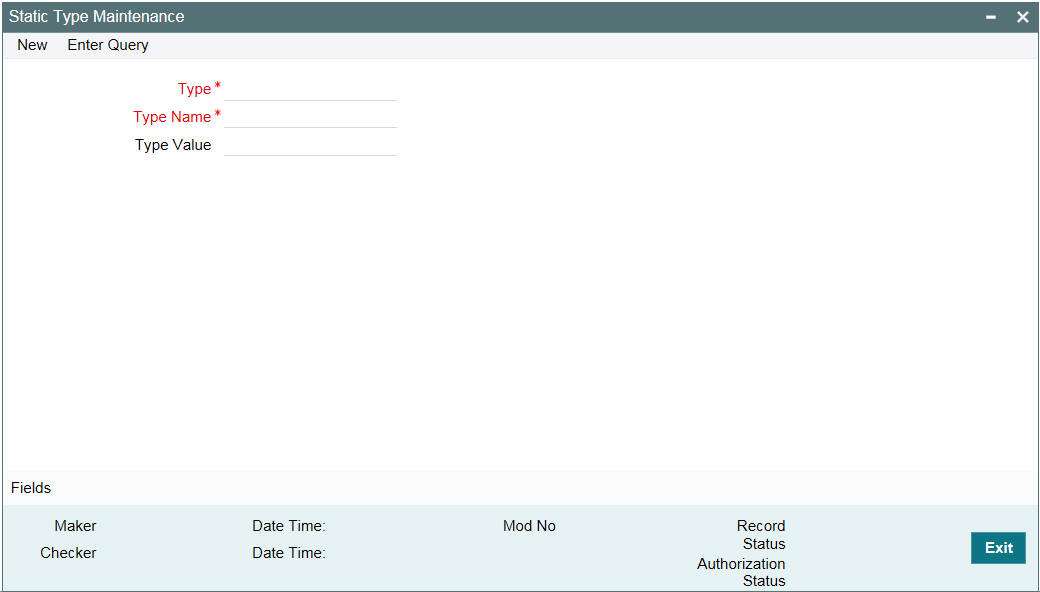
You can specify the following here:
Type
Specify the static type.
Type Name
Specify the type name.
Type Value
Specify the type value.
After entering the details, click the ’Save’ button.
2.4.11 Maintaining Sector and Industry
You can maintain sectors and industries associated each sector using ‘Sector-Industry Maintenance’ screen. To invoke this screen, type ‘GCDSECMT’ in the field at the top right corner of the application toolbar and click the adjoining arrow button.
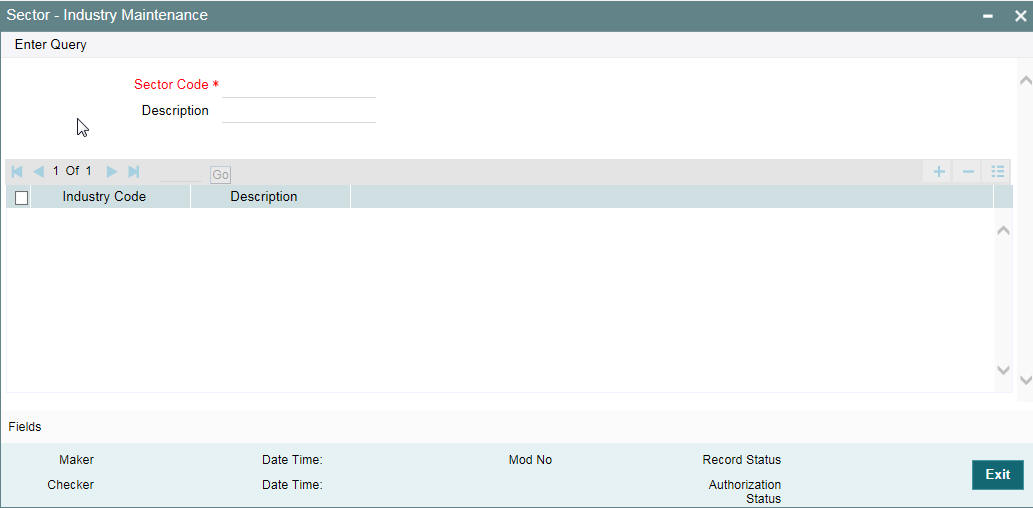
Specify the following details:
Sector Code
Specify a unique code to identify the sector you are defining.
Description
Specify a brief description of the sector.
Industry Code
Specify the industry code to be associated with the sector code. You can associate multiple industry codes with a sector code.
Description
Specify a brief description of the industry.
Once you have captured the above details, save the maintenance.
2.5 Maintaining Agency Details for Credit Rating
You can maintain details regarding credit rating agencies in the ‘Credit Rating Agency Maintenance’ screen. Using this maintenance you can record the credit rating codes published by each credit rating agency. This can later be linked to Liability Maintenance (GEDMLIAB) for specifying customer rating published by an agency.
You can invoke the ‘Credit Rating Agency Maintenance’ screen by typing ‘GEDCREDT’ in the field at the top right corner of the Application tool bar and clicking the adjoining arrow button.
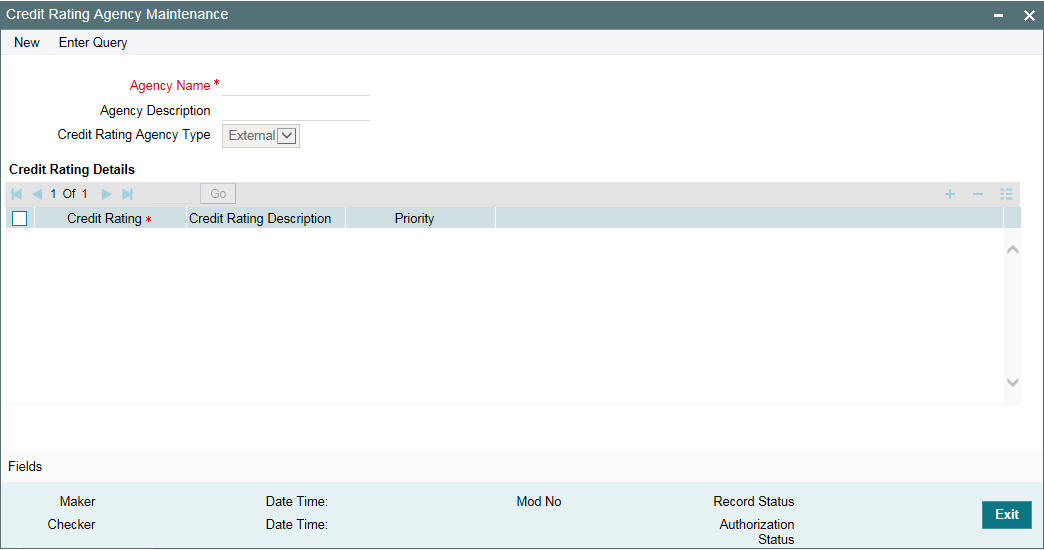
Agency Name
Specify the name of the credit rating agency here.
Agency Description
Give a brief description of the credit rating agency here.
Credit Rating Agency Type
You can select the credit rating agency type as ‘Internal’ or ‘External’. This gets defaulted to ‘Liability Maintenance’ and ‘Facilities Maintenance’ screen.
Credit Rating Details
Specify the following here:
Credit Rating
Specify the unique Credit Rating code/ID.
Credit Rating Description
Give a brief description of the Credit Rating code/ID.
Priority
Specify the priority of the credit rating to enable sequencing of the credit rating. According to this sequencing, an automatic review of the sanctioned limit facility offered to the customer is initiated if the customer’s credit rating is downgraded (Rule 6 as maintained in the GEDLMPRS screen). You can assign the credit rating to a specific customer in the STDCIFCR screen.
Note
This is only for information and not for processing.
2.6 Maintaining User Defined Status
You may want to specify certain statuses for liabilities such as Normal, Partially Defaulting, Defaulting, and so on. Such statuses can be maintained first in the ‘User Define Status Maintenance’ screen. You can name and describe statuses here. This can later be linked to Liability Maintenance (GEDMLIAB) and Facilities Maintenance (GEDFACLT) for choosing the status of the liability or facility respectively.
You can invoke the ‘User Define Status Maintenance’ screen by typing ‘GEDUDFNS’ in the field at the top right corner of the Application tool bar and clicking the adjoining arrow button.

User Defined Status
Provide a name/ID for the status here.
Description
Give a brief description of the status.
2.7 Liability Maintenance
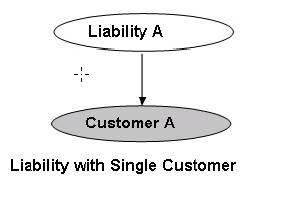
Every customer of your bank who enjoys credit facilities should be assigned or linked to a Liability Code category. Several customers can be linked to the same Liability Code. Liability linkage can be in two ways.
● Single Liability linked to multiple customers (that is, a Customer Group)
● Single Liability linked to only one customer
Single Liability Linked To Multiple Customers
Here multiple customers are linked to same the Liability Code and all restrictions/facilities maintained at liability level are shared to all the customers.
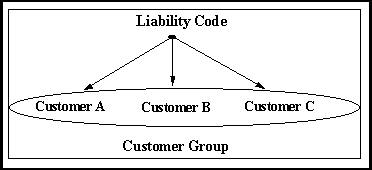
Single Liability Linked To Only One Customer
Here a liability is linked to only one customer and all restrictions/facilities maintained at liability level are applicable to that customer alone.
You can create or modify the Liabilities using the ‘Liability Maintenance’ screen.
You can invoke the ‘Liability Maintenance’ screen by typing ‘GEDMLIAB’ in the field at the top right corner of the Application tool bar and clicking the adjoining arrow button.
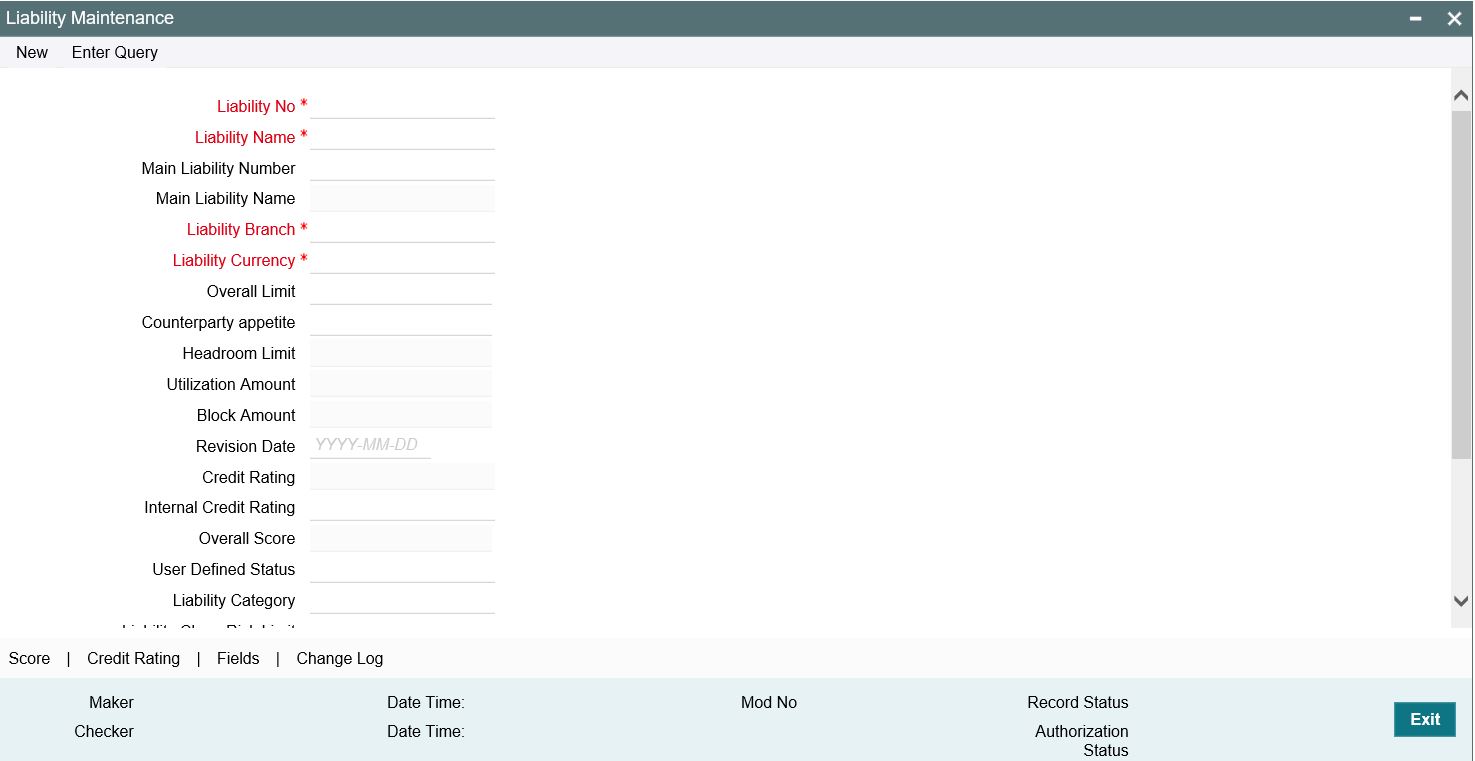
Liability Number
Specify the Liability Number. If the Liability Number is customer group then all customers under this group should have same Liability Number.
Liability Name
Specify the Liability Name here. A maximum of 35 characters are allowed in this field.
Main Liability Number
Specify the main liability number. The adjoining option list displays a list of liability numbers maintained in the system. Choose the appropriate one.
The child liability’s overall limit amount should not exceed the parent liability’s overall limit amount.
During Utilization transaction, the utilization is tracked for both the specified Liability and also the parent Liability to which it is linked.
Liability Branch
Specify the branch in which liability is associated.
Liability Currency
Specify the currency with which the liability is associated. If Liability currency is different from Limit currency specified in Global Exposure Parameter then the Liability amount is converted to the limit currency.
Overall limit amount $1 of the customer liability exceeds the maintained Internal Lending Limit Equivalent Amount $2.
Note
You can modify the Liability Currency after authorization if:
- There are no lines, collaterals or collateral pools linked to the liability.
- The liability is not utilized.
- The liability is not the parent liability for another child liability
Overall Limit
Specify the overall limit amount for that liability. Value entered in the field is in the currency stated above. If liability is of customer group then overall limits stated is common to all the customers.
Note
System validates the overall limit amount with the internal lending limit equivalent amount. If the overall limit amount is greater than the Internal Lending Limit Equivalent Amount then the system displays an override message as ‘Overall limit amount $1 of the customer liability exceeds the maintained Internal Lending Limit Equivalent Amount $2.’
Counterparty Appetite
Specify the total project limit which can be sanctioned to the customer. This value must be less than or equal to the overall limit of the liability. If it exceeds the overall limit under the liability, the system displays an error message.
Head Room Limit
The system displays the future dated headroom available to the customer.
Utilization Amount
This field displays the utilized amount for that liability Id at any point in time. You cannot edit this display.
Revision Date
Specify the date on which your bank would want to revise the limit for the liability. The limit check continues irrespective of the date maintained here. The revision date must be greater than the start date and can also be left blank.
Credit Rating
The primary credit rating maintained in the credit rating sub screen is displayed here.
Note
These details are maintained only for information and have no processing impact.
Overall Score
Specify the overall credit score for the liability. The given credit score is supplemented by the multiple credit score details, if any entered in the Credit Score sub screen.
Note
These details are maintained only for information and have no processing impact.
Liability Category
Select the Liability Category from the list available here. The 'Category' entered in 'Category Maintenance' screen is displayed here.
Liability Clean Risk Limit
This limit is captured in the 'Customer Maintenance' (STDCIF) screen. This field is populated only when the liability is created using 'Auto liability Creation' option in 'Customer Maintenance' screen.
This field is only display field and no other validations as such are supported.
Secondary Clean Risk Limit
This limit is captured in the 'Customer Maintenance' (STDCIF) screen. This field is populated only when the liability is created using 'Auto liability Creation' option in 'Customer Maintenance' screen.
This field is only display field and no other validations as such are supported.
Secondary PSTL Clean Risk Limit
This limit is captured in the 'Customer Maintenance' (STDCIF) screen. This field is populated only when the liability is created using 'Auto liability Creation' option in 'Customer Maintenance' screen.
This field is only display field and no other validations as such are supported.
User Defined Status
Specify status of the liability (For example, NORM for normal, BLOCKED, and so on).
Unadvised
Select this check box if the Liability is unadvised. For any transaction involving an unadvised liability, you are notified.
Netting Required
Select this check box to indicate that the netting amount defined in the 'Account/Contract Balance for Netting' screen is updated in the 'Netting Contribution' field for the specific facility for which 'Netting required' check box is enabled.
This is only for information and not for processing.
You can have the Facility to display the Netting Amount in the 'Netting Contribution' screen. For more details on this feature, refer the section 'Including Netting Amount in Facility’s Netting Contribution' in this document.
Note
Limits tracking at liability level is based on liability tracking at the parameterization level.
- If the liability tracking is enabled, then the system allows you to track the limit at the liability level.
- Disabling liability tracking does not allow tracking limits at liability
level.
Tanked Utilization
The system computes and displays the utilization amount that can be set in the 'Tanked Utilization' field.
As part of EOD process, the utilization amount is set in the 'Tanked Utilization' field.
After BOD process, this utilization amount is updated for the liability which is linked to the transaction as per the contract and the amount is cleared from the 'Tanked Utilization' field.
2.7.1 Specifying Liability Scores
When a Liability is created, Bank assess the credit score for the liability. You can link score parameters in the Liability Score screen. Here you can also assign a score value to each. You can maintain multiple score parameters for the single Liability. To invoke the Liability Score screen, click ‘Score’ button.
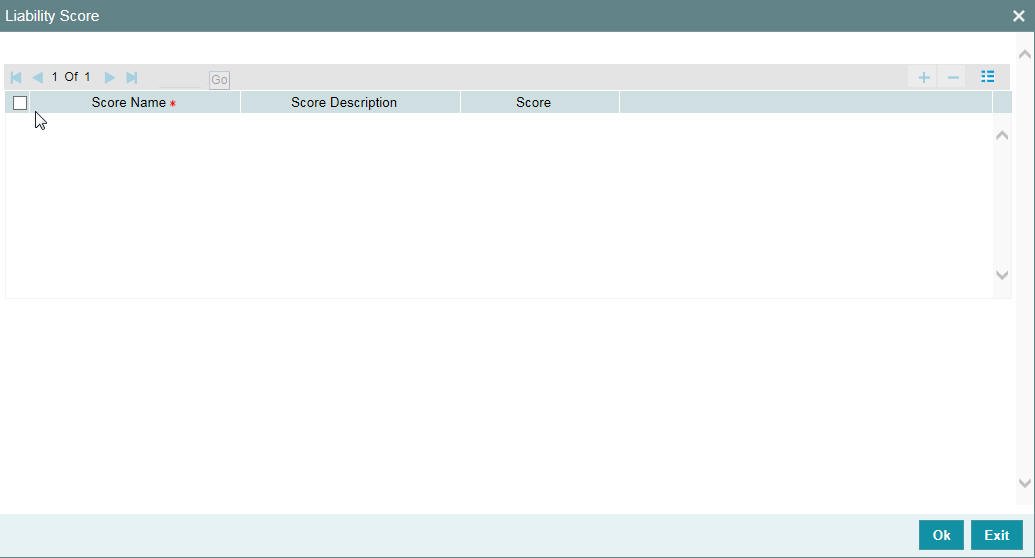
Score Name
Select the score name from the adjoining option list.
Score Description
Give a brief description on the liability score.
Score
Specify the liability score here.
2.7.2 Specifying Liability Credit Rating
When liability is created, bank assess the credit rating for the liability. You can link all the rating parameters to which the liability is associated to in the liability ‘Credit Rating’ screen. Click ‘Credit Rating’ button to invoke this screen.
Here you can select the ‘Agency Name’ with its credit rating for the liability. Out of all the credit ratings, you may select one as the primary rating for external ‘Credit Rating Agency Type’.
When credit rating from a particular credit agency is selected, it is mandatory to signify the effective date from which credit rating is applicable.
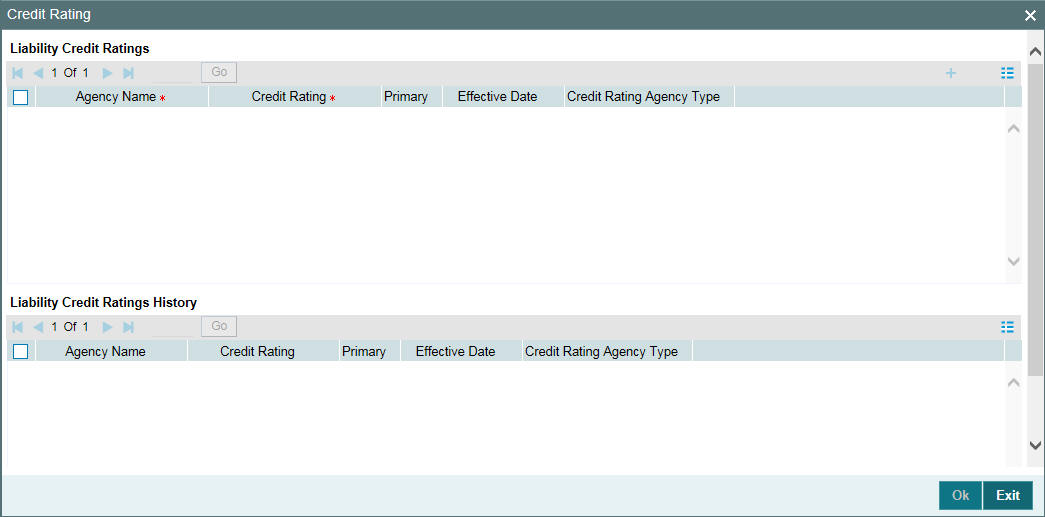
Liability Credit Ratings
Agency Name
Select the credit rating agency name from the adjoining option list.
Credit Rating
Select the credit rating from the adjoining option list. You can maintain multiple external credit rating agencies for a single liability. However, you can maintain only one internal credit rating agency for a single liability.
Primary
Select one of the credit ratings as the primary rating for liability.
The ratings from multiple agencies of external type can be assigned to a liability of which one should be marked as primary.
Only one internal credit rating can be maintained which by default is considered 'Primary'.
The internal credit rating marked as 'Primary' is shown in 'Internal Credit Rating' field of 'Liability Maintenance' screen. Similarly, external credit rating marked as 'Primary' is shown in 'External Credit Rating' field of 'Liability Maintenance' screen.
The modification of primary from one agency to another is allowed.
Note
When a primary credit rating at liability level is modified to a rating with a lower priority, then an alert is triggered. The alert of such liabilities is displayed in the dashboard.
Effective Date
Specify the effective date while associating a credit rating to a liability.
It is mandatory to select the effective date while associating the credit rating. Effective date can be backdated and not future dated. For the same agency, multiple ratings cannot be assigned for the same effective date.
If multiple modifications are done for a particular agency with the same effective date, then the last modification is taken into consideration.
Credit Rating Agency Type
Select the agency type as “Internal’ or External’. These values get defaulted from the ‘Credit Rating Agency Maintenance’ screen.
Liability Credit Ratings History
Credit Rating and Effective Date
If the credit rating for a specific agency is modified along with the Effective date at a liability level, then the existing is recorded in the ‘Liability Credit Ratings History’ section.
2.7.3 Change Log
You can see the history of all liability changes that have happened for a selected liability. For each liability, you can view the record details, remarks, warnings, fields that are modified.
In 'Change Log View' subsystem, you can only view the old and new values of the following fields and the dependent fields that are modified.
You should be able to view the details of particular record of that screen by using the change log button. The result should list all the modifications on the particular record.
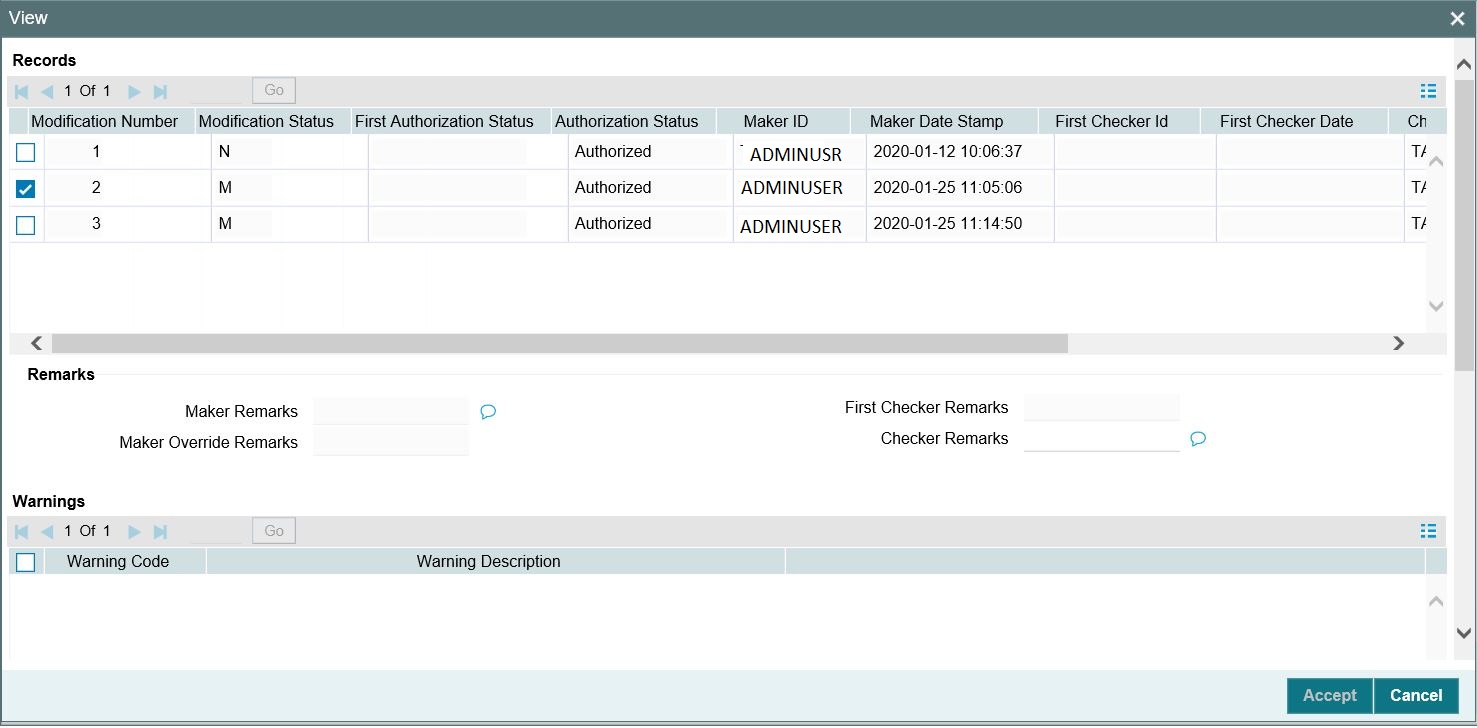
Records section
- Modification Number
- Modification Status
- First Authorization Status
- Authorization Status
- Maker Id
- Maker Date Stamp
- First Checker Id
- First Checker Date
- Checker Id
- Checker Date Stamp
- View Change
Remarks section
- Maker Remarks
- Maker Override Remarks
- First Checker Remarks
- Checker Remarks
Warnings section
- Warning Code
- Warning Description
Fields section
- Field Name
- Old Value
- New Value
2.7.4 Merging Liabilities
You can merge any two liabilities existing in the system into one single liability. Oracle Banking ELCM allows you to merge one liability into another. Upon merger, both liabilities assumes the same liability code. The structure of the liabilities does not change.
The merging of liabilities is done in the following two steps:
- Step 1 – Liability Merger Maintenance
- Step 2 – Liability Merger Process
The above steps are described in the sections below.
2.7.4.1 Liability Merger Maintenance
You must first maintain the details of liabilities to be merged using the ‘Liability Merger Maintenance’ screen. You can invoke the ‘Liability Merger Maintenance’ screen by typing ‘GEDMERGE in the field at the top right corner of the Application tool bar and clicking the adjoining arrow button.
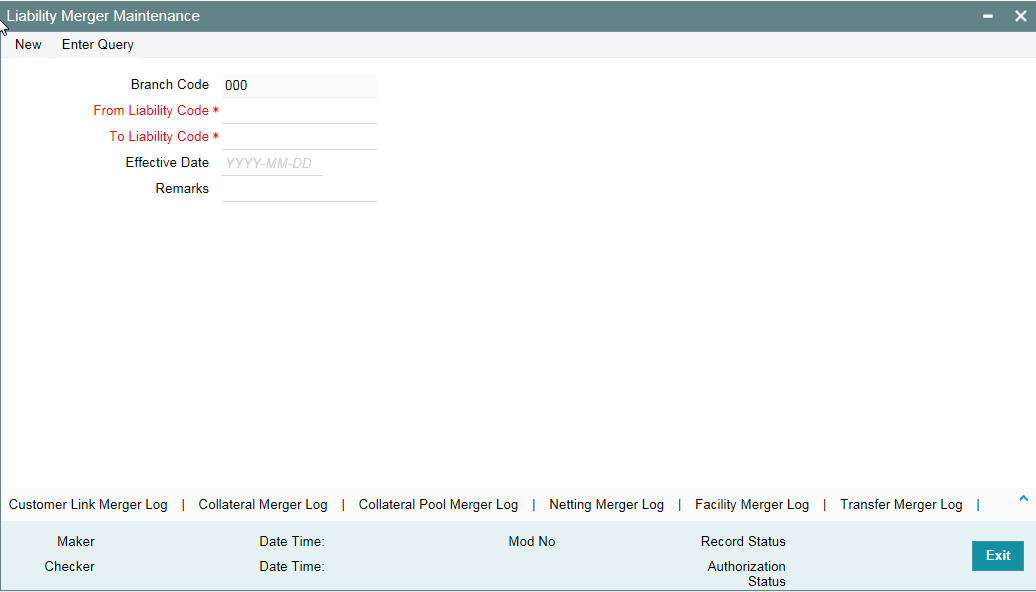
In the above screen you must maintain the following details for merger of two liabilities.
From Liability Code
Specify using the adjoining list of options the code of the liability which is to be merged into another liability.
To Liability Code
Specify using the adjoining list of options the code of the liability into which the liability specified under ‘From Liability Code’ must be merged into.
Branch Code
System defaults the branch code as the branch from which the 'Liability Merger Maintenance' screen is launched and 'New' button is clicked.
Effective Date
Specify the date from which the merger of liabilities must take effect.
Remarks
Specify the remarks about the Liability Merger Maintenance.
Once you have maintained the above merger details, you must initiate the Merger Batch Process using an Intra Day Process so as to complete the merger. During this batch process all liability IDs for all the related maintenances are modified. These include the following maintenances:
- Liability Customer
- Collateral
- Collateral Pool
- Facility
- Netting
- Facility Transfer
- Ear Marking
Upon merger, all the Utilizations point at the new liability. The liability utilization is then be moved from the old liability to the new liability and the old liability is closed.
You may view the following merger logs from the above screen:
- Customer Link Merger Log
- Collateral Merger Log
- Collateral Pool Merger Log
- Netting Merger Log
- Facility Merger Log
- Transfer Merger Log
- EarMarking Merger Log
- Utilization Merger Log
2.7.4.2 Liability Merger Process
Once you maintained the details of liabilities to be merged, you can initiate the process of merger using the ‘Liability Merger Process’ screen.
You can invoke the ‘Liability Merger Process’ screen by typing ‘GESMRGTR’ in the field at the top right corner of the Application tool bar and clicking the adjoining arrow button.
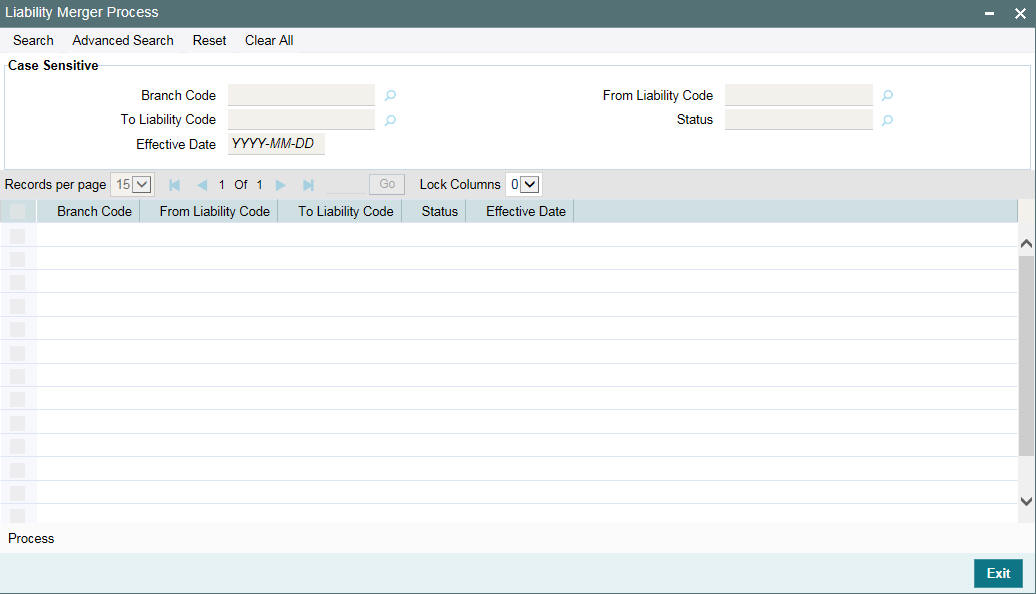
Click ‘Process’ button to initiate the merger of maintained liabilities.
Note
Merger between Liabilities that form part of a hierarchy is not allowed.
2.8 External Customer Account Input
You can invoke ‘External Customer Account’ screen by typing ‘STDCRACC’ in the field at the top right corner of the Application tool bar and clicking on the adjoining arrow button.
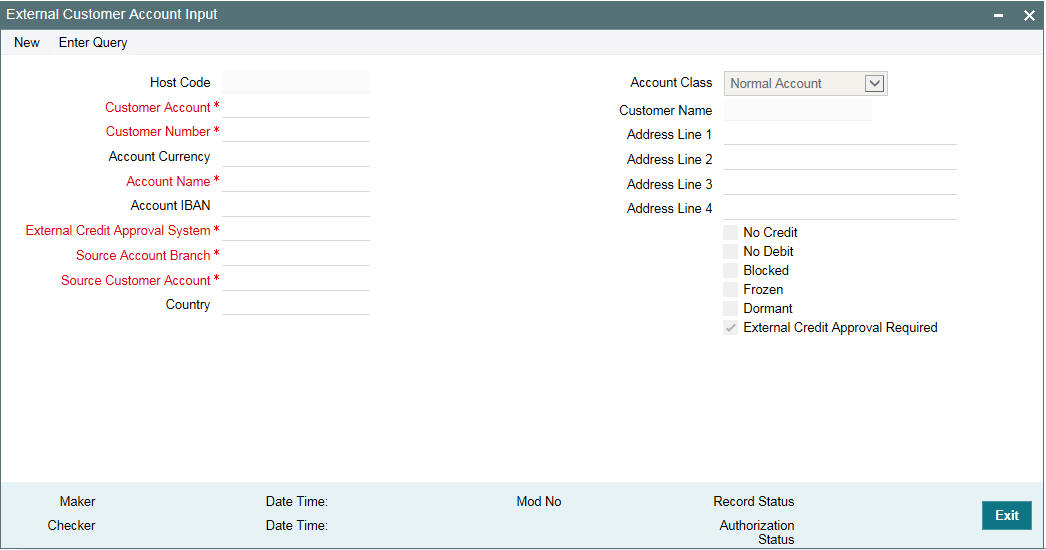
External Credit Approval Required
You can select this check box if ECA check is required. If this check box is selected, then fund is verified for particular CASA account. If this check box is not selected, then the system does a force post for that component.
You can edit this check box before first time authorization. Once authorization is done you cannot edit this check box.
For more information on 'External Customer Account Input' screen, refer to Common Core -Core Entities and Services User Guide.
2.9 Maintaining Customer to Liability Link
You can link customers to liabilities using the ‘Customer to Liability Link Maintenance’ screen.
Multiple customers can be linked to a liability. But a customer cannot be linked to multiple liabilities. You can invoke the ‘Customer to Liability Link Maintenance’ screen by typing ‘GEDCULIK’ in the field at the top right corner of the Application tool bar and clicking the adjoining arrow button.
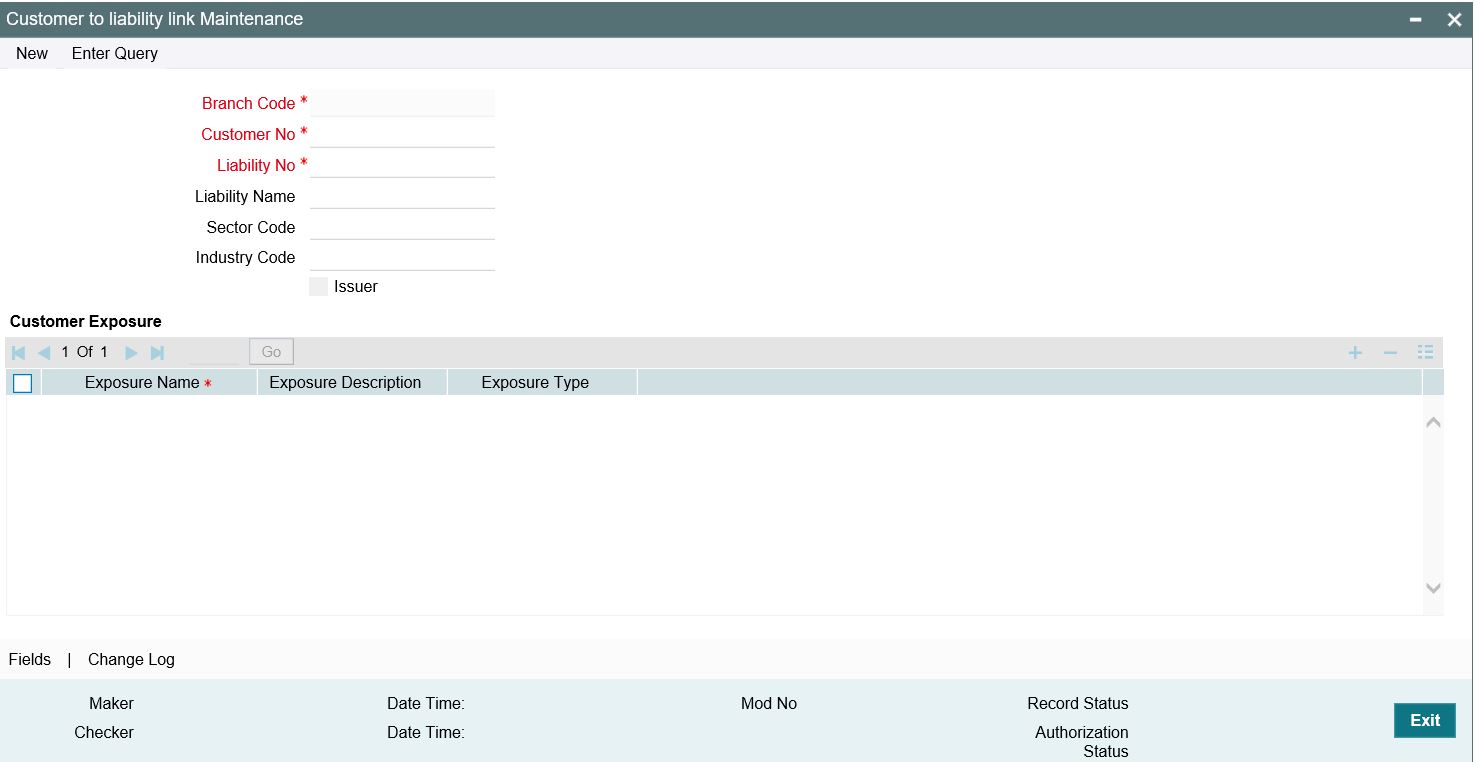
Branch Code
The branch code of the branch in which the Customer to liability link maintenance is done gets defaulted here.
Customer Number
Specify customer’s number to whom the liability has to be linked.
Liability Number and Liability Name
Specify the number and name of the Liability to be linked to the customer.
Customer Exposures
Here you can specify different Exposure Types for the customer. This allows you to track the exposure of a customer. Multiple exposure names can be linked (For example, IT for Sector exposure, INDIA for country exposure) to track exposures.
- Exposure Type - The exposure type for the exposure, as maintained in the 'Track Exposure Maintenance' screen gets defaulted here based on the 'Exposure Name' chosen.
- Exposure Name - Specify an exposure name which is maintained in the 'Track Exposure Maintenance' screen.
- Exposure Description - The description for the exposure, as maintained in the 'Track Exposure Maintenance' screen gets defaulted here based on the 'Exposure Name' chosen.
Note
- The Customer to Liability Link Maintenance is mandatory, when limits tracking are required under any of the Oracle FLEXCUBE modules.
- In the 'Customer Exposures' section, the 'exposure name' LOV displays the exposures having utilization type as 'Customer' maintained in the 'Track Exposure Maintenance' (GEDTREXP) screen.
- The Customer to Liability Link Maintenance is mandatory, when account for the customer is created using account class, for which limit check flag is set as ‘Y’ at preference sub-system screen.
- When account for the customer is created without maintaining liability
and later the liability is created and linked to the customer, the ‘Limits
tracking’ option at the cus- tomer level would be automatically
selected by the system.
Note
In case of granular access, link customers to liabilities details maintained for allowed list of customers are allowed to view, query, modify, authorize, re-open, copy, delete, and so on based on the user/users preferences selected in ‘Access Group Restriction’ tab available in the ‘User Maintenance’ screen. For more information, refer to Common Core - Security Management System User Guide.
2.9.1 Change Log
You can see the history of all customer liability linkage changes that has happened for a selected customer. For each customer, you can view the record details, remarks, warnings, fields that are modified.
In 'Change Log View' subsystem, you can only view the old and new values of the following fields and the dependent fields that are modified.
You should be able to view the details of particular record of that screen by using the change log button. The result should list all the modifications on the particular record.
Records section
- Modification Number
- Modification Status
- First Authorization Status
- Authorization Status
- Maker Id
- Maker Date Stamp
- First Checker Id
- First Checker Date
- Checker Id
- Checker Date Stamp
- View Change
Remarks section
- Maker Remarks
- Maker Override Remarks
- First Checker Remarks
- Checker Remarks
Warnings section
- Warning Code
- Warning Description
Fields section
- Field Name
- Old Value
- New Value
2.10 Covenant Maintenance
As a part of maintaining Collaterals/Facilities, you may collect certain required information and documents from the customer regularly. Based on the information you may revise the collateral/facility details. The information or documents collected from the customer is termed as a ‘Covenant’.
You can maintain Covenant details in the ‘Covenant Maintenance’ screen. You can invoke the ‘Covenant Maintenance’ screen by typing ‘GEDCOVNT’ in the field at the top right corner of the Application tool bar and clicking the adjoining arrow button.

Covenant Name and Description
Specify the Covenant Name for which information is entered. A maximum of 50 alpha numeric characters are allowed in this field. You may also provide a brief description of the covenant maintained.
Mandatory
Indicate whether convent defined is mandatory as part of the process or not. You may change this preference when this convent is linked to a Collateral/Facility.
Frequency
Select a frequency according to which the Convent has to collected/revised. You may select any one of the following frequencies:
- Yearly
- Half Yearly
- Quarterly
- Monthly
- Weekly
- Daily
Start Month
If the Frequency select is Yearly, Half Yearly, Quarterly, or Monthly, then specify the start month here.
Due Date
Specify the number of days after which the covenant needs to be reviewed.
Grace days
Specify the Grace days past the next due/revision date allowed for renewal of the covenant.
Notice days
Specify the number of days in the notice period. The notice period starts from days prior to the revision date of the covenant.
Remarks
Specify the remarks about the covenant maintenance.
This can be linked to 'Collateral Category Maintenance' screen ( GCDCOLCA), 'Collaterals Maintenance' screen (GCDCOLLT) and 'Facilities Maintenance' screen (GEDFACLT) for choosing the covenant that is to be linked to the Collateral Category, Collaterals, and Facilities respectively. On choosing the covenant in these screens the values maintained for the covenant is defaulted. You can modify these defaulted values.
2.11 Collateral Pool Maintenance
You may group together two or more collaterals to create a Collateral Pool. You can create and maintain collateral pools in the ‘Collateral Pools Maintenance’ screen.
You can invoke the ‘Collateral Pools Maintenance’ screen by typing ‘GCDMPOOL‘ in the field at the top right corner of the Application tool bar and clicking the adjoining arrow button.
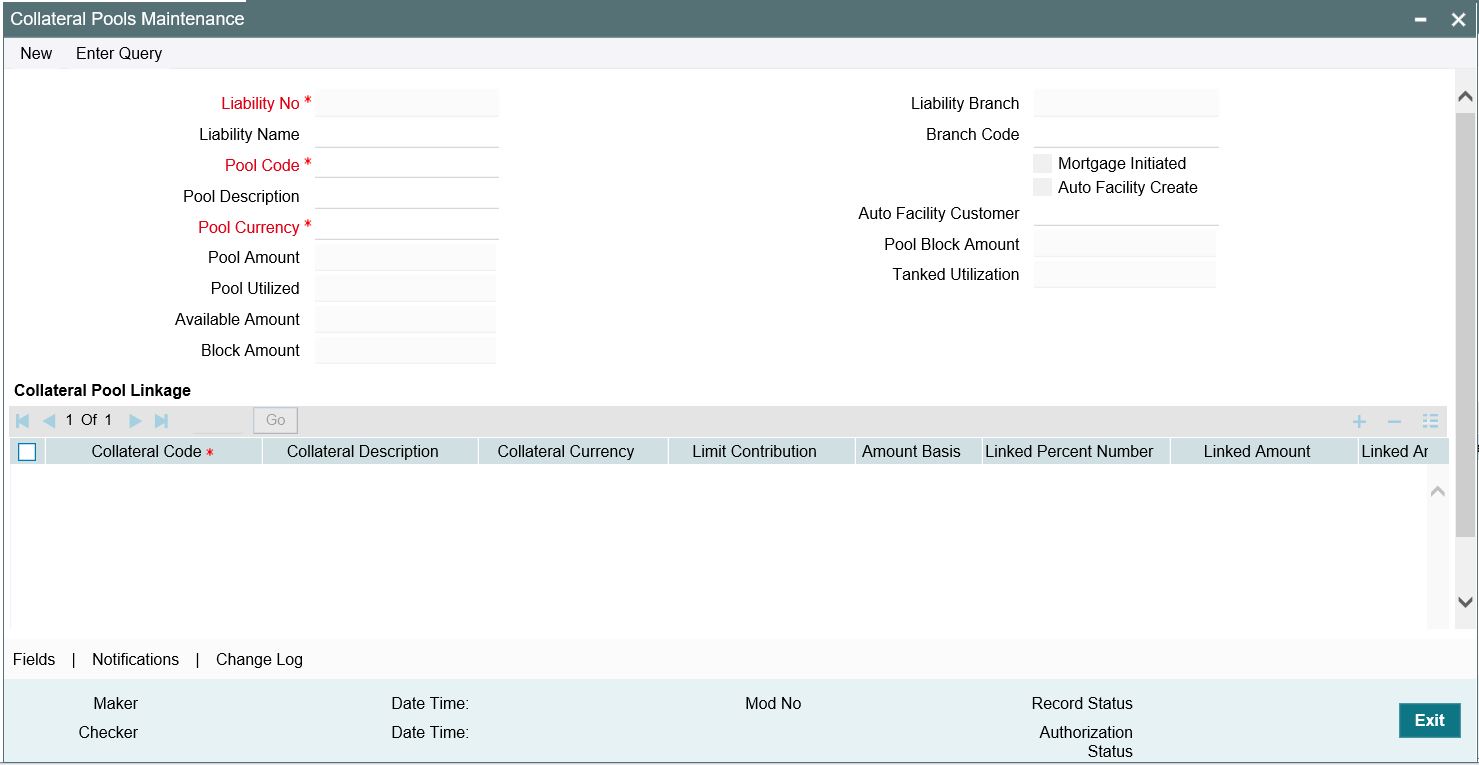
Liability Number
Specify the liability to which the collaterals need to be linked.
Pool Code
Specify the Pool Code here. The pool code assigned to each collateral pool can be linked to a liability while creating credit limits.
Pool Description
Specify a brief description of the collateral pool here.
Pool Currency
Specify the currency in which the Collateral Pool has to be maintained.
Available Amount
On save of the collateral pool record, system defaults the available amount for the collateral pool. It is the difference between Pool Amount and Pool Utilized.
Description (Collateral Pool Linkages)
The description for the collateral, as maintained in the 'Collaterals Maintenance' screen gets defaulted here based on the selected 'Collateral Code'.
Type
The type for the collateral, as maintained in the 'Collaterals Maintenance' screen gets defaulted here based on the selected 'Collateral Code'
Branch Code
The branch code for the branch where the collateral is maintained in the 'Collaterals Maintenance' screen gets defaulted here based on the selected 'Collateral Code'.
Collateral Utilization
System updates the collateral utilization for each of the collateral codes linked in the 'Collateral Pool Linkages', based on the utilization, when the collateral pool comprising the collateral is linked to the facility.
Mortgage Initiated
This option is checked automatically for collateral and collateral pool created as a result of authorization of mortgage account and you cannot modify it.
Auto Facility Create
Select this check box to indicate that a facility should be created automatically for the given Liability number with line code as pool code.
Note
This automatically created line code can be used to maintain limits for customer account in ‘Account Limits’ screen, if required.
Auto Facility Customer
Specify the customer number to which the collateral pool is linked. The option list displays all valid customer numbers linked to the liability number selected on this screen. You can select the appropriate customer number from the option list.
Auto facility customer is enabled only if the option ‘Auto facility Create; is checked, For more details on maintaining Account Limits, refer Core Entities User Manual.
Tanked Utilization
The system computes and displays the utilization amount that can be set in the 'Tanked Utilization' field.
After BOD process, this utilization amount is updated for the transactions linked to collateral pool as per the contract and the amount is cleared from the 'Tanked Utilization' field.
2.11.1 Creating Collateral Pool Linkages
Under ‘Collateral Pool Linkages’ you can add the different collaterals pooled in for the particular Liability.
To add a new collateral click ‘Plus’ button, specify the relevant details and save the record. To delete an existing collateral, select it and then click ‘Minus’ button and save the record. While creating collateral pools, remember the following:
- Collateral can be linked to more than one pool if the collateral amount available is not zero.
- A credit line can be backed by only one pool but a single pool can back multiple credit lines.
You must maintain the following details for each of the collateral.
Collateral Code
Select the collateral code from the adjoining option list.
If the 'Linked Percent Number', is specified, on save of the record, system defaults the 'Linked Amount' calculated as Linked Percentage of 'Collateral Contribution'.
If the 'Linked Amount' is specified, on save of the record, system defaults the 'Linked Percent' calculated as percentage of 'Linked Amount' out of the 'Collateral Contribution.
Collateral Currency
The currency in which the collateral has been maintained is displayed when a collateral code has been picked.
Collateral Contribution
The collateral amount which has been maintained is displayed when a collateral code has been picked.
Amount Basis
You can either select ‘Percentage’ or ‘Amount’
If 'Percentage' is selected, then system allows you to enter the percentage only and not the 'Linked Amount'. The 'Linked Amount' is appropriately calculated by the system and it is not editable. The value of the percentage must be from range 0 to 100.
If 'Amount' is selected, then the system allows you to enter the amount only and not percentage. When amount is entered, the system appropriately calculates the percentage. Ensure to maintain amount in positive.
If the 'Amount Basis' is selected as ‘Amount’ and 'Collateral Value' is modified, then the percentage linked gets recalculated based on the modified 'Collateral Value'.
You can modify the linkage at collateral pool level from percentage to amount and vice-versa.
The system ensures that total of collateral value linked to one or multiple pools is not more than the collateral value maintained in 'Collateral Maintenance' screen. The system ensures that linkage of collateral to one or more pools cannot be more than 100% of collateral value
Linked Percent Number and Linked Amount
In case 'Collateral Value' is increased in 'Collateral Maintenance' screen, then the 'Linked Amount' is modified only if the 'Amount Basis' is 'Percentage'.
If the 'Amount Basis' is 'Amount', then the 'Linked Amount' is retained as is. However based on the changed 'Collateral Value', the 'Linked Percent Number' is re-calculated considering the retained amount.
In case 'Collateral Value' is decreased, modified amount of collateral is validated with all the 'Linked Amount' in various pools (either percentage or amount) and if the total amount linked is less than modified amount then modification of collateral value is to be allowed. Wherever 'Percentage' is considered for linking collateral to pool, the linked amount is re-calculated accordingly with modified amount of collateral.
If the 'Collateral Value' decreased amount is less than the total 'Linked Amount' in various pools, then an appropriate error message appears.
When a collateral pool comprising the collateral is linked to the facility, the system computes and displays the amount to be linked. The linked amount of Collateral pool is computed based on the pool percentage or pool amount specified when a collateral pool is linked to a Facility.
For example, Collateral Pool ‘Pool1’ is created with pool amount of 6000 USD. And 60% of Pool1 is linked to a Facility, then the linked amount of the collateral pool is updated as 3600 (that is, 60% of 6000). The available amount of collateral pool is updated as 2400 (6000-3600). The available amount of the collateral pool is arrived by using the below mentioned calculation
Available amount = pool amount – pool utilization – linked amount.
The available amount of facility is increased to the extent of linked amount in the facility currency. Any utilization to the facility only impacts the available amount and the utilization of the facility and not the collateral pool or the underlying collateral.
Pool Amount
The system computes and displays the utilization amount to the Collateral Pool, if a collateral Pool is attached to a contract or account and not through a facility.
Pool Utilized
This field displays the pool amount that has been linked to a various credit lines, hence displaying the total pool amount utilized at any point in time.
Linked Amount Pool Currency
.System defaults the 'Linked Amount Pool Currency' for each of the collaterals added in the 'Collateral Pool Linkages' as the linked amount in the pool currency.
For example, you have linked the pool ‘LOANP001’ to the liability ‘BIRLA0001’. LOANP001 is in turn backed by the following collaterals:
Collateral code |
Currency |
Collateral Amount |
Linked Amount |
ISDP16924 |
DEM |
100,000 |
75000 |
AC777228 |
GBP |
55,000 |
55,000 |
COLSHRS15 |
INR |
2,000,000 |
1,500,000 |
COLHS819 |
USD |
1,500,000 |
1,500,000 |
Now the pool currency specified is USD. Therefore, the system does the necessary calculations and converts the linked amount into the currency of the pool and displays the pool amount in the respective field.
Order Number
Specify the order for collateral utilization.
You can specify order number of utilization to collaterals linked to pool. This is optional. However, if one collaterals is specified with order number, then all the collaterals linked to pool are to be specified with order number.
The order number of utilization can be specified as part of pool creation or can be specified as part of pool amendment.
The order number can be specified when collaterals are linked to pool with 'Amount Basis' as ‘Percentage’ or ‘Amount’. Collateral pool created when auto pool create is enable while creating a collateral have the order number as 1 by default when the pool is created with this collateral. Even if collateral pool is created with only one collateral linked can be specified with order number as 1.
As part of pool amendment, order number specified to collaterals can be removed. However order number is to be removed from all the collaterals.
Maximum order number specified cannot exceed the number of collaterals linked to the pool. Duplicate order number cannot be specified while linking multiple collaterals to the same pool.
Collaterals linked to the pool are displayed based on the order number of utilization once the pool is saved and authorized. When any collaterals is delinked from the pool the order numbers are to be reassigned to the remaining collaterals such that maximum order number cannot exceed the number of collaterals that remain in the pool. Delinking of collateral with higher order number is not allowed if the collateral value is contributing to already utilized/blocked amount at the pool level.
Modification of pool to delink the collaterals with lower order number when the pool is partially utilized such that the collateral being delinked is not part of this utilization is allowed. You can modify the order number of utilization to bring it down to the lower order such that this collateral is not contributing to the utilized amount at the pool level and then allow delinking of the same from the pool. You can modify the collateral allocation amount/percentage at pool level with order number as long as the modified pool amount is not going below already utilized/blocked amount at pool level.
If order number of one collateral is removed, the system validates the same at the time of authorization. Either order number is to be specified for all collaterals in the pool or to be removed from all the collaterals in the pool.
When the pool is fully utilized, collateral with lower order number also is not allowed to be delinked as the same has contributed to the pool utilized/blocked amount. Closure of pool with order number specified but with no outstanding utilized/blocked amount is possible.
Linked Percent Number
The part of the collateral amount which has to be linked to the pool can be specified as a percentage here. On save of the record, if Linked Percent Number is specified, system defaults the 'Linked Amount' calculated as Linked Percent Number Percentage of 'Collateral Contribution'.Available Interest Rate
The interest rate maintained for the collateral code in ‘Collateral Type Maintenance’ screen gets defaulted here,
Interest Spread
Specify the interest spread to be applied on the customer account. The interest spread can be zero. However, if the collateral attached is a term deposit, then on rollover of the term deposit the interest spread is defaulted to the spread applicable for the term deposit on rollover.
Rate of Interest
The rate of interest applicable on the customer account when customer uses the overdraft facility against the collateral type is derived as follows:
Rate of Interest = Available Interest Rate + Interest Spread + Customer spread
Expiry Date
On save of the record, system defaults the expiry date based on the end date of the collateral maintained. However, if the collateral attached is of a deposit then on rollover of the term deposit the maturity date of the term deposit is updated as the expiry date of the collateral.
Note
The batch program ‘CASABAT’ is used to update the overdraft utilization at collateral level. If a rollover happens for a TD linked as collateral, during BOD, the interest rate applied on the TD gets updated to the interest rate value maintained at the collateral pool level.
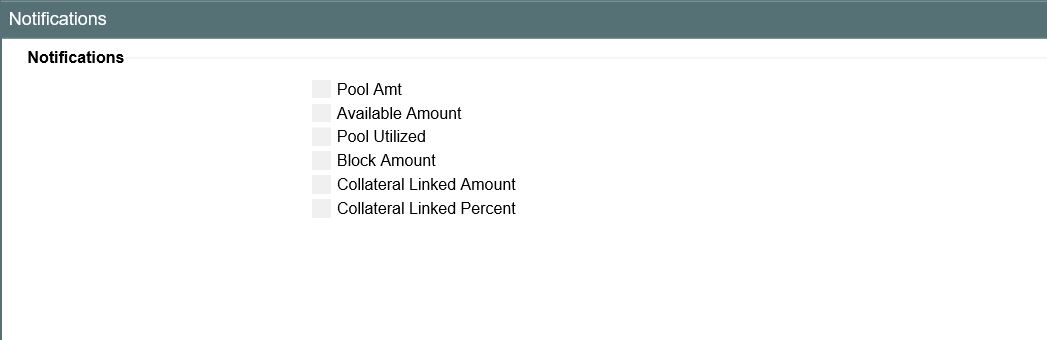
2.11.2 Notifications
Notification sub-system enables the particular collateral pool record to be a candidate for notification whenever the record is amended. At least one of the out of box supplied fields in notification sub-system to be enabled to bring this collateral pool under the purview of generating notification. When values in field/s enabled for notification are modified as part of direct updating or as part of batch updating, all details of the collateral pool is sent in the notification message along with old and new value details of the fields enabled for notification.
Notification messages are logged in a table with unique reference number. A new quartz job is required to read notification messages and publish it on configured queue/topic.
To configure the fields for notification message, click ‘Notification’ subsystem.
Field name |
Screen |
Modification |
Old value relevance |
Notification triggered when |
Pool amount |
GCDMPOOL - main screen |
Direct/Batch |
Yes |
When pool value changes |
Pool utilized |
GCDMPOOL - main screen |
Direct |
Yes |
When utilization is updated |
Available amount |
GCDMPOOL - main screen |
Direct/Batch |
Yes |
When available balance is modified |
Block amount |
GCDMPOOL - main screen |
Direct |
Yes |
When block amount changes |
Linked percent number |
GCDMPOOL - main screen |
Direct |
Yes |
When collateral link percent gets modified |
Linked amount |
GCDMPOOL - main screen |
Direct/Batch |
Yes |
When collateral linked amount gets modified |
2.11.3 Change Log
You can see the history of all collateral pool changes that have happened for a selected collateral pool. For each collateral pool, you can view the record details, remarks, warnings, fields that are modified.
In 'Change Log View' subsystem, you can only view the old and new values of the following fields and the dependent fields that are modified.
You should be able to view the details of particular record of that screen by using the change log button. The result should list all the modifications on the particular record.
Records section
- Modification Number
- Modification Status
- First Authorization Status
- Authorization Status
- Maker Id
- Maker Date Stamp
- First Checker Id
- First Checker Date
- Checker Id
- Checker Date Stamp
- View Change
Remarks section
- Maker Remarks
- Maker Override Remarks
- First Checker Remarks
- Checker Remarks
Warnings section
- Warning Code
- Warning Description
Fields section
- Field Name
- Old Value
- New Value
2.12 Track Exposure Maintenance
Maintenances for exposure tracking can be done through the ‘Track Exposure Maintenance’ screen. This screen not only allows tracking, but also allows you to define a limit for a particular exposure. This means that when the utilization exceeds the limit, you have to provide a confirmation for process to proceed.
You can invoke the ‘Track Exposure Maintenance’ screen by typing ‘GEDTREXP’ in the field at the top right corner of the Application tool bar and clicking the adjoining arrow button.
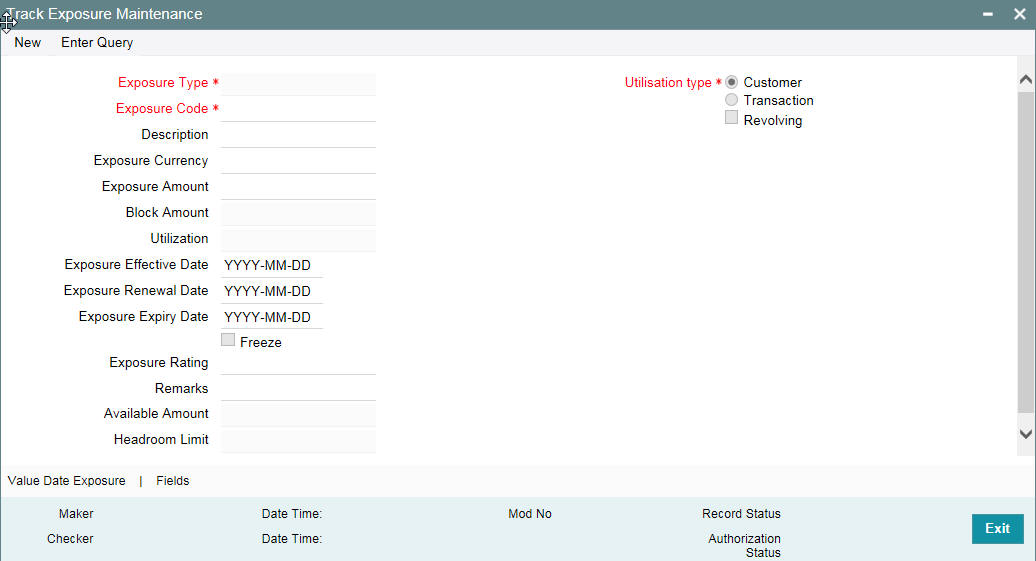
Specify the following details.
Exposure Type
Specify the exposure type. The option list displays all valid exposure types maintained in the system. Select the appropriate one.
The values allowed in field exposure code depends on the exposure type you select here. The validations are as follows.
Selected exposure type |
Value allowed for Exposure Code field |
Currency |
Active currencies maintained in the system |
Country |
Active country codes maintained in the system |
Industry |
Active industries maintained in ‘Sector -Industry Maintenance’ screen |
Sector |
Active sectors or industries maintained in ‘Sector-Industry Maintenance’ screen |
If you select any of the above exposure types, you cannot specify an exposure code that does not belong to the selected exposure type.
For other exposure types, you need to enter a unique exposure code.
Exposure Code
Specify the Exposure code.
If the exposure type is Currency, Country, Industry, or Sector, then you need to select the appropriate exposure code from the option list. For other exposure types, you need to manually enter a unique exposure code.
The exposure code maintained in this screen can be linked in the 'Customer to liability link Maintenance' screen if the 'Utilization type' is 'Customer’ and it can be linked in the 'Facilities Maintenance' screen if the 'Utilization type' is 'Transaction' to make exposure tracking possible. It is possible to track a customer in multiple exposures. For this multiple exposure names should be linked to the ‘Customer to liability link Maintenance' screen.
Description
Provide a brief description of the exposure here.
Exposure Type
Specify what kind of exposure it is. The exposure types are maintained in the Static Maintenance screen 'Exposure Maintenance' having function id CODEXPTY.
Utilization Type
Indicate whether exposure is linked with customer or transaction.
You can track any number of exposures by linking the exposure code to the facility.
Revolving
Check this box if the exposure is a revolving exposure. This implies that each time a repayment is made (revolving amount) against the exposure, the available limit for the exposure is increased by the amount of repayment. In case of non-revolving exposure, the available limit is the amount of exposure reduced by the loans already availed by the customer (if any); repayment does not increase the limit.
This can be denoted in terms of utilized amounts as follows:
- For revolving exposure: New Exposure utilization = Exposure utilization – Revolving amount
- For non-revolving exposure: New Exposure utilization = Exposure utilization
Exposure Currency
Specify the currency in which the Tracking of Exposure has to be maintained. Once authorized, this field will be non-amendable.
Exposure Amount
Specify the exposure limit amount which is to be maintained for each exposure tracking maintenance. A confirmation is sought during utilization when the utilization amount crosses the exposure amount.
Block Amount
The value of the ‘Block Amount’ field in the ‘Global Exposure Block Maintenance’ screen is displayed here.
Utilization
System displays utilization for the exposure here.
Exposure Effective Date
Specify the effective date after which the maintained exposure becomes valid or applicable.
Exposure Renewal Date
Specify the exposure Renewal date. This is only for information purposes.
Exposure Expiry Date
Specify the expiry date after which the maintained exposure is not applicable for tracking.
Freeze
Select this check box to indicate that the exposure is frozen and during utilization. Exposure tracking is not allowed for such an exposure (that is, Utilization under such exposures are not be allowed).
Exposure Rating
Specify the rating of the exposure (Example, Sovereign rating). This is only for information purposes.
Remarks
Add remarks about the track exposure maintenance, if any.
Available Amount
This is the limit amount that is considered when processing utilization requests for an exposure. It is the amount available after taking into account previous utilizations and amount block (earmark) in force for an exposure. It is calculated as shown below:
Exposure Available Amount = Exposure Limit Amount – Utilization – Exposure block amount
Head Room Limit
The system displays the head room limit. This amount is arrived by deducting sum of effective line amounts from exposure amount. The system displays the head room limit in terms of exposure currency of the facilities linked to the exposure.
Note
If the exposure records of type Transaction or Customer are linked to a facility or a customer, you cannot close the records.
2.12.1 Maintaining Value Date Exposure Details
Value dated exposure can be specified using the Value Date Exposure screen. Click ‘Value Date Exposure’ to invoke this screen.
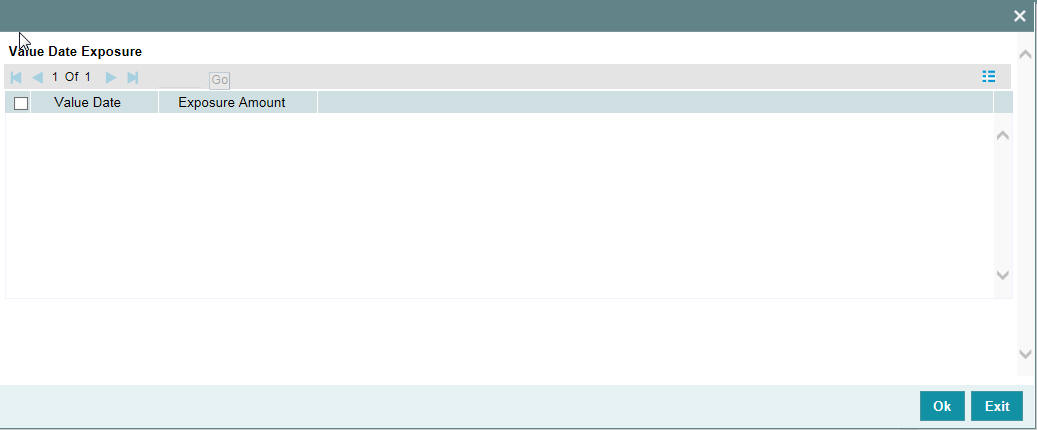
For each record added here you must specify the following:
- Exposure Amount - The value dated Exposure amount
- Value Date - The value date post which the mentioned amount is valid
2.12.2 Viewing Exposure Records
You can view exposure details using the ‘Exposure Query’ screen. You can invoke this screen by typing ‘GESQEXPD’ in the field at the top right corner of the Application tool bar and clicking the adjoining arrow button.
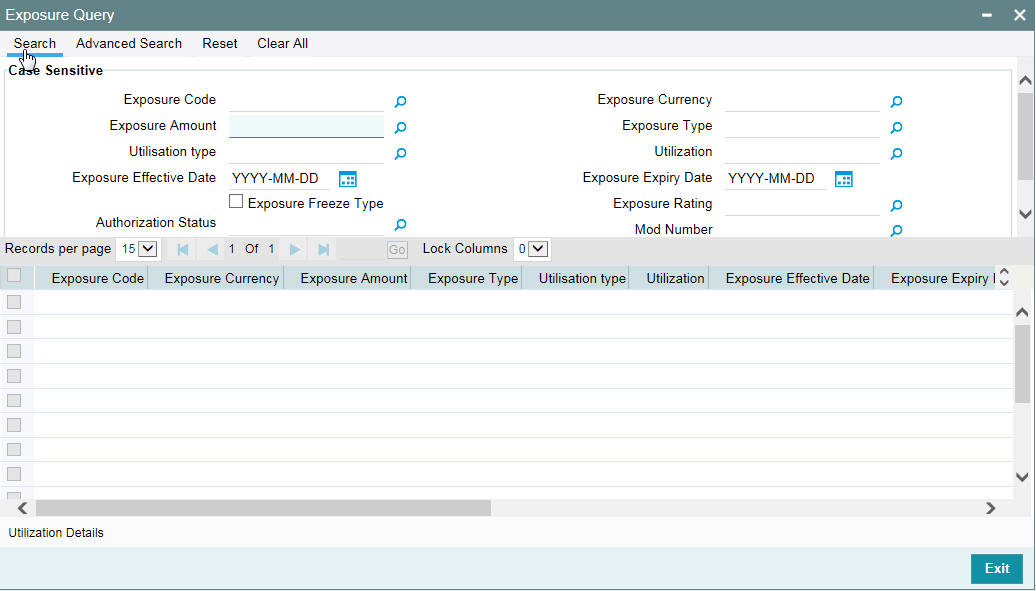
You can query on records based on all or any of the following criteria:
- Exposure Code
- Exposure Amount
- Exposure Currency
- Exposure Type
Click ‘Search’ button. The system identifies all records satisfying the specified criteria and displays the following details for each exposure:
- Exposure Code
- Exposure Currency
- Exposure Amount
- Exposure Type
- Utilization type
- Utilization
- Exposure Effective Date
- Exposure Expiry Date
- Exposure Freeze Type
- Exposure Rating
- Auth Status
- Mod Number
- Revolving Type
- Available Amount
- Revolving Amount
- Block Amount
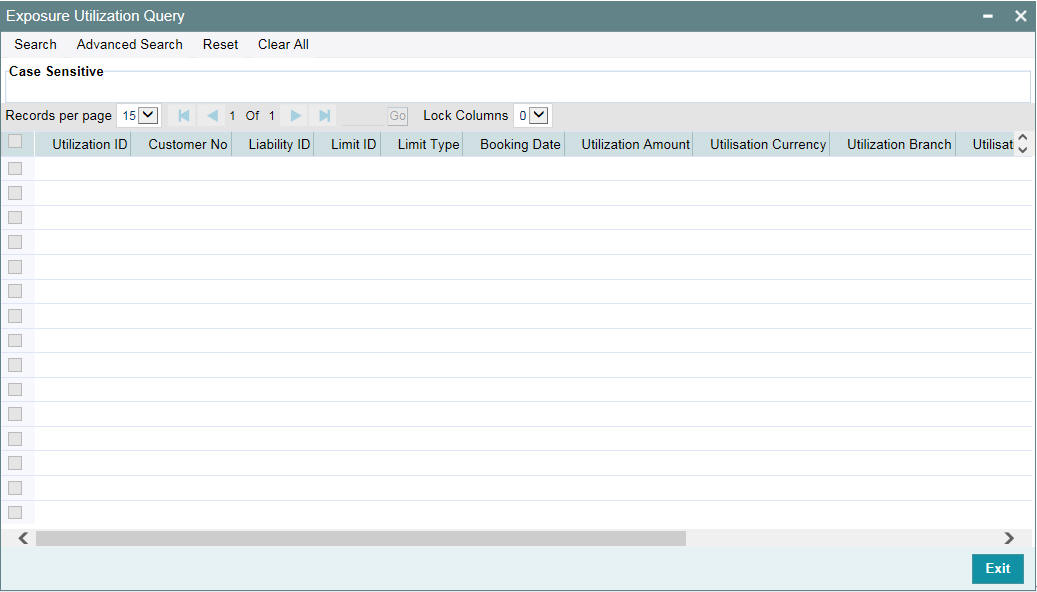
Select particular record and click on ‘Utilization Details’ button to open the ‘Exposure Utilization Query’ screen. You can invoke this screen by typing ‘GESQEXPU’ in the field at the top right corner of the Application tool bar and clicking the adjoining arrow button.
2.13 Exposure Analysis
You can simulate the facilities operations such as creation, modification and renewal of facilities and analyse the impact of such operations on the exposure. To invoke ‘Exposure Analysis’ screen, type ‘GEDEXPAN’ in the field at the top right corner of the application toolbar and click adjoining arrow button.
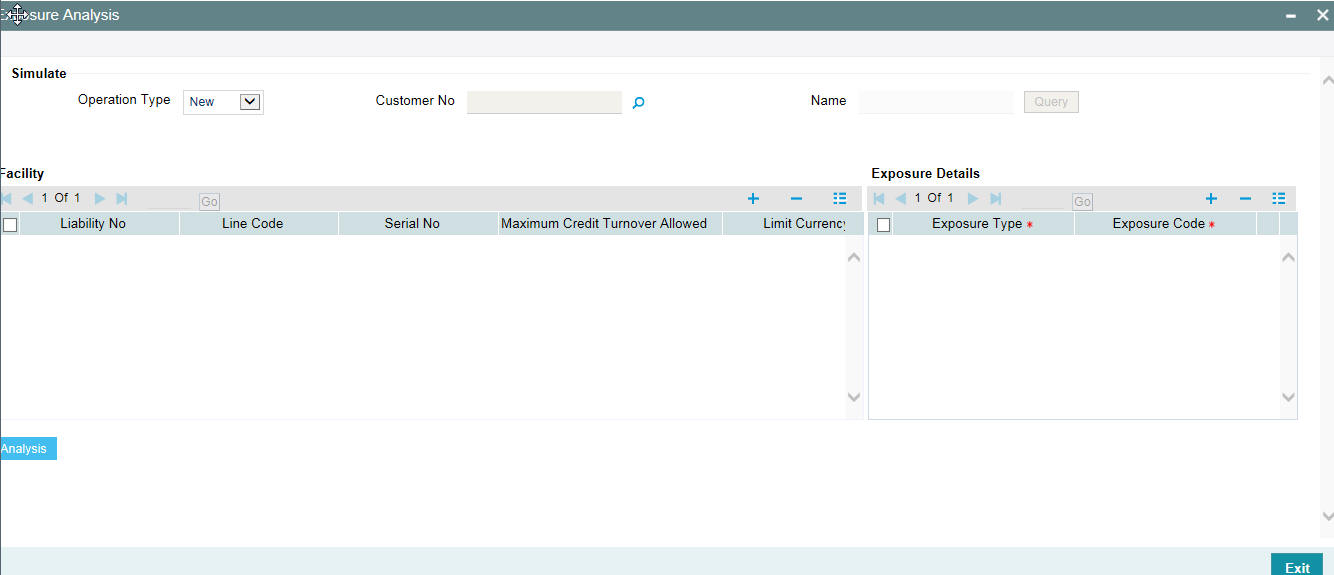
Specify the following details:
Operation Type
Select the operation that you want to simulate. You can select one of the following facility operations.
- New
- Modify
- Renewal
Details are given in the below table.
Operation Type |
Query Facilities |
Editable Fields |
Remarks |
New |
Not Applicable |
New Limit Amount Limit Currency Limit Expiry Date Exposure Type Exposure Code |
Select this to simulate creation of a new facility. Simulation fields other than the editable ones are disabled for this operation. |
Modify |
Based on Customer Number |
New Limit Amount Exposure Type Exposure Code
|
Select this to simulate modification of an existing facility. You can specify a customer ID and click ‘Query’ button to query all the facilities of that customer. The system defaults the Effective Line Amount as the New Limit Amount. The system also defaults the exposure details. You can modify the New Limit Amount and click ‘Analysis’ button to view the impact of modification on the exposure linked with the facility. You can also add a new limit, enter the New Limit Amount and Limit currency, and link the exposures to the new limit before the analysis. |
Renew |
Based on Customer Number |
Limit Expiry Date Exposure Type Exposure Code
|
Select this to simulate renewal of an existing facility. You can specify a customer ID and click ‘Query’ button to query all the facilities of that customer. Modify the Expiry Date to a later date and click ‘Analysis’ button to view the impact of the renewal operation on the exposure. |
Customer Number
You can search for existing facilities based on the customer number. This is applicable only for Modify and Renew operations.
For Modify and Renew operations, you can click ‘Query’ buttons to view the facility details of the selected customer.
Name
The system displays the name of the customer, based on the customer number you have selected for facility query.
Facility Details
For New operation, you can enter the details of the facility. For Modify and Renew operations, you can edit specific fields required for such operations.
Liability Number
The system displays the liability number. You cannot modify this.
Line Code
The system displays the line code. You cannot modify this.
Serial Number
The system displays the serial number. You cannot modify this.
Limit Amount
The system displays the limit amount. You cannot modify this.
Limit Currency
For New operation, you need to specify the limit currency.
For Modify or Renew operations, the system displays the limit currency. You cannot modify this.
Limit Expiry Date
The system displays the limit expiry date.
For Renew operation, you can modify the limit expiry date, For New and Modify operations, you cannot modify this.
New Limit Amount
For New and Modify operations, you can specify the new limit amount. For Renew operation, you cannot edit this field.
Exposure Details
Exposure Type
For New operation, you need to specify the exposure type.
For Modify and Renew operations, the system displays the exposure type. However, you can modify this.
Exposure Code
For New operation, you need to specify the exposure code.
For Modify and Renew operations, the system displays the exposure code. However, you can modify this.
Once you have specified/modified the details for simulation, click ‘Analysis’ button. The system analyses the impact of the operation on the exposure of the respective facility. You can view the details in ‘Exposure Analysis’ screen.
You can view the following details of the selected facility.
- Exposure code
- Exposure type
- Exposure currency
- Total appetite - this is the exposure amount in terms of exposure currency
- Granted appetite - this is the sum of effective line amounts of the facilities linked to this exposure in terms of exposure currency
- Head room - this is arrived by deducting granted appetite from total appetite
- Headroom with HO currency
- Pipe line deals - this is arrived as follows:
sum of new facilities in pipe line using CAM process + (plus)
sum of modified facilities using CAM process where the modified amount is greater than the original amount + (plus)
sum of (modified amount - original amount) modified facilities using CAM process where the expiry date is earlier than or equal to current date and new expiry date is later than current date - (minus)
sum of (original amount - modified amount) of modified facilities using CAM process where modified amount is lesser than the original amount in exposure currency
- Head room with pipe line deals (Head room - pipe line deals in exposure currency)
- Simulated head room
- For New operation, Head Room - New Limit Amount
- For Modify operation, if the limit amount is reduced, then Head Room - (Limit amount - New Limit Amount)
- For Modify operation, if the limit amount is increased, then Head Room + (New Limit amount - Limit Amount) in terms of exposure currency
- White text in green background indicates that it is a positive value
- White text in red background indicates that it is a negative value
- Simulated headroom in HO currency
- Simulated head room with pipe line deals
- Number of days to expire - difference between exposure expiry date and application date
You can view a bar chart that shows the exposure name, head room and head room with this limit fields. You can click an exposure name on the main table to view the following details.
- Liability number - liability number of the facility linked to the selected exposure of the bar chart
- Line Code - line code of the facility linked to the selected exposure of the bar chart
- Line Serial - serial number of the facility linked to the selected exposure of the bar chart
- Effective Line Amount - effective line amount of the facility linked to the selected exposure of the bar chart
- Limit Currency - limit currency of the facility linked to the selected exposure of the bar chart
- Utilization Amount - utilized facility amount
- Block Amount - blocked facility amount
- Number of days to expire - difference between facility expiry date and application date
2.14 Exposure Dashboard
Exposure dashboard helps you analyse the total and granted appetite of exposure codes as bar chart and pie chart. To invoke ‘Exposure Dashboard’, type ‘GEDEXDBD’ in the field at the top right corner of the application toolbar and clicking the adjoining arrow button.
Exposure Type
Select the exposure type whose details you want to analyse. The option list displays all valid exposure types. Select the check boxes adjoining each exposure type to include the details of that exposure type in the dashboard.
Utilisation Type
Select the utilization type that you want to analyse. The option list displays all valid utilisation types. Select the check boxes adjoining each utilization type to include the details of that in the dashboard.
As you select the required options and tab out of the field, the system displays the following details of the exposure codes associated with the selected exposure type.
- Exposure code
- Exposure type
- Exposure currency
- Total appetite
- Granted appetite
- Head room
- Head room in HO currency
- Pipe line deals
- Headroom with pipe line deals
- Simulated head room
- Simulate head room in HO currency
- Simulated head room with pipe line deals
- Number of days to expire
Bar Chart
The bar chart displays the total appetite and granted appetite in HO currency for each exposure code.
Pie Chart
You can view a pie chart of the total appetite in HO currency.
You can view the following details of the facilities linked with a selected exposure code and exposure type.
- Liability number
- Line code
- Line serial
- Effective line amount
- Limit currency
- Block amount
- Utilization amount
- Number of days to expire
2.15 Global Block Exposure Maintenance
You can block (earmark) a certain amount of an exposure limit using the ‘Global Block Exposure Maintenance’ screen. You can invoke the ‘Global Exposure Block Maintenance’ screen by typing ‘GEDEXPBL’ in the field at the top right corner of the Application tool bar and clicking the adjoining arrow button.
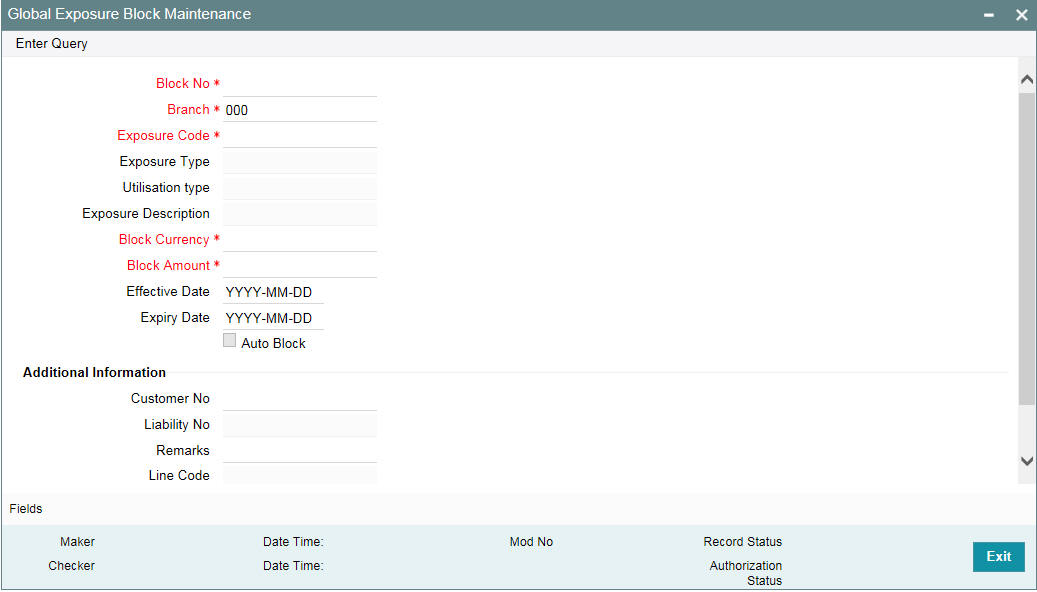
Block Number
Specify a unique number for the block you are creating. The system does not allow you to modify it after authorization of the maintenance.
Branch
Specify the branch from which the block is being maintained. You cannot change the branch after authorization of the maintenance.
Exposure Name
Specify the exposure code for which the amount block is to be done. The adjoining option list contains all the relevant codes. Select the appropriate one.
Exposure Description
The system defaults the exposure description here.
Block Currency
Specify the currency in which the amount block is to be applied. You cannot modify this once the maintenance has been authorized.
Block Amount
Specify the amount to be earmarked. This amount is deducted from the existing utilization of an exposure before additional utilization requests are processed.
Note
It is also updated as the ‘Block Amount’ in the ‘Track Exposure Maintenance’ screen.
Effective Date
Specify the date from which the amount block should be applied for the exposure.
Expiry Date
This is the date till which the amount block for the exposure is enforced.
Auto Block
The system automatically checks this option on the date the block on the exposure comes into force that is, the ‘Effective Date’.
2.15.1 Additional Information
As part of additional information for the exposure, you can capture the following details:
Customer Number
Specify the customer number for the global exposure block maintenance.
Liability Number
Specify the liability number for the global exposure block maintenance.
Remarks
Add remarks about the global block exposure maintenance, if any.
Line Code
Specify the line code for the global exposure block maintenance.
Line Serial
System displays the serial number for the line chosen in the field 'Line Code'.
2.16 Limit Block Maintenance
You can block the funds for facility liability, collateral, and collateral pool using 'Limits Block' screen.You can invoke the ‘Limits Block’ screen by typing ‘GEDBLCKS’ in the field at the top right corner of the Application tool bar and clicking the adjoining arrow button.
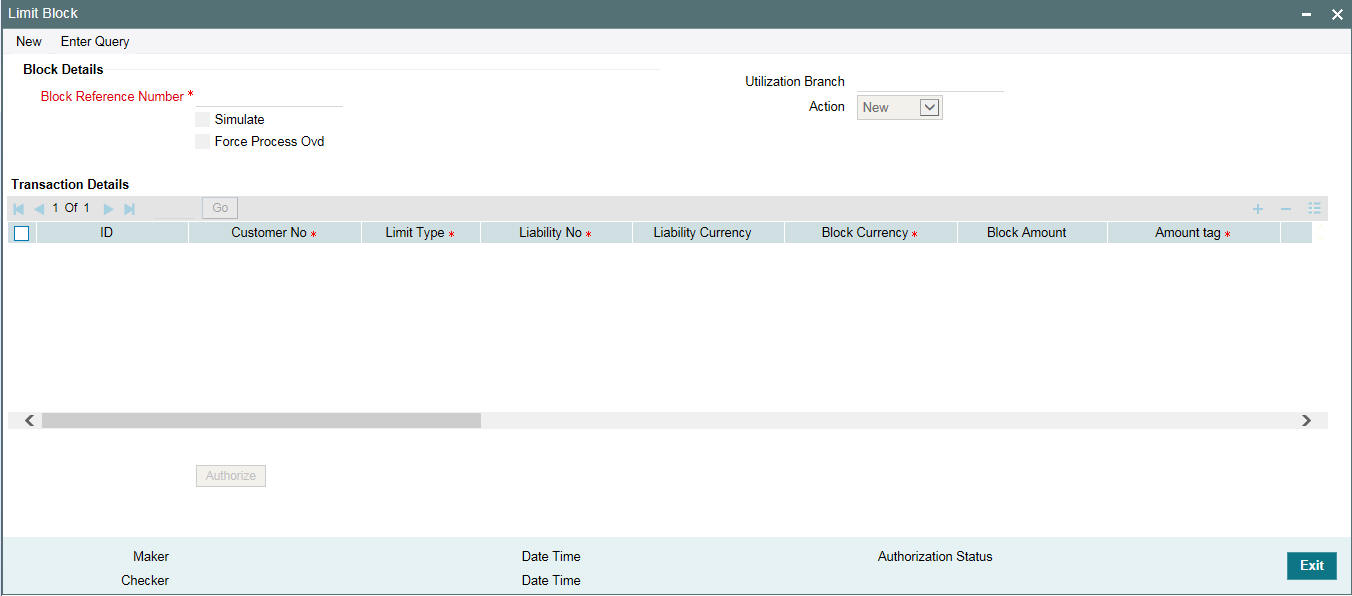
Block Details
Block Reference Number
Specify the unique number which is to be assigned for every block that has been created.
Simulate
Select this check box to indicate that the details for the transaction being entered should be used only for simulation and not stored permanently within the system. After a successful simulation of a transaction, the system displays the utilized amount for the facility and the for the liability.
Force Process Ovd
Indicates whether transaction should ignore the overrides occurred in the process or not.
Utilization Branch
Branch code is displayed here. It indicates the transaction branch code.
Action
During new block, you can perform below mentioned operations for all entities.
- New Block
- Increase Block
- Decrease Block
- Alter Block
- Reverse Block
- Re-open Block
- Mature
- Query Block
The following examples depict block applied on a facility for different block operations.
New Block
Before Block
Facility Available Amount |
Block Amount |
Block Status |
10000 |
0 |
A |
After Block of 1000
Facility Available Amount |
Block Amount |
Block Status |
9000 |
1000 |
A |
Alter Block
After New Block of 1000
Facility Available Amount |
Block Amount |
Block Status |
9000 |
1000 |
A |
After Alter Block of 3000
Facility Available Amount |
Block Amount |
Block Status |
7000 |
3000 |
A |
After Alter Block of 2000
Facility Available Amount |
Block Amount |
Block Status |
8000 |
2000 |
A |
Increase Block
After New Block of 1000
Facility Available Amount |
Block Amount |
Block Status |
9000 |
1000 |
A |
After Increase of 1000
Facility Available Amount |
Block Amount |
Block Status |
8000 |
2000 |
A |
Decrease Block
After New Block of 1000
Facility Available Amount |
Block Amount |
Block Status |
9000 |
1000 |
A |
After Decrease of 1000
Facility Available Amount |
Block Amount |
Block Status |
9500 |
500 |
A |
Reverse Block
After Block
Facility Available Amount |
Block Amount |
Block Status |
8000 |
2000 |
A |
After Reverse of Block
Facility Available Amount |
Block Amount |
Block Status |
10000 |
0 |
A |
Reopen Block
After Block
Facility Available Amount |
Block Amount |
Block Status |
10000 |
0 |
A |
After Reopen of Block
Facility Available Amount |
Block Amount |
Block Status |
10000 |
0 |
A |
Liquidate Block
After Block
Facility Available Amount |
Block Amount |
Block Status |
8000 |
2000 |
A |
After Liquidate of Block
Facility Available Amount |
Block Amount |
Block Status |
10000 |
0 |
A |
Transaction Details
ID
Indicates the transaction ID
Customer No
The system displays the customer number to which the Facility, Liability, Collateral, Collateral Pool are linked. The option list displays all valid customer numbers linked to the facility and liability number selected on this screen. You can select the customer number from the option list.
Limit Type
The system displays the limit type to which the limit is associated.
Liability No
Liability which is linked to customer in ‘Customer to Liability Link Maintenance’ screen (GEDCULIK).
Liability Currency
The currency with which the liability is associated.
Block Currency
Specify the currency based on which the Block amount for the limit has to be considered.
Block Amount
Specify the amount to be blocked
Amount Tag
The 'Amount Tag' entered in 'Amount Tag Maintenance' screen is displayed here.
Amount tag would be required when there are multiple utilization for the same reference number. This tag would indicate which component needs to be authorized.
Block Product
Specify the product for the transaction.
Liability Block Amount
Displays the liability blocked amount.
Line Code
Specify the facility here.
Serial No
Indicates the ELCM generated unique identifier for the facility. The ‘Serial No’ field is disabled and it gets defaulted from the ‘Facilities Maintenance’ screen.
Collateral Code
Specify the Collateral Code here. Each Collateral code should be unique.
Pool Code
Specify the Pool Code here. The pool code assigned to each collateral pool can be linked to a liability while creating credit limits.
Limit Currency
The limit currency of the facility.
Limit Block Amount
Block amount of entity
Utilization Status
Indicates the utilization status, possible values are A-Active, R-Reverse, L- Liquidated.
Tenor Basis
Select this check box to indicate that the utilization should be tracked tenor wise for the facility.
Tenor
Enter the basis on which tenor tracking should be done for the utilization. You must have selected the ‘Tenor Basis’ option before you can specify the basis here.
Maturity Date
Specify the date on which the transaction matures.
Value Date
Specify the value date for the transaction.
Module
The module from which the transactions are triggered is displayed.
Source Code
Indicates the product processor name from where the transaction has been originated. This field will be as part of Header section (Source Code).
Exposure Block Number
Specify a unique number for the block you are creating. The system does not allow you to modify it after authorization.
2.17 Global Exposure Parameter Details
You can specify certain parameters relating to the End Of Day operations in the ‘Limits & Collaterals Parameter Details’ screen.
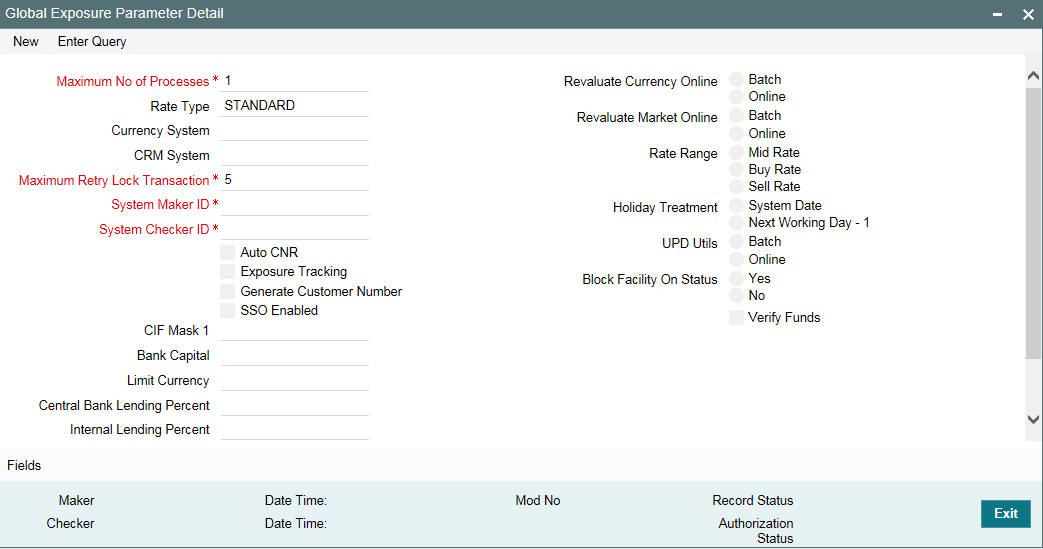
You can invoke the ‘Global Exposure Parameter Detail’ screen by typing ‘GEDPARAM’ in the field at the top right corner of the Application tool bar and clicking the adjoining arrow button.
The following details are maintained here.
System Maker ID and System Checker ID
During the processing of user entries, if the maker ID and checker ID is not mentioned, then IDs specified here are recorded.
Maximum Retry Lock Transaction
Specify the number of times authorization can be tried before the transaction is locked.
Maximum Number of Processes
Multi threading feature in Oracle Banking ELCM can be controlled by specifying the max number of processes here. In case of load balancer during End Of Day batch operations the maximum process for load sharing can be specified using this field.
Rate Type
Specify the rate type that has to be considered for all amount conversions in Oracle Banking ELCM.
Currency System
Specify the external currency system if the Bank is using a external currency system other than the one provided in Oracle Banking ELCM.
CRM System
Specify the external CRM system if the Bank is using an external CRM system other than the one provided in Oracle Banking ELCM.
Generate Customer Number
Check this box to generate the customer number automatically at the time of customer creation and customer replication from the Oracle FLEXCUBE as per the specified customer mask.
Auto CNR (Auto Closure of Non Revolving Line)
Select this box to close the non-revolving line automatically on expiry date.
Exposure Tracking
Select this check box if exposure tracking is to be enabled in the system.
Customer Mask
If you have selected ‘Generate Customer Number’ option, you need to specify the customer mask.
The customer mask is maximum nine characters length, out of which it is mandatory to use three characters from the branch code of the customer number and the rest six can be numbers. E.g. bbbnnnnnn. If branch code is not part of customer mask, then maximum characters of number digit will be nine else it would be six characters and minimum characters of number digit would be four. E.g. nnnnnnnnn.
If the customer number is less than nine digits, then the system left pad it with ‘0’ that is, zero.
Note
Character ‘b’ indicates the branch code and character ‘n’ indicates number digits.
Bank Capital
Specify the amount to calculate internal lending equivalent amount.
Limit Currency
The System defaults the local currency of the bank.
Central Bank Lending Limit%
Specify the percentage of central bank lending limit. Central Bank Lending Limit percentage of the bank capital is considered as limit amount allowed by the central bank. The central bank lending limit percentage should be between 0 and 100.
Internal lending Limit%
Specify the percentage of internal lending limit. The internal lending limit percentage should be between 0 and 100.
Note
If Bank Capital is specified then Central Bank Lending Limit% and Internal Lending Limit% fields are mandatory.
Revaluate Currency Online
Indicate whether the currency revaluation should be an online or a Batch (EOD) process. Revaluation of the line amount takes place online if the parameter is set to online.
Revaluate Market Online
Indicate whether Market price revaluation should be Online or Batch. Market price based security Revaluation takes place online if the parameter is set to online.
UPD Utils
Specify whether Value date utilization updating can be Online or Batch. Value date updating takes place online if the parameter is set to online.
Block Facility on Status
Indicate whether, depending on the worst status of a liability, the EOD process should block the facility or not.
Rate Range
Specify the rate - Mid Rate, Buy rate, Sell rate - which has to be considered during all Conversion Amount calculations in Oracle Banking ELCM.
Batch Process
Indicate whether the EOD Batch Process should be set up as part of the Database Server or the Application Server. Application server is the recommended choice.
Holiday Treatment
The revaluation process for the securities, collaterals and covenants may fall on a bank holiday. You can specify which of the following actions must be taken in such cases:
- System Date – Choose this to indicate that only collaterals with a Reval Date prior to or same as the system date is considered for revaluation.
- Next Working Date -1 – Choose this to indicate that all the collaterals with the Reval
Date prior to or same as the day before the next working date is considered.
The EOD process closes all the active non-revolving lines automatically when the check box ‘Auto CNR’ is checked. Example
Limits:
Facility |
Expiry Date |
Revolving |
FACILITY1 |
15-Jul-2009 |
N |
FACILITY2 |
16-Jul-2009 |
Y |
FACILITY3 |
16-Jul-2009 |
N |
FACILITY4 |
15-Jul-2009 |
N |
System Date - 15-Jul-2009
Next Working Day - 17-Jul-2009
On 15-Jul-2009 EOD, the system closes FACILITY1 and FACILITY3.
Note
This process does not close the following lines:
- If there are any underlying active transactions on that line
- If there are any active sub lines reporting to this main line
If line is not closed due to the above exceptions then the system logs the same into an exception table ‘GETB_EXCEPTION_LOG’. If particular line is not closed on expiry date due to the above exception then same line is taken up for auto closure process on next EOD.
Verify Funds
Select this check box if ECA check is required bank wide.
If ECA parameters are not maintained in any of the screens, then the system does a force debit of fees.
2.18 Maintaining Rule Criteria Code
Review rules are configured in the ‘Rule Criteria Code Maintenance’ screen which will allow for automatic review of the sanctioned facilities that are offered to the customer. The review rules and pre-defined configurable parameters are maintained in this screen. You can invoke this screen by typing ‘GEDLMPRS’ in the field at the top right corner of the application tool bar and clicking the adjoining arrow button.
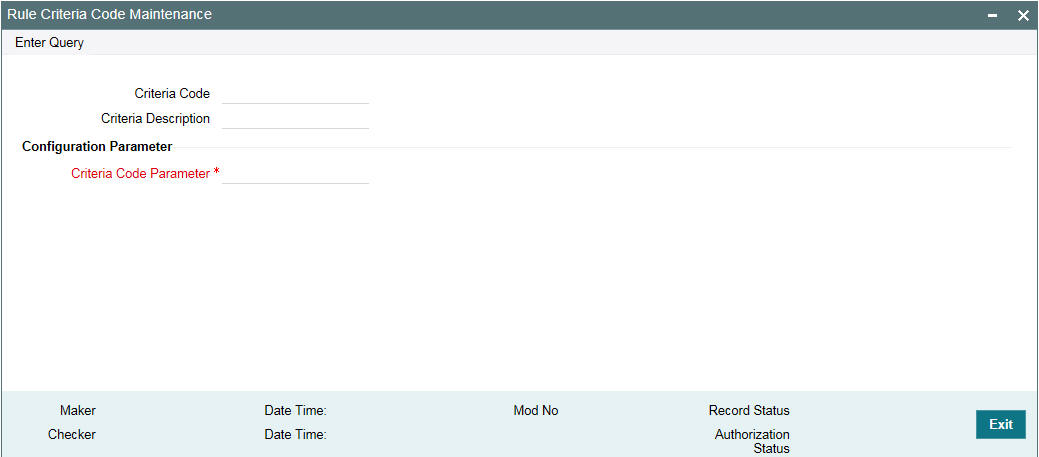
Specify the following details in this screen:
Criteria Code
Specify anyone of the following pre-defined criteria codes and press the F8 function key. The criteria codes available for selection are as follows:
Criteria Code |
Rule Name |
Rule Description |
Rule1 |
Limits Due for Expiry |
Limits which are due for expiry in next N days. Alerts are generated for limits which are expiring in next N days. |
Rule 2 |
Limits where Collateral is due for expiry |
Collaterals which are due for expiry in next N days. Alerts are generated for collaterals which are expiring in next N days. |
Rule 3 |
Limits where the Utilization Threshold% is breached with respect to Sanctioned Limit |
Alerts are generated for limits which have been utilized equal or more than the limit |
Rule 4 |
Limits where the Utilization Threshold% is breached with respect to Collateral Value |
Alerts are generated for collaterals which has been utilized equal or more than the limit. |
Rule 5 |
Frequency Based Limit Review |
Alerts are generated N days before the limit review date in GEDFACLT. |
Rule 8 |
Documents due for Expiry |
Alerts are generated for collaterals whose covenants are due for expiry in next N days. |
* where X is the Notice Days defined in the ‘Notice Days or Threshold Value%’ field.
Threshold% is defined in the ‘Notice Days or Threshold Value%’ field.
Criteria Description
The system displays the description based on the criteria code selected.
Configurable Parameters Details
Criteria Code Parameter
Enter the parameter value in this field.
Note
Note
- For notice days the calendar days are considered to generate alerts.
- The notice days for Rule 1, Rule 2, and Rule 5 should be 0 or more than 0.
For Rules 3 and 4, the threshold % is applicable. The value should be greater than or equal to 1%. An override message is displayed if the value is less than 1%.
Based on the review rules maintained in this screen, alerts can be defined in the CODADMNT screen. These alerts are generated for a bank user and are generated on a daily basis as per the frequency set in the Alert Definition Screen (CODADMNT). Based on the parameters defined in the CODADMNT screen, when a review rule is satisfied, then an alert is triggered in the ELCM dashboard or Credit Desktop (GEDSKTOP). In the ELCM Dashboard, when an alert is generated, the ‘Review’ or ‘Dismiss’ buttons are displayed against the alert. You can either Review or Dismiss these alerts by clicking the relevant buttons as shown in the following screen shot.
The Review button is displayed for only Rule 1, Rule 3, and Rule 5. On clicking the ‘Review’ button the limit review process flow is initiated. For the remaining rules, besides the limit review rules, the ‘Dismiss’ button is displayed. If you click the ‘Review’ or ‘Dismiss’ buttons against any alert, then the system removes the alert from the Dashboard. If the target user at alert definition is ‘ALLROLES’, then the alert generated is available for all the users accessing the dashboard. If any user clicks the ‘Review’ or ‘Dismiss’ button, then the system removesthe alert from the dashboard and the remaining users are unable to view the same alert in the dashboard.
If a user dismisses an alert and no corrective action is taken within a day, then the alert is regenerated the next day with a new effective date that is considered to be the current date. The alerts are generated based on the ITALRM and ITPURGE batch jobs. The frequency for these alert batch jobs should be set as daily in the Alert Definition Screen. All the alerts that are reviewed, dismissed, or have expired are archived in the ITPURGE batch. This archival is an automated process which happens based on the system date (physical date) and time.
Note
The dashboard and relevant alerts are displayed for only those users for whom the ‘Show Dashboard and Alerts’ flag is set as Yes in the Home Page.
In the Credit Desktop screen, the ‘Review’ button is enabled for all facilities mapped to a liability and is not only applicable for those facilities where alerts are generated. If a facility has a CIF ID mapped to it, then the CIF ID will be listed. The ‘Dismiss’ button option is not available in the Credit Desktop. Also, all alerts are available in a report format with ‘Exception’ or ‘Warning’ stated against each alert.
For more information about Credit Desktop, refer to the section “Credit Desktop” in this User Manual.
For more information about defining Alerts refer to the section “Defining Alerts” in this User Manual.
2.18.1 Viewing Rule Code Criteria
You can view the criteria codes maintained for a branch using the ‘Rule Code Criteria Summary’ screen. You can invoke this screen by typing ‘GESLMPRS’ in the field at the top right corner of the Application tool bar and clicking the adjoining arrow button.
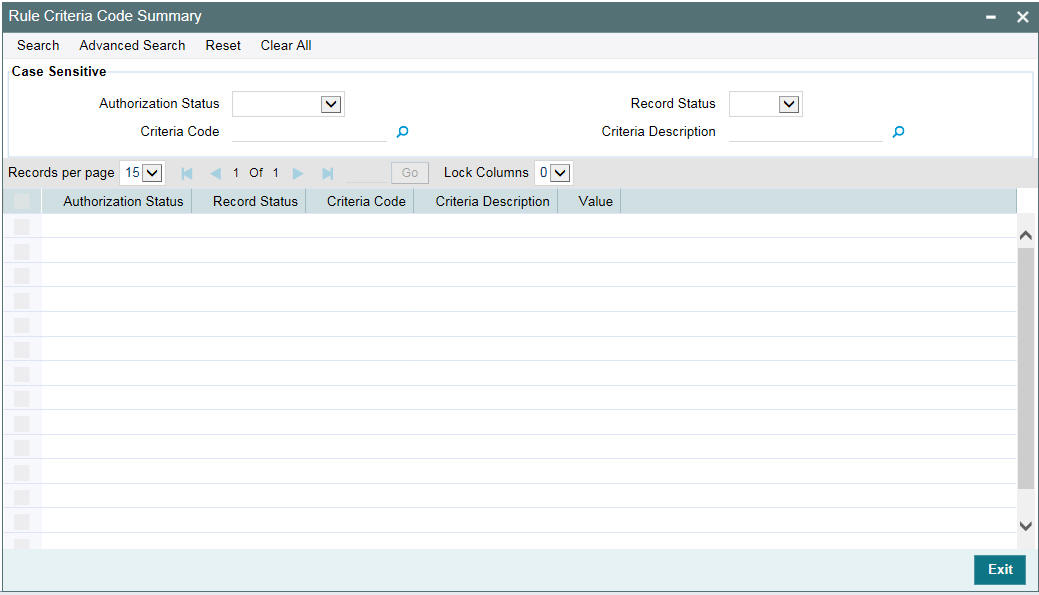
You can query the records based on all or any of the following criteria:
- Authorization Status
- Record Status
- Criteria Code
- Criteria Description
You can alternatively perform a wildcard search by entering the ‘%’ sign in the any of the above mentioned fields.
Click ‘Search’ button. The system identifies all records satisfying the specified criteria and displays the following details for each one of them:
- Authorization Status
- Record Status
- Criteria Code
- Criteria Description
- Value
2.19 Defining Alerts
You can define specific alerts to be sent to the bank users. You need to define the alert codes and map the alert code to the bank user using ‘Alert Definition Maintenance’ screen. To invoke this screen, type ‘CODADMNT’ in the field at the top right corner of the Application toolbar and click the adjoining arrow button.
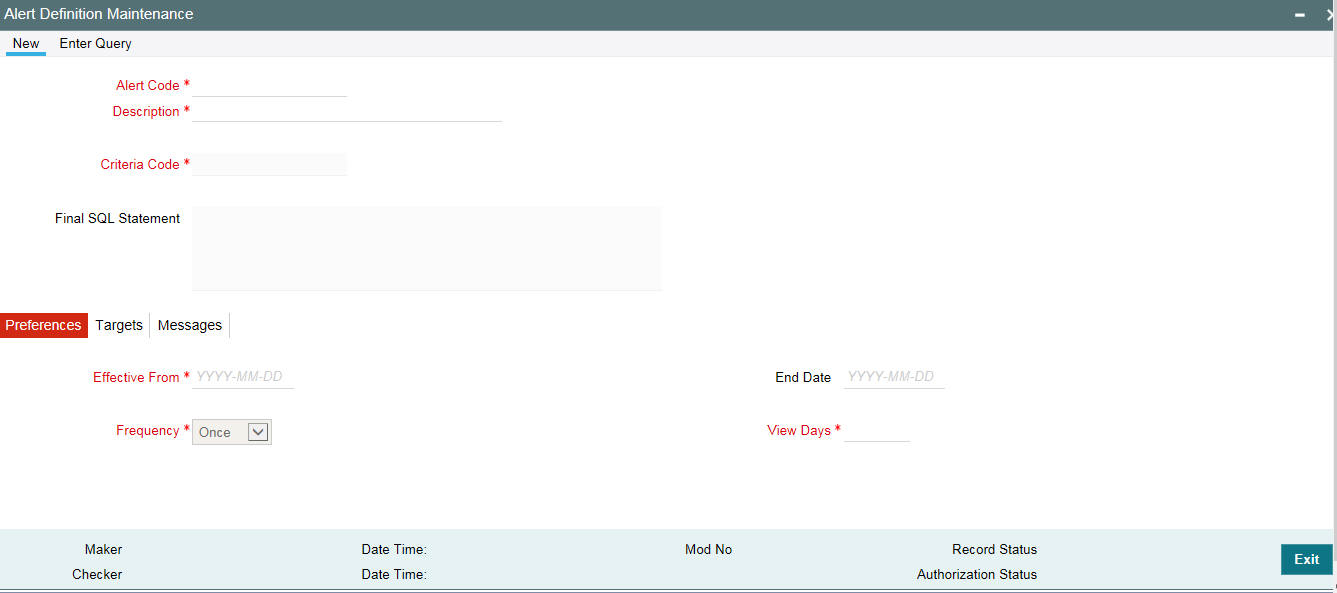
Specify the following details:
Alert Code
Specify the alert code to be mapped to the customer or bank.
Description
System displays the description of the alert based on the alert code specified.
Criteria Code
Specify the selection criteria code to be used for the alert. The option list displays valid criteria codes (Rules 1 to 9 which are factory shipped) that are maintained in the system. Choose the appropriate one. The description of each criteria code is explained in the following table:
Rule Code |
Rule Name |
Rule Description |
Parameter Configured |
Trigger for Alert |
Alert Message Description |
RULE1 |
Limits Due For Expiry |
Review required X days before Limit Expiry Date, where X is configurable parameter |
Notice Days (GEDLMPRS) Screen |
Limit Expiry Date |
<FACILITY_ ID> - Limit <LIAB_ ID> - <LINE_CO DE> due for expiry |
RULE2 |
Limits where Collateral due for Expiry |
Review required X days before Collateral Expiry Date, where X is a configurable parameter |
Notice Days (GEDLMPRS Screen) |
Collateral Expiry Date |
<COLLATERAL_ID> - Collaterals <COLLATERAL CODE> for Limit <LIABILITY ID> due for expiry |
RULE3 |
Limits where the Utilization Threshold % is breached with respect to Sanctioned Limit
|
Review required for Limit Utilization % breached with respect to Sanctioned Limit, where Threshold % is a configurable parameter |
Threshold % (GEDLMPRS Screen)
|
Sanctioned Limit Amount |
<FACILITY_ ID> - Sanctioned Limit for Limit <LIABILITY ID> - <LINE CODE> has breached the predefined threshold percentage |
RULE4 |
Limits where the Utilization Threshold % is breached with respect to Collateral Value
|
Review required for Limit Utilization % breached with respect to Collateral Value, where Threshold % is a configurable parameter |
Threshold % (GEDLMPRS Screen)
|
Collateral Value |
<COLLATERAL_ID> - Collaterals Value for Limit <LIABILITY ID> has breached the predefined threshold percentage |
RULE5 |
Frequency Based Limit Review |
Frequency based Limit Review. |
Frequency maintained in the Facilities Maintenance (GEDFACLT) screen.
|
Frequency and Next Review Date on the Facilities Maintenance Screen (GEDFACLT) |
<FACILITY_ ID> - Limit Review for Limit <LIABILITY ID> - <LINE CODE> is due |
RULE6 |
Counter Party Grade Lowered |
Review required when the Counter Party’s Credit Grade is lowered |
From Customer Account Creation (STDCIFCR) level |
Credit Rating Grade |
<CUSTOMER ID> - Customer - <CUSTOMER NAME> Credit Rating Grade lowered |
RULE7 |
Counter Party Blacklisted
|
Review required when the Counter Party is blacklisted |
From Customer Account Creation (STDCIFCR) level |
Blacklisting flag
|
<CUSTOMER ID> - Customer + <CUSTOMER NAME> is blacklisted |
RULE8 |
Documents due for Expiry |
Review required when the documents are expired |
Frequency, Start Month, Due date on field on the Covenant Maintenance Screen (GEDCOVNT) and Notice Days on the Rule Criteria Code Screen. Notice days on the Covenant Maintenance Screen will not be considered for Alert generation |
Revision Date on the Covenants tab on the Collateral Maintenance (GCDCOLLT)
|
<COVENANT_ ID> - Documents/ Covenants <COVENANT NAME> for Limit <LIABILITY ID> due for expiry |
RULE9 |
Marketable/non-marketable securities value decrease |
Review required when the marketable or the nonmarketable securities value is decreased |
From Securities Maintenance Level |
Securities Value |
<SECURITY_ID> - Securities <SECURITY CODE> for Limit <LIABILITY ID> value decreased |
Final SQL Statement
Based on the criteria code selected, the system displays the final SQL statement.
2.19.1 Preferences Tab
You can set the preferences for alert message generation under ‘Preferences’ tab. Click ‘Preferences’ tab on ‘Alert Definition’ screen:
Under this tab, you can set the following preferences for the alert generation.
Effective From
Specify the start date of the alert message generation. Click the date button to choose a date from the calendar.
The system generates the alerts for the users/customers from this date.
End Date
Specify the end date of the alert message generation. Click the date button to choose a date from the calendar.
The system generates the alerts for the users/customers until this date.
Frequency
Specify the frequency of the alert message generation as Daily only from the drop down list.
View Days
Specify the number of days you wish to keep the alert message in the dashboard or the portal. The user or customer can view the alert message in the dashboard or portal for the number view days maintained here. After that, the message disappears from the dashboard or portal.
2.19.2 Target Tab
You can capture the details of the customer and bank users for who will receive the alert message. Click ‘Target’ tab.
Specify the following details:
Target Type
The target type indicates the receiver of the alert message. The system displays the default value as a Bank User.
Customer No Column Position
Specify the position of the customer number column in the SQL statement. If you have selected the target type as ‘Customer’ or ‘Both’, it is mandatory to specify the customer number column position.
Bank User Type
Specify the bank user type to receive the alert message. The drop-down list displays the following user types:
● Role
● User ID
Choose the appropriate one.
This is applicable only if the target type is ‘Bank User’.
Target ID
Specify the target ID. If the Bank User Type is ‘Role’, you need to specify the particular user role. If the Bank User Type is ‘User ID’, you need to specify the respective user ID.
You can choose the appropriate target ID from the option list. The alert message is generated to the target IDs selected here.
Description
The system displays the description of the selected target ID.
You can add more bank user types by clicking the add button. You can also delete a bank user type using delete button.
2.19.3 Message Tab
You can capture the details of the message to be sent to the customers and users under ‘Message’ tab. Click ‘Message’ tab.
You can capture the following details under this tab:
Channel
Select the mode of message delivery. You can select any one of the following options only:
● Dashboard – applicable to bank users only
● Credit Desktop - applicable to bank users only
Choose the appropriate one. The alert message is delivered to the bank user by the mode specified here.
Language
Specify the language of the alert message. The option list displays all valid languages that are applicable. Choose the appropriate one.
Subject
Specify a subject that is significant to the alert message to be generated.
Customer Message
Enter the message to be generated for the customer. The message may contain two types of text, namely, static and dynamic.
The static text is generated as they are defined here. The dynamic text varies based on the intended customer and the nature of the message.
This field is enabled only if the alert message is generated for the customer.
User Message
Enter the message to be generated for the bank user or RM. The message may contain two types of text, namely, static and variables.
The static text is generated as they are defined here. The variable text varies based on the intended user and the nature of the message.
This field is enabled only if the alert message is generated for the bank user.
2.19.3.1 Viewing Alert Definition Summary
You can view a summary of the alerts defined in Oracle FLEXCUBE using ‘Alert Definition Summary’ screen. To invoke this screen, type ‘COSADMNT’ in the field at the top right corner of the Application toolbar and click the adjoining arrow button.
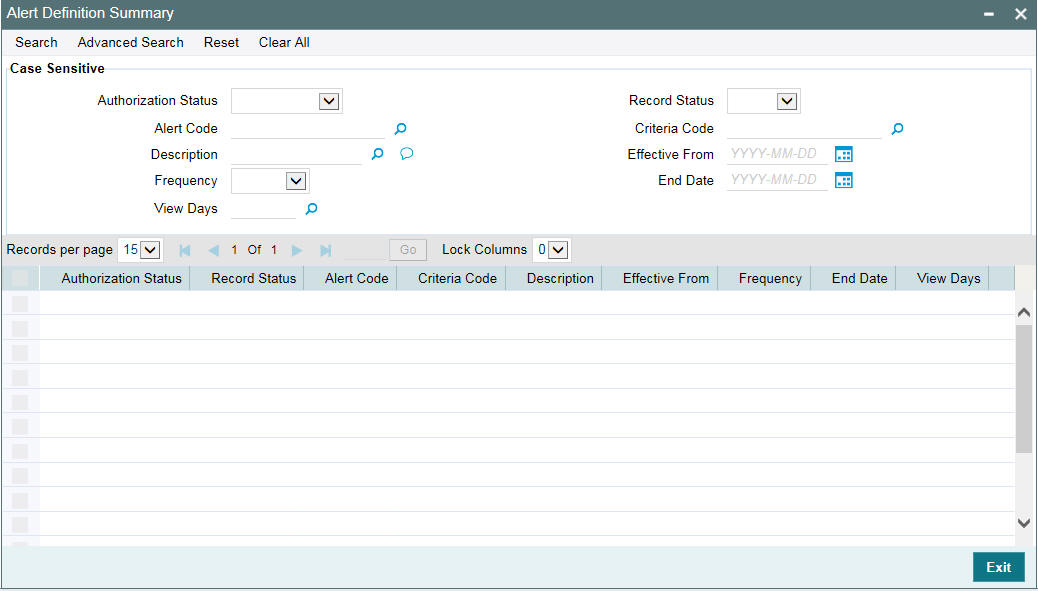
You can search for the records based on one or more of the following parameters:
● Authorization status of the record
● Alert code
● Alert description
● Frequency of the alert
● End date
● Target type
● Record status
● Criteria code
● Effective date
● View days
● Customer number column position
● Customer/both
Once you have set the search parameters, click ‘Search’ button. The system displays the records that match the search criteria. Double-click a record to view the detailed screen of the record.
2.20 Viewing Alerts
You can view alerts which satisfy the rules criteria using this screen. This screen displays alerts generated for all users. You can filter the alerts on the basis of the User ID.
You can view this screen by typing ‘GESLMRVW’ in the field at the top right corner of the Application tool bar and clicking the adjoining arrow button.
You can query the records based on all or any of the following criteria:
● Alert Code
● Frequency
● Alert Description
● Effective Date
● Rule Code
● Expiry Date
● Rule Description
● Process Status
● User
You can alternatively perform a wildcard search by entering the ‘%’ sign in the any of the above mentioned fields.Click ‘Search’ button. The system identifies all records satisfying the specified criteria and displays the following details for each one of them:
● Alert Code
● Frequency
● Alert Description
● Effective Date
● Rule Code
● Expiry Date
● Rule Description
● Process Status
● Message
● User
2.21 Defining Alert Selection Criteria
You can define alert selection criteria in Oracle FLEXCUBE. The system identifies the set of customers who receive the alerts based on the selection criteria.
The system generates the alerts based on the selection criteria defined in ‘ Criteria Code Maintenance’ screen. To invoke this screen, type ‘GEDACMNT’ in the field at the top right corner of the Application toolbar and click the adjoining arrow button.

Specify the following details:
Criteria Code
Select a unique code that identifies the criterion that you are defining. To retrieve the criteria code click the F7 and F8 function keys. This code is the unique identifier of the criterion based on which alert is generated.
The system does not allow you to modify the criteria code after saving it.
Description
Specify a brief description of the selection criterion that you are defining.
Select
Specify the ‘Select’ part of the selection criterion.
The criterion must be defined as an SQL statement with aliases. However, you need not enter the keyword ‘SELECT’.
The alias naming convention is ‘ColX’. Here, ‘X’ refers to the sequential number of the column in the ‘Select’ clause.
Examples are s1.cust_ac_no Col1 ,s1.cust_no Col2 ,s1.ccy Col3 ,s1.account_class Col4
,s1.ACY_OPENING_BAL Col5, s2.customer_name1 Col6, s2.language Col7, s2.default_media Col8
Based on the columns defined under ‘Select’ and ‘From and Where Clause’, the system forms the final SQL statement. You need to ensure that the final SQL statement is a syntactically correct SQL statement.
From and Where Clause
Specify the remaining part of the selection criterion. You need not enter the keyword ‘From’.
Based on the columns defined under ‘Select’ and ‘From and Where Clause’, the system forms the final SQL statement. You need to ensure that the final SQL statement is a syntactically correct SQL statement.
Note
The ‘From and Where Clause’ values and ‘Alert Criteria Code’ values are already pre-de- fined in the system as these are factory shipped values.
Final SQL Statement
The system concatenates the values defined under ‘Select’ and ‘From and Where Clause’ and displays the final SQL statement. This must be a valid SQL statement. The system generates the alert messages based on this final SQL statement. Once you have captured the details, save the record.
To define the criteria as SQL statement, you need to have sufficient understanding about the data model of Oracle FLEXCUBE and SQL programming language.
2.21.1 Viewing Alert Criteria Definition Summary
You can view a summary of the alert criteria maintained in Oracle FLEXCUBE using ‘ Criteria Code Summary’ screen. To invoke this screen, type ‘GESACMNT’ in the field at the top right corner of the Application toolbar and click the adjoining arrow button.
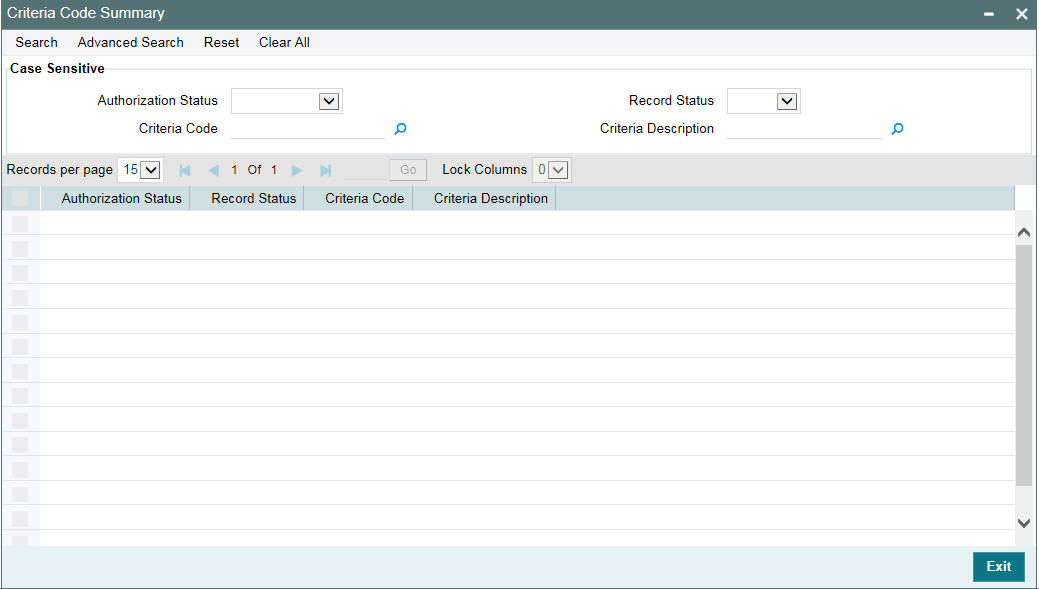
You can search for the records based on one or more of the following parameters:
● Authorization status of the record
● Status of the record
● Selection criteria code
● Selection criteria description
Once you have set the search parameters, click the ‘Search’ button. The system displays the records that match the search criteria. Double-click a record to view the details.
2.22 ELCM - OFSAA Integration
The integration between ELCM and OFSAA enables you transfer data from ELCM module to OFSAA. The transfer of data from ELCM to OFSAA is performed using staging table.
The following data is transferred in ELCM staging table:
- AATB_STG_EL_ACCOUNT_MITIGANT_MAP - Extraction for Mitigant Map
- AATB_STAGE_EL_COLLATERALS - Extraction for Collaterals
- AATB_STG_EL_COLLATERAL_MASTER - Extraction for Collateral Master
- AATB_STG_EL_CREDIT_LINE_DETAILS - Extraction for Line Details
- AATB_STG_EL_CREDIT_LINE_MASTER - Extraction for Credit Line Master
- AATB_STG_EL_CR_LINE_TYPE_MASTER -Extraction for Line Type Master
- AATB_STG_EL_MITIGANT_ISSUER_MST - Extraction for Issuer Master
- AATB_STG_EL_MITIGANT_MASTER - Extraction for Mitigants Masters
- AATB_STG_EL_MITIGANTS - Extraction for Mitigants
- AATB_STG_EL_COLLAT_CONT_CONTRIB - Extraction for Collateral Contribution
- AATB_STG_EL_POOL_LINK - Extraction for Collateral Pool Link
- AATB_STG_EL_SECURITY_MASTER - Extraction for Security Master
- AATB_STG_EL_COLLAT_MSECRITES - Extraction for Collateral Securities
- AATB_STAGE_EL_LIAB_DETAILS - Extraction for Liability Details
- AATB_STAGE_EL_LIAB_CREDIT_RATING - Extraction for Liability Credit Rating
2.22.1 Maintaining Batch Programs
You need to maintain the batch program ‘GEBXTRAC’ using ‘Mandatory Batch Program Maintenance’ (EIDMANPE) screen. This batch extracts the data from Oracle FLEXCUBE during end of financial input (EOFI) stage. You also need to maintain the extraction routine.
For further details on the maintenances in FLEXCUBE Information Server, refer FLEXCUBE Information Server user manual.