Purchase order (PO) is a document or dataset generated by the buyer that authorizes a purchase or procurement transaction. When accepted by the seller, it becomes a contract binding on both the parties.
This screen allows you to create/maintain purchase order details along with associated shipment, commodity, and auto-calculated pricing details.
Below is the list of actions you can take to manage the purchase order:
• Edit and Accept Purchase Order
Create Purchase Order
This screen is used to create a purchase order of a buyer for a supplier with relevant purchase contract related details.
Navigation Path: Receivables > Purchase Order > Create Purchase Order
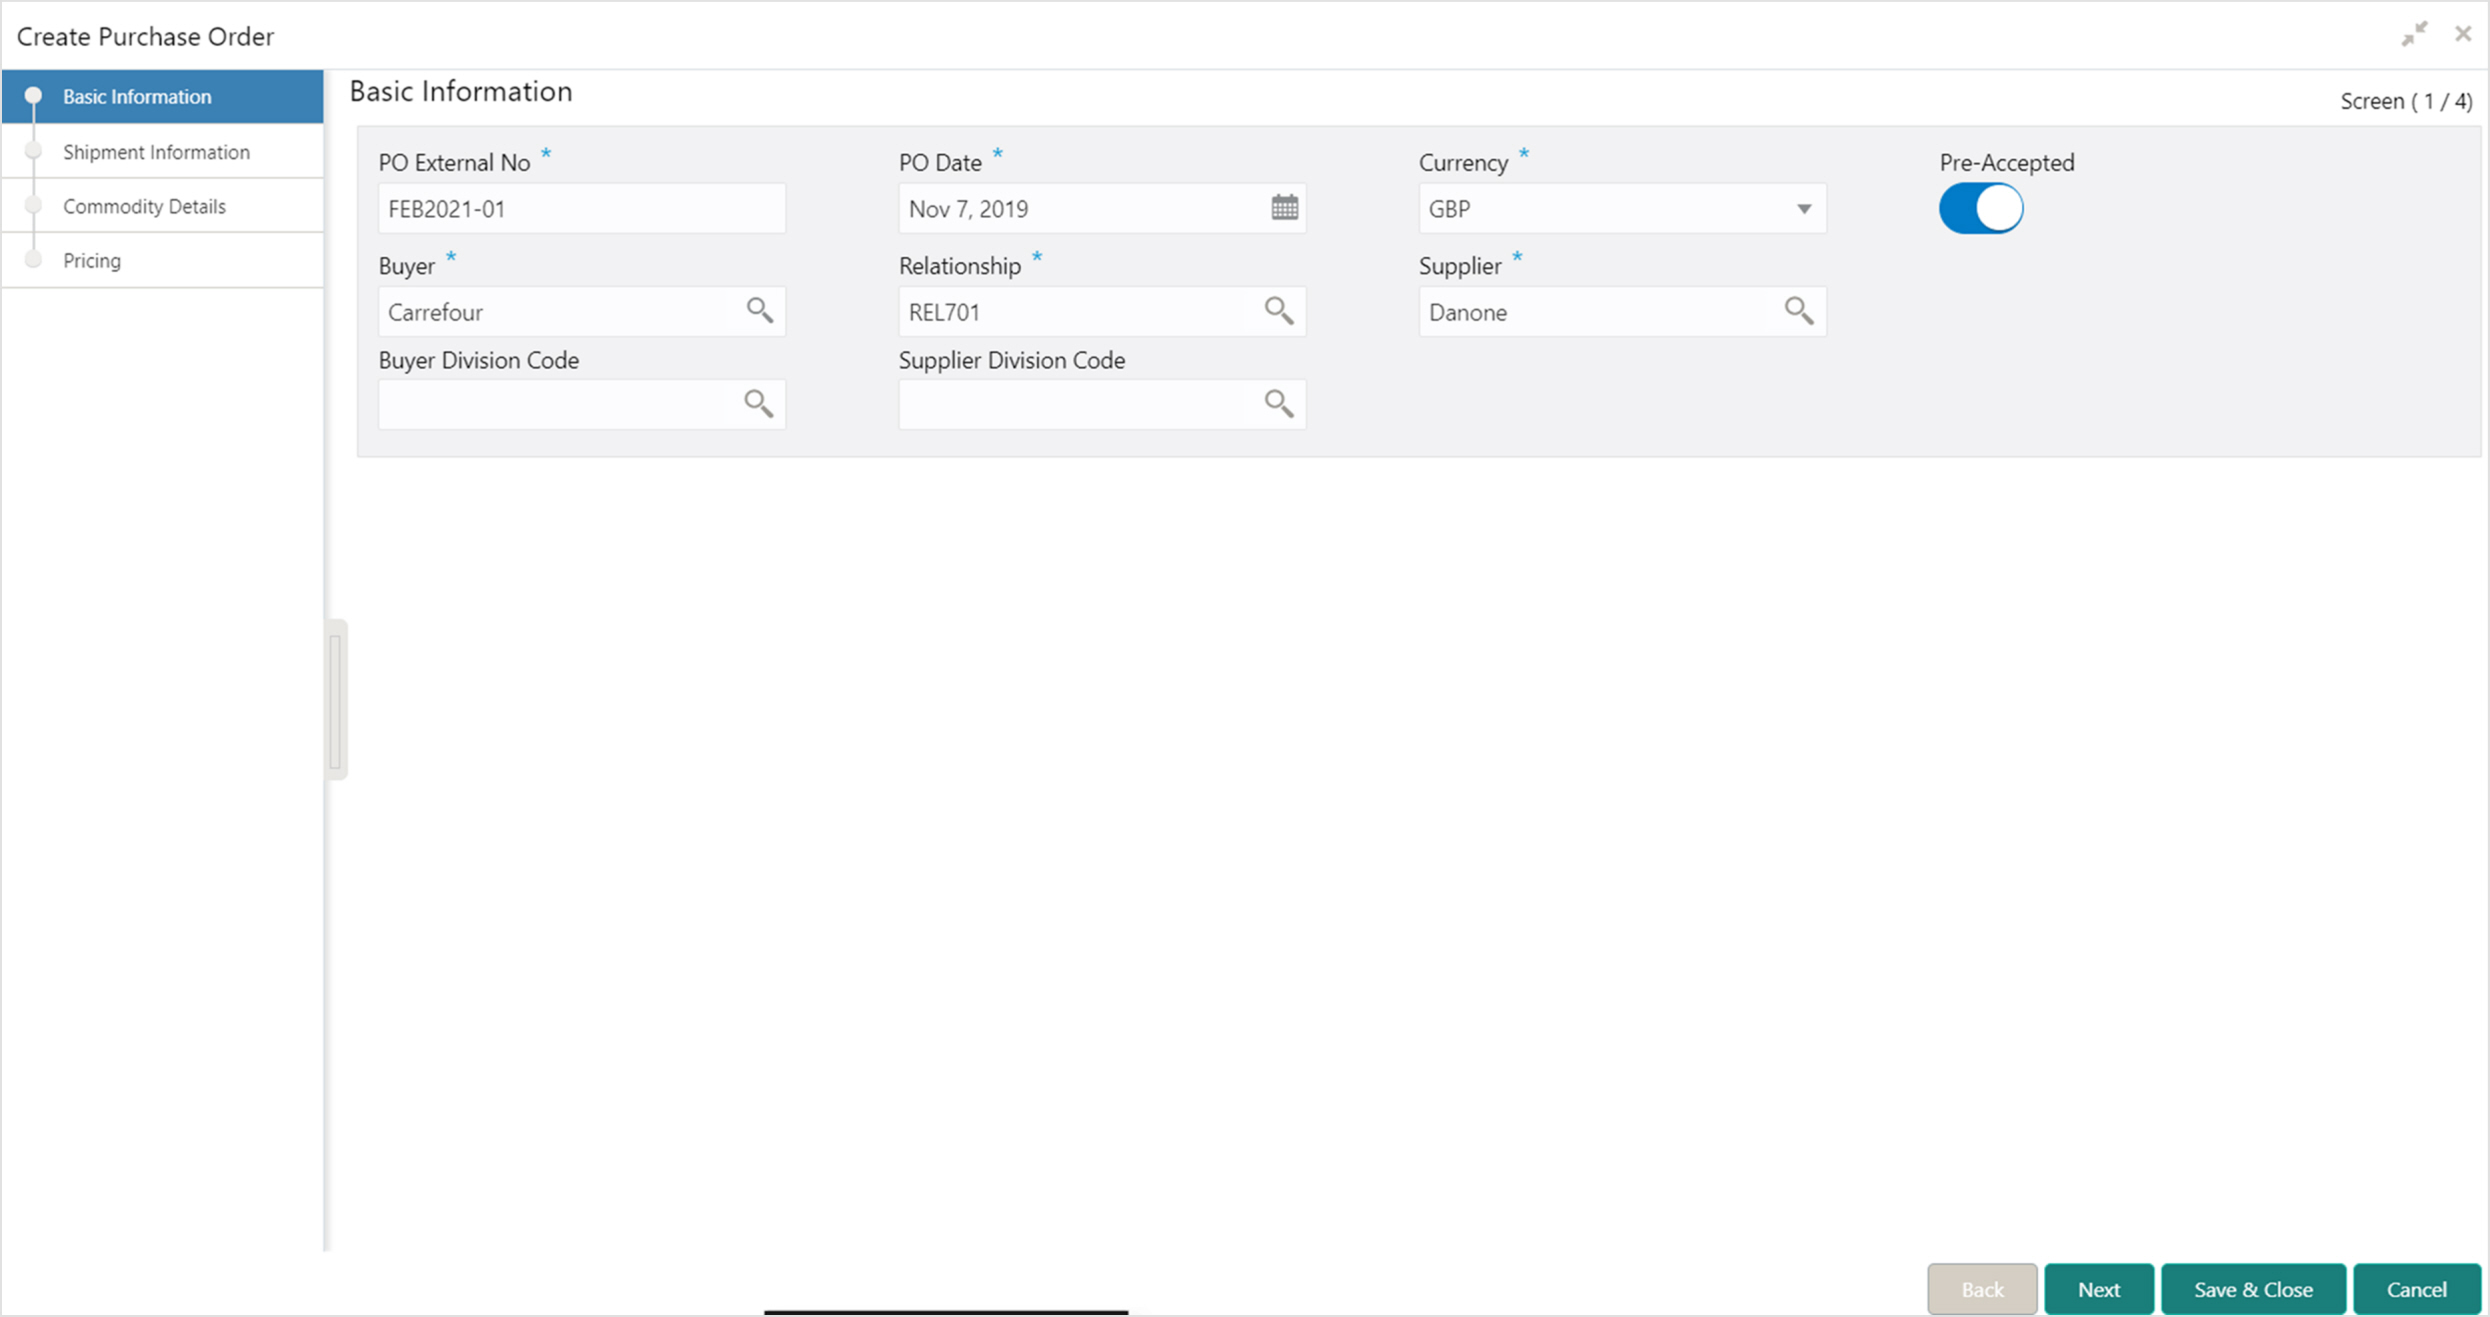
1. Refer the following table for specifying basic details of the PO on the above screen:
Note: Fields marked with ‘*’ are mandatory.
|
Field Name |
Description |
|
PO External No * |
Enter the external reference number for purchase order to be created. Only “-” is allowed as a special character. This field cannot be modified once authorized. |
|
PO Date * |
Click the Calendar icon and select the date of purchase order creation. By default, the system’s current date is set. |
|
Currency * |
Select the currency of the purchase order. |
|
Pre-Accepted |
Switch the toggle ON if the purchase order is pre-accepted by the supplier. |
|
Buyer |
Click the Search icon and select the buyer to create the purchase order for. This field cannot be modified once authorized. |
|
Relationship * |
Click the Search icon and select the relationship of the selected buyer under which this purchase order should be created. This field cannot be modified once authorized. |
|
Program |
Click the Search icon and select the required program under which the purchase order should be created. |
|
Supplier |
Click the Search icon and select the supplier of the goods/commodity. This field cannot be modified once authorized. |
|
Buyer Division Code |
Click the Search icon and select the division code of the buyer. |
|
Supplier Division Code |
Click the Search icon and select the division code of the supplier. |
2. Click Next to enter shipment information of the order.
3. Optional: Click Save & Close to save the basic information and send the PO details for authorization.
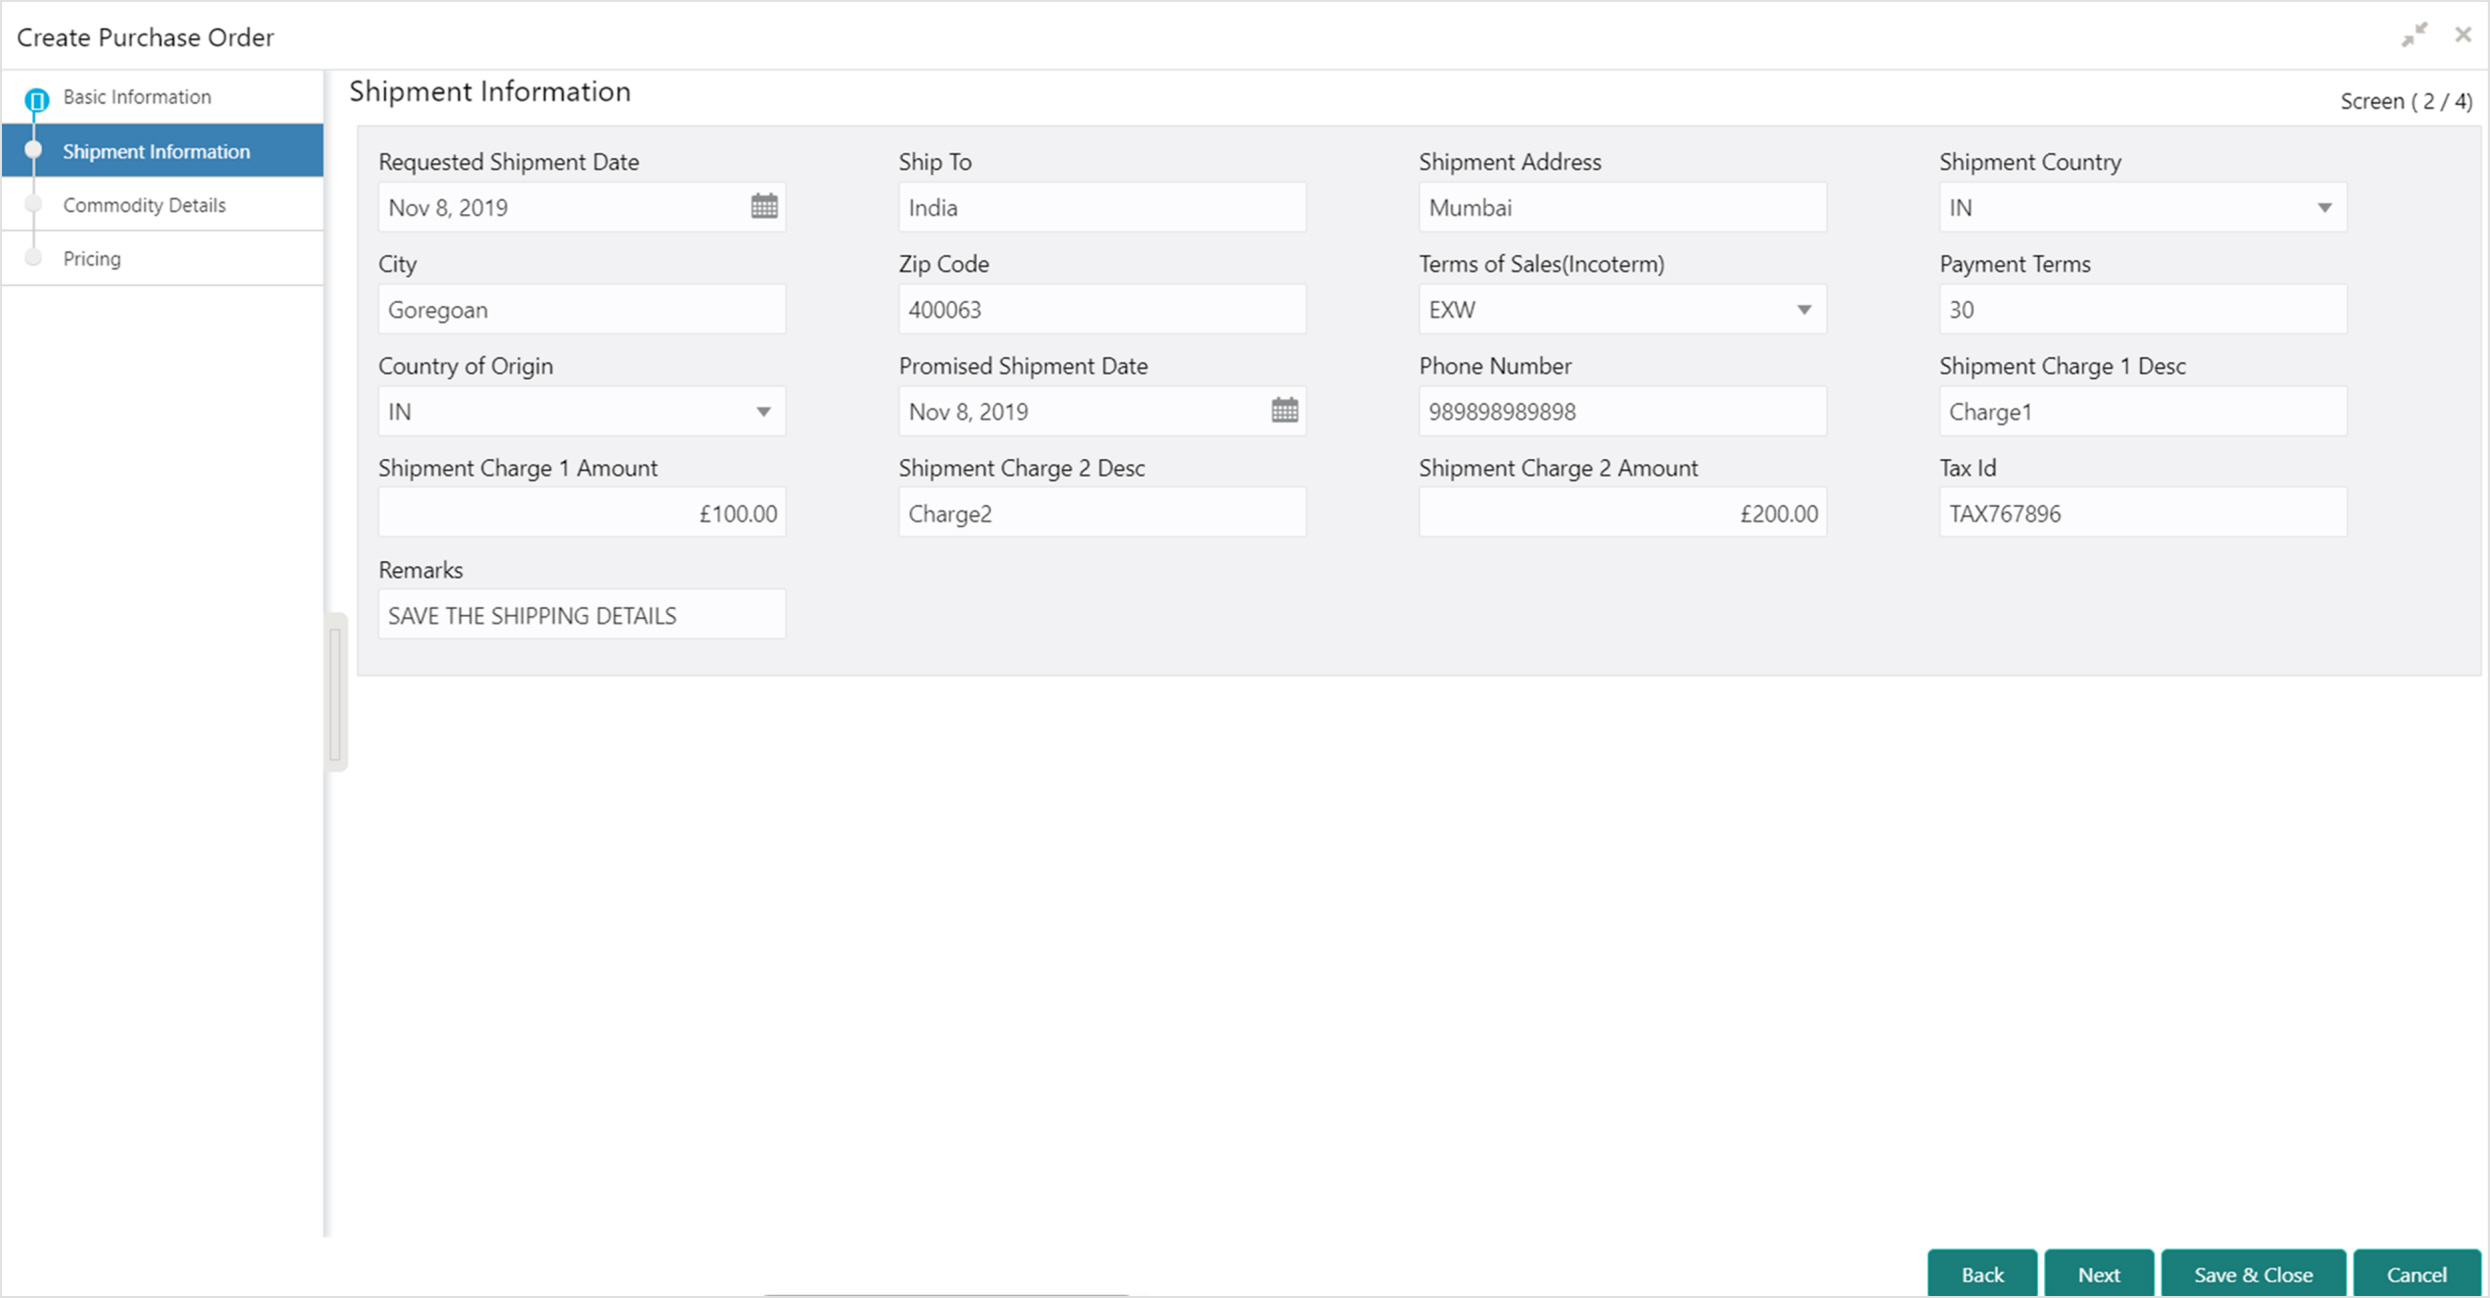
4. Refer the following table for specifying shipment details of the PO on the above screen:
Note: Fields marked with ‘*’ are mandatory.
|
Field Name |
Description |
|
Requested Shipment Date |
Click the Calendar icon and select the date on which the buyer expects commodity to get dispatched. |
|
Ship To |
Enter the name of the location where shipment should be sent. |
|
Shipment Address |
Enter the complete address where shipment should be sent. |
|
Shipment Country |
Select the country to send the shipment to. |
|
City |
Select the city to send the shipment to. |
|
Zip Code |
Enter the postal code to send the shipment to. |
|
Terms of Sale(Incoterms) |
Select any of the below terms of sales: EXW - Ex Works (Insert place of delivery) FCA - Free Carrier (Insert named place of delivery) CPT - Carriage Paid to (Insert place of destination) CIP - Carriage and Insurance Paid To (Insert place of destination) DAP - Delivered at Place (Insert named place of destination) DPU - Delivered at Place Unloaded (Insert of place of destination) DDP - Delivered Duty Paid (Insert place of destination). |
|
Payment Terms |
Enter the terms of payments, if any. |
|
Country of Origin |
Select the country from where the shipment is being sent. |
|
Promised Shipment Date * |
Click the Calendar icon and select the date agreed by the supplier to send the shipment. |
|
Phone Number |
Enter the contact number of the shipment company. |
|
Shipment Charge 1 Desc |
Enter the description of the shipment charge. |
|
Shipment Charge 1 Amount |
Enter the shipment charge amount. |
|
Shipment Charge 2 Desc |
Enter the description of any additional charge to be levied with the shipment. For example: Tax or packaging cost. |
|
Shipment Charge 2 Amount |
Enter the additional charge amount. |
|
Tax Id |
Enter the unique tax id if shipment charge includes tax amount. |
|
Remarks |
Enter the comments relevant to the shipment. |
5. Click Next to enter commodity details of the order.
6. Optional: Click Save & Close to save the shipment details and send the PO details for authorization.

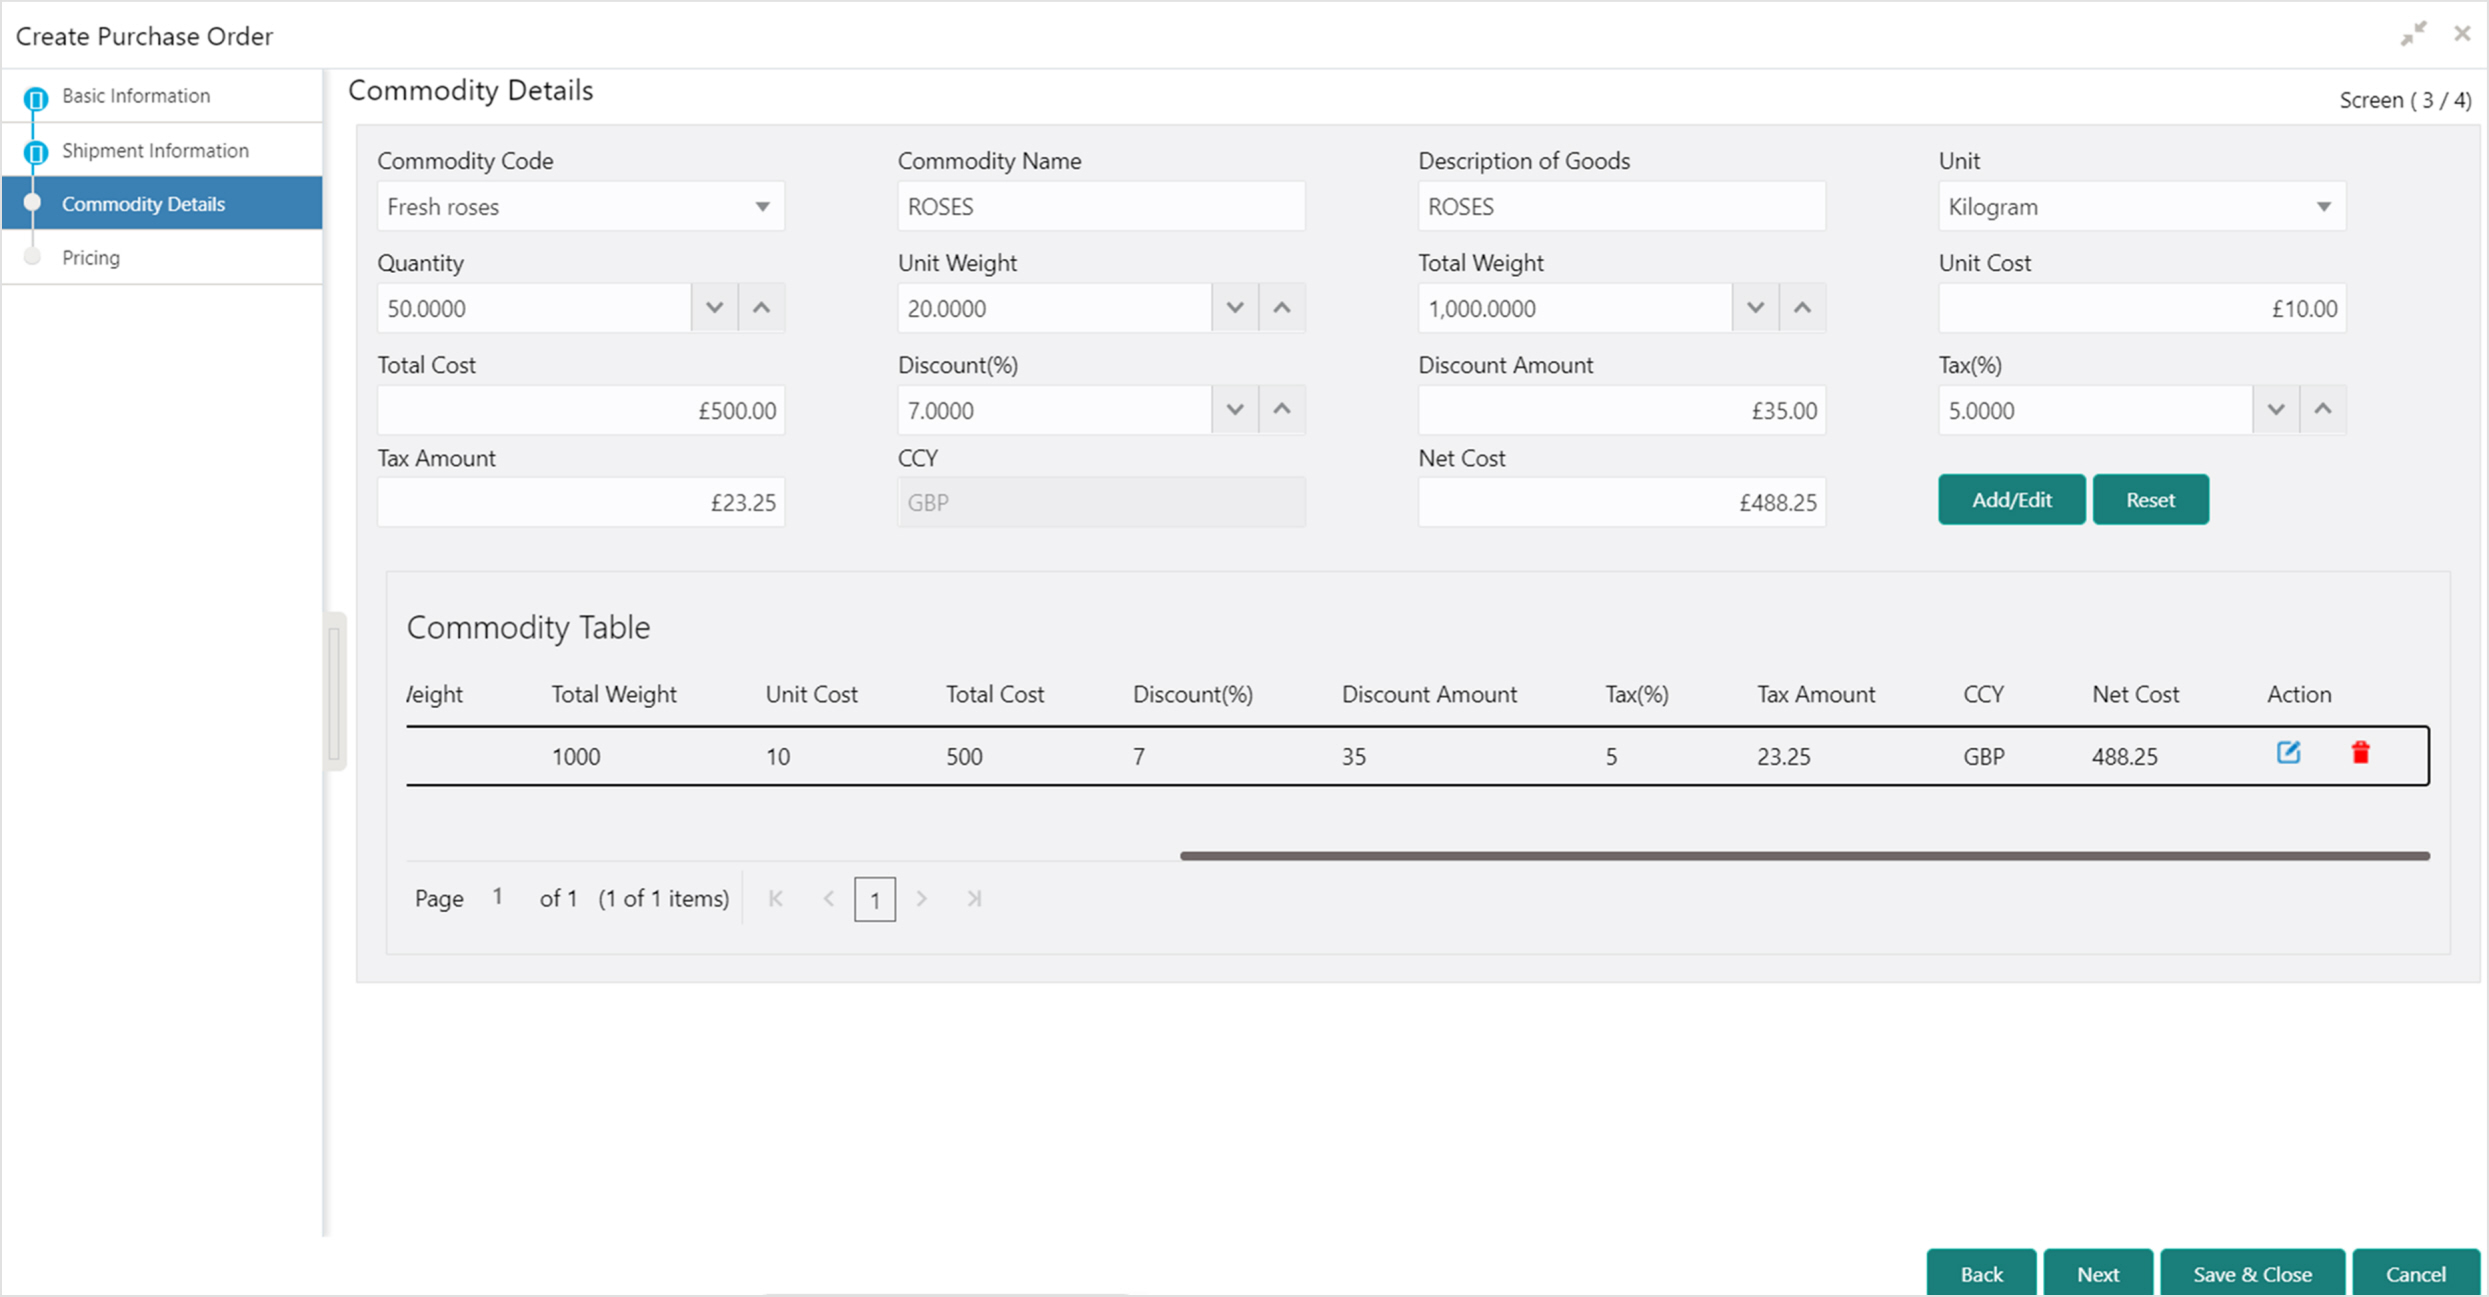
7. Refer the following table for specifying commodity details of the PO on the above screen:
Note: Fields marked with ‘*’ are mandatory.
|
Field Name |
Description |
|
Commodity Code |
Select the commodity code available in the system. |
|
Commodity Name |
Commodity name gets auto-populated based on the selected commodity code. |
|
Description of Goods |
Description of goods gets auto-populated based on the selected commodity code. |
|
Unit |
Select the measuring unit for the goods. |
|
Quantity |
Enter the quantity of the goods as per selected measuring unit. |
|
Unit Weight |
Enter a single unit’s weight. |
|
Total Weight |
This is auto-populated based on entered quantity and unit weight. |
|
Unit Cost |
Enter a single unit’s cost of the goods. |
|
Total Cost |
Total cost is auto-populated based on single unit’s cost. |
|
Discount (%) |
Enter the percentage of discount to be applied on the total cost. |
|
Discount Amount |
This field is auto-populated based on the discount percentage. |
|
Tax (%) |
Enter the percentage of tax to be applied on total amount post discounting. |
|
Tax Amount |
This is auto-populated based on tax percentage. |
|
CCY |
The currency is auto-populated as selected in the basic information screen. |
|
Net Cost |
Net costing is auto-populated based on all the previous fields. |
8. Click Add/Edit to add commodities in the grid or modify the selected records from the grid. If required, click Reset to clear the selected values.
9. Click Next to enter pricing details of the order.
10. Optional: Click Save & Close to save the commodity details and send the PO details for authorization.
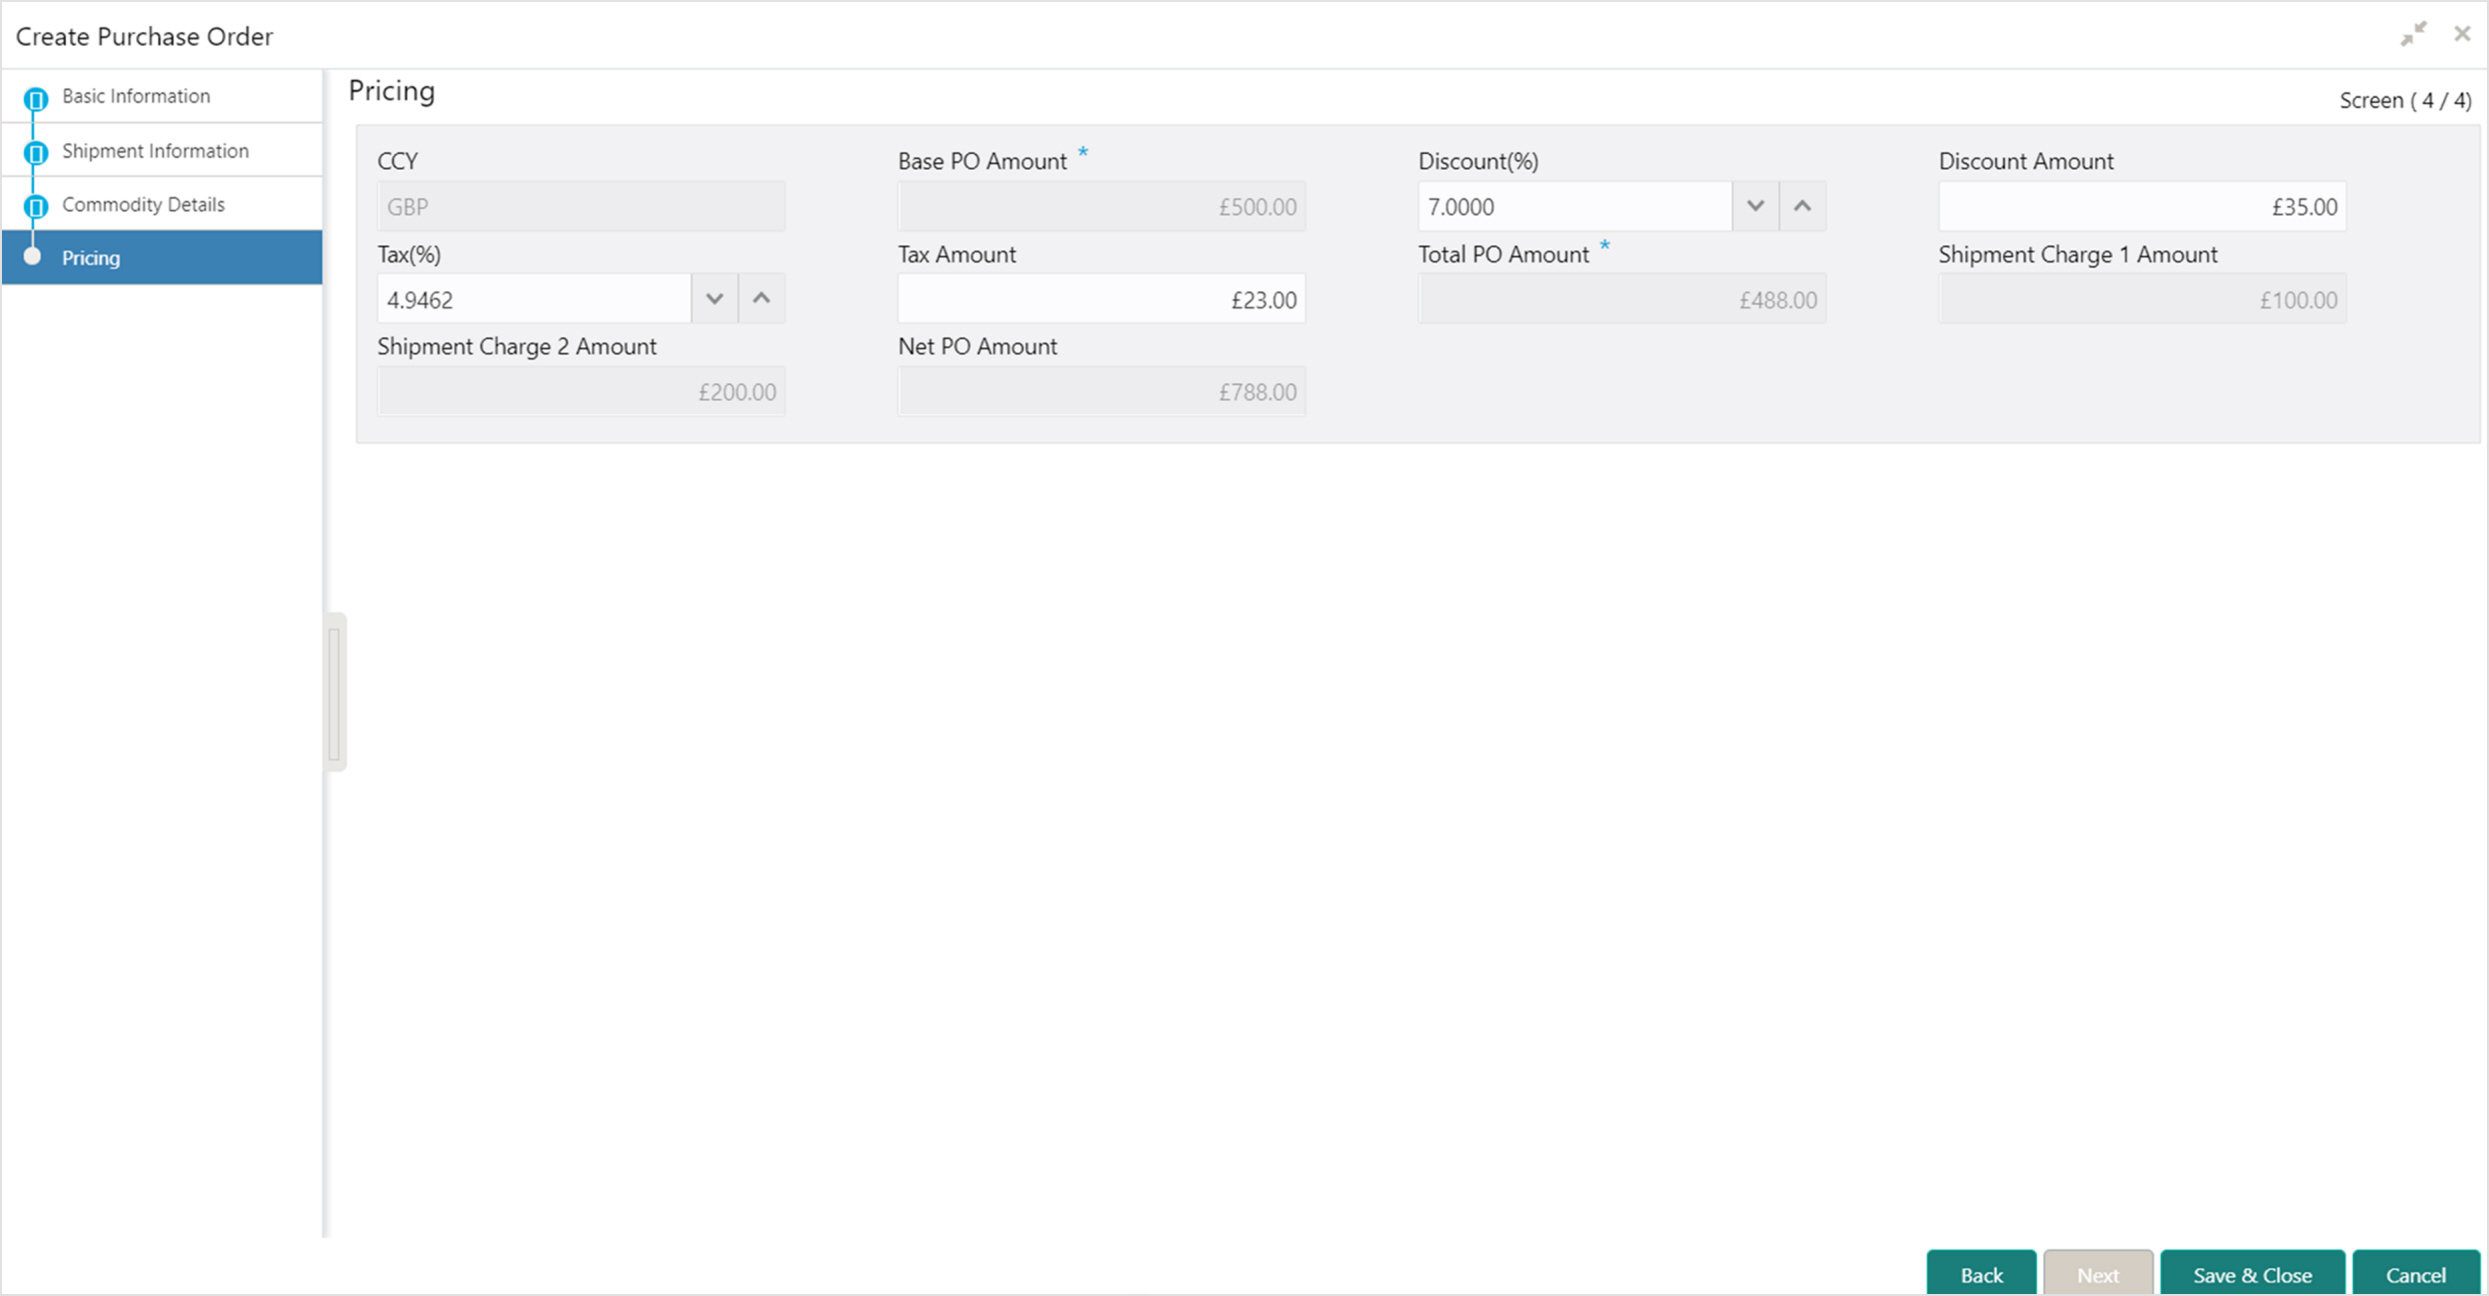
11. Refer the following table for specifying pricing details of the PO on the above screen:
Note: Fields marked with ‘*’ are mandatory.
|
Field Name |
Description |
|
CCY |
This is auto-populated from basic information screen. |
|
Base PO Amount |
Enter the base amount of the whole order. The same gets auto-populated to sum of total cost of all commodities in case commodities are added. |
|
Discount (%) |
Enter the percentage of discount to be applied on the base amount. |
|
Discount Amount |
This is auto-populated based on the entered discount percentage or gets defaulted to cumulative discount amount of commodities in the grid. |
|
Tax (%) |
Enter the percentage of tax to be levied on the base amount post discount. |
|
Tax Amount |
This is auto-populated based on the entered tax percentage or gets defaulted to cumulative tax amount of commodities in the grid. |
|
Total PO Amount |
The total amount of the purchase order is auto-populated based on the previous parameters. |
|
Net PO Amount |
The net amount of the purchase order is auto-populated based on the previous parameters. |
12. Click Save & Close to save the purchase order details and send for authorization (if applicable).
Manage Purchase Order
By using this screen, you can view, modify, or take actions the PO.
Navigation Path: Receivables > Purchase Order > Purchase Order Management
1. Refer the following table for specifying details to search the PO and perform actions by using above screen:
Note: Specify any one mandatory field marked with ‘*’ to view the search result.
|
Field Name |
Description |
|
File Name |
Enter the file name containing PO uploaded in the system to perform file based searched on PO records. |
|
External PO Reference Number |
Enter the specific external PO number to search for. |
|
Internal PO Reference Number |
Enter the specific internal PO number to search for. |
|
Buyer |
Click the Search icon and select the buyer of the PO record. |
|
Supplier |
Click the Search icon and select the supplier of the PO record. |
|
Relationship |
Click the Search icon and select the relationship linked to PO record. |
|
Program |
Click the Search icon and select the program linked to PO record. |
|
Search By Date Range |
Select the type of date range to be applied for search. For example: PO date. |
|
Date Form |
Click the Calendar icon and select the start of the date range. |
|
Date To |
Click the Calendar icon and select the end of the date range. |
|
Financeable |
Switch the toggle ON to search for financed purchase orders. |
|
Accepted |
Switch the toggle ON to search for accepted purchase orders. |
|
Rejected |
Switch the toggle ON to search for rejected purchase orders. |
|
Linked Program |
Switch the toggle ON to search for purchase orders linked to a program. |
|
In Progress |
Switch the toggle ON if PO processing is in progress. |
2. Click Search to view the result or click Reset to clear the populated search criteria.
3. In the Program column, double click and select the program to link.
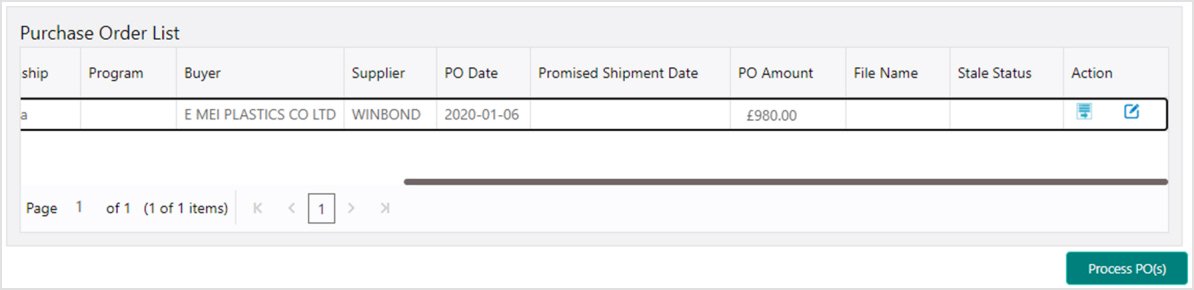
4. In the Action column, click the edit icon ( ) to modify the purchase order, if required.
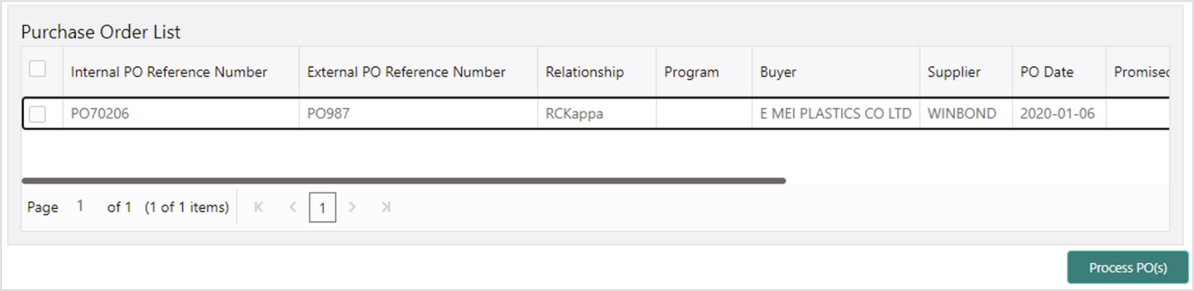
5. Select the POs to be processed and then click Process PO(s).
OR
Click the Process Purchase Order icon ( ) to process the same.
Edit and Accept Purchase Order
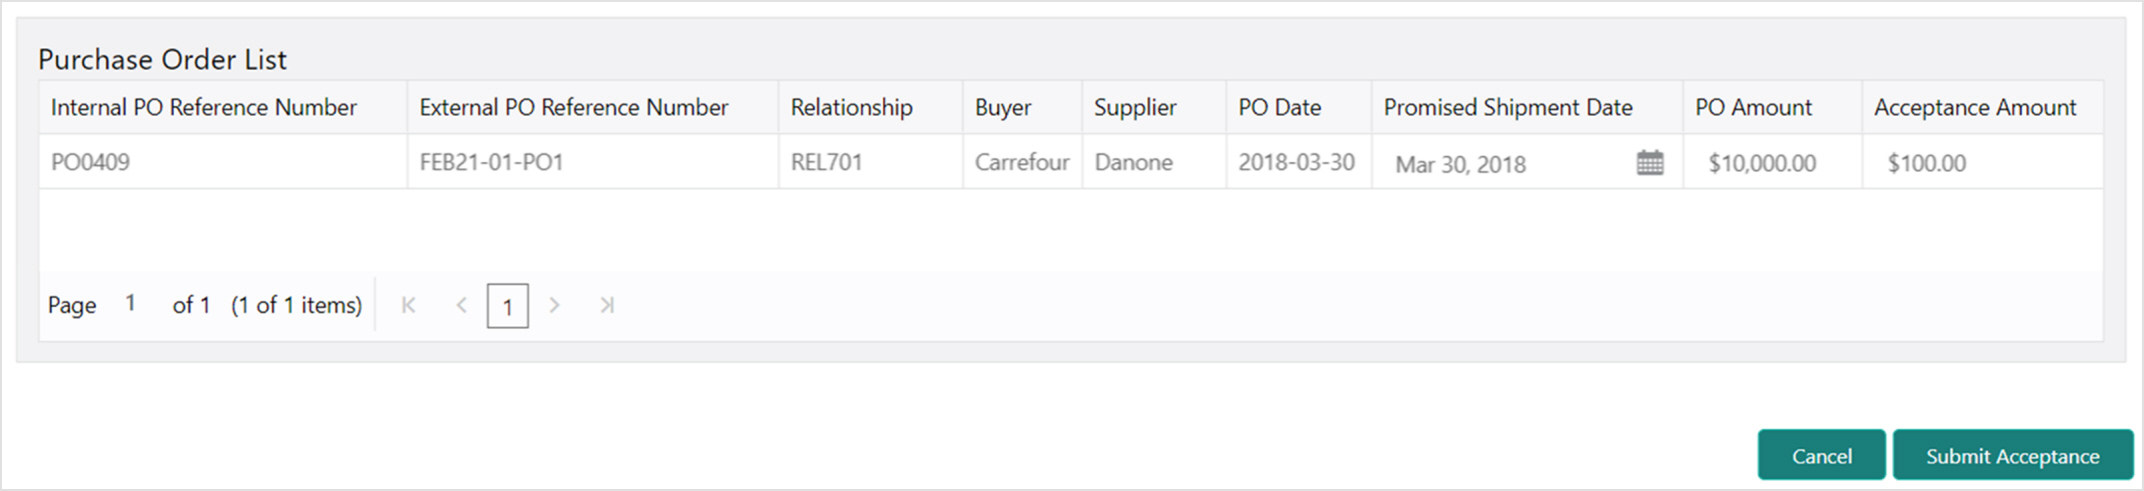
1. Click Edit and Accept to edit/accept the purchase order.
2. In the Promised Shipment Date column, click the Calendar icon and select a shipment date for the purchase order.
3. Edit the Acceptance Amount, if required.
4. Click Submit Acceptance. A status message is displayed along with the transaction reference number.
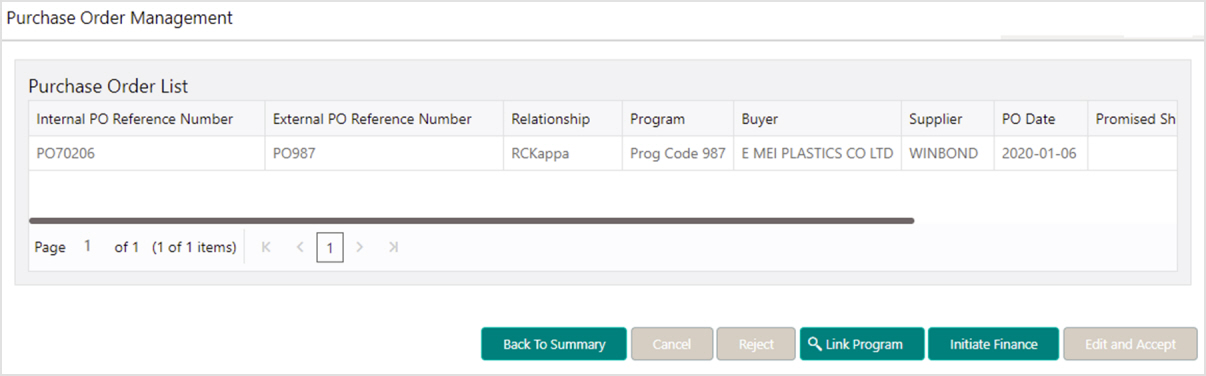
1. Optional: Click Link Program to link a program with the purchased order.
2. Click Initiate Finance to initiate finance for the purchase order. A finance disbursement task for the same is created in the Free Tasks. This can be acquired and processed. For more information on processing this task, refer the Finance Disbursement section in this user manual.
OR
Click Link Program to link a program to the purchase order.
Only a purchase order that has not yet been accepted, can be cancelled.
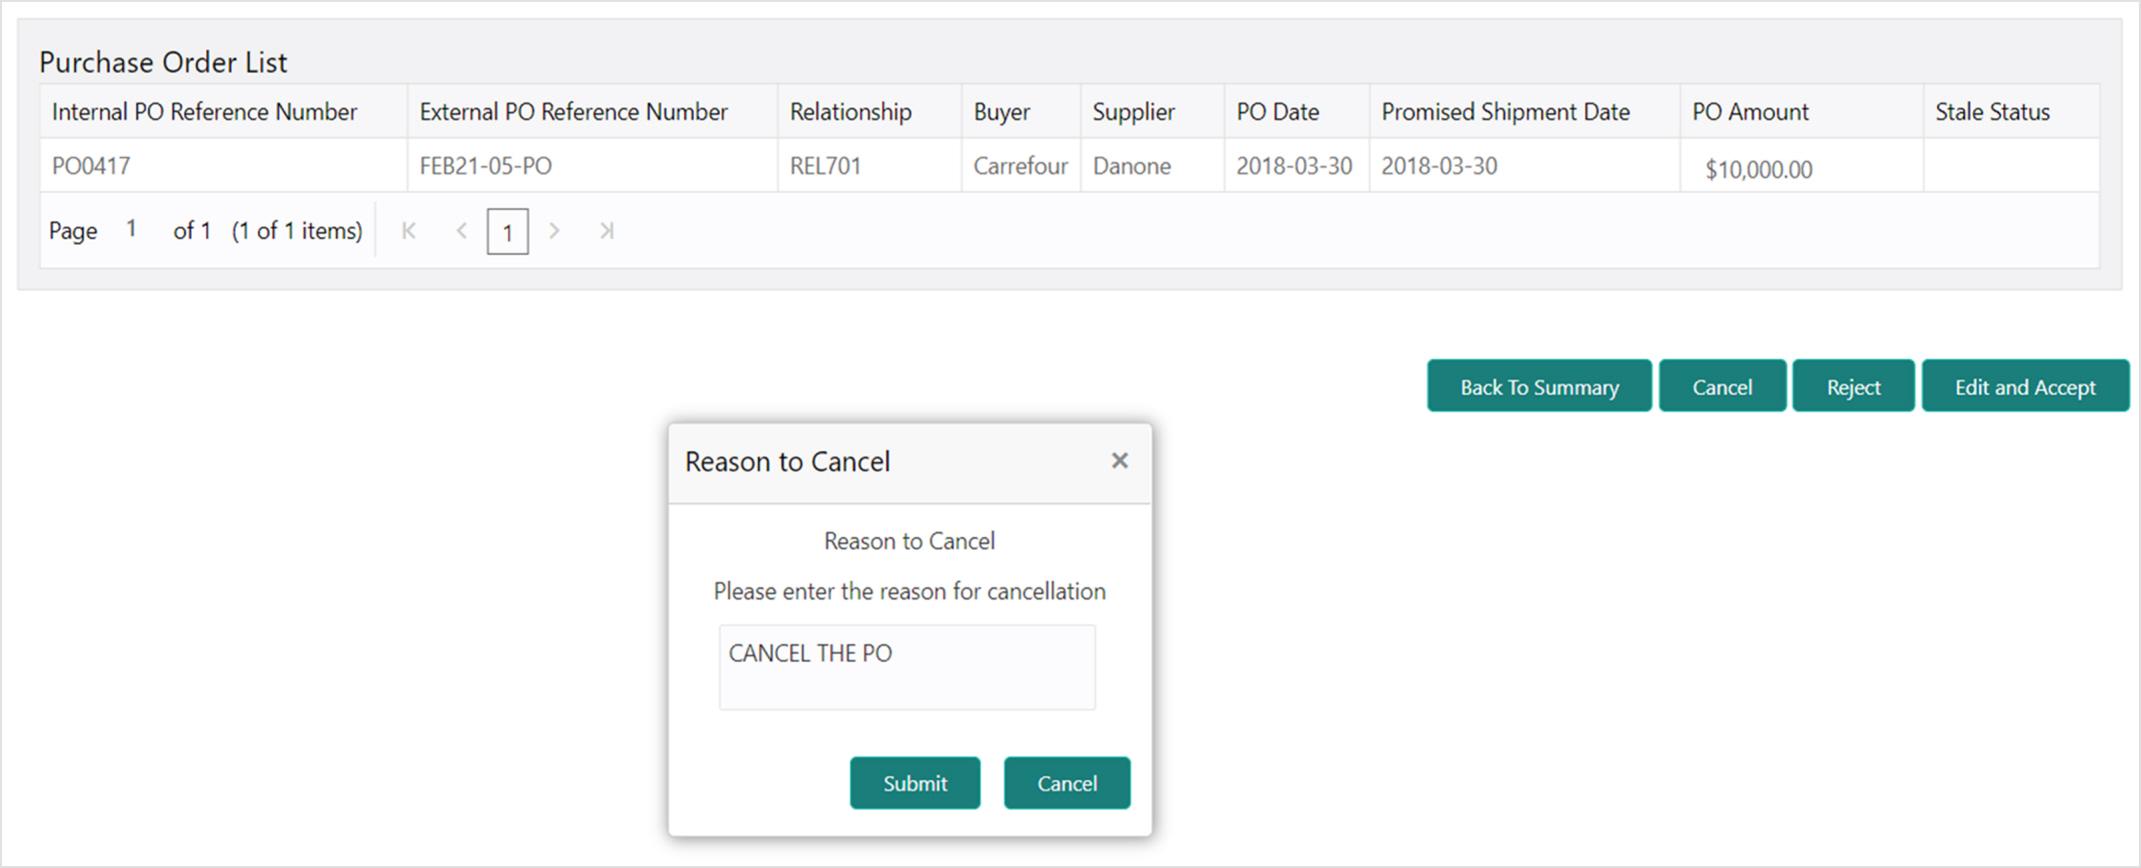
1. Click Cancel to cancel the purchase order.
2. In the ‘Reason to Cancel’ popped up window, enter the reason to cancel the PO and then click Submit.
Post processing the PO from search screen, perform the following steps to reject the purchase order.
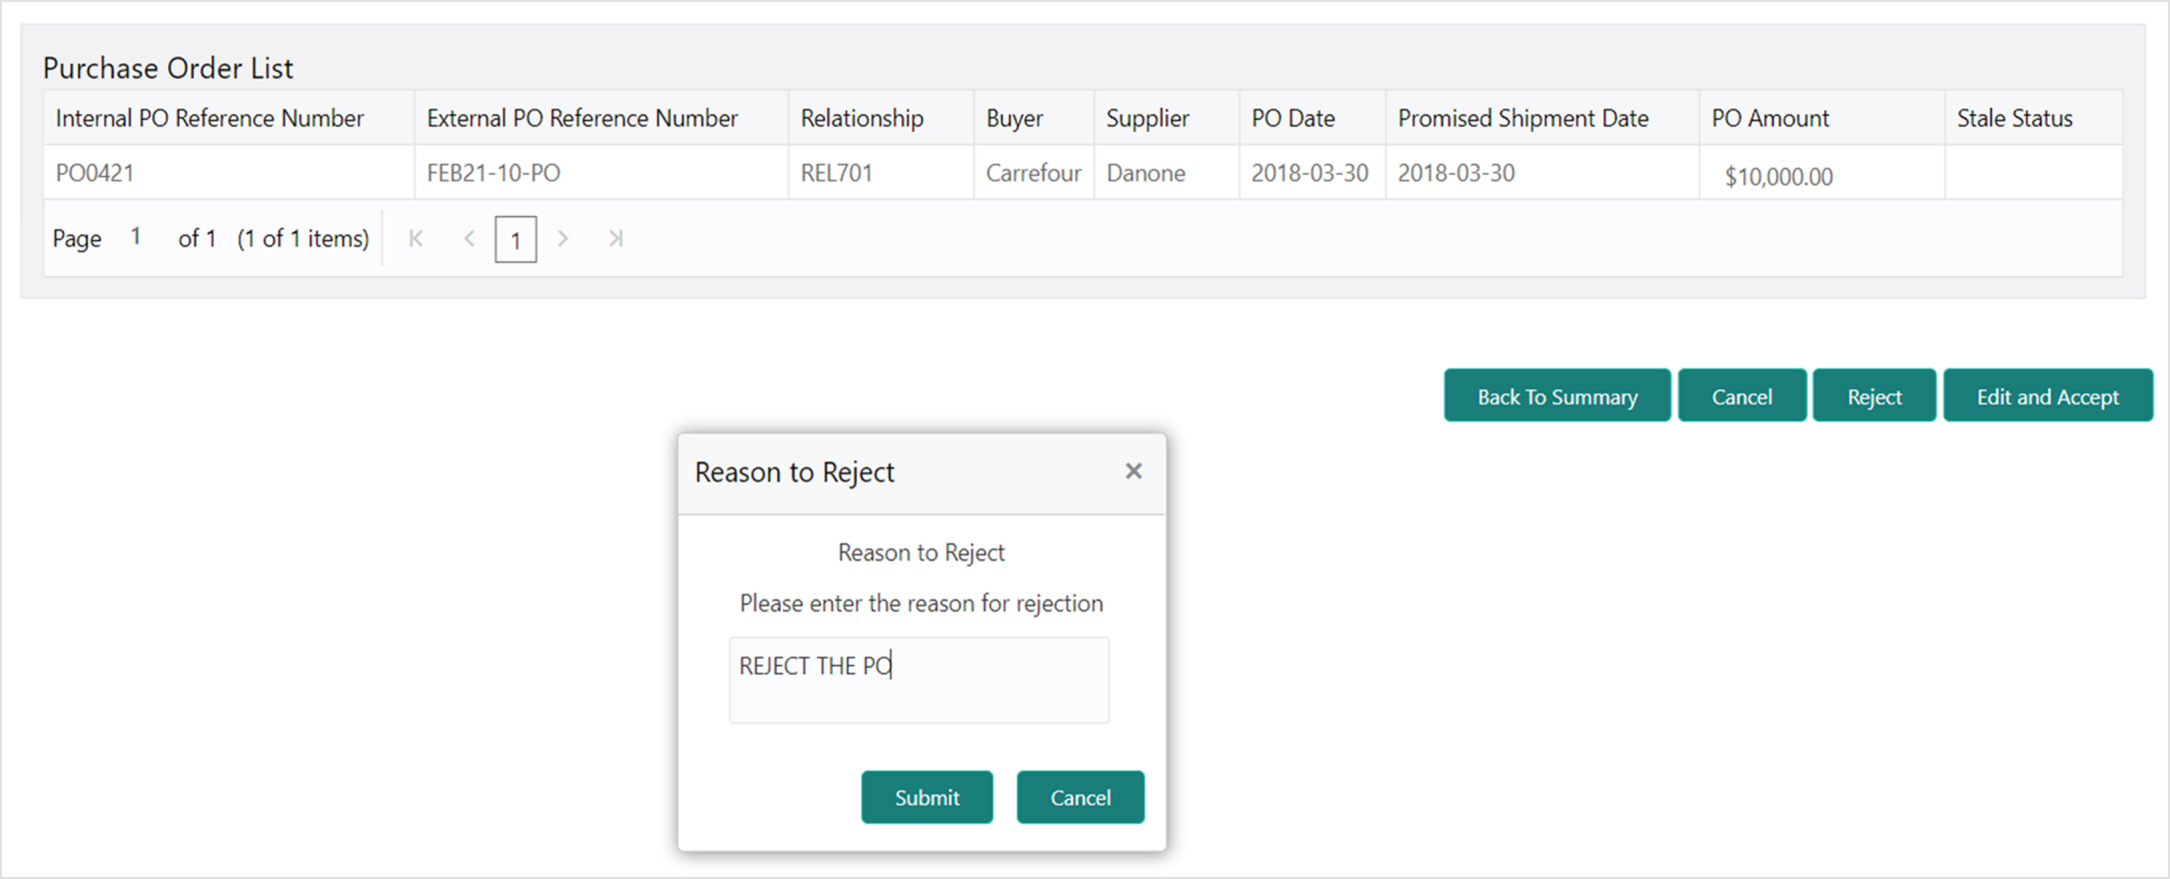
1. Click Reject to reject the purchase order.
2. In the ‘Reason to Reject’ popped up window, enter the reason to reject the PO and then click Submit.