Cash Flow Edit processes allow you to verify the accuracy and check the completeness of your Instrument table data.
The procedure for working with and managing a Cash Flow Edit process is similar to that of other Oracle Funds Transfer Pricing and Oracle Asset Liability Management Processes. It includes the following steps:
· Searching for Cash Flow Edit processes.
· Viewing and Updating Cash Flow Edit processes.
· Copying Cash Flow Edit processes.
· Deleting Cash Flow Edit processes.
· Check Dependencies in the Cash Flow Edit processes.
· Refresh the Cash Flow Edit summary page.
Figure 1:
Ideally, you should create and run Cash Flow Edit Processes on your Instrument table data before you submit cash flow engine based rules for processing.
|
NOTE |
For more information, see Oracle Financial Services Cash Flow Engine Reference Guide. |
Creating a Cash Flow Edit process is a one-step process. You define both the attributes that uniquely describe a particular Cash Flow Edit process and the data to be validated or cleansed by that process on the Create Cash Flow Edit process page.
Procedure
This table describes key terms used for this procedure.
|
Term |
Description |
|---|---|
|
Filters |
One of the two components that determine the data that will be cleansed by Cash Flow Edit processes. This field allows you to select a subset of data for processing by selecting a Filter that was previously created. Its default value is "No Filter". |
|
Source Selection |
One of the two components that determine the data that will be cleansed by Cash Flow Edit processes. This field allows you to select the Instrument tables that need to be included in a Cash Flow Edit process. Alternatively, you can select a hierarchy and then select the desired product members that will be included in the process. Note that the Source selection and Hierarchy selection options are mutually exclusive. You can define your dataset by selecting one or the other, but not a combination of both. |
|
Preview Mode |
Selecting this check box allows you to view the results of running a Cash Flow Edit process before the system updates the underlying records in the Instrument tables. The default value is checked. |
|
Source Selection: Available Tables |
When the "Source Selection" option is made, you are presented with two Shuttle Control windows which contain the names of the Instrument Tables available for inclusion during a Cash Flow Edit process. |
|
Source Selection: Selected Tables |
One of the two Shuttle Control windows, it contains the names of the tables that have already been selected for processing by the Cash Flow Edit process. |
|
Cash Flow Edit Rules |
The Cash Flow Edit Rule section provides a summary of all seeded cash flow edit rules. Users can refer to this list to understand the validations that are applied to the cash flow fields on the instrument records and also view the default values that are applied when errors are found. |
To create Cash Flow Edit Processes, do the following:
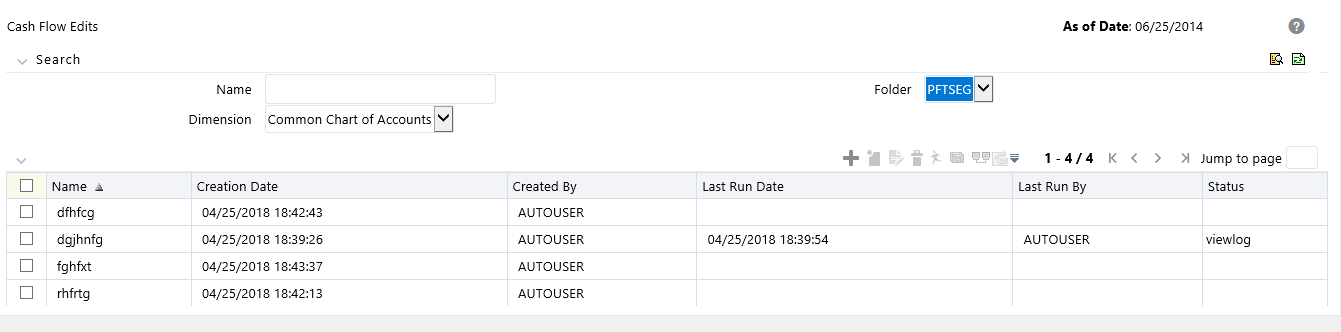
1. Navigate to the Cash Flow Edits summary page.
2. Click Add to display the Create Cash Flow Edits Process page.
Figure 2:
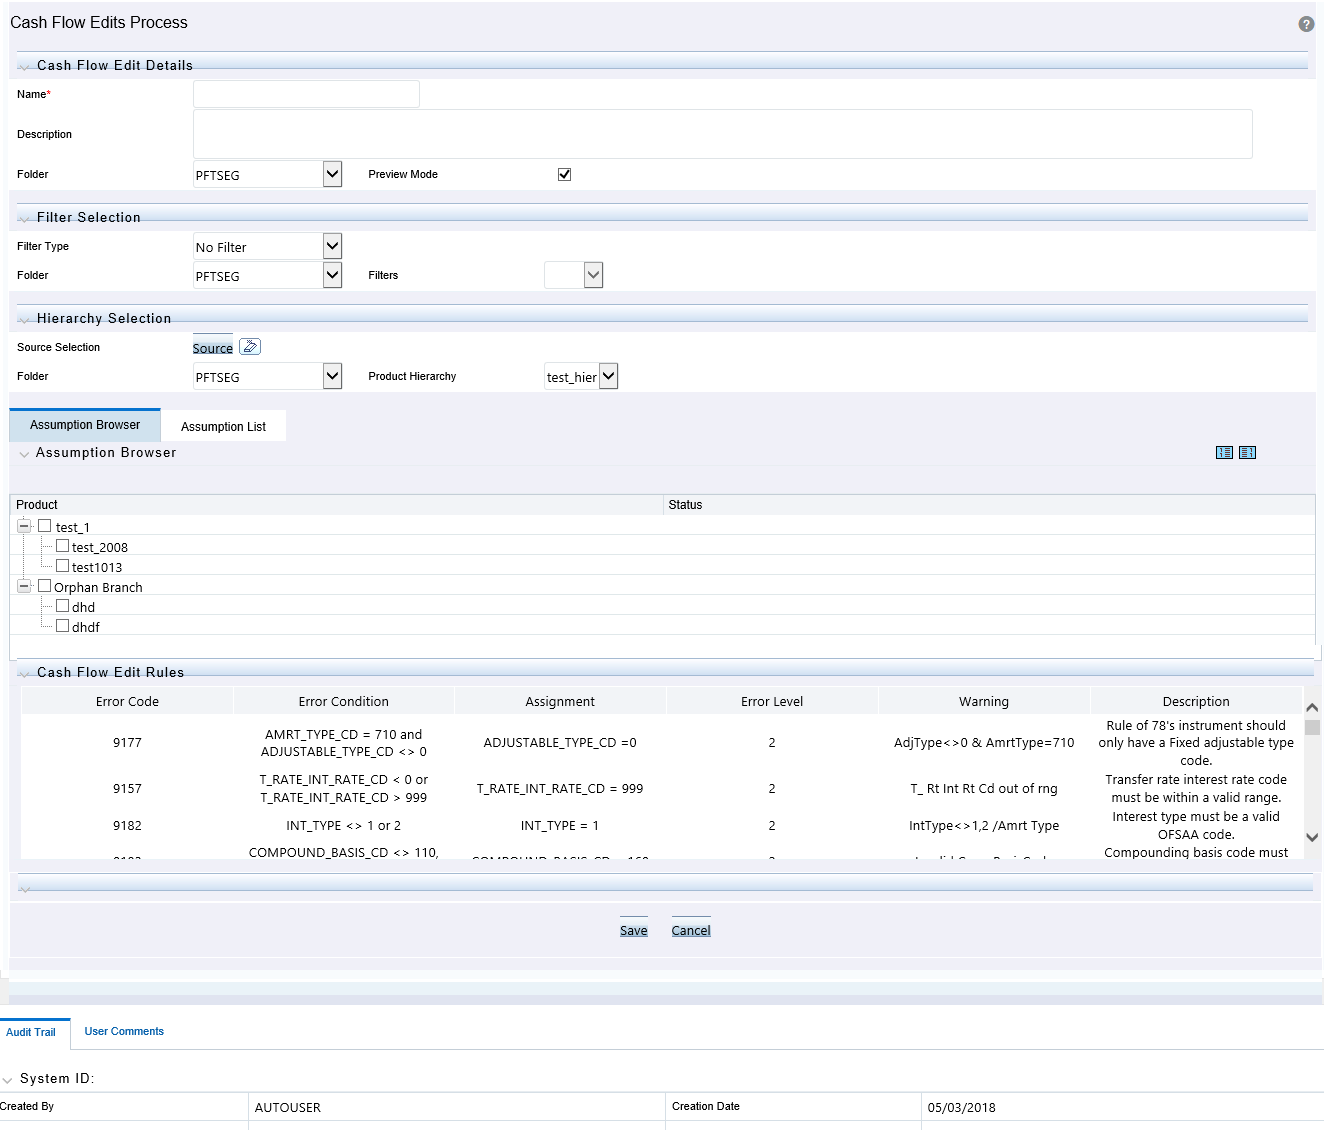
3. Complete standard steps for this procedure. See: Creating Transfer Pricing Rules.
|
NOTE |
At this point, you can input the components to ensure that the data processed by Cash Flow Edits will be clean. If you save the Rule without selecting Instrument tables or selecting product members from the hierarchy, the Process will be saved but no data would be selected for cleansing. |
4. (Optional) Select a Filter.
5. Select the Instrument tables or use a hierarchy to make Product member selections.
|
NOTE |
Use the Source Selection: Shuttle Control to select the Instrument tables that you want to include in the Cash Flow Edit process. You can move Instrument tables from Available Tables into Selected Tables and vice versa by using Move, Move All, Remove, and Remove All. These tables can also be reordered to change the order of processing. |
Initially, the selected tables list is empty. However, during subsequent runs, the selected tables list retains the names of the tables that you selected previously. For example, if you select two tables and save the Cash Flow Edits Process, the system shows them the next time you open the rule.
A table name shown in the Selected Tables list does not appear in the Available Tables.
6. Click Save. The Cash Flow Edits process is saved and the summary page is displayed.
You execute a Cash Flow Edit process to check the accuracy and the completeness of your Instrument table data. When you run in Preview mode, you can view the results of running a Cash Flow Edits process by querying the FSI_PROCESS_ERRORS table for generated errors before the system updates the underlying records in the Instrument tables.
Prerequisites
Predefined Rules
Figure 3:

To execute the Cash Flow Edit Processes, do the following:
1. Navigate to the Cash Flow Edits summary page.
2. Search for a rule.
3. Select a rule and Click the Run icon to execute the selected process. The Cash Flow Edits run confirmation page is displayed.
|
NOTE |
You can view the results of running a Cash Flow Edits rule before the system updates the underlying records in the Instrument tables, provided you selected Preview Mode while defining it. If run in Preview Mode, query the FSI_PROCESS_ERRORS table for any generated errors. |
Figure 4:
