The Invoice Management screen helps you to create, process, and accept invoices. You can search the Invoices based on the various parameters such as invoice number, supplier, program, date range, and so on.
After creating/searching an existing invoice, below are the list of actions you can take to manage the invoices:
Create Invoices
Navigation Path: Receivables > Invoice > Create Invoice
Note: Fields marked with ‘*’ are mandatory and ‘**’ are conditionally mandatory.
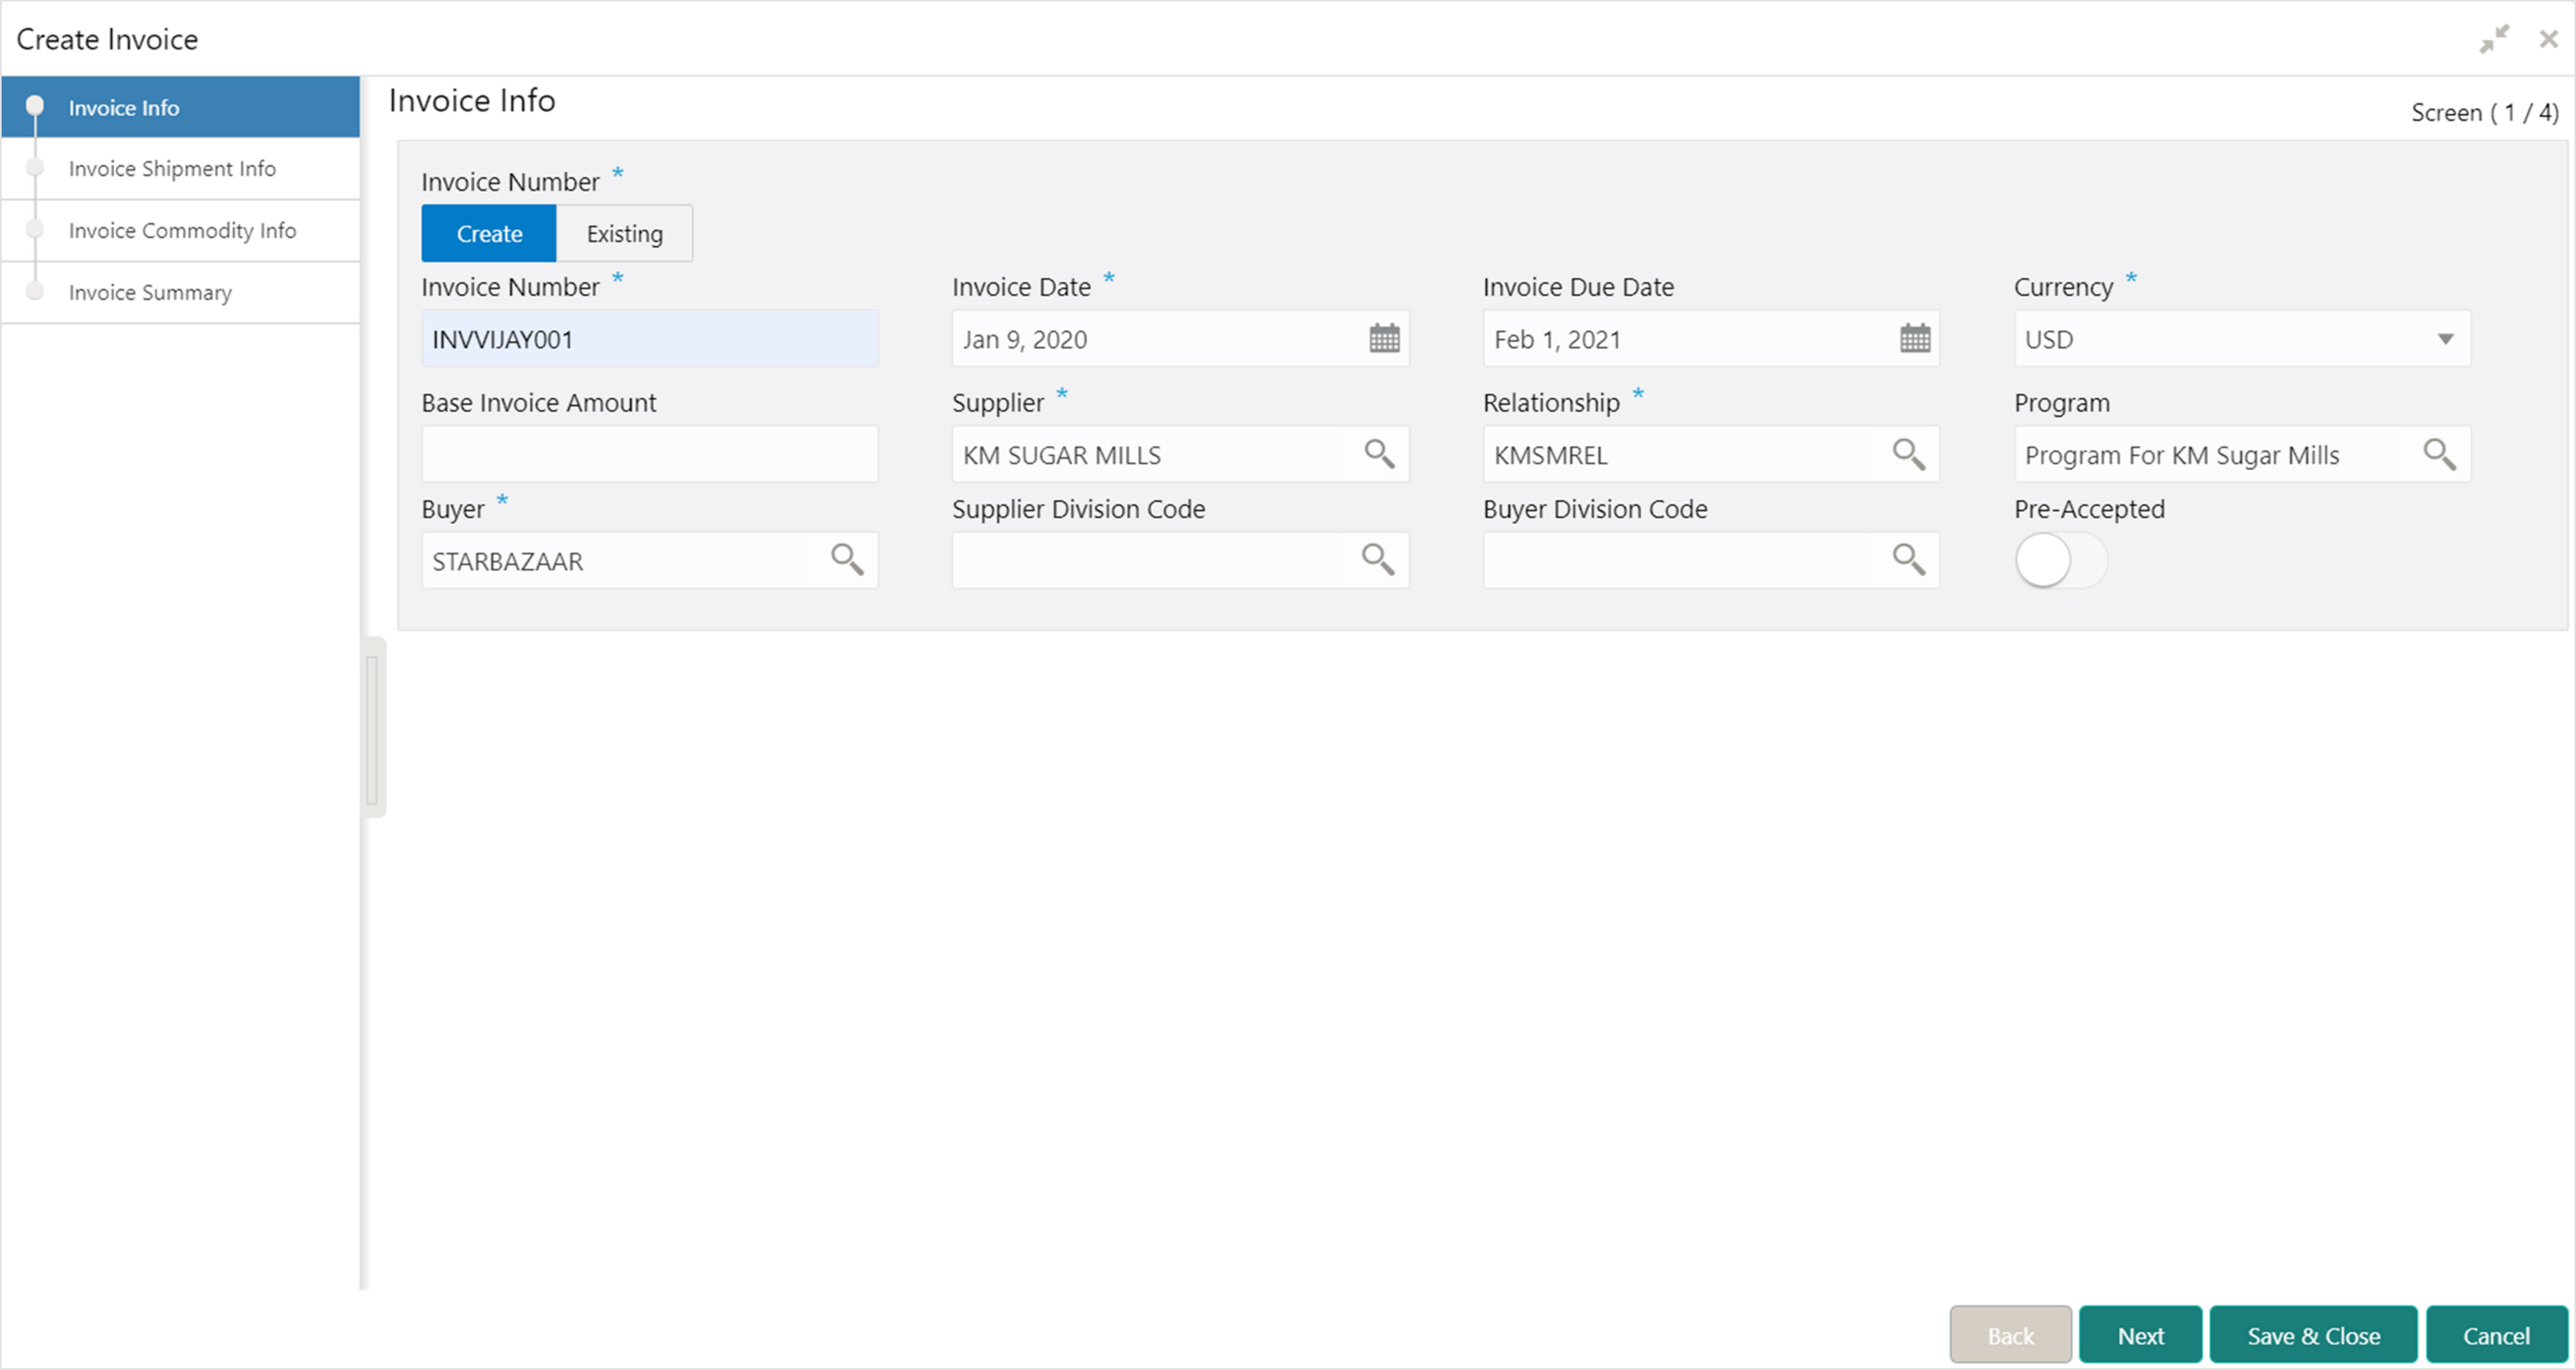
1. Specify details in the ‘Invoice Info’ screen.
2. Click Save & Close to save the invoice details and submit it for authorization.
OR
Click Next to go to the Invoice Shipment Info screen.
OR
Click Cancel to cancel the creation of the invoice.
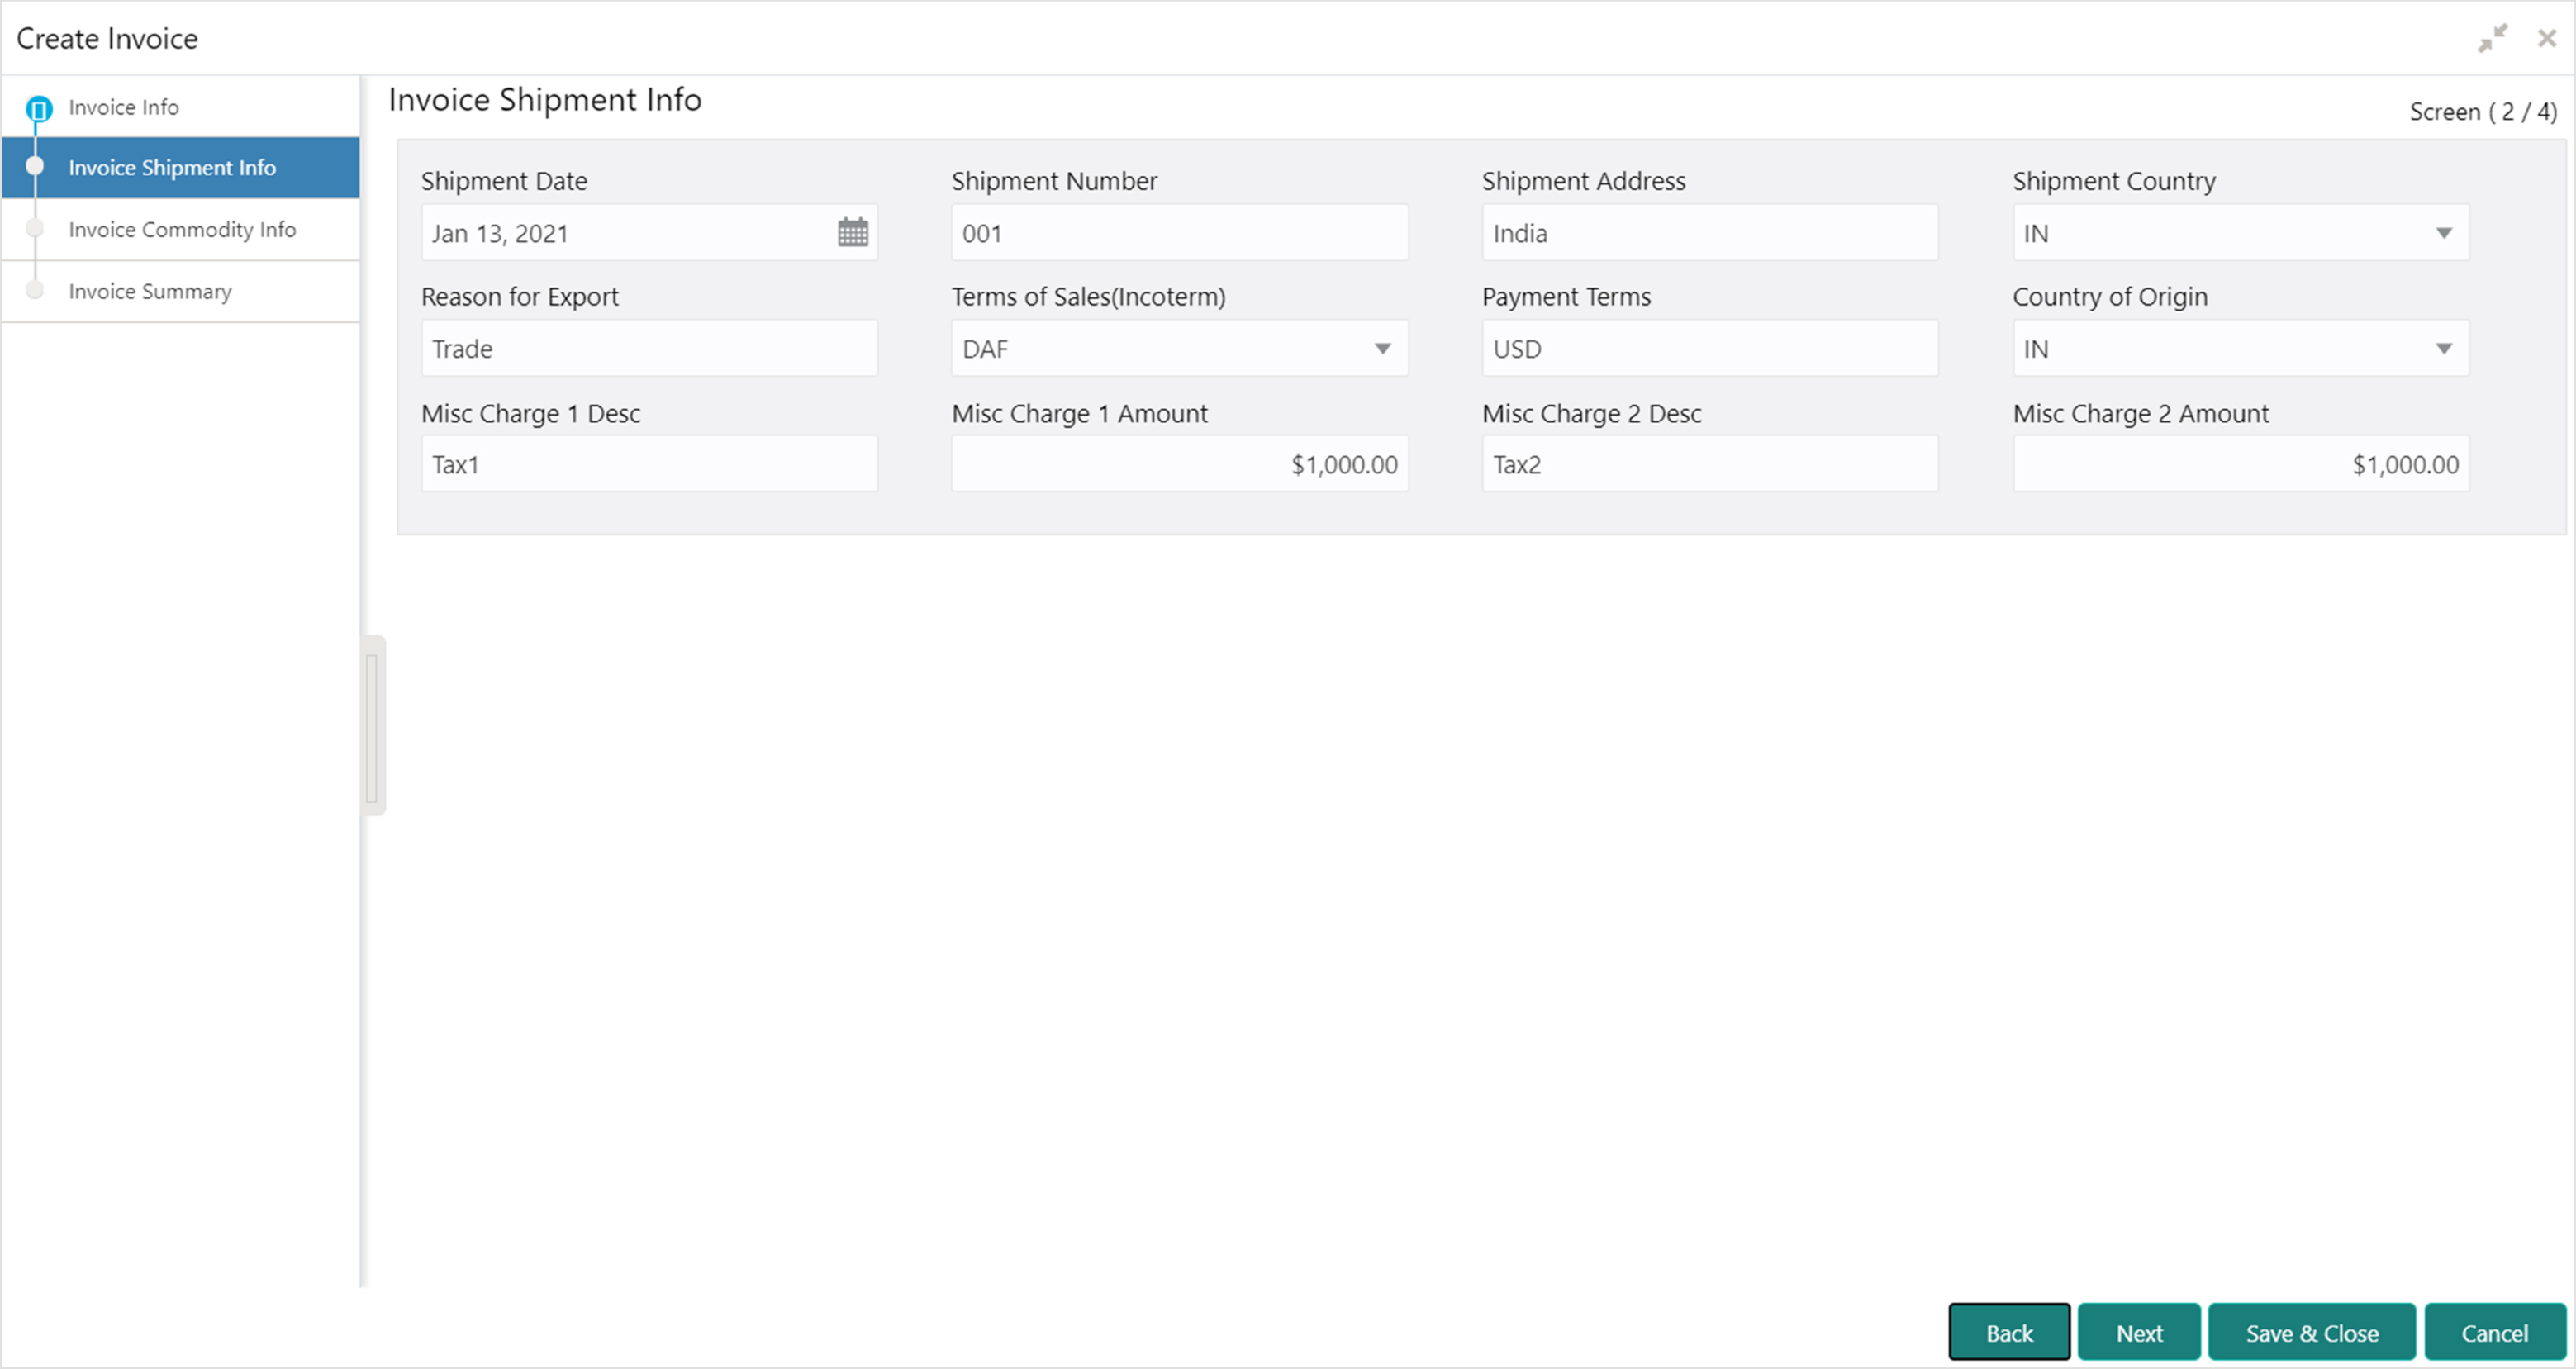
3. Specify the shipment details corresponding to the invoice in the ‘Invoice Shipment Info’ screen.
4. Click Save & Close to save the invoice details and submit it for authorization.
OR
Click Next to go to the Invoice Commodity Info screen.
OR
Click Back to go to the Invoice Info screen.
OR
Click Cancel to cancel the creation of the invoice.
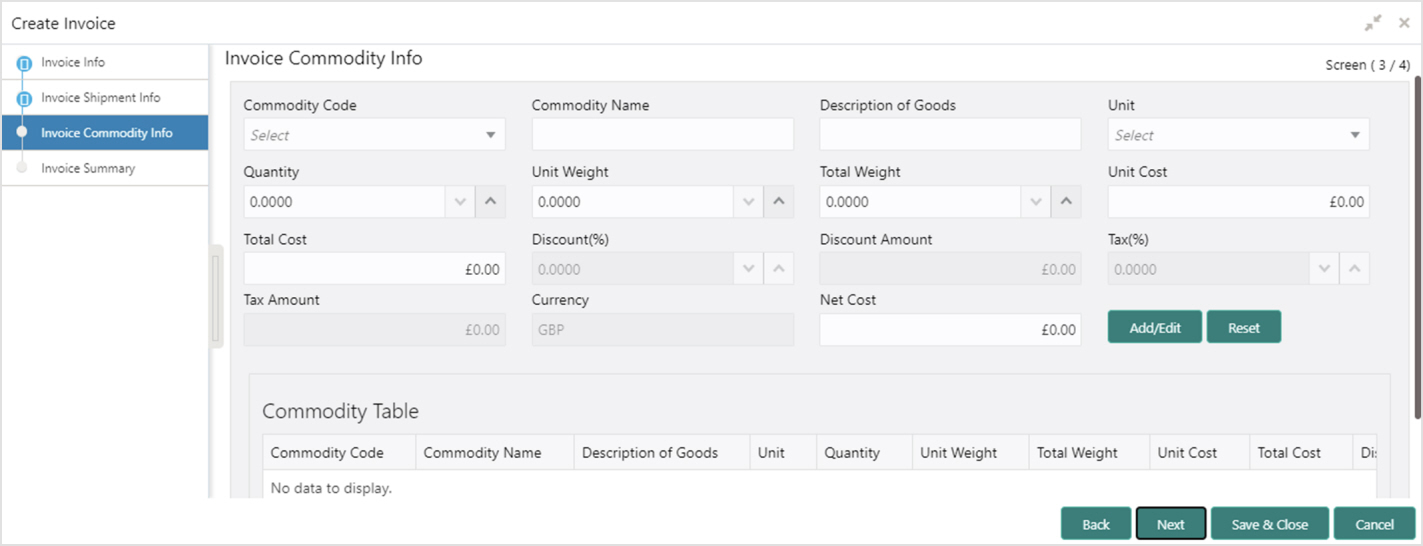
5. Specify the commodity details for the invoice in the ‘Invoice Commodity Info’ screen.
6. Click Add/ Edit to add more records in the grid or modify the selected records. If required, click Reset to clear the selected values.
7. Click Save & Close to save the invoice details and submit it for authorization.
OR
Click Next to go to the Invoice Summary screen.
OR
Click Back to go to the Invoice Shipment Info screen.
OR
Click Cancel to cancel the creation of the invoice.
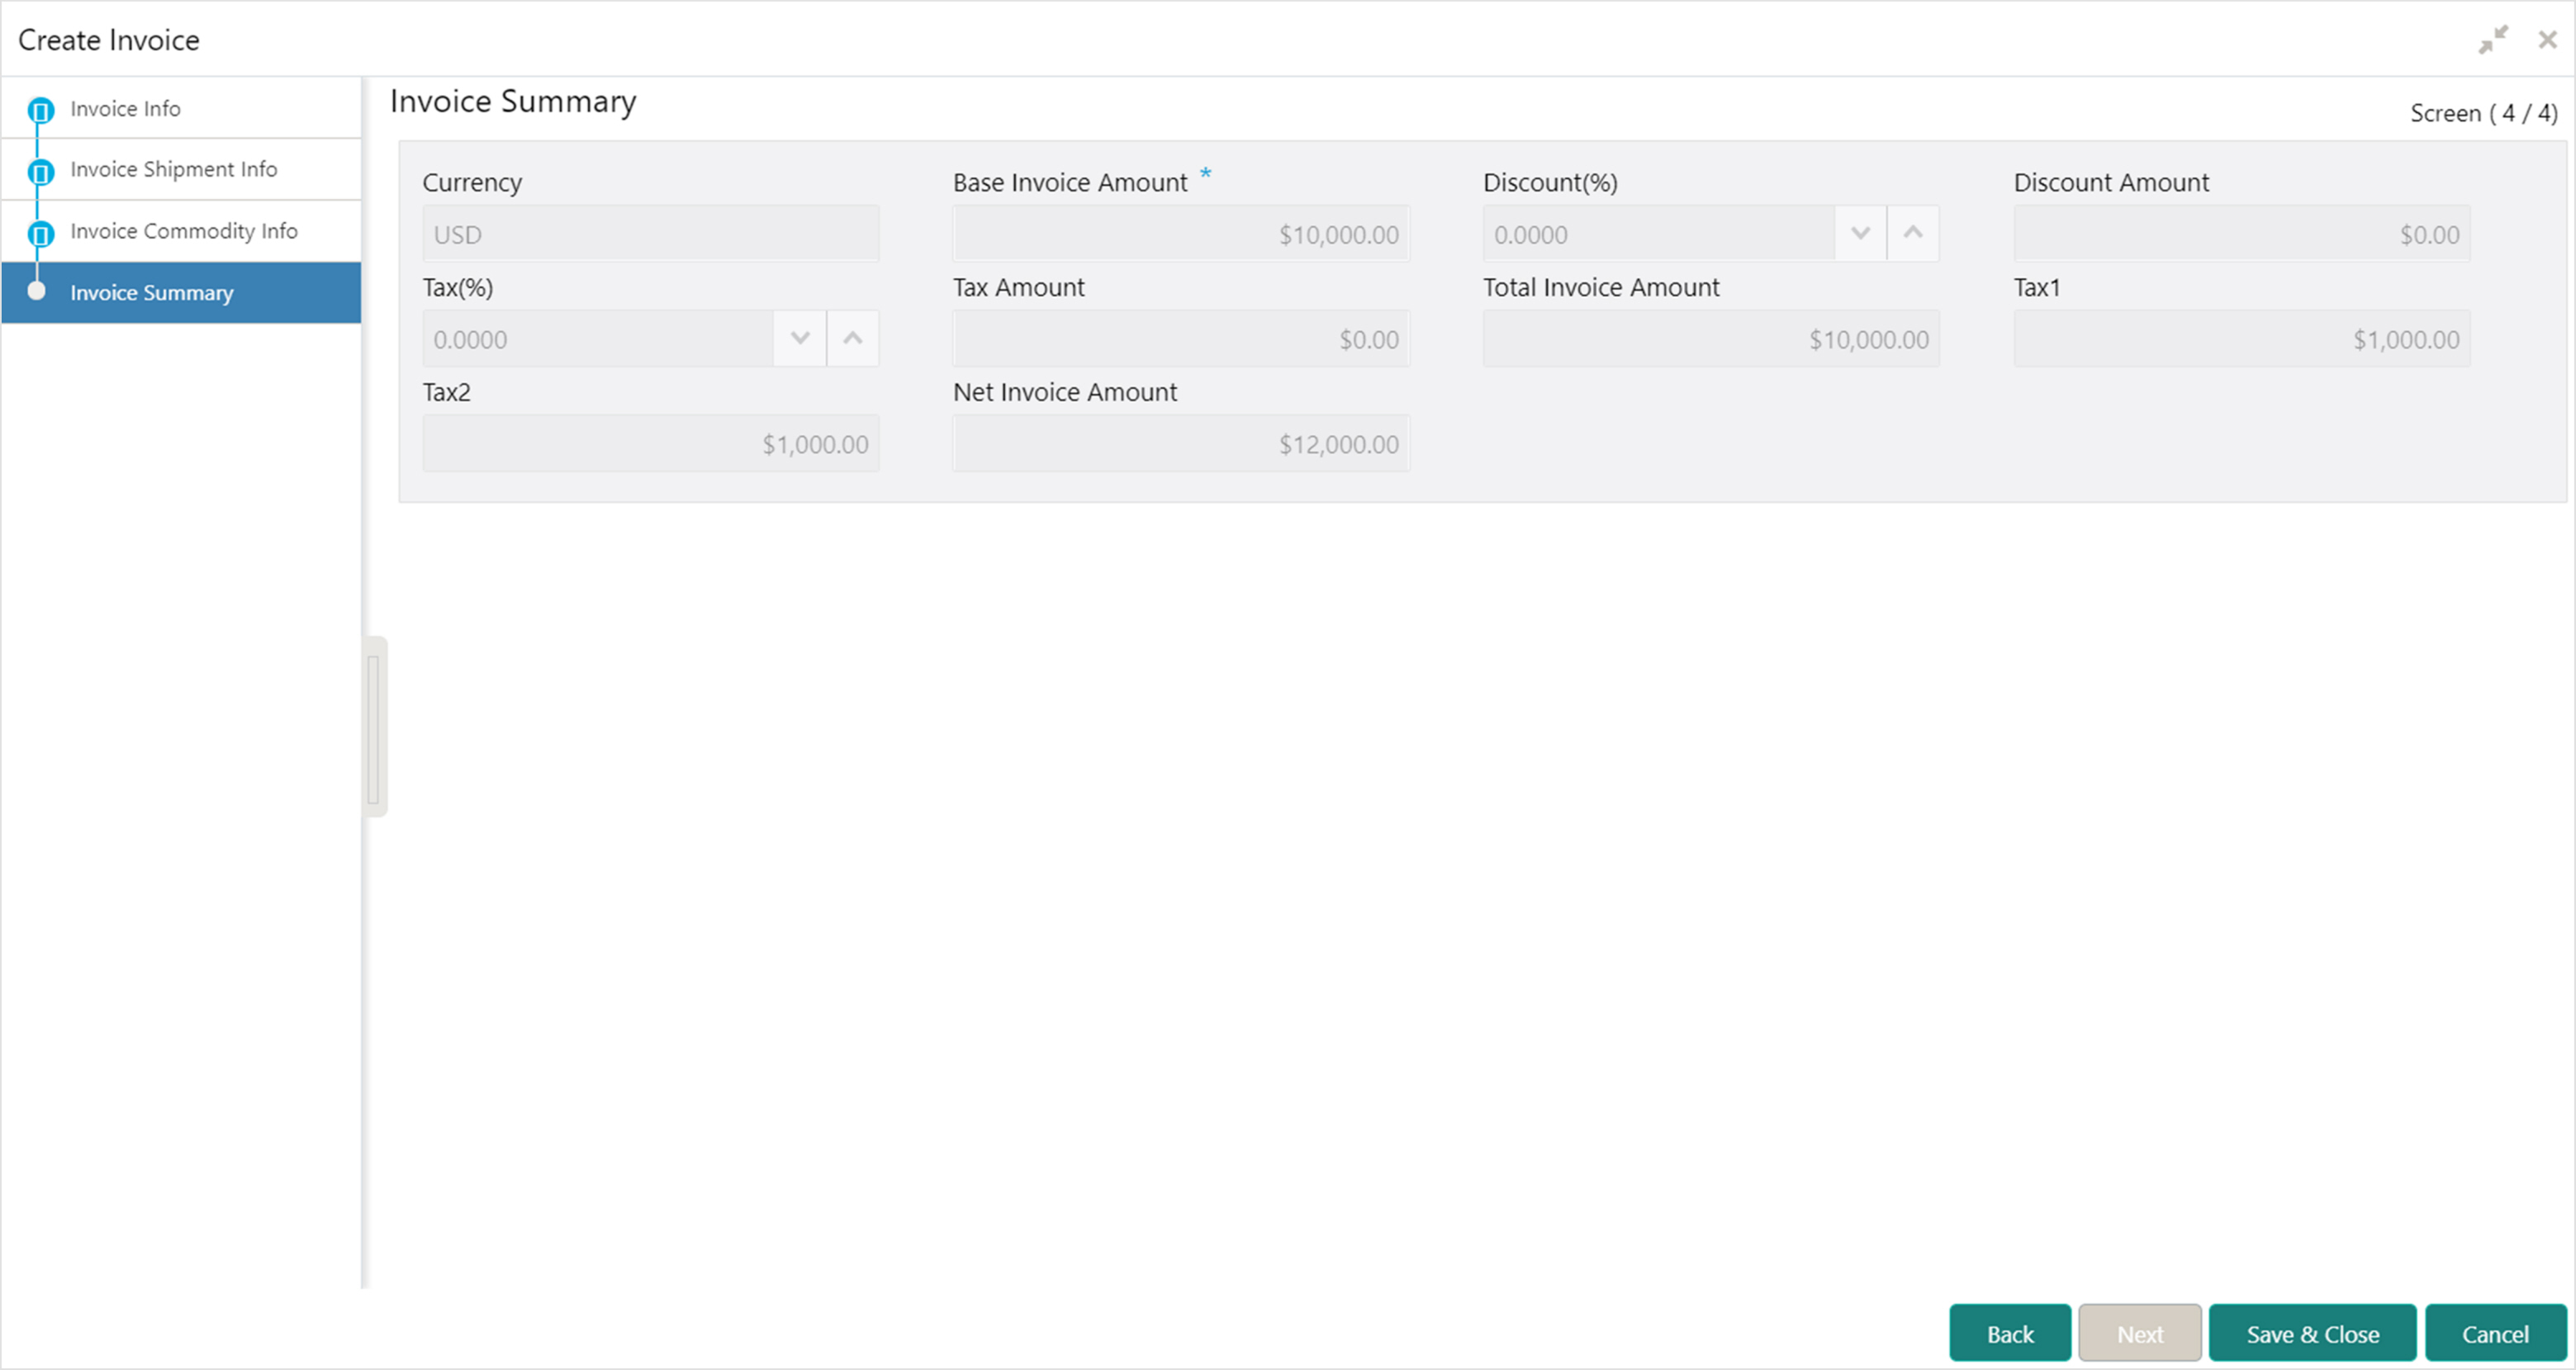
8. Review the detail of the invoice being created in the ‘Invoice Summary’ screen.
9. Click Save & Close to save the invoice details and submit it for authorization.
OR
Click Back to go to the Invoice Commodity Info screen.
OR
Click Cancel to cancel the creation of the invoice.
Manage Invoice
Navigation Path: Receivables > Invoice > Invoice Management

Perform the following steps to search the invoices:
1. In the Branch list, select the branch for which the invoice needs to be processed. By default, the branch of the logged-in user is selected.
2. From the Action list, select the action to be taken on the invoice.
3. Click Proceed to view the search parameters.

4. Specify the value for at least one mandatory field (marked with ‘*’) to search the Invoice(s).
5. Click Search to view the search results in the ‘Invoice List’ section.
OR
Click Reset to clear the search fields.
Perform the following steps post searching the invoices for ‘Accept Invoice’ action:
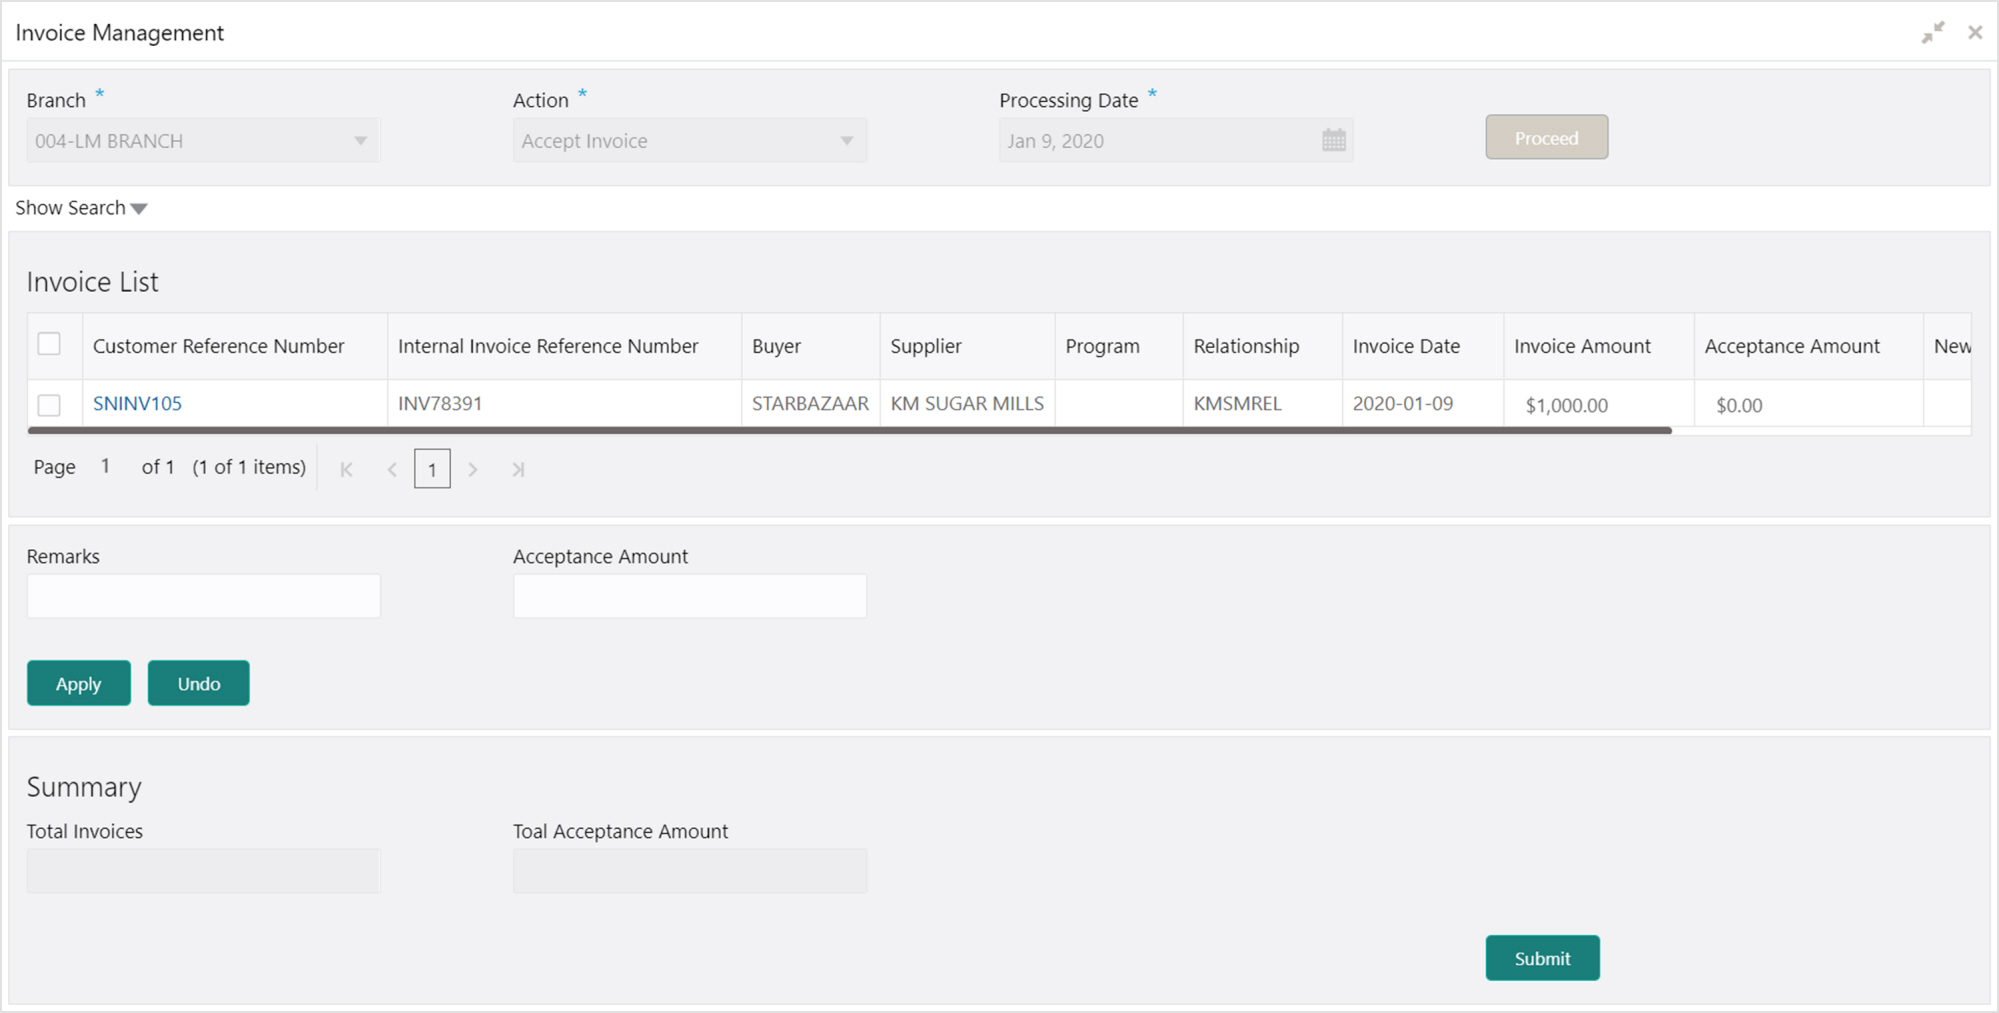
1. Optional: In the Customer Reference Number column, click the link to view more details about it.
2. Select the invoice to be accepted.
3. Optional: In the Remarks field, enter the remarks for the accepted amount.
4. In the Acceptance Amount field, enter the amount to be accepted.
5. Click Apply to make changes in the grid.
6. If required, click Undo to revert the applied changes.
7. Click Submit to accept the invoice and send for authorization (if applicable).
Perform the following steps post searching the invoices for ‘Assign Invoice’ action:
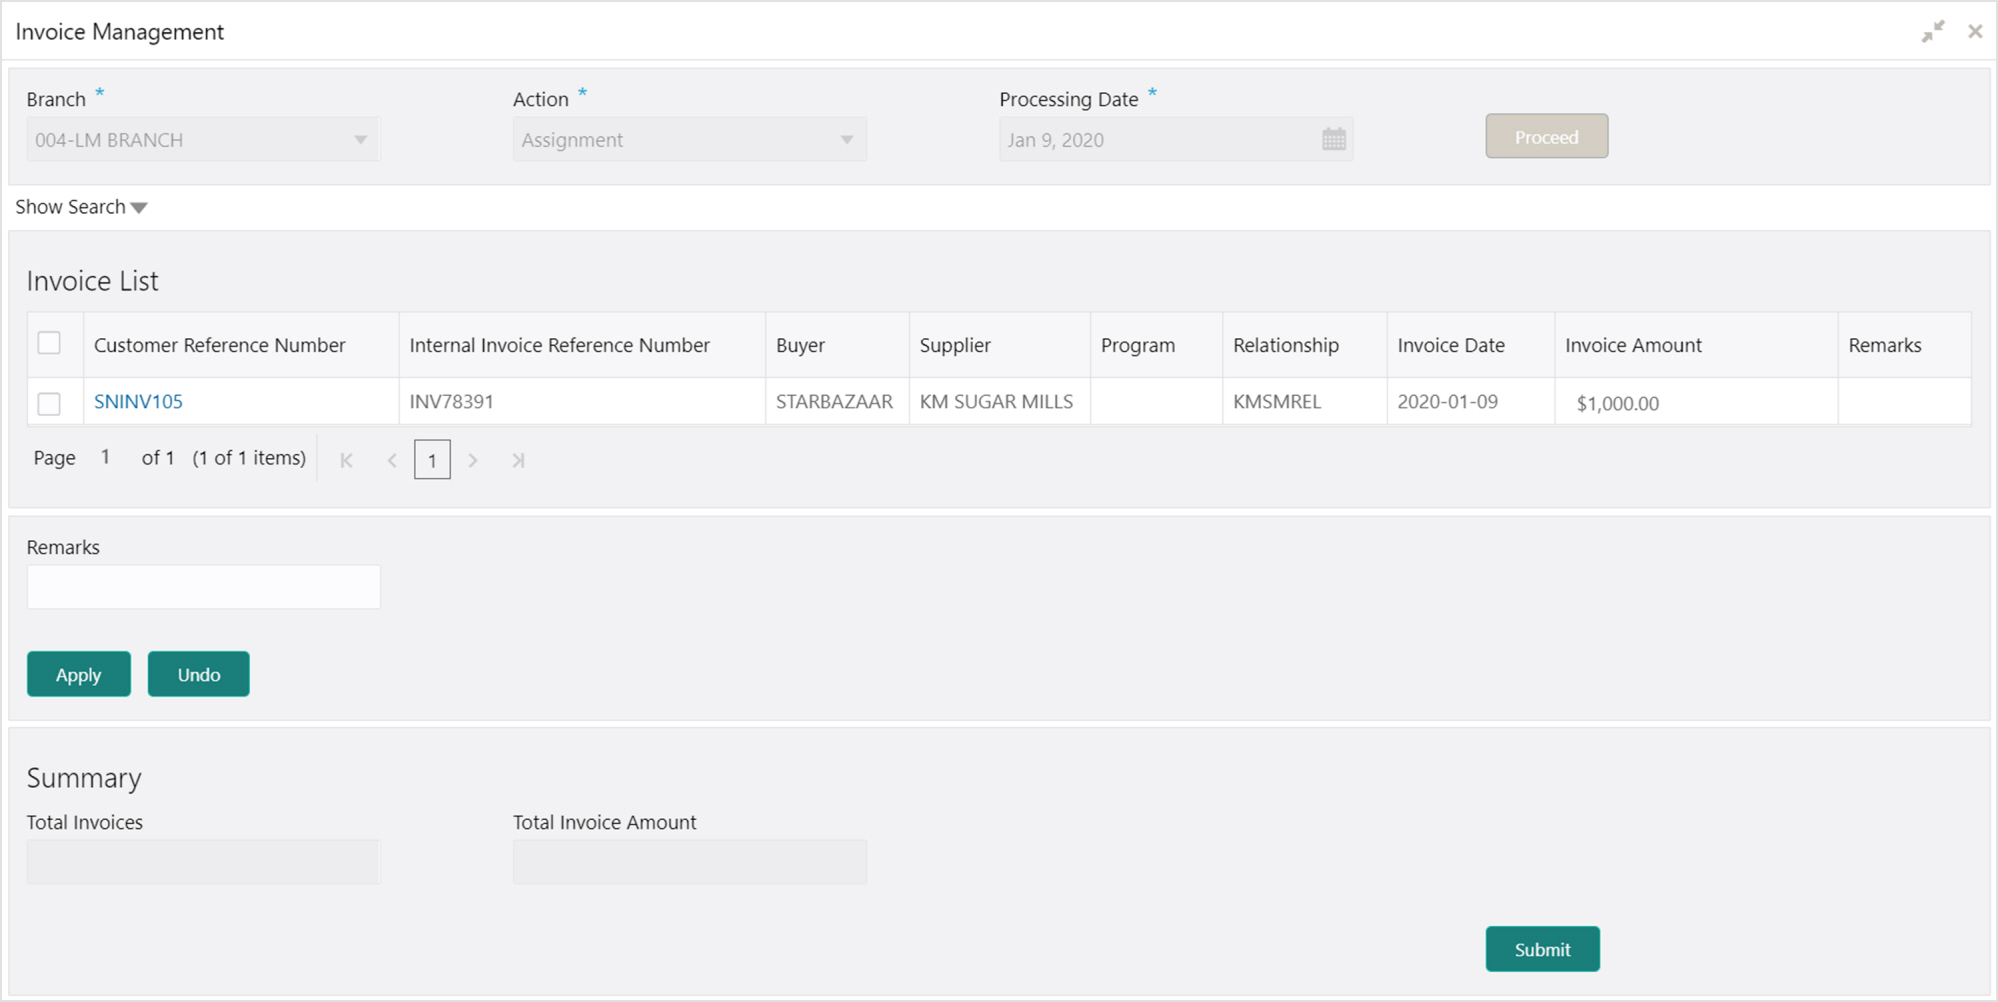
1. Optional: In the Customer Reference Number column, click the link to view more details about it.
2. Select the invoice to be assigned.
3. Optional: In the Remarks field, enter the remarks for the accepted amount.
4. Click Apply to make changes in the grid.
5. If required, click Undo to revert the applied changes.
6. Click Submit to accept the invoice and send for authorization (if applicable).
Only an invoice that has not yet been accepted, can be cancelled. Perform the following steps post searching the invoices for ‘Cancel Invoice’ action:
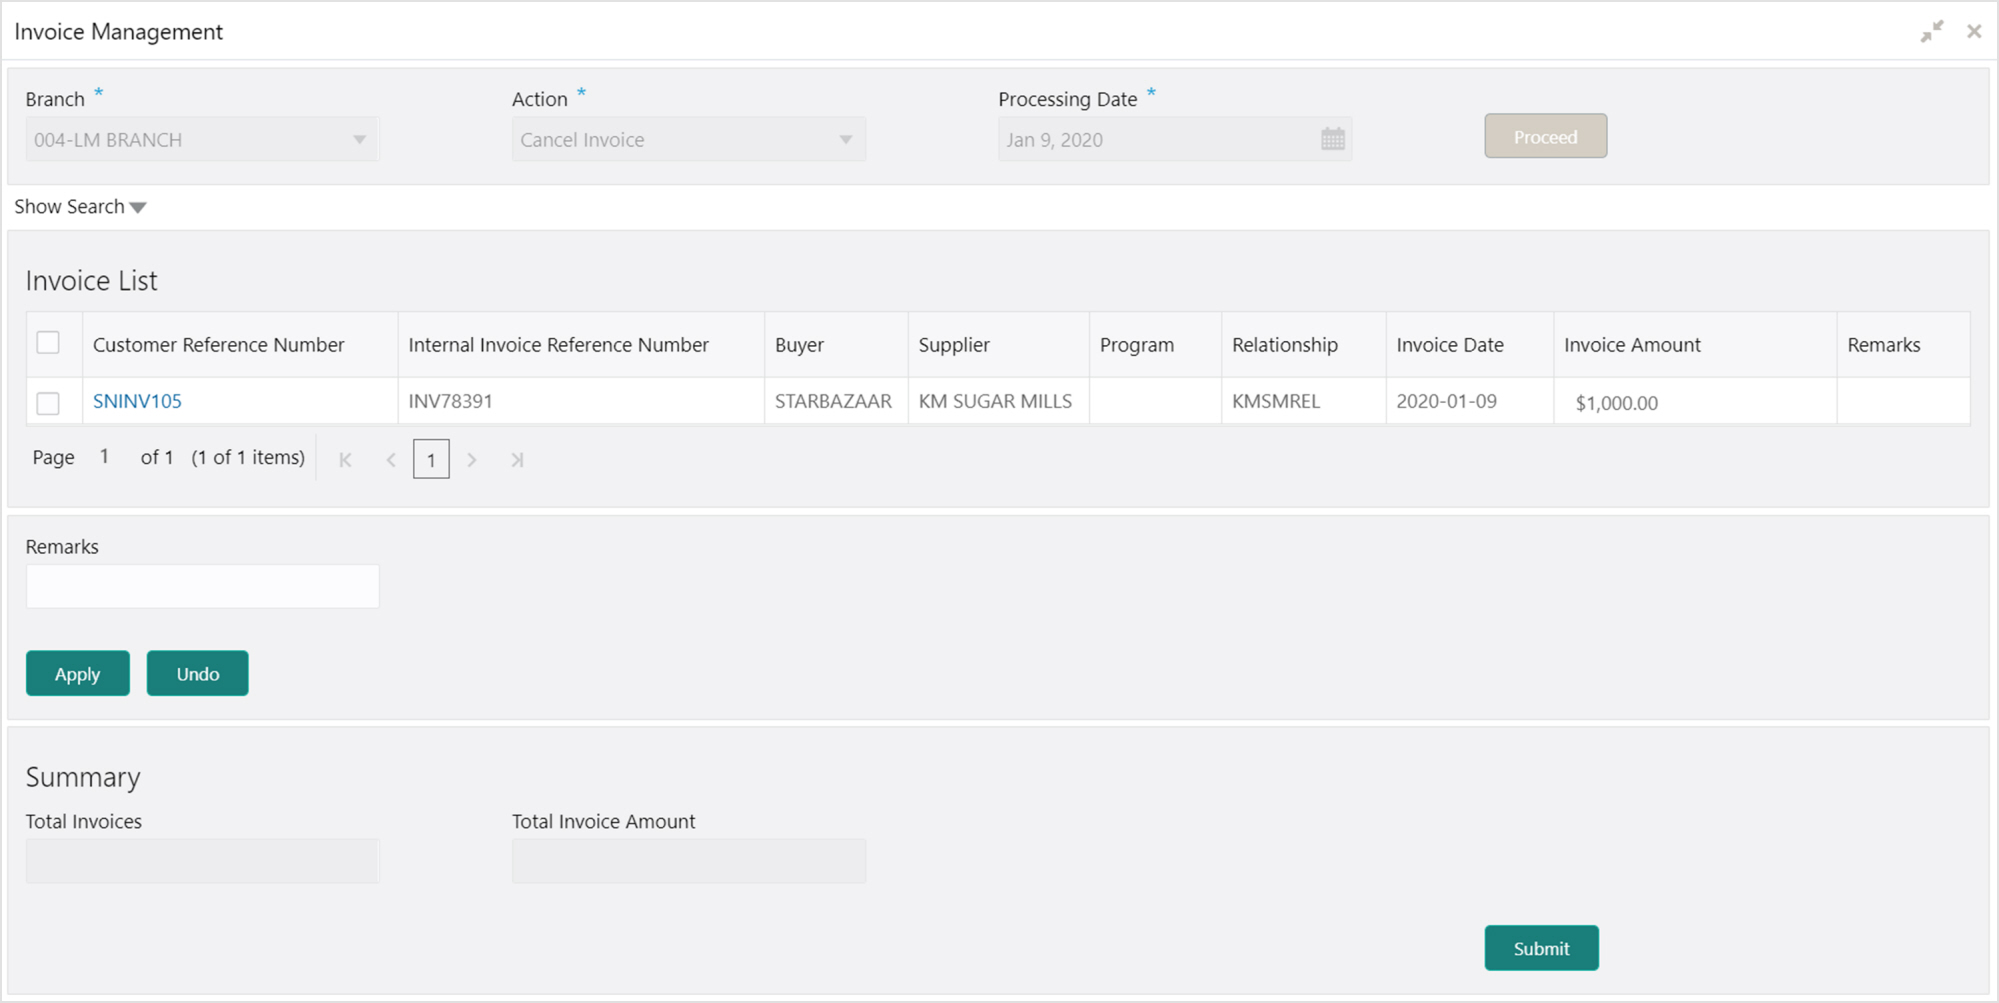
1. Optional: In the Customer Reference Number column, click the link to view more details about it.
2. Select the invoice(s) to be cancelled.
3. Optional: In the Remarks field, enter the remarks for cancelling the invoice.
4. Click Apply to make changes in the grid.
5. If required, click Undo to revert the applied changes.
6. Click Submit to cancel the invoice(s) and send for authorization (if applicable).
Perform the following steps post searching the invoices for ‘Edit Invoice’ action:

1. Optional: In the Customer Reference Number column, click the link to view more details about it.
2. Select the invoice to be edited.
3. Optional: In the Remarks field, enter the remarks for the updated invoice due date.
4. In the Invoice Due Date field, click the Calendar icon and select the new due date for the invoice.
5. Click Apply to make changes in the grid.
6. If required, click Undo to revert the applied changes.
7. Click Submit to submit the invoice and send for authorization (if applicable).
Finance can be initiated only for those invoices that are linked to a program and have been accepted.
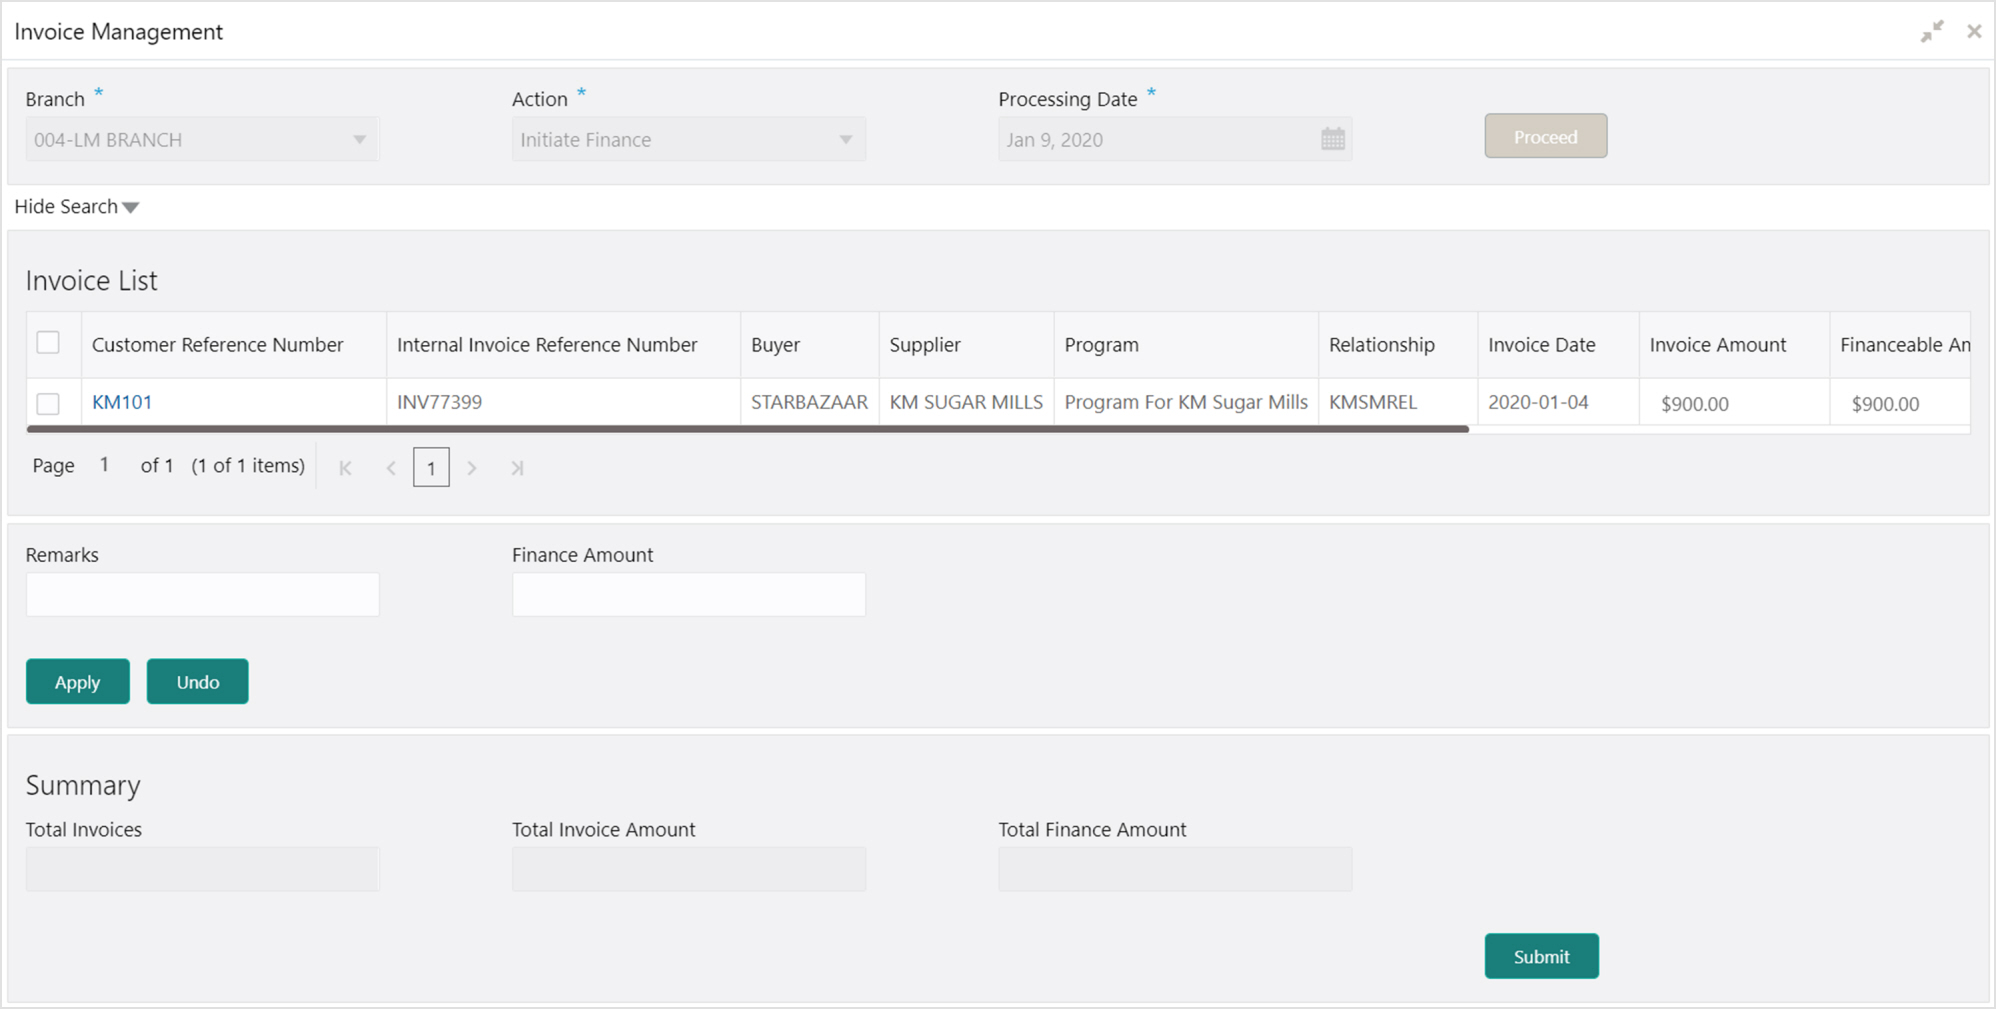
1. Optional: In the Customer Reference Number column, click the link to view more details about it.
2. Select the invoice(s) to be financed.
3. Optional: In the Remarks field, enter the remarks for cancelling the invoice.
4. In the Finance Amount field, enter the amount to be financed.
5. Click Apply to make changes in the grid.
6. If required, click Undo to revert the applied changes.
7. Click Submit to initiate finance and send for authorization (if applicable). A finance disbursement task is created in the Free Tasks, which can be acquired and processed. For more information, refer the Finance Disbursement section in this user manual.
Perform the following steps post searching the invoices for ‘Link Program’ action:
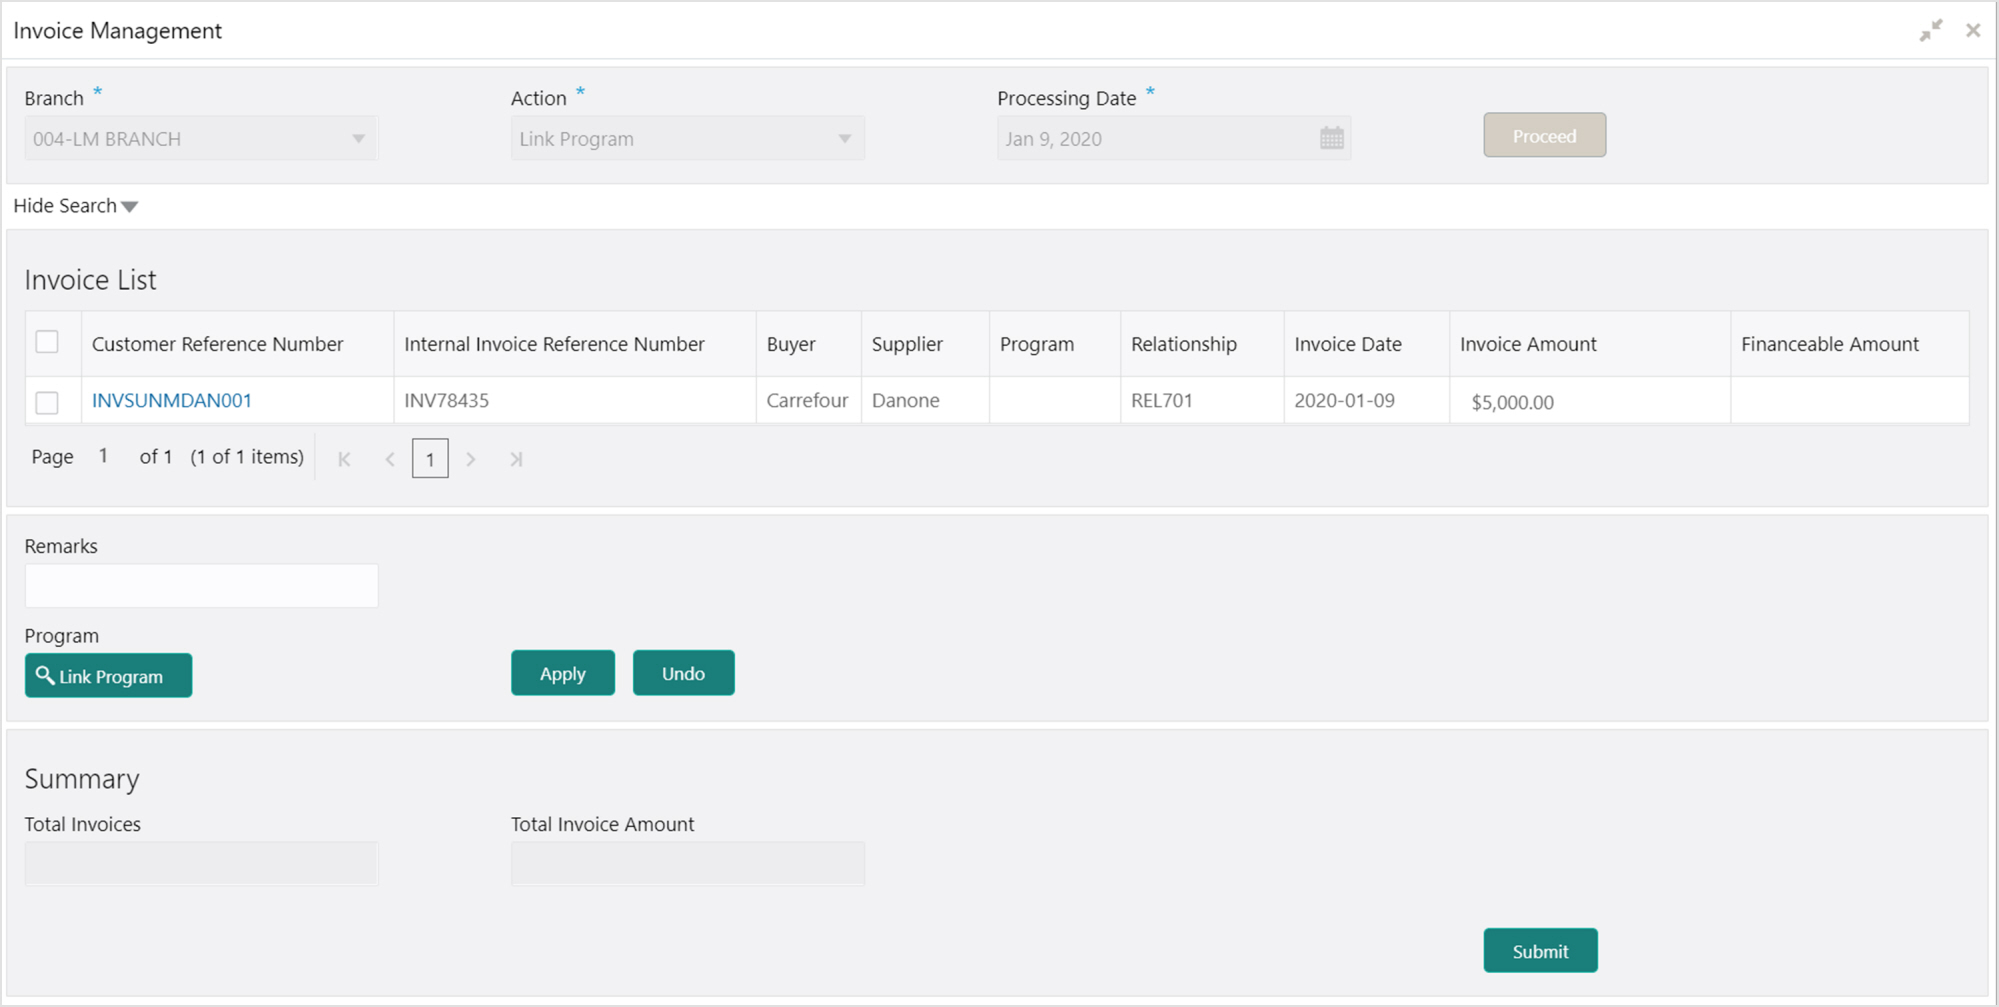
1. Optional: In the Customer Reference Number column, click the link to view more details about it.
2. Select the invoice to link a program to.
3. Optional: In the Remarks field, enter the remarks for the linked program.
4. Click Link Program, and select the program to be linked.
5. Click Apply to make changes in the grid.
6. If required, click Undo to revert the applied changes.
7. Click Submit to link the program and send for authorization (if applicable).
Perform the following steps post searching the invoices for ‘Raise Dispute’ action:
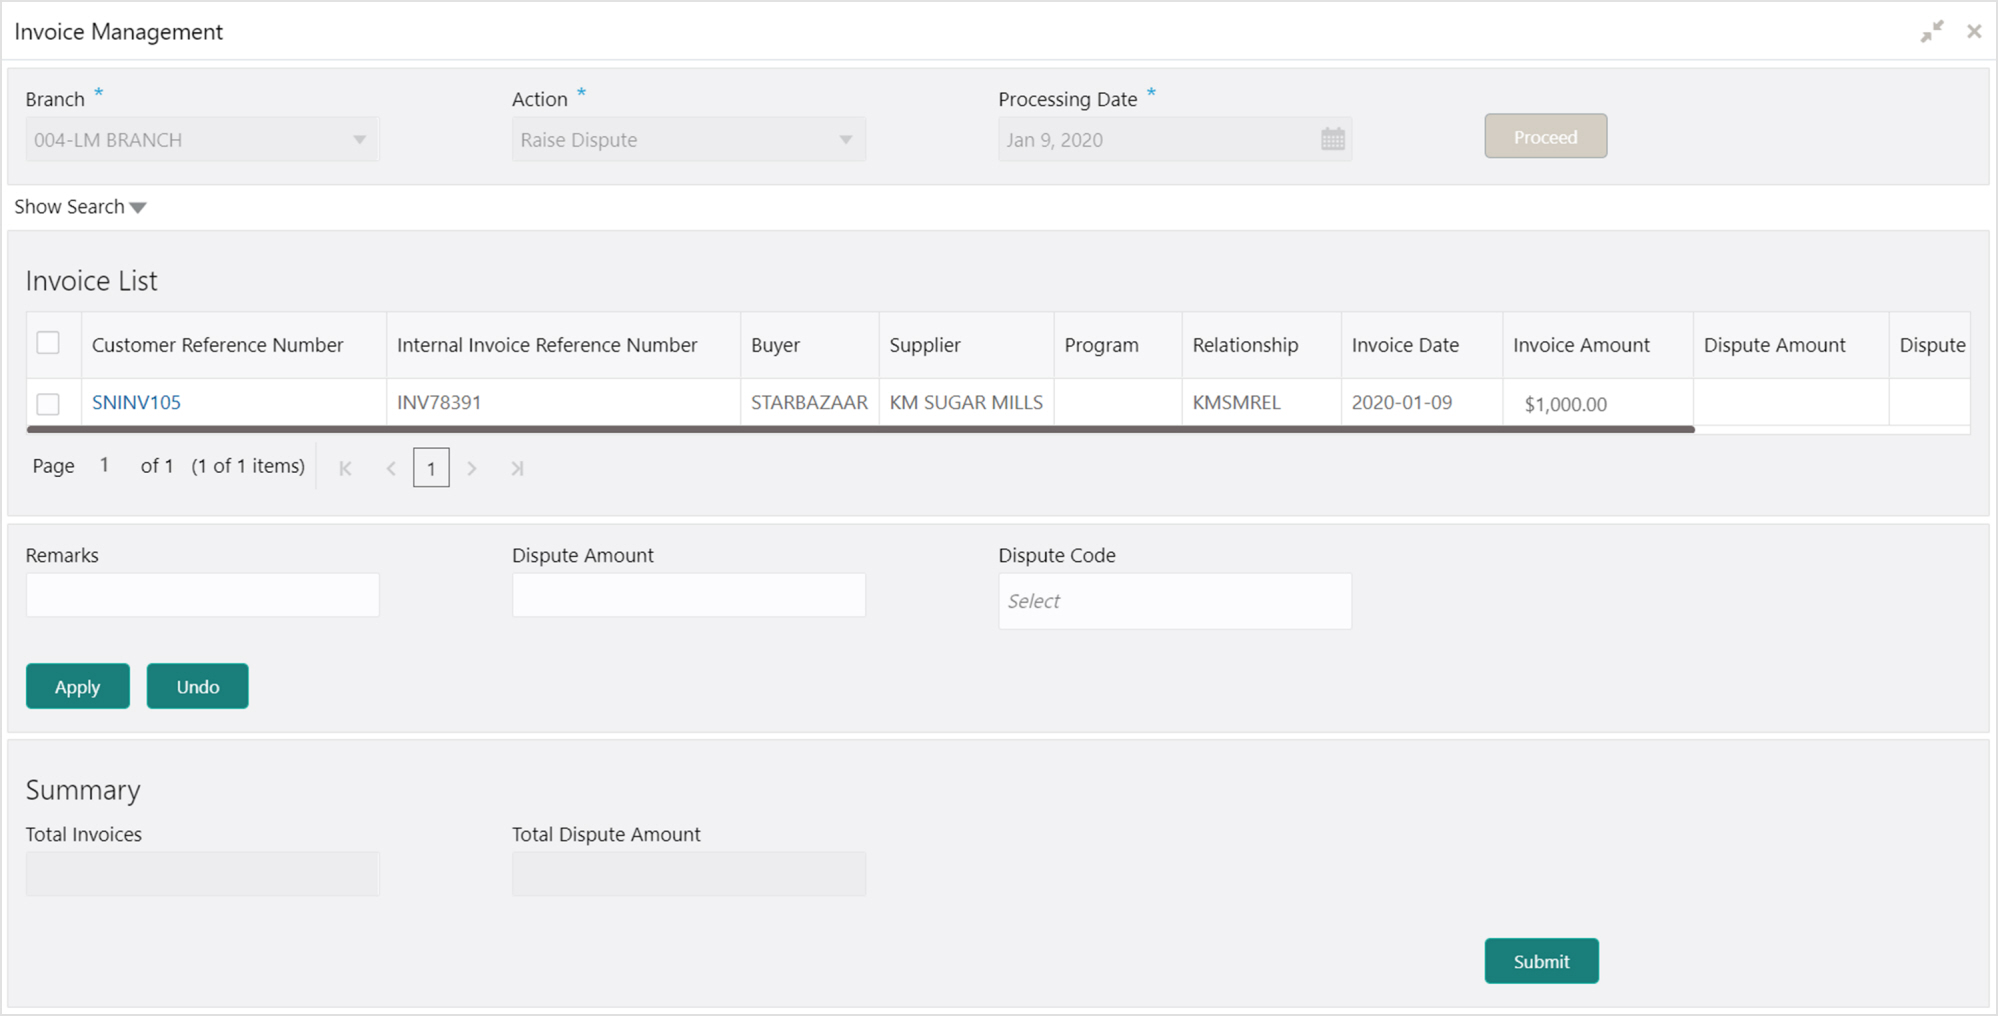
1. Optional: In the Customer Reference Number column, click the link to view more details about it.
2. Select the invoice to raise the dispute for.
3. Optional: In the Remarks field, enter the remarks for the disputed amount.
4. In the Dispute Amount field, enter the disputed amount.
5. In the Dispute Code field, select the code for which the dispute is raised.
6. Click Apply to make changes in the grid.
7. If required, click Undo to revert the applied changes.
8. Click Submit to raise dispute for the invoice and send for authorization (if applicable).
Perform the following steps post searching the invoices for ‘Re-Assignment Invoice’ action:

1. Optional: In the Customer Reference Number column, click the link to view more details about it.
2. Select the invoice to be re-assigned.
3. In the ‘Financeable Amount’ field of the grid, enter the amount to be financed.
4. Optional: In the Remarks field, enter the remarks for the disputed amount.
5. Click Apply to make changes in the grid.
6. If required, click Undo to revert the applied changes.
7. Click Submit to re-assign the invoice and send for authorization (if applicable).
Perform the following steps post searching the invoices for ‘Resolve Dispute’ action:
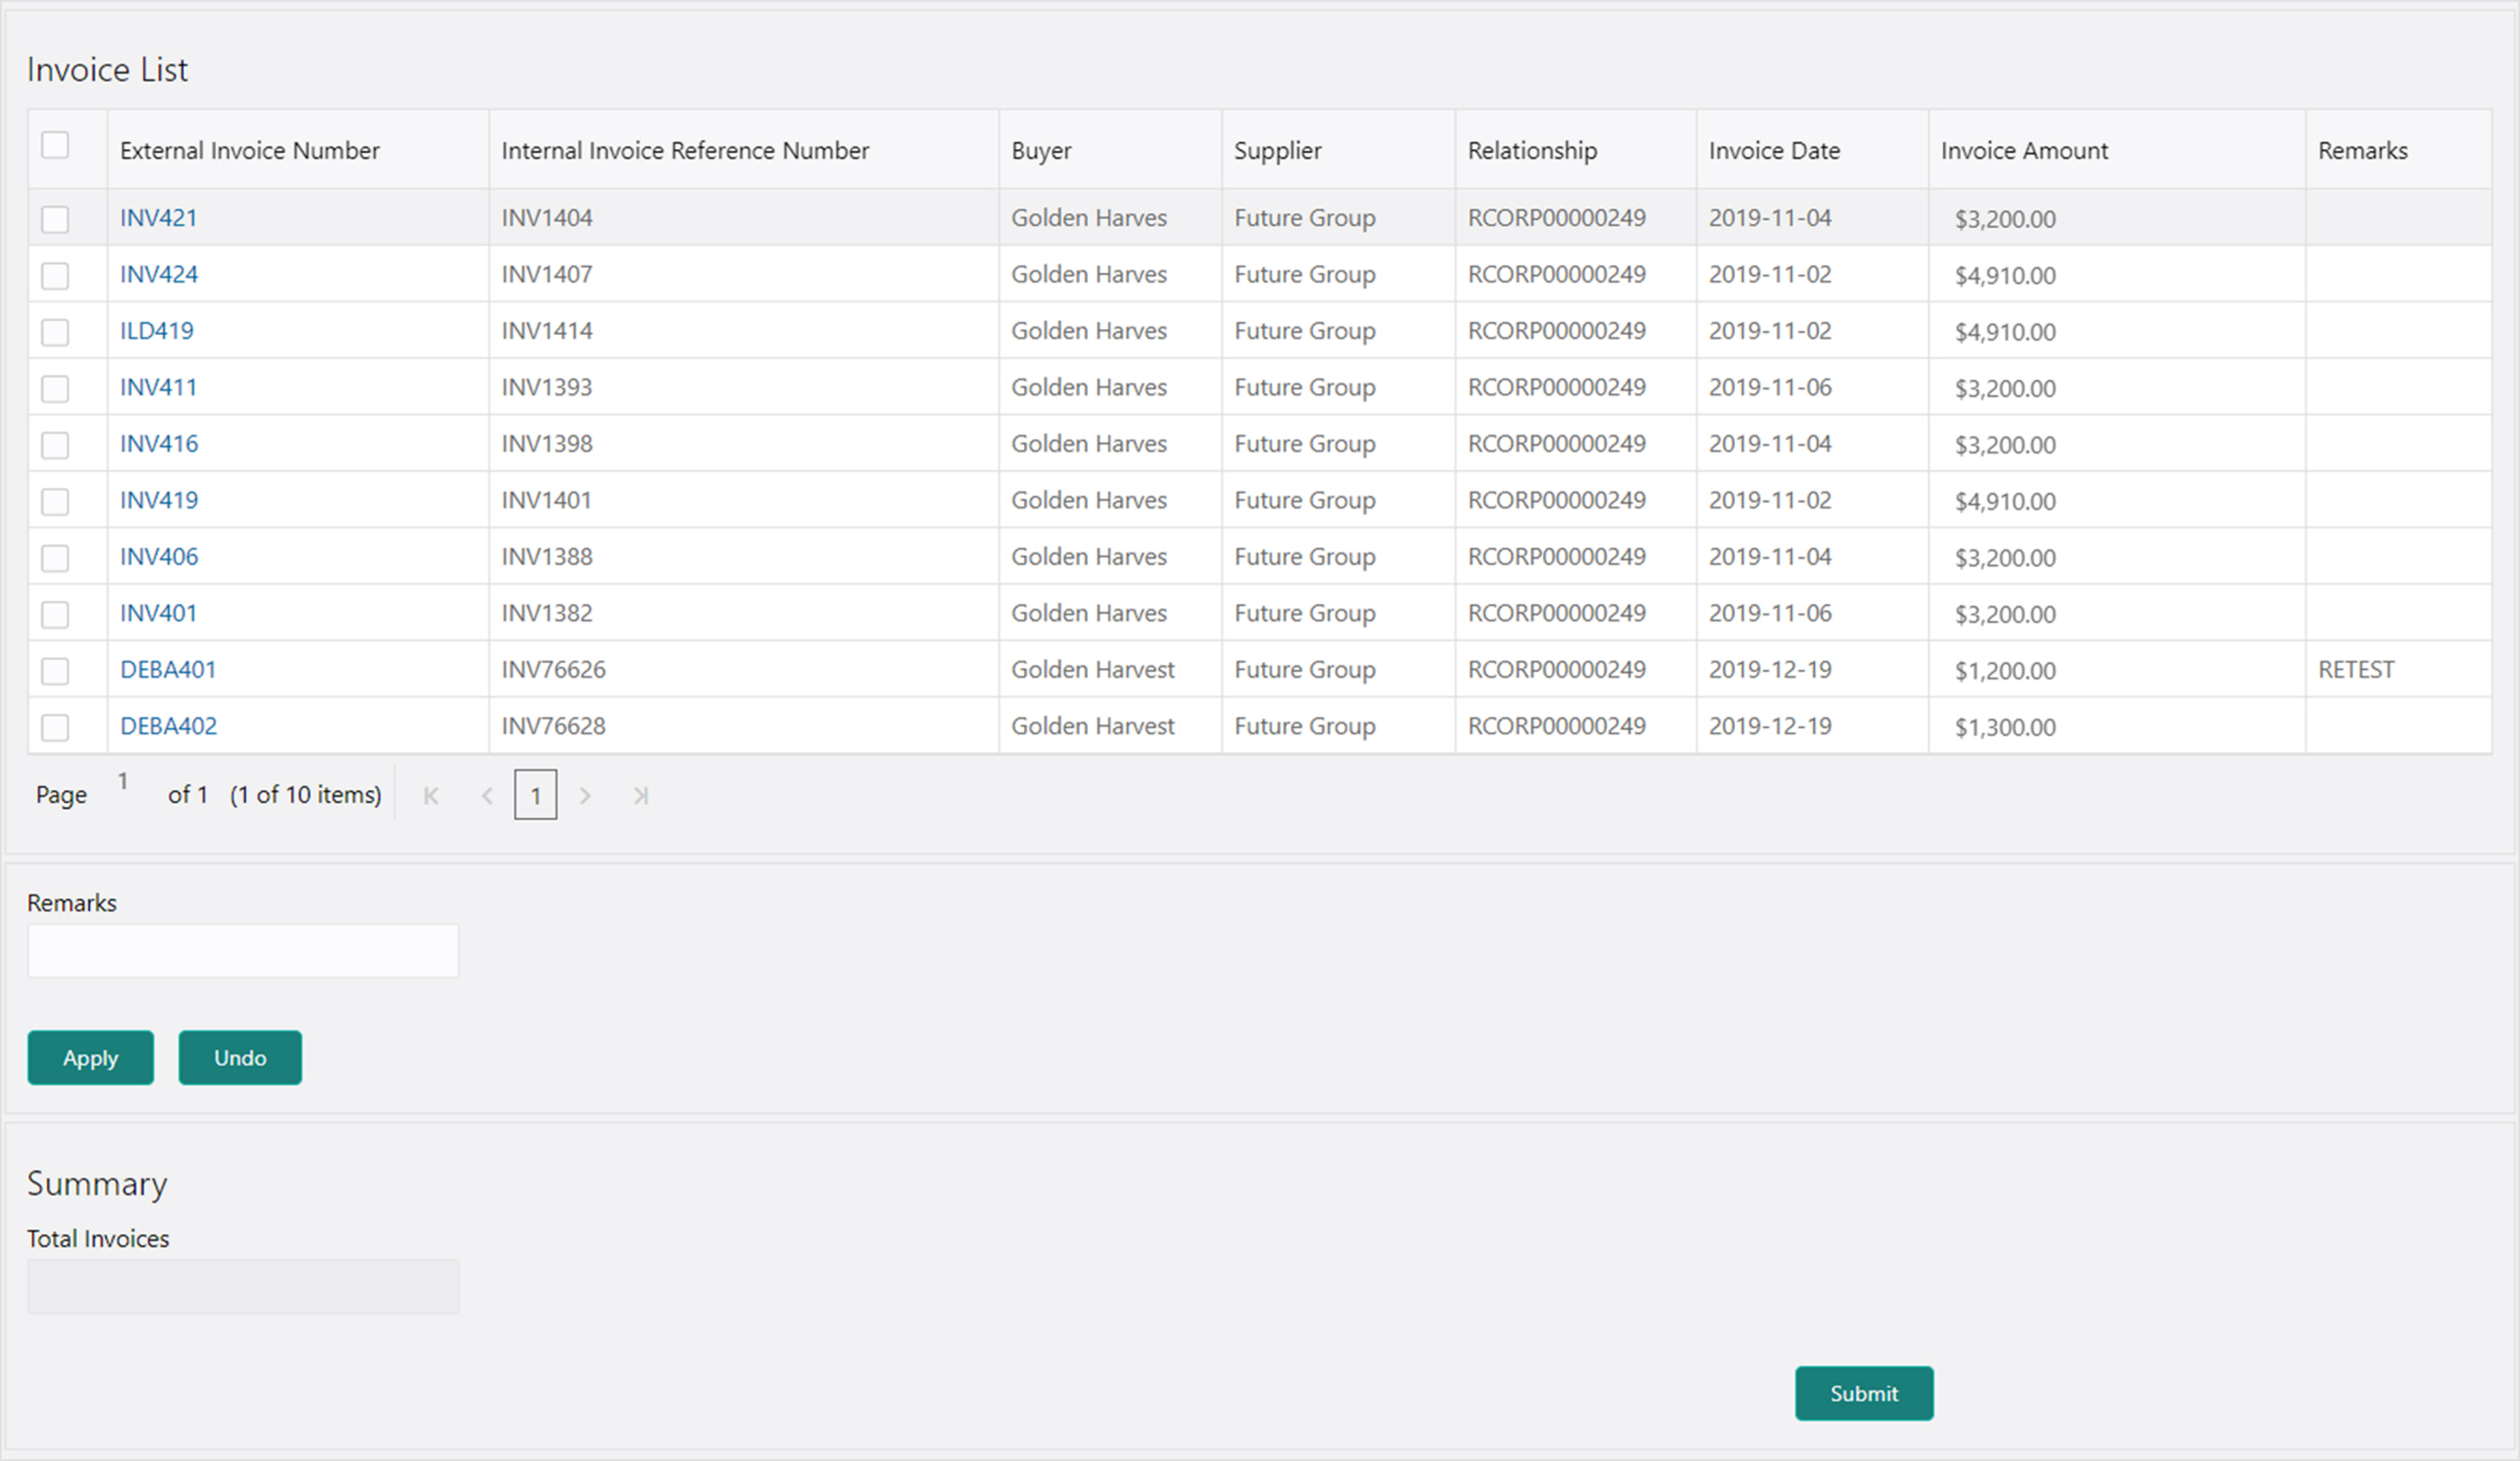
1. Optional: In the External Invoice Number column, click the link to view more details about it.
2. Select the invoice to resolve the dispute for.
3. Optional: In the Remarks field, enter the remarks for the dispute resolution.
4. Click Apply to make changes in the grid.
5. If required, click Undo to revert the applied changes.
6. Click Submit to resolve dispute on the invoice and send for authorization (if applicable).
Perform the following steps post searching the invoices for ‘Write off Dispute’ action:
1. Optional: In the External Invoice Number column, click the link to view more details about it.
2. Select the invoice to write-off the dispute for.
3. Optional: In the Remarks field, enter the remarks for writing-off the disputed amount.
4. Click Apply to make changes in the grid.
5. If required, click Undo to revert the applied changes.
6. Click Submit to write-off the disputed invoice and send for authorization (if applicable).