The ‘Manual Recon’ screen helps to manually ‘Reconcile’ or ‘De-Reconcile’ the payments against the invoices or cashflows in case of exceptions in auto recon process.
In manual reconciliation, back office user can search and reconcile records basis on invoice related attributes, payment related attribute, or cashflow related attributes depending upon the selected reconciliation category. From the search result, you can choose how to reconcile the data i.e. ‘One Invoice to Many Payments’ or ‘Many Invoice to One Payment’ or ‘One Cashflow to Many Payment’ etc.
Similarly, you can de-reconcile any record that was reconciled manually or automatically. This is useful to correct the reconciliation, incorrectly done manually or by automatic rule engine.
You can select a value from the list for the field ‘Reconciled by’. Based on the value selected, the grid below will enable/disable ‘Invoices/Cashflows’ and/or ‘Payments’ row post selection.
Navigation Path: Receivables > Manual Recon
Search
The parameters to search the transactions for performing the manual reconciliation differs as per the recon category. Mainly there are two categories viz. ‘Invoice to Payment recon’ and ‘Expected Cashflow recon’.
Perform the following steps for searching the invoices/payments to reconcile or de-reconcile.


1. In the Action field, select the action to be performed as reconciliation or de-reconciliation.
2. In the Recon Category list, select the category to specify whether the recon is for payment or expected cashflow.
3. In the Branch list, select the branch for which reconciliation needs to be done. By default, branch of the logged-in user is selected.
4. Click Proceed to view the search parameters to search transactions.
Refer to the following table for specifying details on the above search screen:
|
Field Name |
Description |
|
DeReconcile Method |
Specify whether the reconciliation was done by using ‘Auto’ or ‘Manual’ method. This field is displayed only when ‘Action’ is selected as ‘De Reconcile’. |
|
Manual Reconcilation Reference No |
Click the Search icon to select the reconciliation reference number. This field is mandatory and displayed for only ‘Manual’ de-reconciliation method. |
|
Reconcile Date From |
Click the Calendar icon to specify start date of range within which record was reconciled. This field is displayed only when ‘Action’ is selected as ‘De Reconcile’. |
|
Reconcile Date To |
Click the Calendar icon to specify end date of range within which record was reconciled. This field is displayed only when ‘Action’ is selected as ‘De Reconcile’. |
|
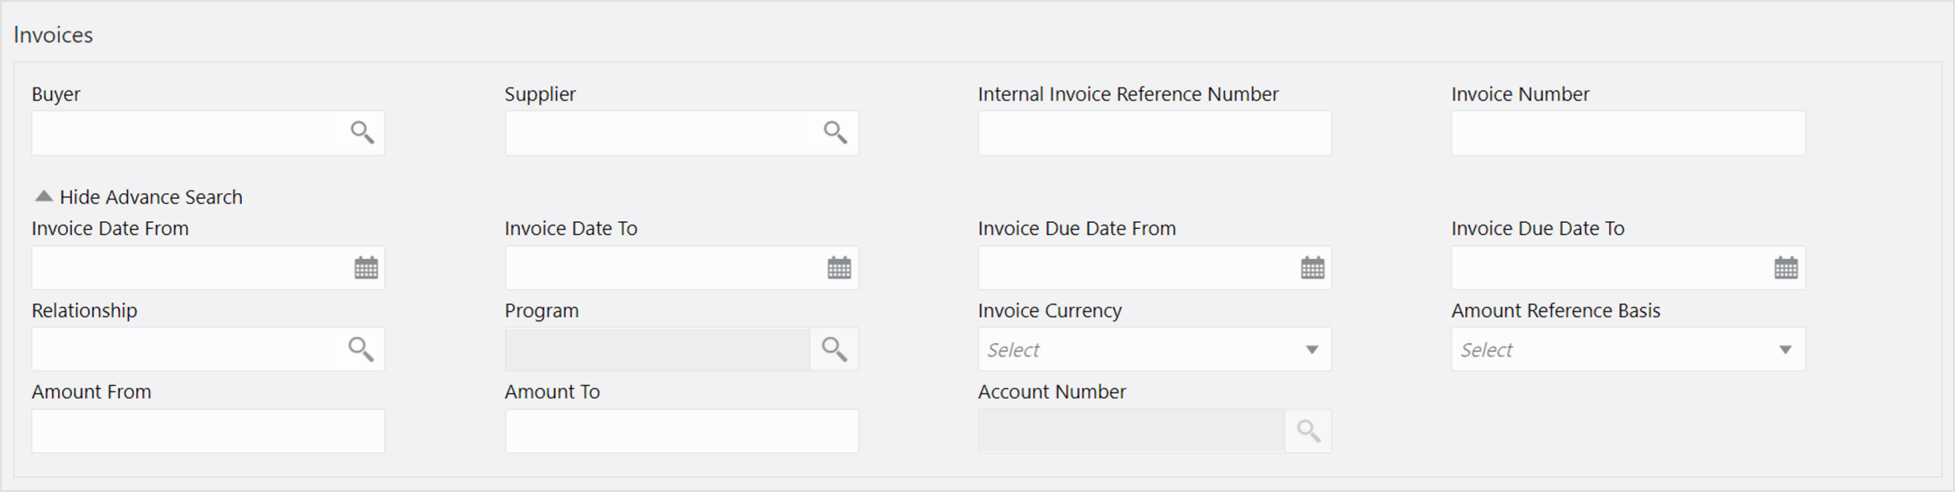
For Invoices |
|
|
Buyer |
Click the Search icon to search buyer mentioned in the invoice. |
|
Supplier |
Click the Search icon to search supplier by whom invoice is generated. |
|
Internal Invoice Reference Number |
Enter the specific internal invoice reference number to search. |
|
Customer Reference Number |
Enter the specific customer reference number that is included in the invoice. |
|
Invoice Date From |
Click the Calendar icon to specify the start date of range within which invoice is generated. |
|
Invoice Date To |
Click the Calendar icon to specify the end date of range within which invoice is generated. |
|
Invoice Due Date From |
Click the Calendar icon to specify the start date of range within which invoice is due. |
|
Invoice Due Date To |
Click the Calendar icon to specify the end date of range within which invoice is due. |
|
Relationship |
Click the Search icon to select the relationship code used in the transaction. |
|
Program |
Click the Search icon to select the program linked with the invoice. |
|
Invoice Currency |
Enter the currency selected for Invoice. |
|
Amount Reference Basis |
Select the reference basis of the amount range as base invoice amount or net invoice amount. |
|
Amount From |
Enter the lowest amount of the range. |
|
Amount To |
Enter the highest amount of the range. |
|
Account Number |
Click the Search icon to select the account number. This field is enabled only after selecting supplier. |
|
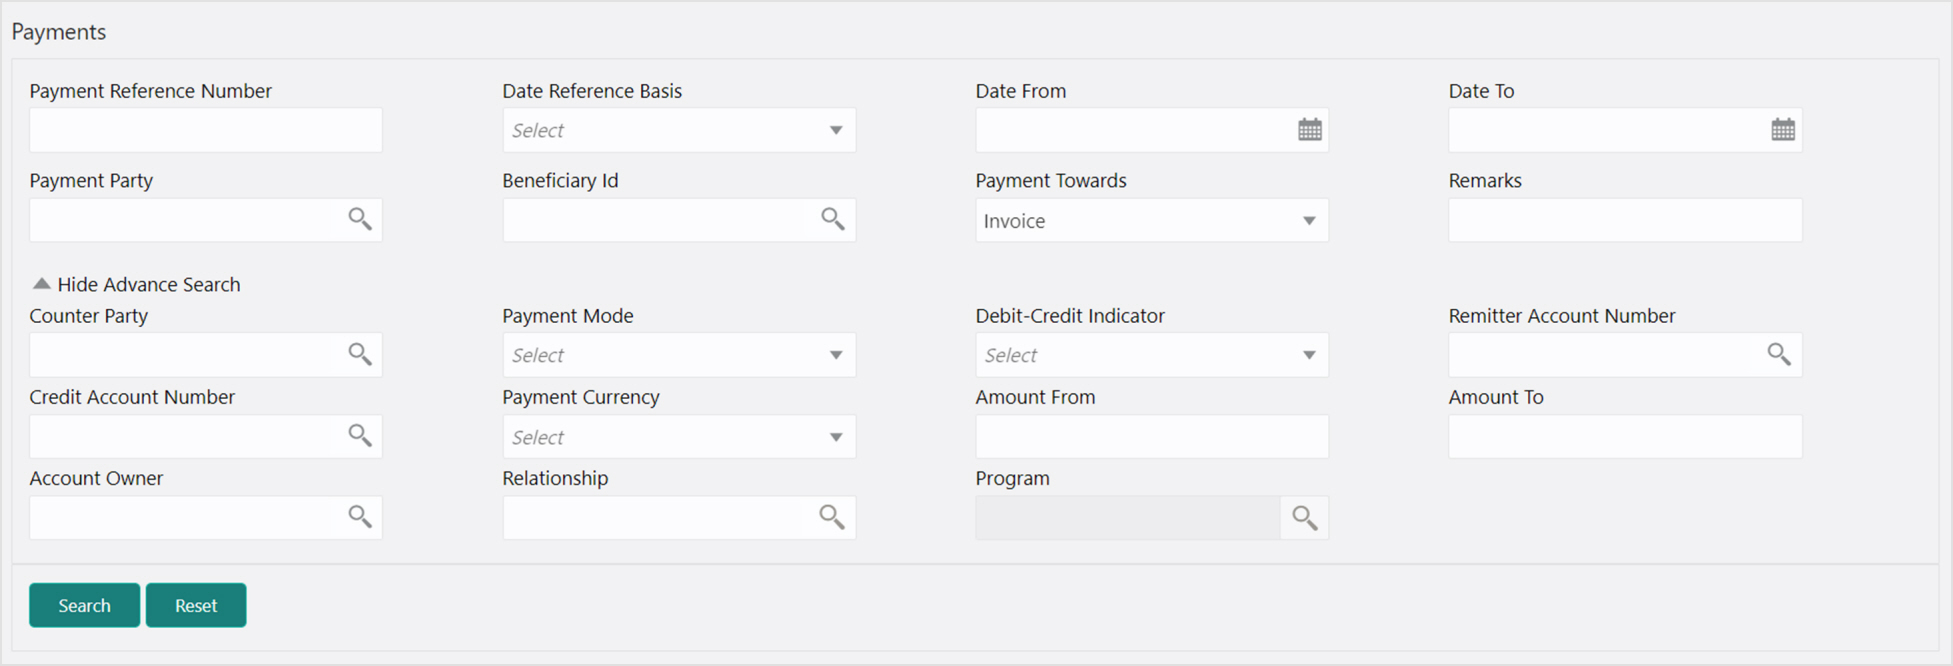
For Payments |
|
|
Payment Reference Number |
Enter the unique reference number generated while making a payment. |
|
Date Reference Basis |
Select the reference basis of the date range as payment date or value date. |
|
Date From |
Click the Calendar icon and select the start of the date-range. |
|
Date To |
Click the Calendar icon and select the end of the date-range. |
|
Payment Party |
Click the Search icon to select the party who made the payment. |
|
Beneficiary Id |
Click the Search icon to select the beneficiary id or name who received the payment. In case if supplier is selected in the ‘Invoice’ search parameter; then the same gets auto-populated here. |
|
Payment Towards |
Select the value from below to specify towards what the payment is made: • None • Finance • Invoice • Expected Cashflow • Virtual Account |
|
Remarks |
Enter the remarks added in the transaction. |
|
Counter Party |
Click the Search icon to select the counterparty. |
|
Payment Mode |
Select the mode by using which payment was done. For example: Account Transfer, NEFT etc. |
|
Debit-Credit Indicator |
Select the value to specify whether the transaction is of debit or credit type. |
|
Remitter Account Number |
Click the Search icon and select the remitter account of the transaction. |
|
Credit Account Number |
Click the Search icon and select the account credited with the amount. |
|
Payment Currency |
Select the currency in which payment is done. |
|
Amount From |
Select the minimum amount of the payment range. |
|
Amount To |
Select the maximum amount of the payment range. |
|
Account Owner |
Click the Search icon and select the owner of the account. |
|
Relationship |
Click the Search icon to select the relationship code used in the transaction. |
|
Program |
Click the Search icon to select the linked program. |
5. Optional: Click Reset clear the selected values.
6. Click Search to view the result.
Perform the following procedure for searching the invoices/payments to reconcile or de-reconcile.


1. In the Action field, select the action to be performed as reconciliation or de-reconciliation.
2. In the Recon Category list, select the category to specify whether the recon is for payment or expected cashflow.
3. In the Branch list, select the branch for which reconciliation needs to be done. By default, branch of the logged-in user is selected.
4. Click Proceed to view the search parameters to search transactions.
Refer to the following table for specifying details on the above search screen:
Note: Fields marked with ‘*’ are mandatory.
|
Field Name |
Description |
|
DeReconcile Method |
Specify whether the reconciliation was done by using ‘Auto’ or ‘Manual’ method. This field is displayed only when ‘Action’ is selected as ‘De Reconcile’. |
|
Manual Reconcilation Reference No |
Click the Search icon to select the reconciliation reference number. This field is mandatory and displayed for only ‘Manual’ de-reconciliation method. |
|
Reconcile Date From |
Click the Calendar icon to specify start date of range within which record was reconciled. This field is displayed only when ‘Action’ is selected as ‘De Reconcile’. |
|
Reconcile Date To |
Click the Calendar icon to specify end date of range within which record was reconciled. This field is displayed only when ‘Action’ is selected as ‘De Reconcile’. |
|
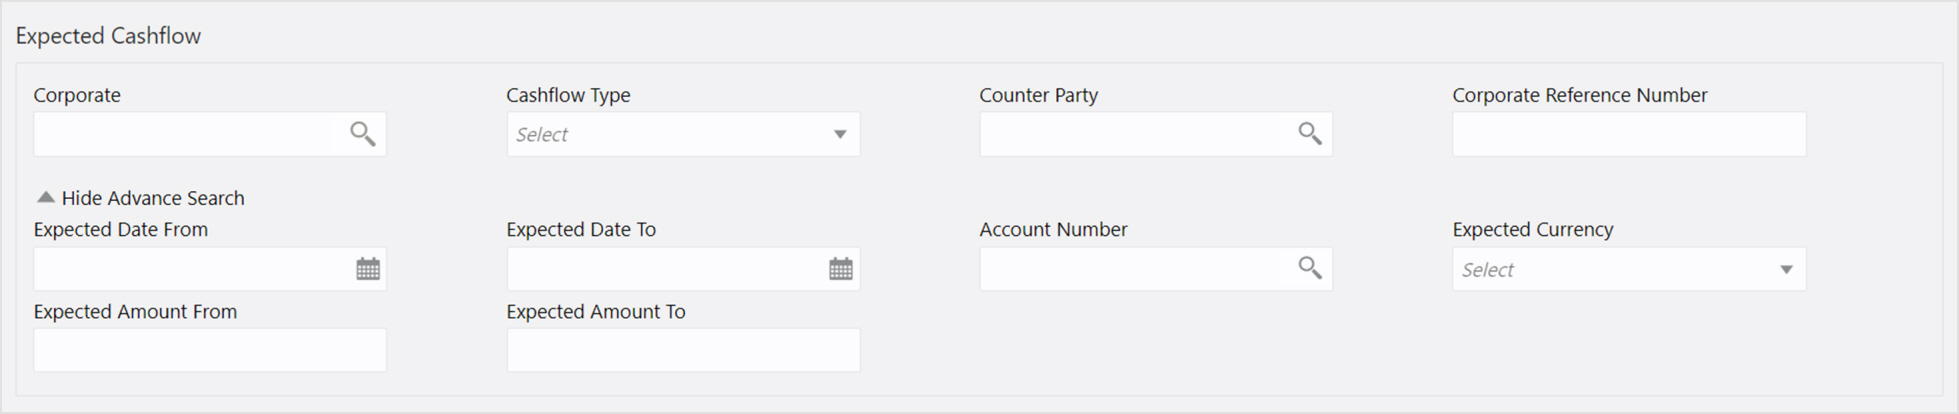
For Expected Cashflow |
|
|
Corporate * |
Click the Search icon to select the corporate from whom the cashflow is expected. |
|
Cashflow Type * |
Select the value to specify whether it is inflow or outflow of cash. |
|
Counter Party |
Click the Search icon to select the counter party involved. |
|
Corporate Reference Number |
Enter the corporate reference number to search the cashflow details for. |
|
Expected Date From |
Click the Calendar icon and select the date from when the cashflow is expected. |
|
Expected Date To |
Click the Calendar icon and select the date till when the cashflow is expected. |
|
Account Number |
Click the Search icon to select the account number. |
|
Expected Currency |
Enter the currency in which cashflow is expected. |
|
Expected Amount From |
Enter the lowest amount of the range. |
|
Expected Amount To |
Enter the highest amount of the range. |
|
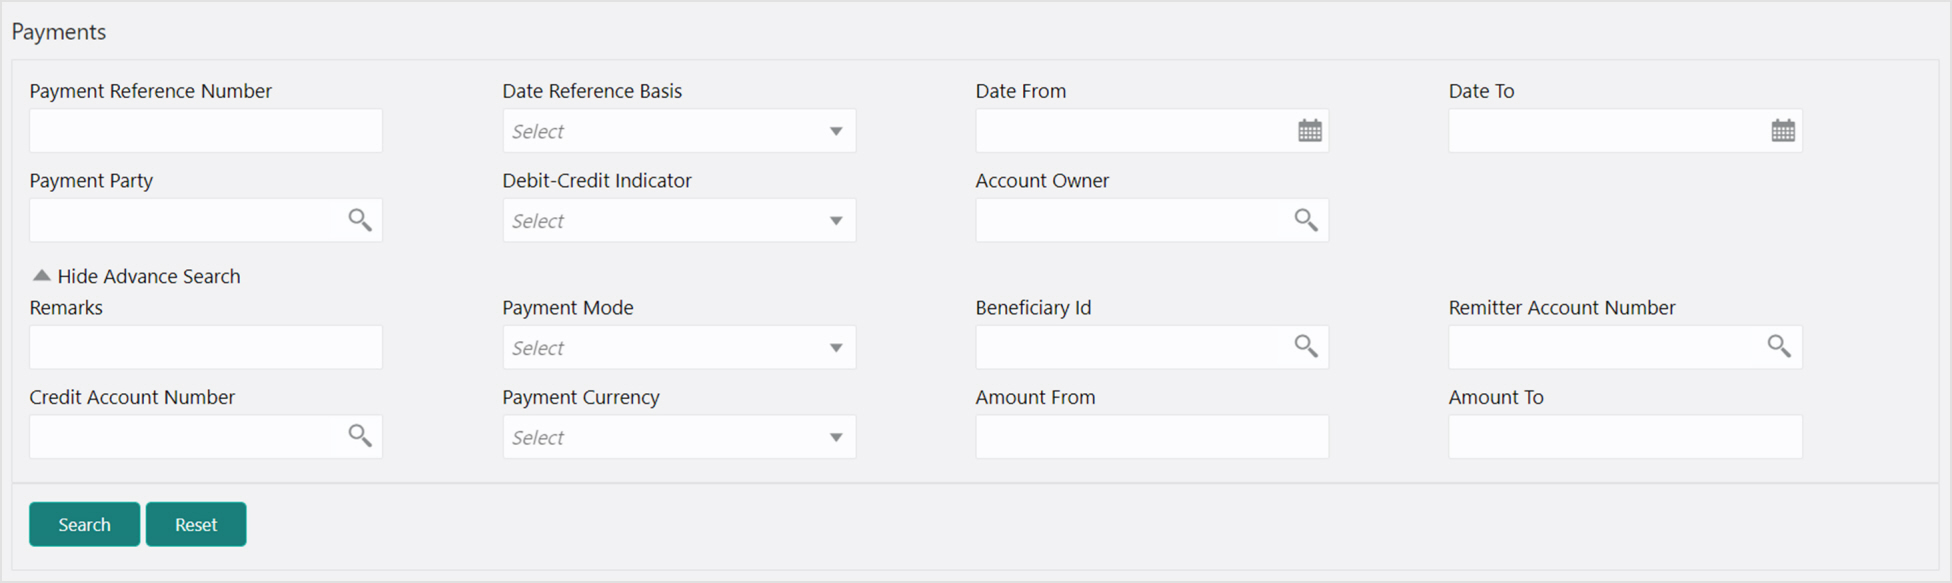
For Payments |
|
|
Payment Reference Number |
Enter the unique reference number generated while making a payment. |
|
Date Reference Basis |
Select the reference basis of the date range as payment date or value date. |
|
Date From |
Click the Calendar icon and select the start of the date-range. |
|
Date To |
Click the Calendar icon and select the end of the date-range. |
|
Payment Party |
Click the Search icon to select the party who made the payment. |
|
Debit-Credit Indicator |
Select the value to specify whether the transaction is of debit or credit type. |
|
Account Owner |
Click the Search icon and select the owner of the account. |
|
Payment Towards |
Select the value from below to specify towards what the payment is made: • None • Finance • Invoice • Expected Cashflow • Virtual Account |
|
Remarks |
Enter the remarks added in the transaction. |
|
Payment Mode |
Select the mode by using which payment was done. For example: Account Transfer, NEFT etc. |
|
Beneficiary Id |
Click the Search icon to select the beneficiary id or name who received the payment. In case if supplier is selected in the ‘Invoice’ search parameter; then the same gets auto-populated here. |
|
Remitter Account Number |
Click the Search icon and select the remitter account of the transaction. |
|
Credit Account Number |
Click the Search icon and select the account credited with the amount. |
|
Payment Currency |
Select the currency in which payment is done. |
|
Amount From |
Select the minimum amount of the payment range. |
|
Amount To |
Select the maximum amount of the payment range. |
5. Optional: Click Reset to clear the selected values.
6. Click Search to view the result.
On clicking the Search for selected criteria, the resulting invoices/cashflows and payments are populated in the grid below. In case, multiple unreconciled invoices/cashflows and/or payments for the searched criteria, all will be populated as show below.
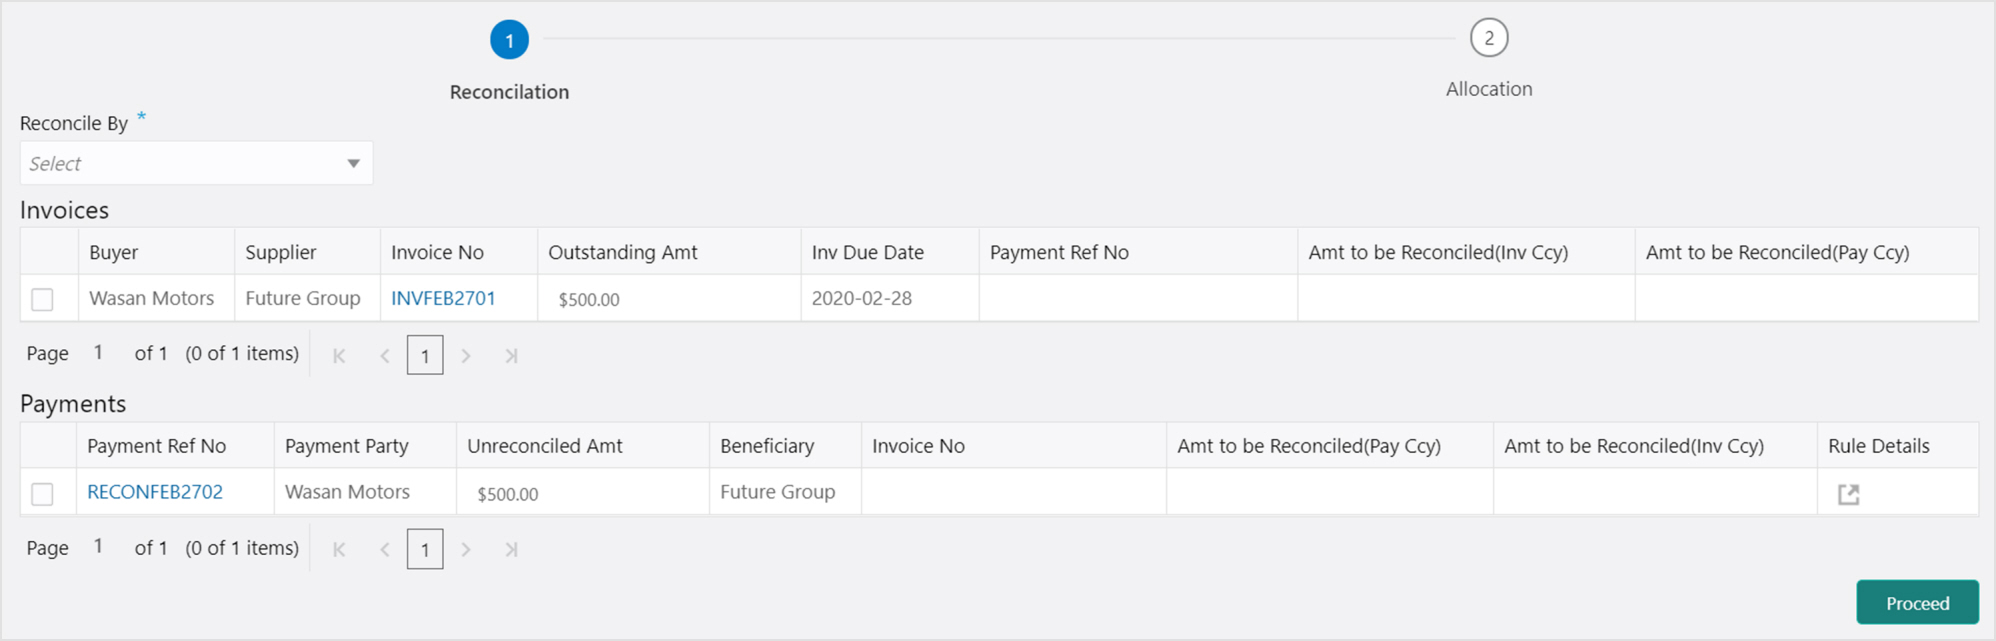
Perform the following steps on the search result displayed in the grid:
1. In the Reconciled By field, select any of the following:
- Many Invoice/Cashflow to Many Payment – To reconcile multiple invoices/cashflows from multiple payments.
- One Invoice/Cashflow to Many Payment – To reconcile single invoice/cashflow from multiple payments.
- One Payment to Many Invoice/Cashflow – To reconcile multiple invoices/cashflow from single payment.
2. In the ‘Invoices/Cashflows’ section:
- Select the invoice(s)/cashflow(s) to reconcile.
- In the Payment Ref No column, enter the payment reference number of the selected payment in the ‘Payments’ section.
- In the Amount to be Reconciled (Inv Ccy) column, enter the amount to be reconciled in the invoice currency.
- Similarly, in the Amount to be reconciled (Pay Ccy) column, enter the amount to be reconciled in payment currency.
3. In the ‘Payments’ section:
- Select the payment to reconcile.
- In the Invoice/Cashflow No column, enter the external reference number of the invoice to make the payment for.
- In the Amount to be reconciled (Pay Ccy) column, enter the amount to be paid in payment currency.
- In the Amount to be reconciled (Inv Ccy) column, enter the amount to be paid in the invoice currency.
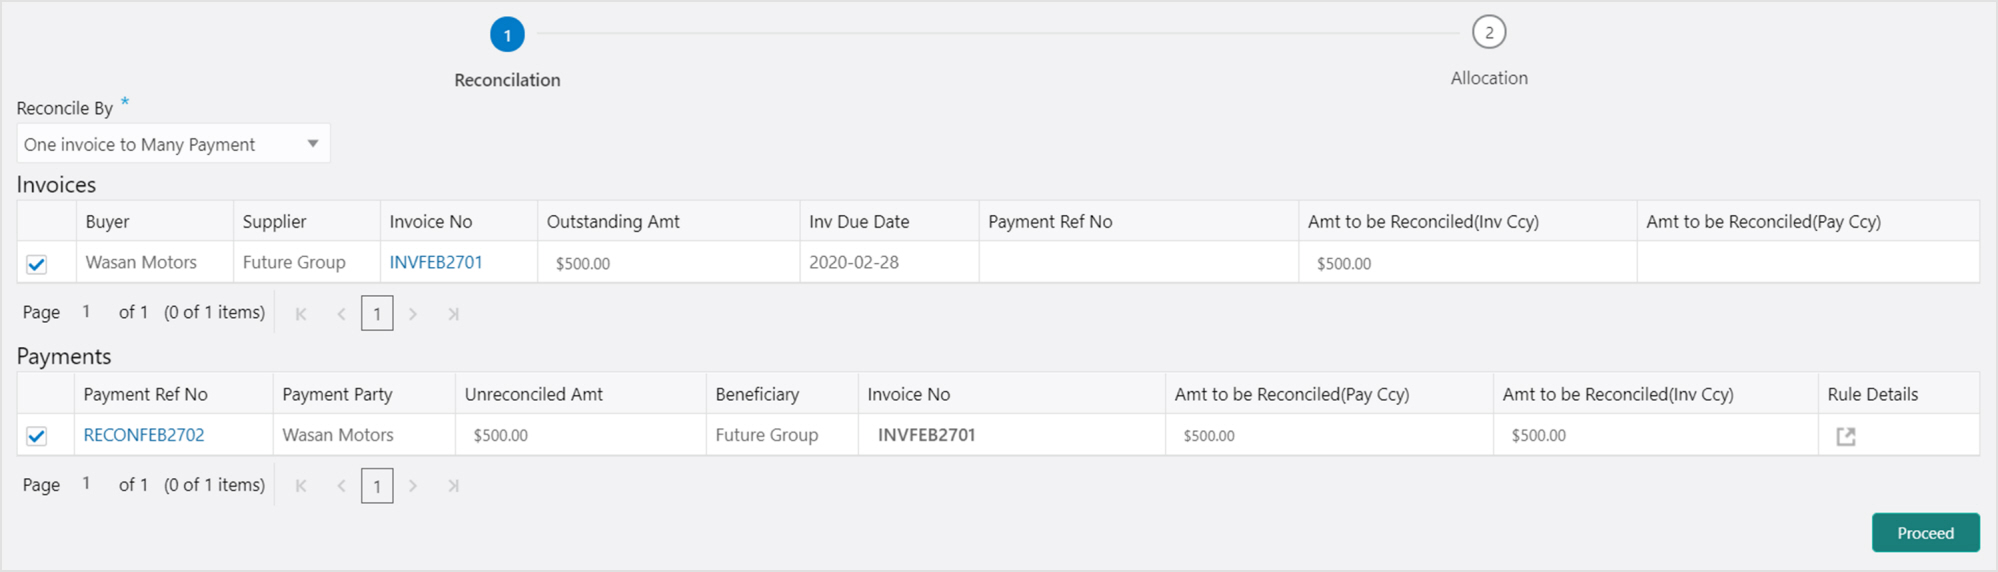
4. Optional: In the Rule Details column of Payments section, click  to view rule details.
5. Click Proceed to move to the ‘Allocation’ stage.

6. Perform the following steps to allocate payment manually:
a. In the Allocation Required column, enable the toggle to allocate account and percentage.
b. In the Virtual Account column, select the account to be allocated.
c. In the Allocated Amount column, enter the amount to be allocated for the respective virtual account.
d. In the Percentage column, enter the percentage of the amount.
7. Click Submit to confirm the reconciliation and send the record for authorization.
You can use this option to de-reconcile invoice/cashflow to payment that are reconciled incorrectly due to some erroneous mapping of payments to an invoice/cashflow either automatically or manually. This screen allows you to select multiple records or single record to de-reconcile.
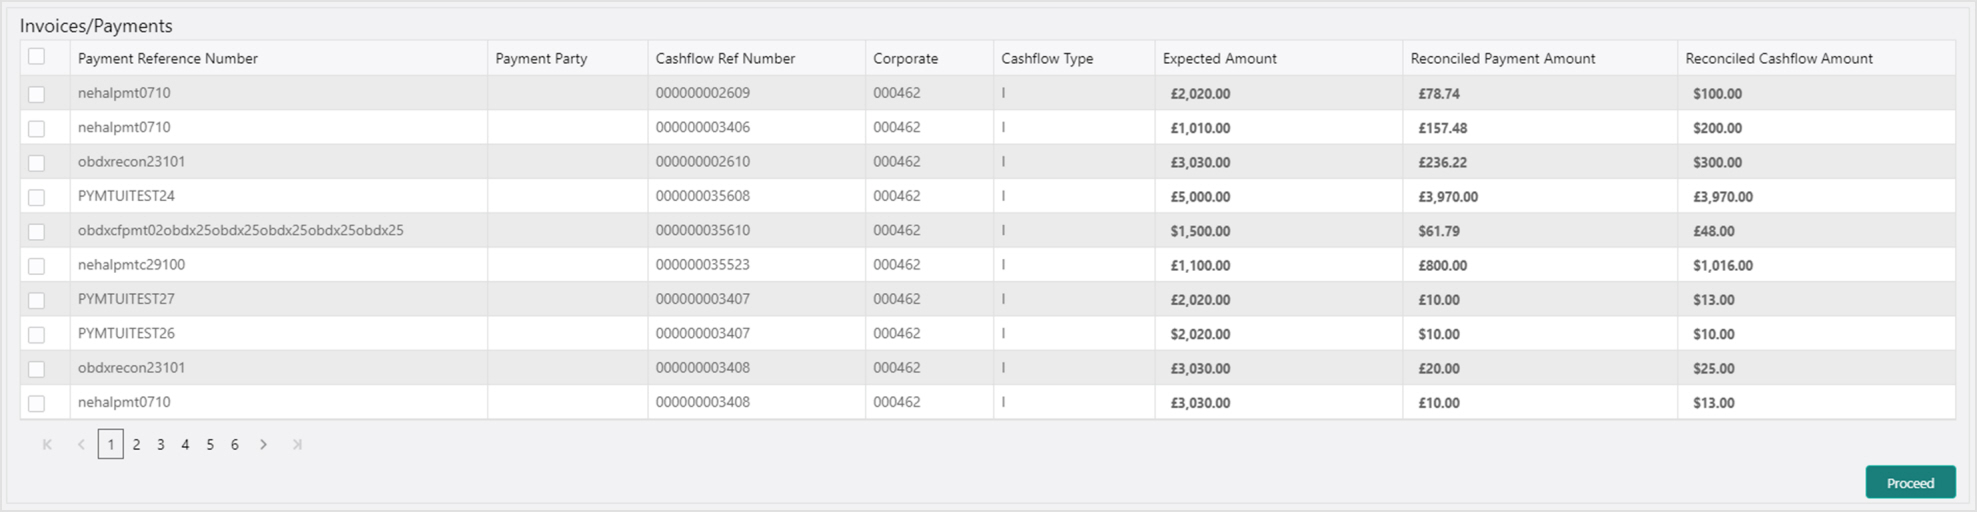
Perform the following action on the search result displayed in the grid:
1. In the Invoices/Payments or Cashflows/Payments section, select the record to de-reconcile.
2. Click Proceed to send the record for authorization of de-reconciliation.