3 Tax Maintenance
Centralized tax maintenance functionality allows the tax configuration to be done using tax rules instead of setting the taxes item by item. The concept of tax rules provides simpler setup performed at higher level such as tax region and merchandise hierarchy. This concept makes it easier for the management of tax setup as well as its maintenance over the time.
Centralized tax maintenance supports user access restrictions and is available via tax screens and the download/upload process (induction).
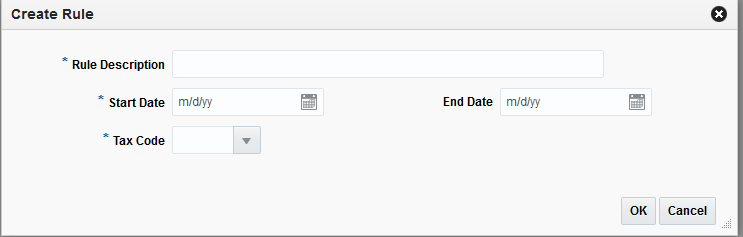
Create Rules
To create a tax rule, follow the steps below.
-
From the Tasks menu select, Taxes > Create Rule. The Create Rule pop-up appears.
-
In the Rule Description field, enter a description for the tax rule.
-
In the Start Date field, select the date on which the tax rule will take effect.
-
In the End Date field, select the date on which the tax rule will expire.
-
In the Tax Code field, select the tax code for the rule.
-
Click OK to save create the tax rule. The Tax Rule page opens.
-
Click Cancel to return to the Tasks menu without saving the tax rule.
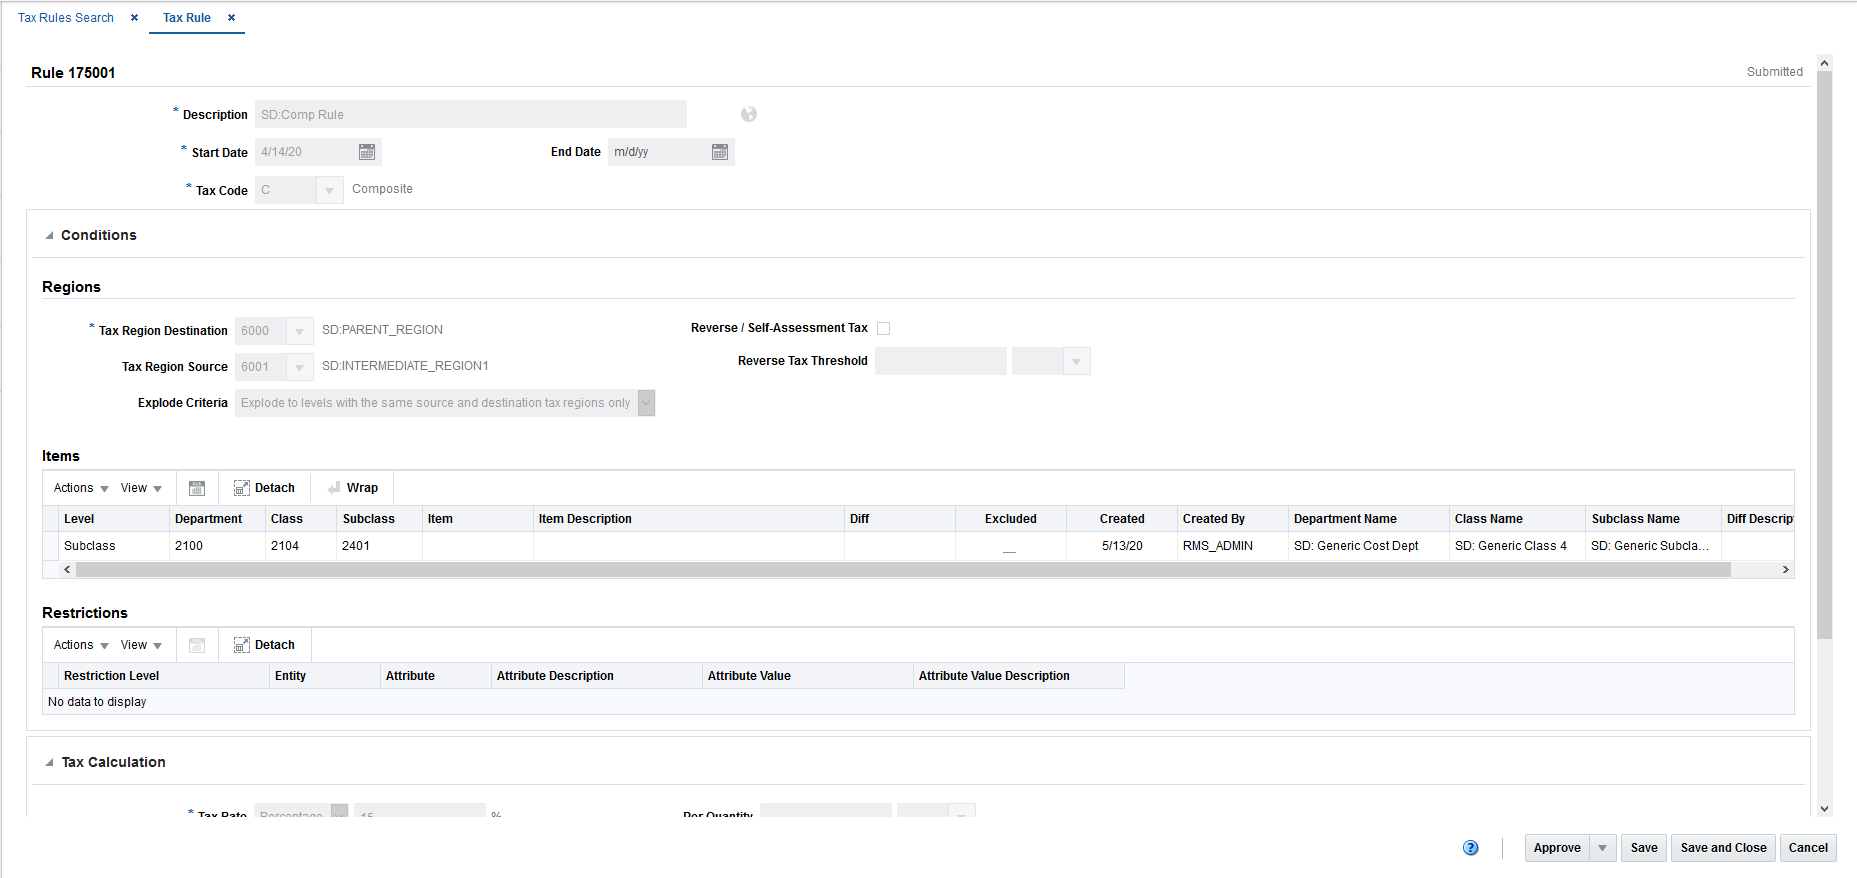
Tax Rule Header
Once a tax rule is created, the Tax Rule page appears. The Tax Rule page allows you to enter additional information about the tax rule.
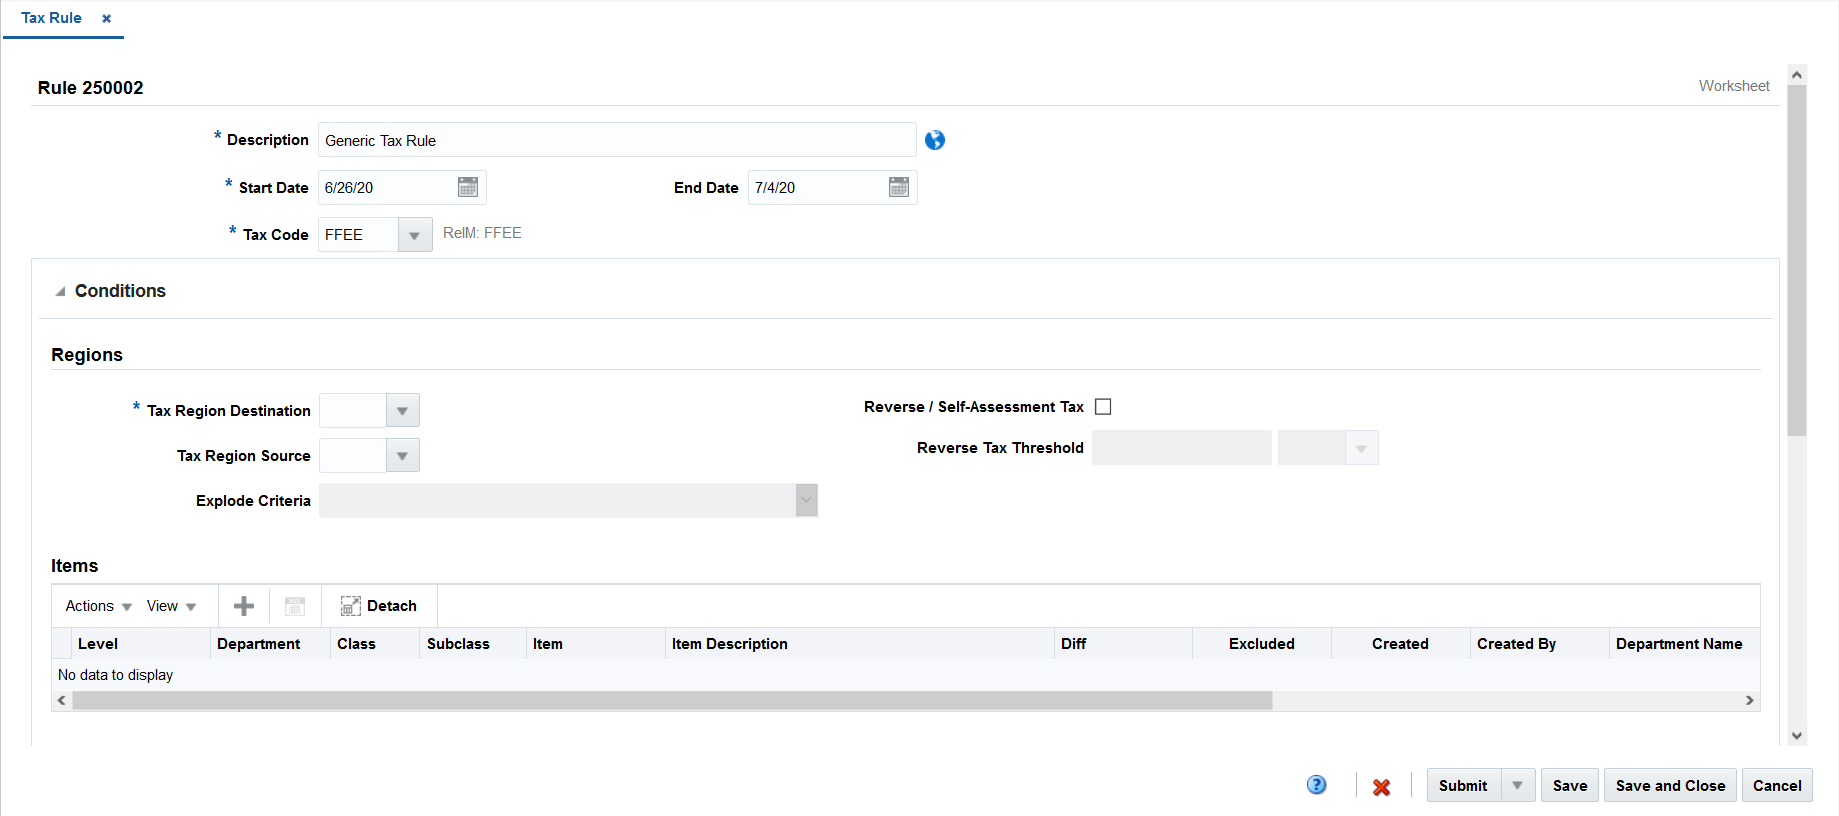
Table 3-1 Tax Rule Header - Fields and Descriptions
| Field | Description |
|---|---|
|
Rule |
The Tax Rule internal sequence number. |
|
Description and translation icon |
The Tax Rule description that was defined on the Create Rule pop-up. The Translation icon appears next to the Description field and can be used to translate the description. |
|
Start Date |
The tax rule start date defined on the Create Rule pop-up. |
|
End Date |
The tax rule end date defined on the Create Rule pop-up. |
|
Tax Code |
The tax code selected for the tax rule on the Create Rule pop-up. |
|
Status |
The status of the tax rule appears in the top right corner of the Rule identification tab. |
Note:
The Start Date, End Date, and Tax Code fields are editable. However, the remaining fields are displayed based on the information entered in the Create Rule pop-up.Conditions
The Conditions tab groups the Regions, Items and Restrictions sections.
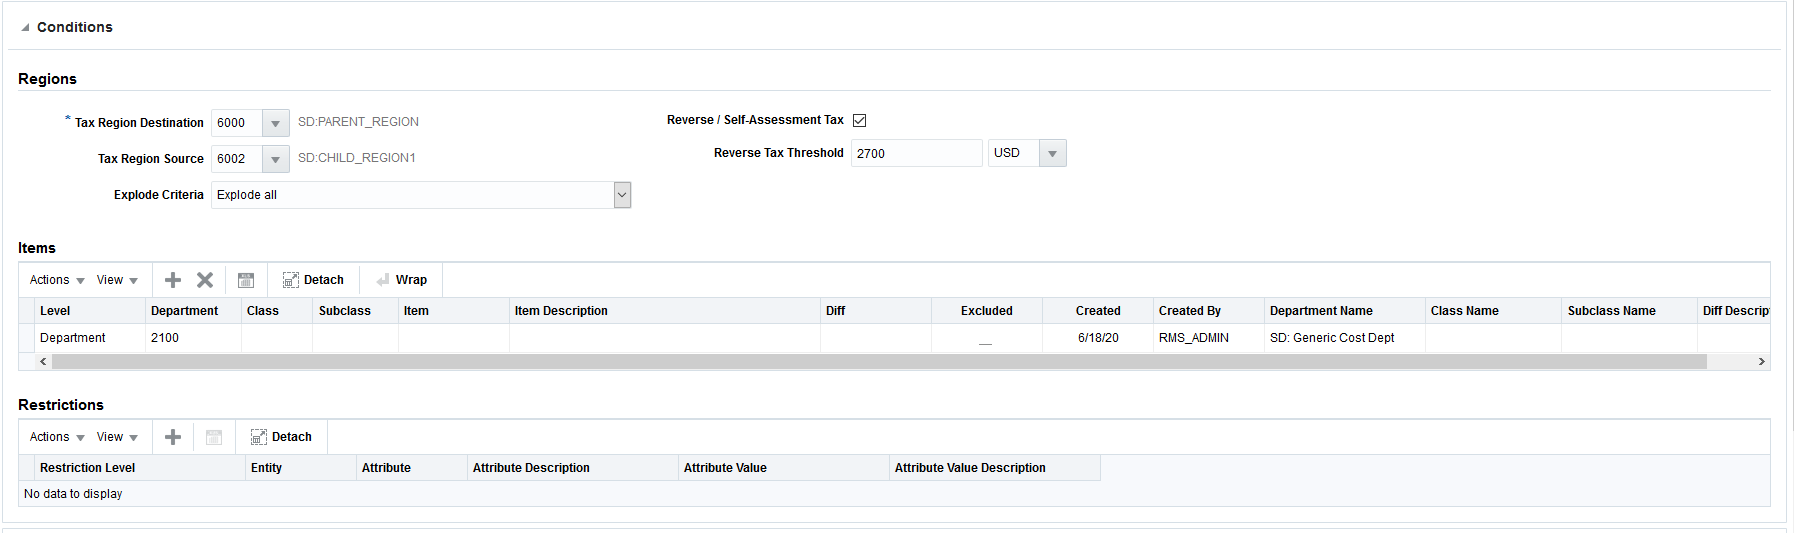
Regions
The Regions section includes the following fields.
Table 3-2 Regions - Fields and Descriptions
| Field | Description |
|---|---|
|
Tax Region Destination |
The destination tax region code for which the tax rule will be applied. |
|
Tax Region Source |
The source tax region code for which the tax rule will be applied. |
|
Reverse / Self-assessment |
Flag for when the tax rule is applied in a Self-assessment operation. |
|
Reverse Tax Threshold |
The threshold amount to be taken into consideration while returning the tax code. |
Items
The Items section allows multi-selection of any level in the merchandise hierarchy like items, item lists, parent diff and even the capacity to upload item lists. It also offers the flexibility to have selected lines as excluded. This functionality enables users to have a selection with multiple lines and with exceptions within the lines selected. For example, it is possible to select all departments to be part of the tax rule, with the exception of one specific class that is created as excluded.
To add items to a tax rule, follow the steps below.
Note:
Only those tax rules that are in Worksheet status can be edited.-
In the Tax Rule page, go to the Items section.
-
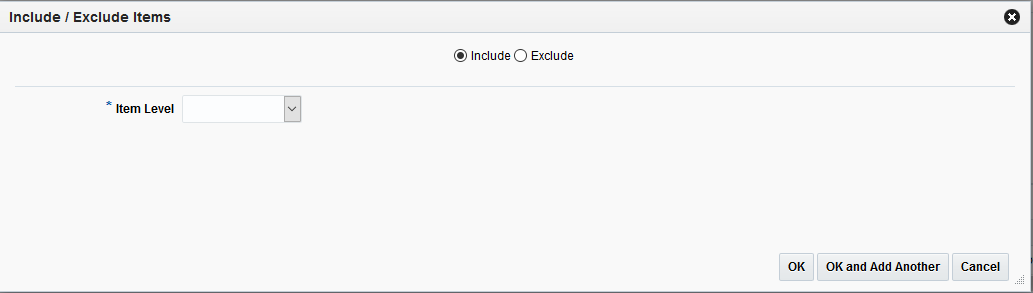
From the Actions menu, select Add or click the Add icon. The Include/Exclude Items pop-up appears.
-
Select Include or Exclude to select whether the items specified in this selection should be included or excluded from the conditions for the rule.
-
In the Item Level field, select the item level to be used to define the items which will be included or excluded from the tax rule.
Table 3-3 Item Tax Rule Fields
Field Description Item Level
Select the item level to be used to define the items to be included or excluded from the selection. Additional fields will be displayed depending on the Item Level selection. Options are:
-
All Departments
-
Department
-
Class
-
Subclass
-
Item
-
Parent/Diff
-
Item List
-
Upload List
Department
Enter (or select) a single department.
This field is enabled when Item Level is Department, Class, or Subclass.
Class
Enter (or select) a single class.
This field is enabled when Item Level is Class or Subclass.
Subclass
Enter (or select) a single subclass.
This field is enabled when Item Level is Subclass.
Item
This field allows for entry of a parent item or transaction item. Enter an item number or use the search icon to look up items. Once the search icon is clicked the standard Item Search and Select window opens.
This field is enabled when Item Level is Item. In the case of a parent item being entered, the transactional child items are listed in the grid.
Parent/Diff
This field only allows for entry of a parent item with the intent to define a diff for item selection. Enter an item or use the search icon to look up items. Once the search icon is clicked the Item Search and Select window opens.
Once the parent item is entered the Diff Type field is enabled.
This field is enabled when Item Level is Parent/Diff.
Diff Type
Confirm or select a Diff Type value.
This field is enabled when a valid parent item has been entered in the Parent/Diff field.
Diff
Confirm or select a Diff value.
This field is enabled when a valid parent item and diff type have been entered.
Item List
This field allows for entry of an Item List that exists in Merchandising. This field supports single item list entry only.
Rebuild List checkbox
Select whether to rebuild the item list.
Depending on the type of list entered in the Item List field, users may have an option to rebuild the list prior to it being applied to the Selected Items table.
Upload List
The Upload List field provides users the ability to upload a previously created data file with the items they want included on the rule. Click the Browse button to select a file. The data file must be created as a comma delimited CSV file.
-
-
Once all information is added, choose one of the following options.
-
Click OK to add the item and close the page.
-
Click OK and Add Another to add additional items.
-
Click Cancel to reject all entries and close the page.
-
Restrictions
Restrictions are attributes added to the rule in order to apply the rule only in the case that the item or entity in the transaction has those attributes. For example, you can create a tax rule for a department and add an item level restriction with attribute X. When items within that department have tax calculated, the restriction is applied only in the case those items have the defined CFAS attribute. Items within the same department but without the CFAS attribute will not have the restriction applied.
To add restrictions to a tax rule, follow the steps below.
Note:
Only those tax rules that are in Worksheet status can be edited.-
In the Tax Rule page, go to the Restrictions section.
-
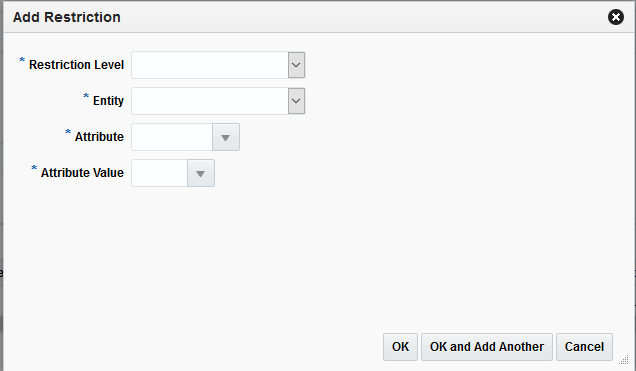
From the Actions menu, select Add or click the Add icon. The Add Restriction pop-up appears.
-
In the Restriction Level field, select the level of restriction for the tax rule. Options are:
-
Destination Region: The tax region to which the restriction at entity level will be defined.
-
Source Region: The tax region to which the restriction at entity level will be defined.
-
Merchandise Hierarchy: Select Merchandise Hierarchy to provide item level restrictions.
-
-
In the Entity field, select the entity to which the restriction applies. Selections in this field depend on the selection in the Restriction Level field.
-
In the Attribute field, select the attribute to which the restriction applies.
-
In the Attribute Value field, select the attribute value ID to which the restriction applies.
-
Once all information is added, choose one of the following options.
-
Click OK to add the restriction to the rule and close the pop-up.
-
Click OK and Add Another to add additional restrictions.
-
Click Cancel to reject all entries and close the pop-up.
-
Tax Calculation
The Tax Calculation tab has the fields that provide the tax calculation behavior and results.

Table 3-4 Tax Calculation Fields
| Field | Description |
|---|---|
|
Tax Rate (Type) |
Select the type of tax calculation to be configured. Options are:
|
|
Tax Rate (value) |
The tax rate percentage or value, depending on the Tax Rate type chosen. |
|
Tax Basis |
Select the value used as a base calculation to apply taxes. Options are:
|
|
Tax Basis Multiplication Factor |
Enter a factor to which the tax basis is multiplied during tax calculation in order to increase or decrease the basis. This field will be defaulted to 1 when enabled. |
|
Non-Merchandise Code |
Select a list of all Non-Merch Codes that were selected to be used in Tax Rules Setup. |
|
Predecessor Rule |
If a tax rule has a predecessor rule, this field holds the predecessor rule ID. The result of the taxes calculated in the predecessor rule is added to the tax basis of the current rule in order to address Tax over Tax calculation requirements. |
|
Effective Tax Rate |
When a predecessor rule is selected, the effective tax rate based on the product of the rates from both rules is displayed. Note: The Effective Tax Rate field will only be displayed if the Tax Rate (Type) is Percentage. |
Manage Rules
Managing tax rules involves performing one or more of the following tasks:
-
Searching for a tax rule
-
Creating from an existing tax rule
-
Editing a tax rule
-
Viewing a tax rule
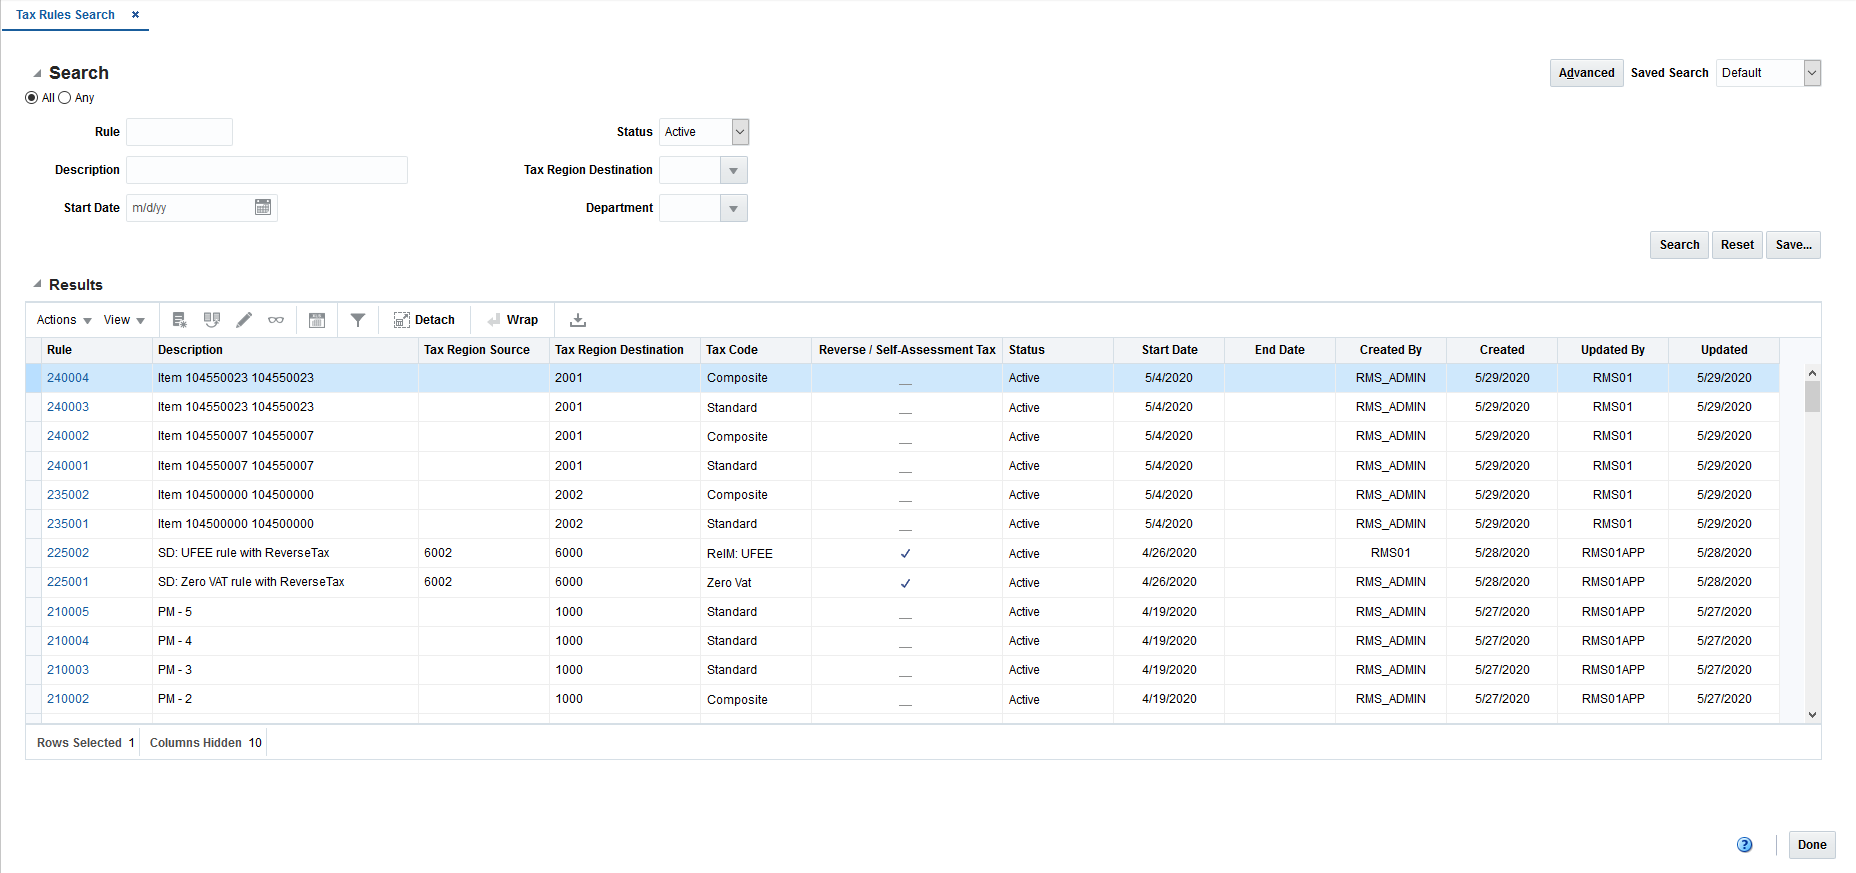
To manage tax rules, access the Tax Rule Search page by selecting Taxes > Manage Rules, the Tax Rules Search page appears.
Search for a Tax Rule
To search for a tax rule:
-
Provide search criteria in the search section. The criteria can be provided either in Basic or Advanced mode, depending on the requirement. Basic is the default mode when the search page is entered.
Click Advanced to access the search panel in advanced mode. You can return to Basic mode by clicking Basic.
Search for a Tax Rule through the Basic Search Criteria
To search for a tax rule through the basic search criteria.
-
Enter or select one or all of the following basic search criteria.
Table 3-5 Tax Rule Search - Basic Search Criteria
Field Description Rule
Enter the tax rule ID.
Status
Select the status of the tax rule. The options are: Worksheet, Submitted, Approved, Active, Updated, and Closed.
Description
Enter the description of the tax rule.
Tax Region Destination
Enter, select or search for the tax region destination of the tax rule.
Start Date
Enter or select the start date of the tax rule.
Department
Enter, select or search for the department assigned to the tax rule.
Note:
For more information about searches, see Search Screens in the Oracle® Retail Merchandising Do the Basics User Guide. -
Click Search. The tax rules that match the search criteria are displayed in the Results section.
-
Click Reset to execute the saved search.
-
Click Done to close the page.
Search for a Tax Rule through the Advanced Search Criteria
To search for a tax rule through the advanced search criteria:
-
Enter or select one or all of the following advanced search criteria. Click Add Fields to add more fields for the advanced search. To remove the field from the search, click the x right next to the field.
Table 3-6 Tax Rule Search - Advanced Search Criteria and Description
Fields Description Rule
Enter the tax rule ID.
Status
Select the status of the tax rule. The options are: Worksheet, Submitted, Approved, Active, Updated, and Closed.
Description
Enter the description of the tax rule.
Tax Region Destination
Enter, select or search for the tax region destination of the tax rule.
Start Date
Enter or select the start date of the tax rule.
End Date
Enter or select the end date of the tax rule.
Department
Enter, select or search for the department assigned to the tax rule.
Class
Enter, select or search for the class.
Created
Enter or select the date on which the tax rule was created.
Created By
Enter the user ID of the person that created the tax rule.
Item
Enter or search for the item used as the tax rule criteria.
Reverse / Self-Assessment Tax
Select whether the tax rule was set up with the Reverse/Self-Assessment Tax flag. Options are Yes or No.
Subclass
Enter, select or search for the subclass.
Tax Code
Select the tax code associated with the tax rule.
Updated
Enter or select the date on which the tax rule was updated.
Updated By
Enter the user ID of the person that last updated the tax rule.
-
To narrow down the search, use the list next to the search fields. For example, determine if the entered value should equal or not equal the search result.
-
Click Search. The tax rules that match the search criteria are displayed in the Results section.
-
Click Reset to clear the search section and results.
-
Click Done to close the page.
Create a Tax Rule from Existing
To create a tax rule from an existing rule:
-
From the Tasks menu, select Taxes > Manage Rules. The Tax Rule Search page appears.
-
Enter or select search criteria as desired to make the search more restrictive.
-
Click Search. The tax rules that match the search criteria are displayed in the Results section.
-
Select a rule in the Results section
-
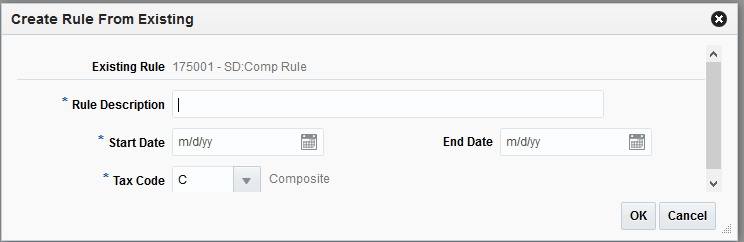
Then select Actions > Create from Existing or click the Create from Existing icon. The Create Rule from Existing pop-up appears. The data of the selected rule is displayed. Change the data as necessary.
For more information about tax rules, see the Tax Rule Header section.
-
Then choose one of the following options.
-
Click Save to save and create the tax rule.
-
Click Save and Close to create the tax rule and close the page.
-
Click Cancel to reject all entries and return to Tax Rule Search page.
-
Edit a Tax Rule
To edit a tax rule:
-
From the Tasks menu, select Taxes > Manage Rules. The Tax Rule Search page appears.
-
Select the rule you want to edit.
-
From the Actions menu, select Edit or click the Edit icon. The Tax Rule page appears.
-
Make the necessary changes and select one of the following options:
-
Click Save to save the tax rule.
-
Click Save and Close to save the tax rule and close the page.
-
Click Cancel to reject all entries and return to Tax Rule Search page.
Note:
Only rules in Worksheet status can be edited. A part from this status only the End date field will be enabled for editing if the rule is not yet closed. -
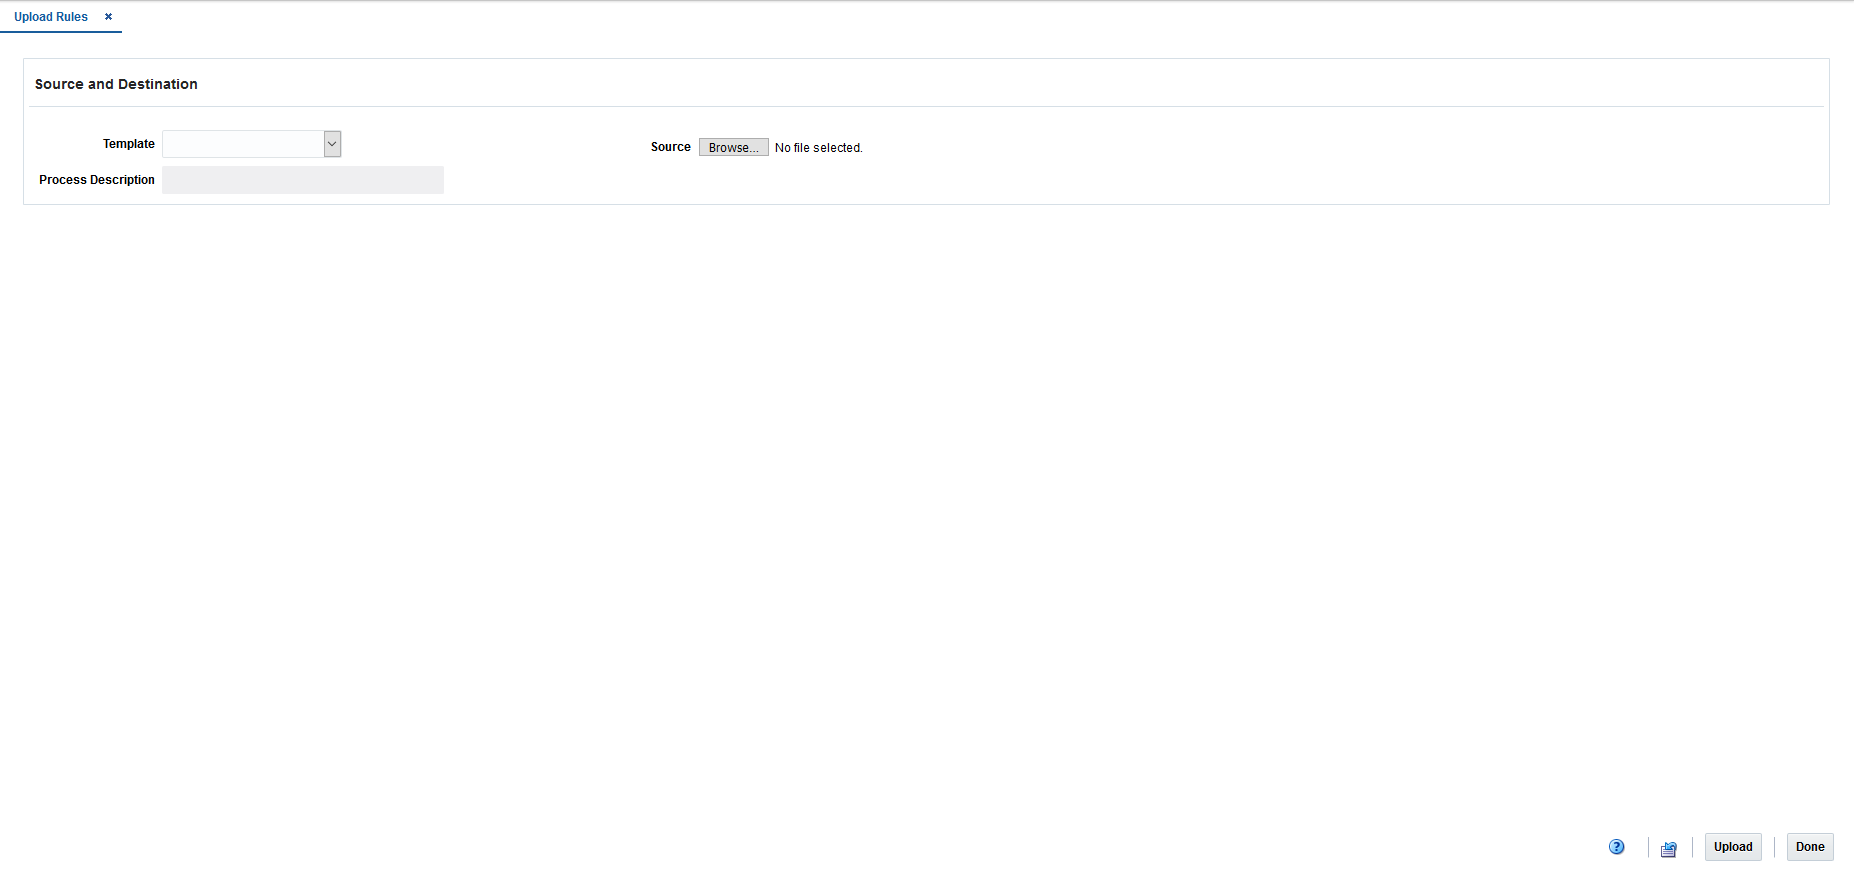
Upload Rules
The Upload Rules page provides the ability to upload tax rules from a spreadsheet (.ods file) into Merchandising.
All uploads are done using templates. You can use the default Tax Rules template or configure a template for use in your business such that certain fields are defaulted or hidden from users to streamline the uploading process. You can download a blank version of your template by selecting the Download Blank Template option under Data Loading in the task list. For more information on blank templates, see the Do the Basics User Guide.
Note:
The Upload Rules link is only available if the user has the Maintain Tax Rules privilege assigned.Perform the following procedure to upload promotions via spreadsheet:
-
From the Tasks menu, select Taxes > Upload Rules. The Upload Rules page opens.
-
In the Template field, select the template you are using.
-
The Process Description will default based on the template name and timestamp, but can be updated.
-
In the Source field, click the Browse button to locate the spreadsheet file (.ods file) you want to upload and click Open.
-
Select one of the following options:
-
Click Upload to upload the file.
-
Click Revert to clear out the screen inputs.
-
-
Click Done to close the Upload Rules page.
Note:
If any errors occur during the upload, you will receive a notification. If there are no issues with the new event, you will not receive a notification.