5 Manage Data Loading Requests
The Manage Requests screen allows users to search, view status, download errors, and delete Data Loading requests. If additional action is required, users can view errors, download errors, or delete the request.
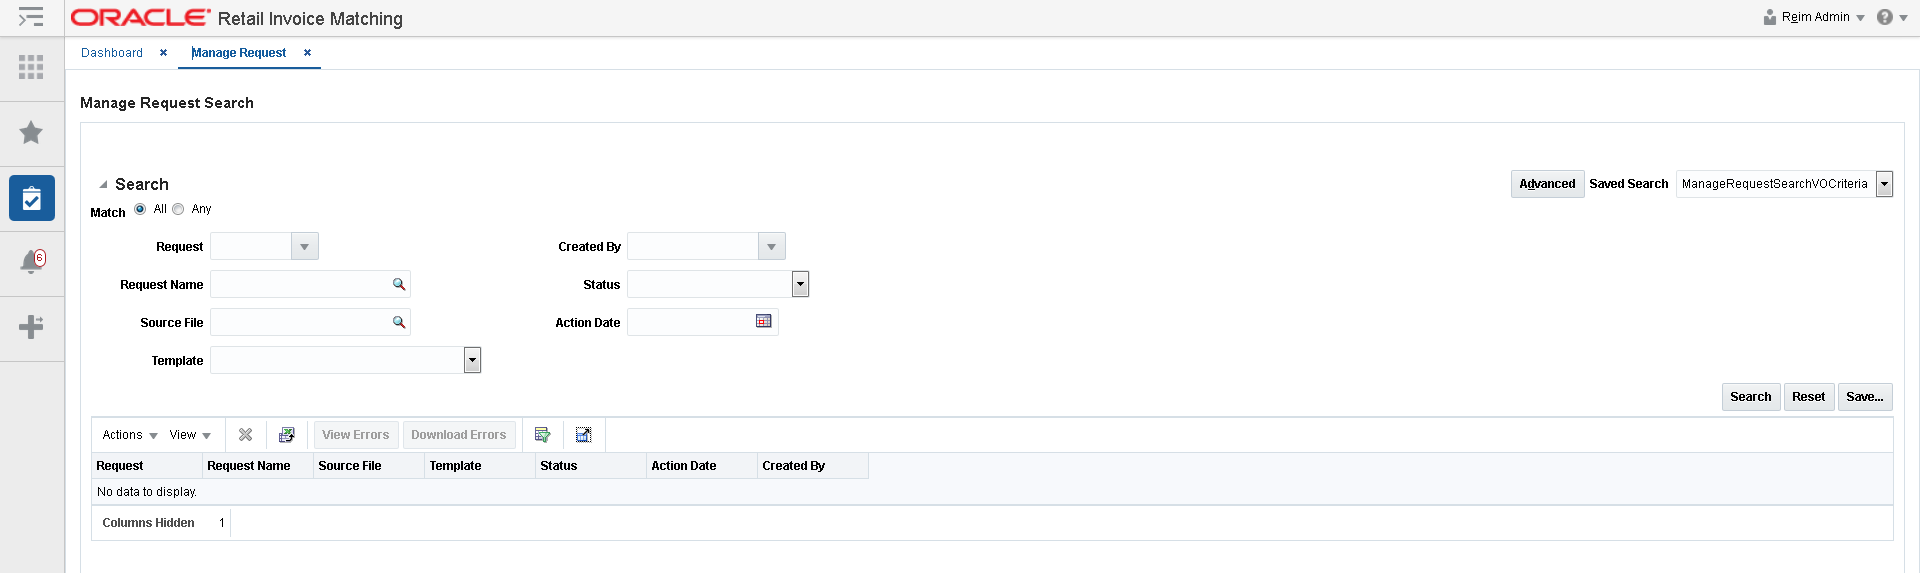
Navigate: From the Tasks menu, select Data Loading > Manage Requests. The Manage Requests window opens.
-
Enter criteria as desired to make the search more restrictive. You must enter at least one search criterion. The following criteria are available:
-
Request – The Request field is a list of values field that lists all Request IDs for data loading requests. This allows users to search by the unique ID assigned by the system for every upload/download request.
-
Request Name – The Request Name field is a list of values where users can enter the name of a request on which to search.
-
Template – The Template field is a list of template names. This allows users to search for Request IDs created using the selected template.
-
File Name – The File Name field is a select one choice list of values where users can enter a name and the system searches based on the criteria entered.
-
Status – The Status field is a list of statuses. This allows users to search for Request IDs in the selected status.
-
Action Date – The Action Date field allows users to search for the Request IDs submitted on that date.
-
Action – The Action field is a list of actions. This allows users to search for Request IDs with the selected action.
-
Created By – The Created By field is a list of values that includes a list of users. This allows users to search for Request IDs created by the selected User. The list of users only displays users which are already available in the Search Results table.
-
-
Click Search. The results are displayed in the Search Results table. The user has the ability to select rows by checking a checkbox to select them, and then choose an action for the selected rows.
Note:
Actions are only available if there were errors in the upload. If there are errors in the upload, you have the option to 'View Errors' or you could 'Download Errors' to a spreadsheet. You can then fix the errors in the spreadsheet and use it to re-upload the invoices which were in error.