Installing Oracle Database 18c
To install Oracle Database 18c for a Simphony installation, from the database server:
- Select the Accept License Agreement option to download the software.
- Select the server’s compatible operating system, typically Microsoft Windows x64 (64–bit).
- Since the downloaded file is compressed, beginning with Oracle Database 18c, Image Based Installation has been introduced. Previously, with Oracle Database 11g or 12c, you were allowed to select the location of your db_home directory. With Oracle Database 18c, via Image Based Installation, the Oracle Universal Installer takes the location of the setup.exe file and assigns its db_home location.
- Prior to performing the Oracle Database 18c software download, create a new folder on the database server’s ‘C’ drive named: Oracle18c (with no spaces in the folder name).
- Logon as a Windows Administrator and, download and extract the Oracle 18c installation file into the newly created Oracle18c folder. Since the file is nearly 10GB in size, the extraction takes some time.
- Once extracted, locate and right-click on the setup.exe and select Run as administrator.
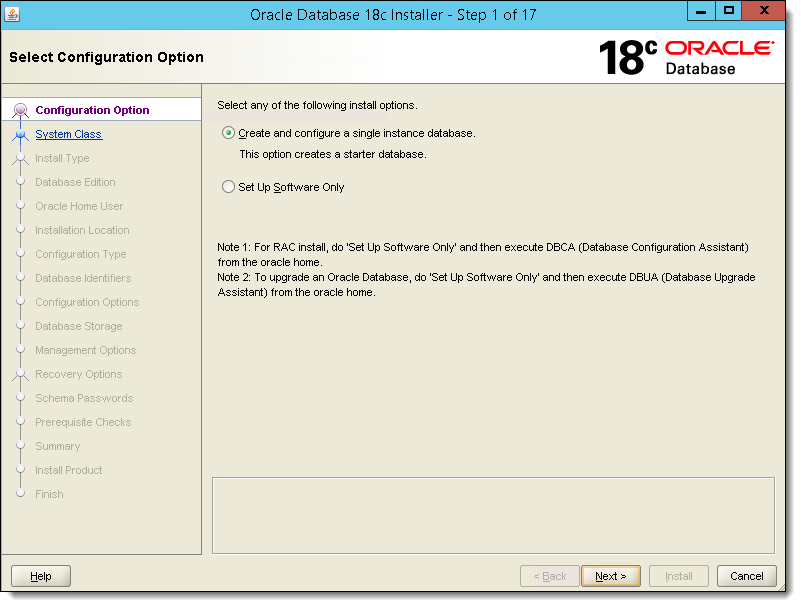
- Select Create and configure a single instance database. This option creates a starter database., and then click Next.
Figure 2-27 Select Configuration Option
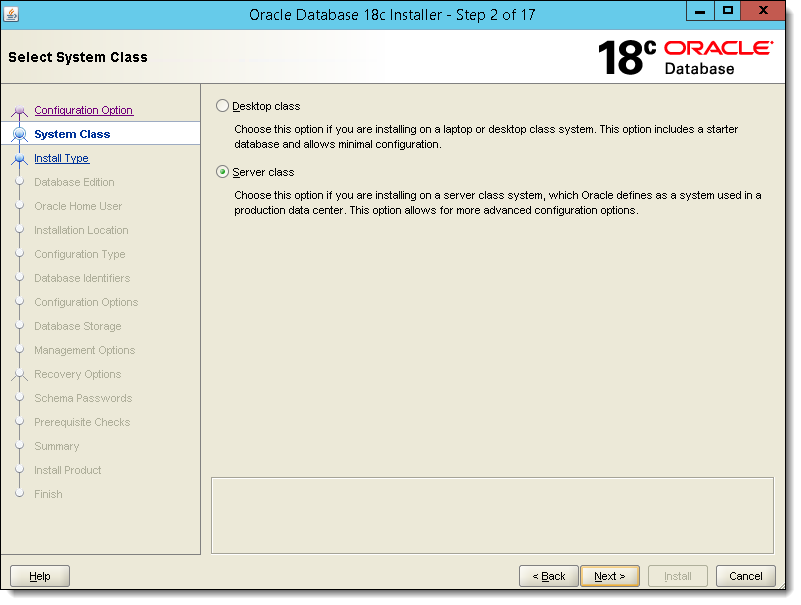
- Select Server class, and then click Next.
Figure 2-28 Select System Class
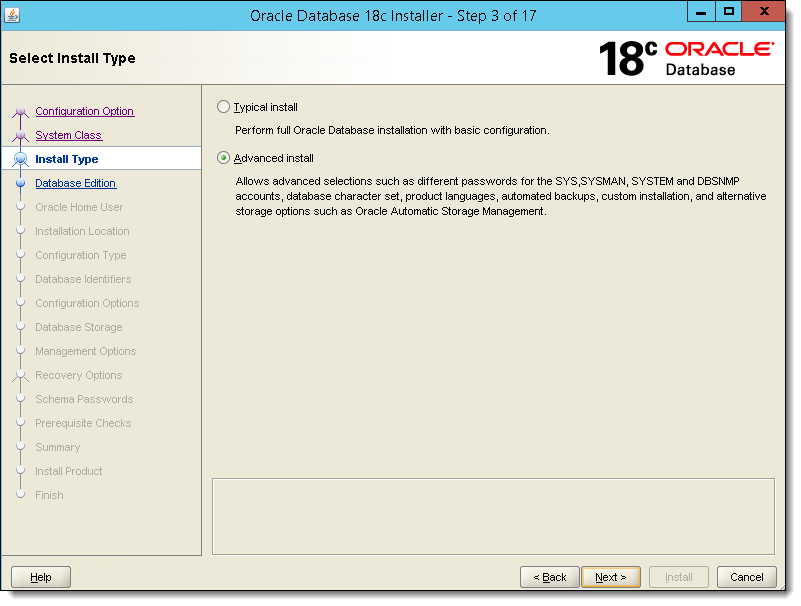
- Select Advanced install, and then click Next.
Figure 2-29 Select Install Type
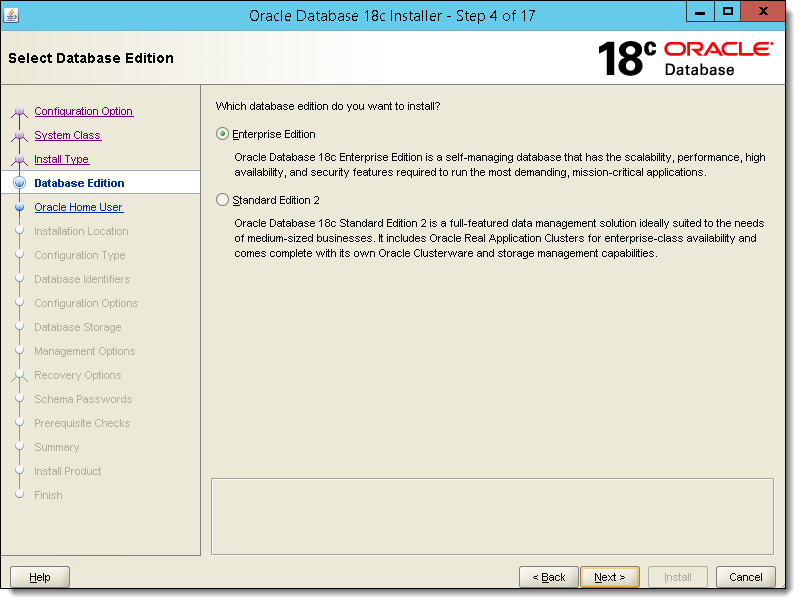
- Select Enterprise Edition and then click Next.
Figure 2-30 Specify Database Edition
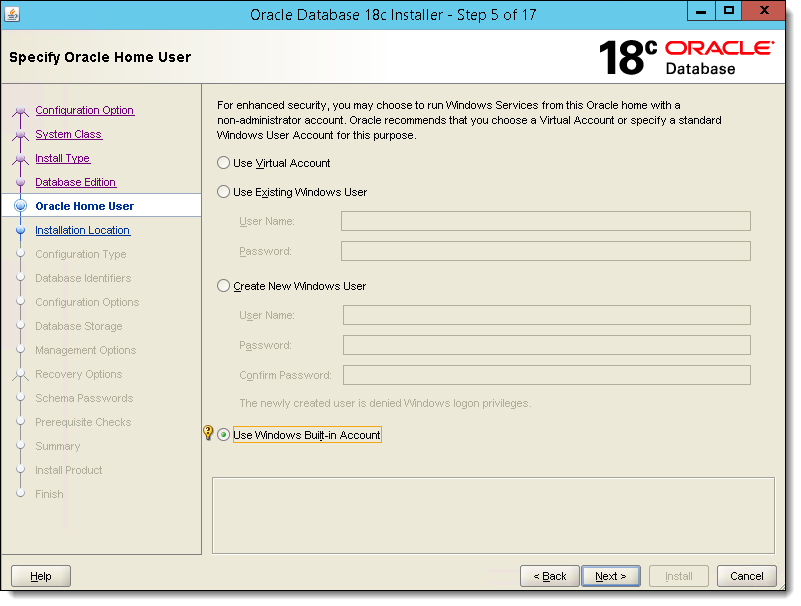
- Select Use Windows Built-in Account, and then click Next.
Figure 2-31 Specify Oracle Home User
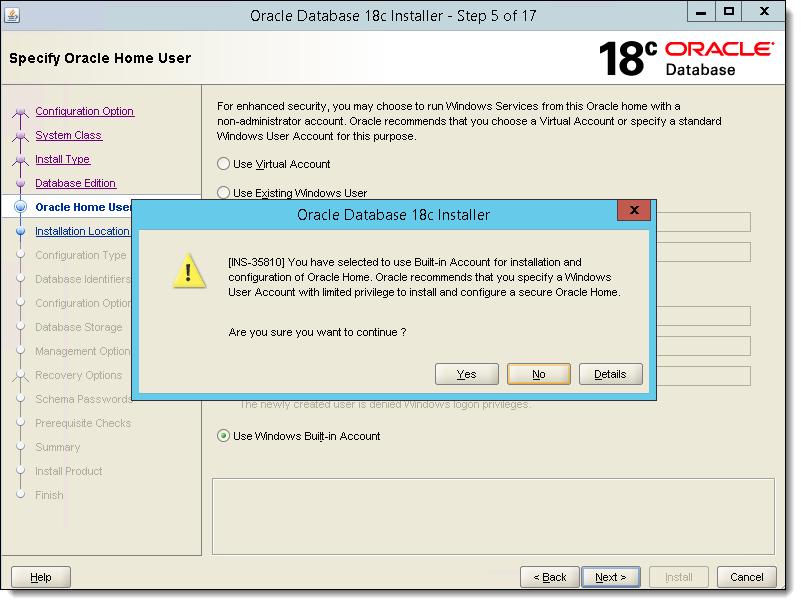
- Confirm the Built-in Account selection by responding to the message prompt by clicking Yes, and then click Next.
Figure 2-32 Specify Oracle Home User
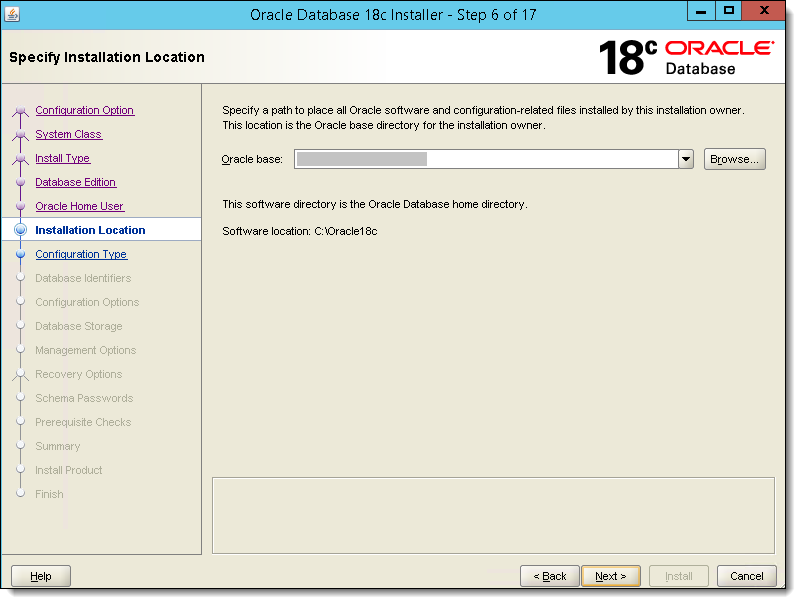
- Enter (or browse to) the path to place the Oracle software and configuration files in the Oracle base field, and then click Next.
Figure 2-33 Specify Installation Location
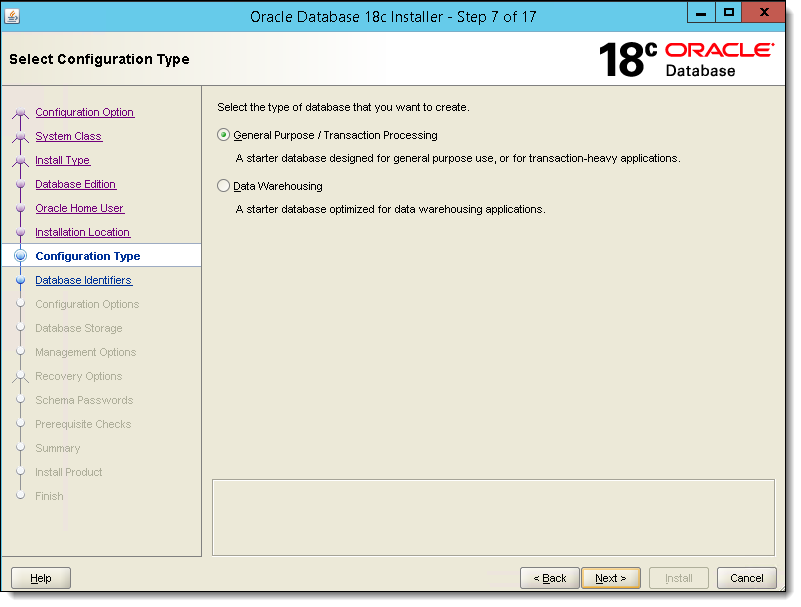
- Select the General Purpose / Transaction Processing database type, and then click Next.
Figure 2-34 Select Configuration Type
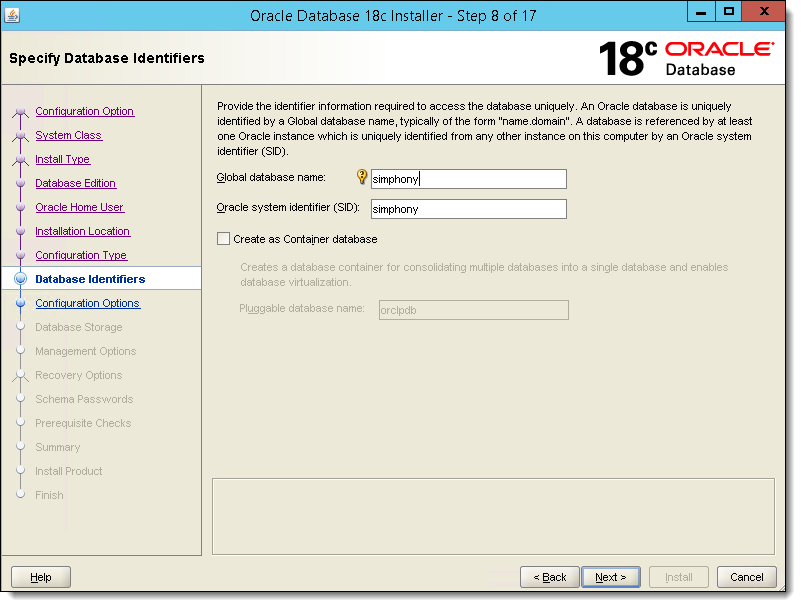
- Enter the database name and system identifier in the Global database name and Oracle system identifier (SID) fields respectively, and then click Next.
Figure 2-35 Specify Database Identifiers
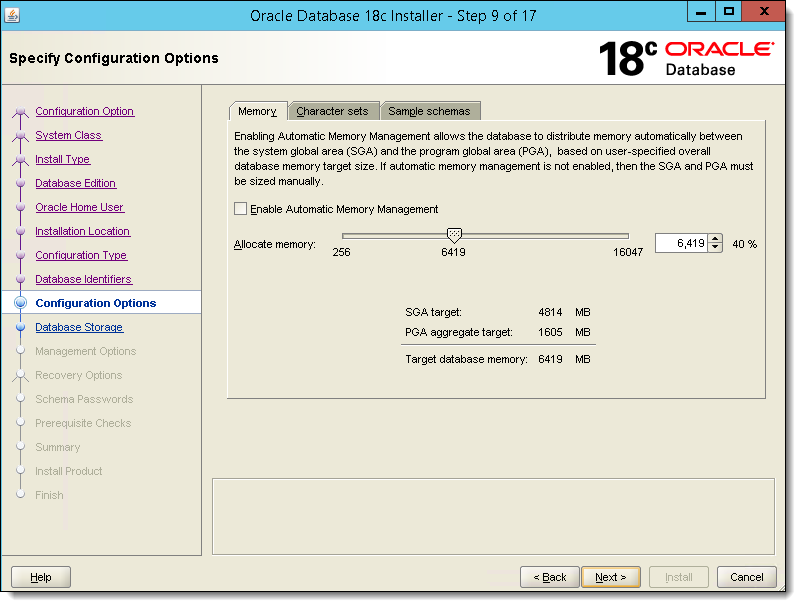
- Configure the Memory allocation for your system, and then click the Character sets tab.
Figure 2-36 Specify Configuration Options
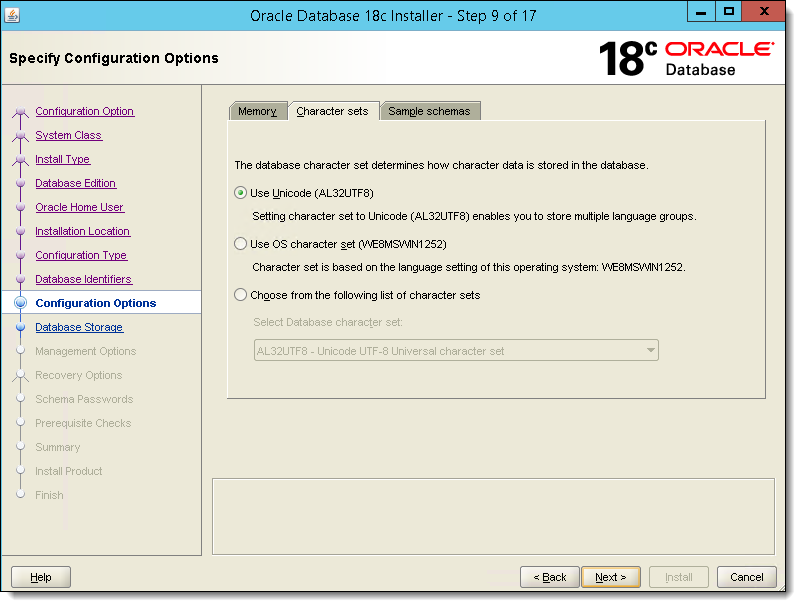
- From the Character sets tab, select Use Unicode (AL32UTF8) as the character set. *(Optional) You can click the Sample schemas tab and install a sample schema in the starter database, and then click Next.
Figure 2-37 Specify Configuration Options — Character Sets
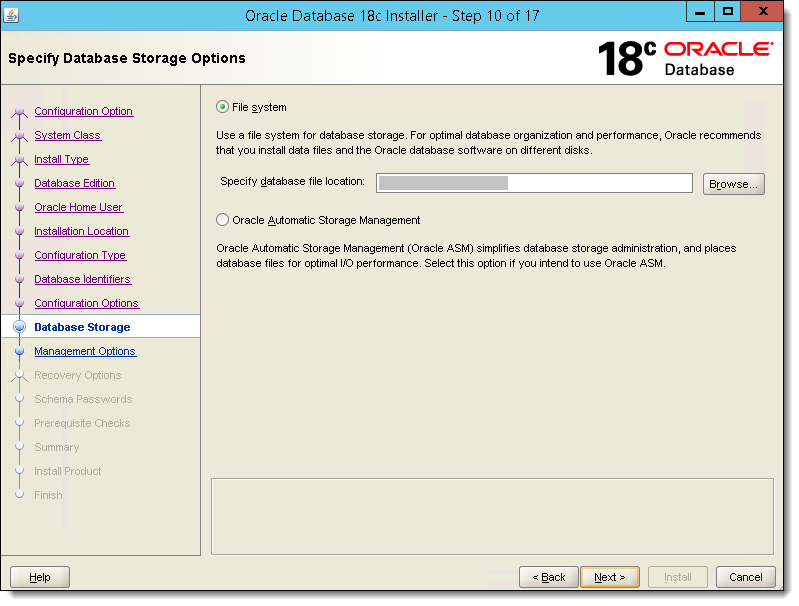
- Select File system as the database storage option, and enter (or browse to) the database file path in the Specify database file location field, and then click Next. From the next *(Optional) installation window, you can register for the Oracle Enterprise Manager 12c Cloud Control for your Oracle 18c database, and then click Next.
Figure 2-38 Specify Database Storage Options
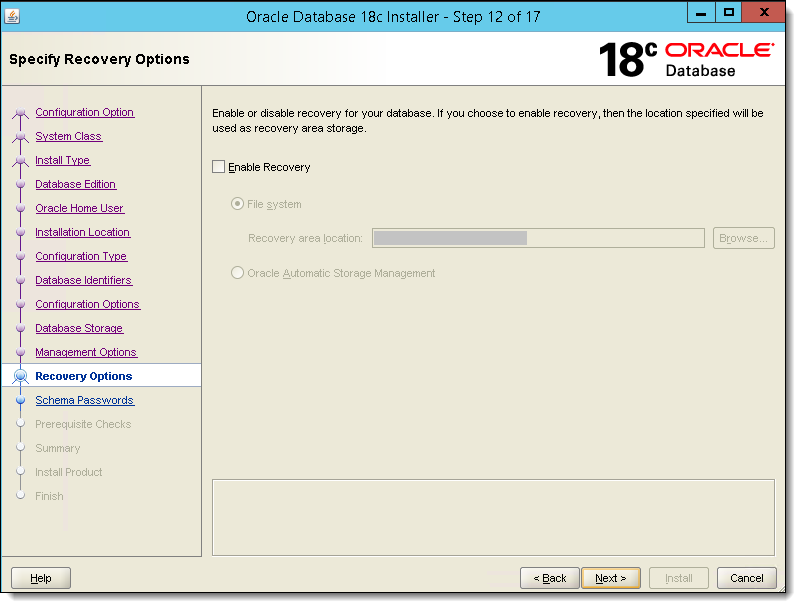
- *(Optional) Enable or disable recovery for your database.
Figure 2-39 Specify Recovery Options
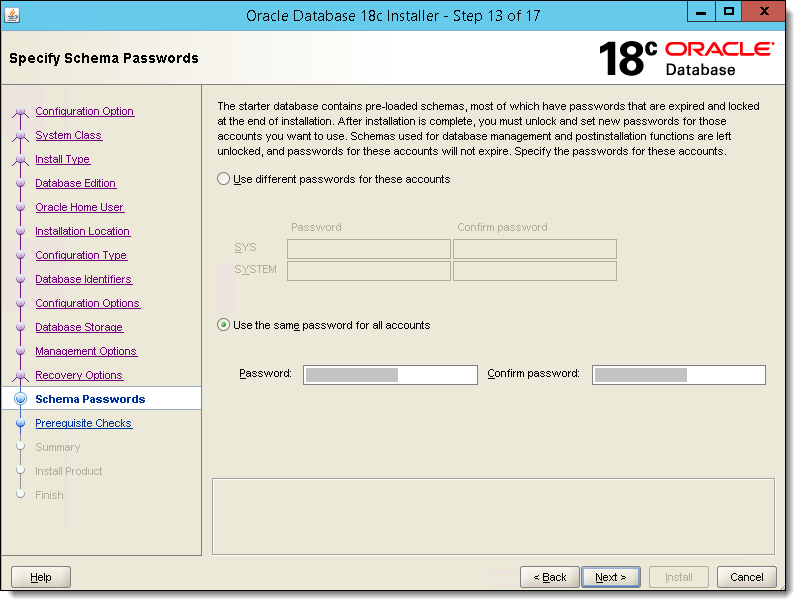
- Select Use the same password for all accounts. Enter your password in the Password field, re-enter it in the Confirm password field, and then click Next.
Figure 2-40 Specify Schema Passwords
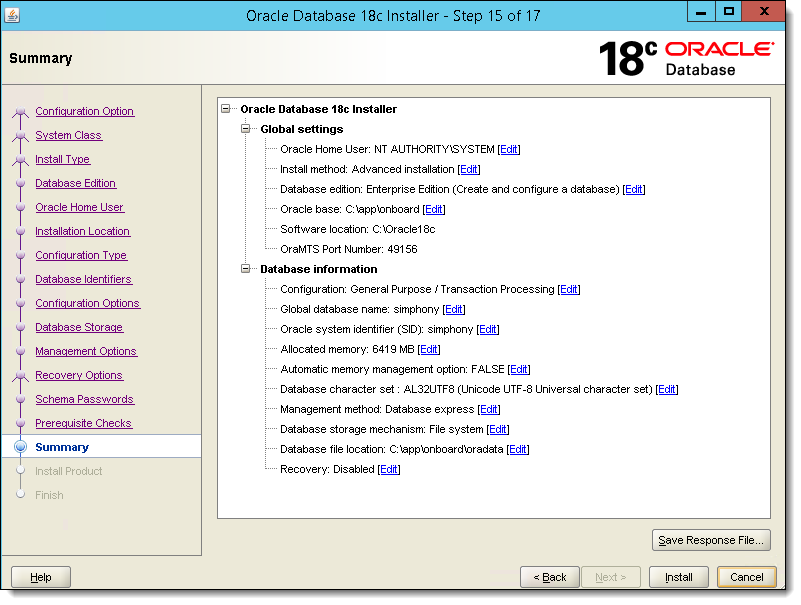
- Review the Summary window to ensure that your previous selections are correct. If edits are required, click Back until you reach the window that contains the setting that needs to be changed. If no edits are necessary, click Install.
Figure 2-41 Summary
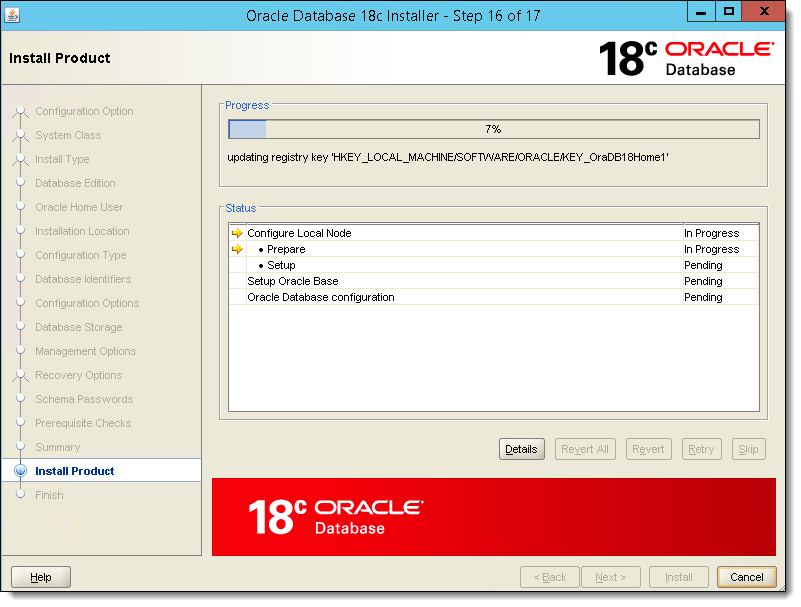
- An installation Progress Page appears that allows you to track the ongoing database creation.
Figure 2-42 Install Product — Progress Window
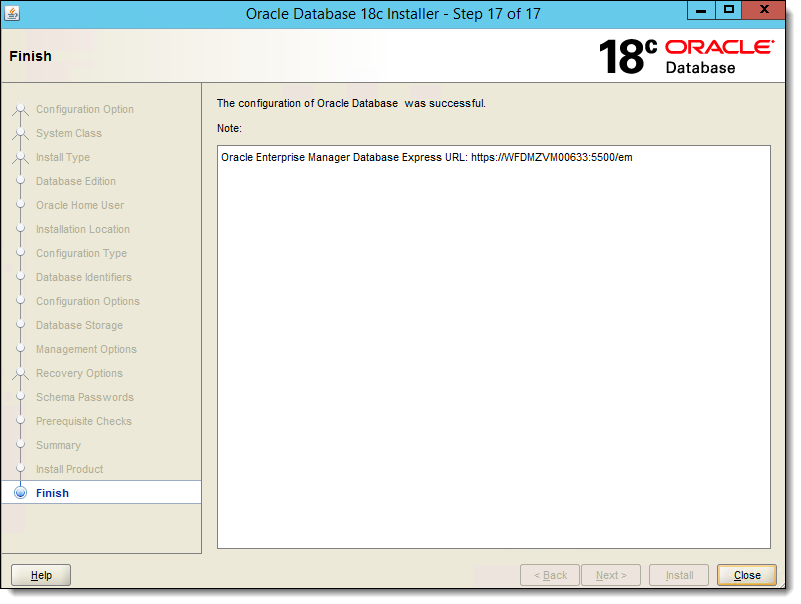
- Once complete, the Finish window appears and indicates a successful installation. Click Close to exit the installation program.
Figure 2-43 Finish
Parent topic: Database Platform Installation