Process Flow for Configuring P6 EPPM On-Premises for CIC
The following process flow outlines the key steps for configuring P6 EPPM on-premises for CIC.
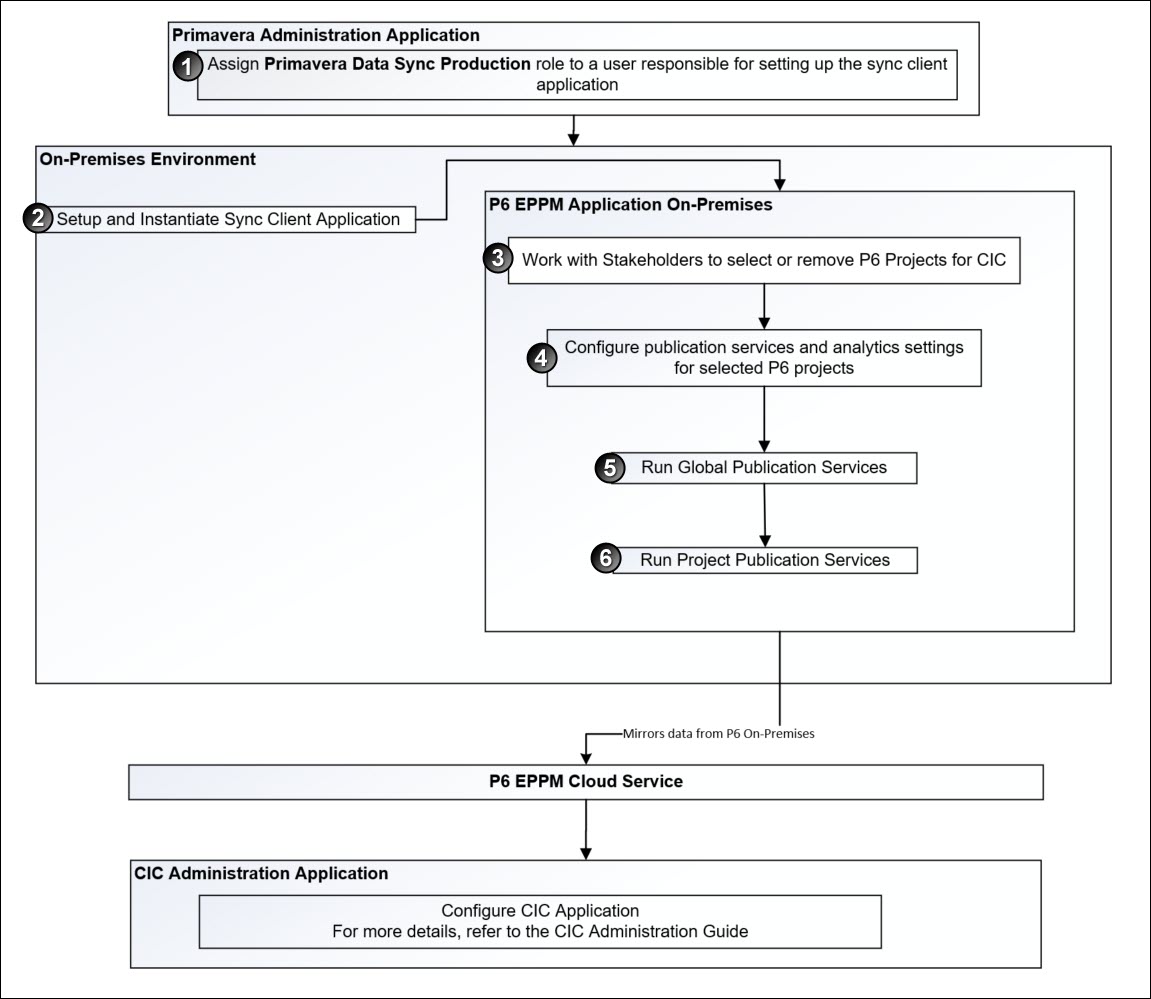
Step 1
Set up at least one user or administrator who is responsible for synchronizing the data between P6 on-premises application and P6 cloud.
- Sign in to the Primavera Administration Application.
- Assign the Primavera Data Sync Production role to a user who will be setting up the sync client application. This user must be distinct from the CIC administrator.
For more details on using the Primavera Administration Application, refer to:
- Preparing to Administer your Applications, in the Primavera Administration Getting Started Guide.
- Primavera Administration Identity Management Administration Guide
Step 2
Setup and instantiate sync client application in your on-premises environment. For more details, see Setting Up the Sync Client Application.
Step 3
Work with key stakeholders in your organization to identify P6 projects to be made available in CIC and ensure users are granted access to the P6 Analytics module.
- Notes:
- If P6 on-premises is source for CIC, then there cannot be another P6 SaaS running. A P6 on-premises source is only for on-premises data. It cannot be a combination of P6 SaaS and P6 on-premises.
- If you are also licensed for Primavera Analytics, then any projects added or removed in CIC Advisor or CIC Analytics will correspondingly reflect in Primavera Analytics.
For more details on how to select specific projects, see Selecting P6 Projects for CIC for the First Time.
For more details on how to grant user access to the P6 analytics module, see Configuring User Access for P6 Analytics Module.
Step 4
For the identified P6 projects, enable publication and analytics settings in P6.
For more details, see Enabling History and Publication Services Settings for P6 Projects.
Step 5
Run global publication services in P6 EPPM to load global data into CIC.
For more details, see Enabling Automatic Publishing of P6 Global Data or Manually Publishing P6 Global Data.
Step 6
Run project publication services in P6 EPPM to bring over project data into CIC.
For more details, see Enabling Automatic Publishing of P6 Project Data or Manually Publishing P6 Project Data.
After completing all the steps, proceed to the Next Step of the application setup sequence.
Last Published Thursday, December 7, 2023