
To declare any report to be suspicious and report it to the FinCEN, you must view and assess the selected report and its details. There can be one or more accounts, entities, or persons associated with a report. You must also know the types of transactions, entities, or individuals associated with it. You must study narrations, documents, and audit history associated with the report before you take any type of action on the selected report.
Use the Report Details page to view, analyze, and update the report information. You can add, delete, and modify the reports based on the status of the report and your user privileges. For more information on user roles and privileges, see Table 2 .
The Report Details page includes the following sections:
· Accessing Report Details : Use this section to access the specific Report Details page. Click the required Report Number on the Regulatory Reports List page.
· Filing Institution : Use this section to know more about Report Details, Filing Institution Information, and .
· Transactions Info : Use this section to know the list of transactions associated with the selected report.
· Involved Accounts Details : Use this section to know the list of accounts involved in the transaction and analyze the details pertaining to them.
· Involved Entity Details : Use this section to know the list of entities (Individual or Institution) involved in the transaction and analyze the details pertaining to them.
· Involved Person Details : Use this section to know the list of persons involved in the transaction and analyze the details pertaining to them.
· Adding Comments: Use this section to add comments to a report in any status. By adding comments, the status of the report does not change.
· Adding Narrative : Use this section to add narrative a report in any status. By adding narratives, the status of the report does not change.
· Adding Documents : Use this section to add narrative a report in any status. By adding documents, the status of the report does not change.
To access the Report Details page, follow these steps:
1. In the Summary Report page, click the required Report ID link. The Reports Details page is displayed. By default, the Filing Institution page is displayed. You can also navigate to the Financial Institution, Suspicious Activity, and Subject Information pages.
Figure 11:
Report Details
To view the report details, click More Details on top of the page. The Reporting Context window is displayed. The Reporting Context window details Report Name, Report Status, Created By, and so on.
Figure 12:

Reporting Context
2. To collapse the Reporting Context window, click Less Details.
Use this page to view and update the information pertaining to the institution that is filing this report to FinCEN and its details.
This page has the following panes:
· Reporting Information: Use this pane to select the type of filing (Initial Report, Continuing Activity Report, and so on) and provide note to FinCEN.
· Filing Institution Information: Use the this pane to view and update the information pertaining to the institution (banks or financial institutions) who is reporting this specific report.
The Reporting Information is the default pane of the Filing Institution page. Use this pane to select the type of filing (Initial Report, Continuing Activity Report, and so on) and provide note to FinCEN.
Figure 13:

Reporting Information -Types of Filing
3. Enter the following information in the Reporting Information pane as tabulated.
Table 10 describes fields in the Reporting Information pane.
Use the this pane to view and update the information pertaining to the institution (banks or financial institutions) who have reported this specific report. For example, Type of Financial Institution, Financial Institution ID, Financial Institution Identification Type, and so on.
Figure 14:

Filing Institution Information
4. Enter the following information in the Filing Institution Information pane as tabulated.
Table 11 describes fields in the Filing Institution Information pane. Fields marked with asterisk * are mandatory.
NOTE |
Fields in this pane are displayed based on the Filing Institution Name selection. |
NOTE |
If you have entered one or more prohibited words in fields - Filling Institution Contact Office and Prior Report Doc Number, then the application displays the warning message. The following words are prohibited: AKA, COMPUTER GENERATED, CUSTOMER, DBA, NON CUSTOMER, NONE, NOT APPLICABLE, OTHER, SAME, SAME AS ABOVE, SEE ABOVE, SEE NARRATIVE, SIGNATURE CARD, T/A, UNKNOWN, VARIOUS, and XX. |
5. Click Save. A confirmation message is displayed and the filing institution information is updated.
This section covers the following topics:
· Adding Financial Institution Where Activity Occurred
·
The Financial Institution Where Activity Occurred pane captures the data of the financial institution where the suspicious activity has occurred and also the associated branches of the financial institution that are involved in the suspicious activity.
Select the Fin Inst Where Activity Occurred tab. The page refreshes and displays the Financial Institution Where Activity Occurred grid. The Financial Institution details of the first record is auto-populated down the grid. The auto-populated pane has a left-hand side (LHS) menu with Financial Institution Details and Branch Details options.
This page allows you to add, edit or delete details about the financial institution where the activity occurred and branch details.
The Internal Control/File Number field displays in the Financial Institution Where Activity Occurred tab only in View mode. Editing or entering a value for this field must be done from the Financial Institution Information tab.
The Validate button in this tab checks for any missing mandatory information.
This section covers the following topics:
· Adding Financial Institution Where Activity Occurred
·
The Financial Institution Where Activity Occurred pane captures the data of the financial institution where the suspicious activity has occurred and also the associated branches of the financial institution that are involved in the suspicious activity.
Use this section to add a new financial institution where the activity has taken place.
To add a financial institution where the activity occurred, follow these steps:
1. On the Financial Institution Where Activity Occurred pane.
2. Click
Add  .
The Financial Institution Where Activity
Occurred window is displayed.
.
The Financial Institution Where Activity
Occurred window is displayed.
Figure 15:

Figure 16: Financial Institution Where Activity Occurred Pop-up Window
3. Enter the following information in the Financial Institution Where Activity Occurred window as tabulated.
4. Table 11 describes fields in the Financial Institution Where Activity Occurred window. Fields marked with asterisk * are mandatory.
5. Click Save. A confirmation message is displayed and the financial institution information is updated.
Note: If you click Clear, all the fields are set to default values that are blank.
6. To
edit the existing financial institution, Select the required record number.
click  . The Financial
Institution Where Activity Occurred window is displayed. Modify
the necessary information and click Save.
The financial institution details are updated. For more information on
the fields, see Table 12 .
. The Financial
Institution Where Activity Occurred window is displayed. Modify
the necessary information and click Save.
The financial institution details are updated. For more information on
the fields, see Table 12 .
7. To
delete the existing financial institution, select the required financial
institution from the list and click ![]() .
The selected transaction is removed from the list.
.
The selected transaction is removed from the list.
This section covers the following topics:
· Subject Information Overview
· Using Subject Alternate Name Details
· Using Subject Website (URL) Address
· Using Subject Relationship with Financial Institution
The Subject Information page lists information related to the subject, accounts associated with the subject, and the subject’s relationship with the financial institution. A maximum of 999 records can be added to one report or suspicious activity.
The Validate button in the Subject Information grid checks for any missing mandatory information.
Table 21 explains the columns in the Subject Information grid.
Fields |
Description |
|---|---|
Subject Record # |
Displays the subject record number. It is a system-generated unique number that identifies the subject for this report. It is used for confirmation messages to identify the subjects whose information does not meet validation or approval requirements. |
Subject Name |
Displays the subject name. |
TIN |
Displays the subject TIN number. |
Occupation/Type of Business |
Displays the occupation/type of business of the subject. |
Role |
Defines the role of the subject in the suspicious activity that is reported. The Role is a drop-down list with the following options: · Purchaser/Sender: If the subject purchased, sent the instruments, or products involved in the suspicious activity, then they are considered to have played the role of Purchaser/Sender. · Payee/Receiver: If the subject received the instruments or products involved in suspicious activity, then they are considered to have played the role of the Payee/Receiver. · Both A and B: Select this option if the subject acted as both Purchaser/Sender and Payee/Receiver. |
Use this section to update and add the following details of subject:
Use this section to view and modify subject details.
To view and modify subject information, follow these steps:
1. On the Subject Information pane. Click the required Record Number. The Subject Details pane is displayed.
Figure 17: Subject Details

2. Enter the following information in the Subject Details pane as tabulated.
Table 13 describes fields in the Subject Details pane. Fields marked with asterisk * are mandatory.
Fields |
Description |
|---|---|
Is critical information unknown? |
Select this check box only if critical information (Last Name/Entity Name, First Name, TIN, DOB, Address, and Identification) are unknown to you. NOTE: If you select Is critical information unknown? check box, the Last Name/Entity Name, First Name, TIN, DOB, Address, and Identification fields are disabled. |
Is subject an Entity |
Select this check box only if the subject is an entity. If you select Is subject an Entity check box, the First Name, Middle Name, Date of Birth, Suffix, and Gender fields are disabled. |
Last Name/Entity Name |
Enter the last name of the entity or subject. |
Middle Name |
Enter the subject’s middle name. |
First Name |
Enter the subject’s first name. |
Suffix |
Enter the subject suffix. |
DOB |
Enter the subject’s date of birth. |
Gender |
Enter the subject’s gender. |
TIN |
Enter the subject TIN number. |
TIN Type |
Enter the subject TIN type. |
NAICS Code |
Select the NAICS code. For example, goods, materials, and so on. NAICS stands for The North American Industry Classification System. It is used by business and government to classify and measure economic activity in Canada, Mexico, and the United States. The NAICS numbering system is a six-digit code. The first five digits are generally the same in all three countries. The last digit designates national industries. The first two digits designate the largest business sector, the third digit designates the sub-sector, the fourth digit designates the industry group, and the fifth digit designates particular industries. |
Occupation/Type of Business |
Enter the occupation or type of business of the subject. |
Corroborative Statement Received |
Select Yes or No to specify whether the corroborative statement is received. As per FinCEN, a corroborative statement is considered to be where the subject has made a statement to the filing institution admitting to the involvement or otherwise substantiating the suspicious activity. If you select Yes, then the nature of that statement should be captured in the report Narrative. |
Subject role |
Select the role of the subject in the suspicious activity. |
3. Click Save. A confirmation message is displayed and the Subject Information information is updated.
Note: If you click Clear, all the fields are set to default values that are blank.
4. To
edit the existing subject information, Select the required record number.
click  . The Subject
Information pane is displayed. Modify the necessary information
and click Save. The subject information
details are updated. For more information on the fields, see Table 13 .
. The Subject
Information pane is displayed. Modify the necessary information
and click Save. The subject information
details are updated. For more information on the fields, see Table 13 .
To delete the existing subject information,
select the required subject information from the list and click  .
The selected subject information is removed from the list.
.
The selected subject information is removed from the list.
Use this section to view, modify, and delete the address or addresses associated with the subject. When you identify a address is not associated with the subject, you can also add a new address and associate it with the selected subject.
To view, delete, and modify address, follow these steps:
1. On the Subject Information pane, go the Address pane.
2. To
edit the existing address, select the required record number. click  .
The Address pane is displayed.
.
The Address pane is displayed.
Figure 18: Address

Details
3. Enter the information in the Address pane as tabulated.
Table 13 describes fields in the Address pane. Fields marked with asterisk * are mandatory.
NOTE |
Select the check box if you do not know the details. |
Fields |
Description |
|---|---|
Address |
Enter the address of the subject. |
City |
Enter the city of the subject. |
Country |
Enter the country of the subject. |
State |
Enter the state where of subject is residing. |
Zip/Postal Code |
Enter the area zip or postal code of subject. |
4. Click Save. A confirmation message is displayed and the address details are updated.
To delete the existing address, select the
required record number from the list and click  .
The selected address is removed from the list.
.
The selected address is removed from the list.
Use this section to add a new address.
To add a new address, follow these steps:
1. On the Address pane.
2. Click
Add  .
The Address window is displayed.
.
The Address window is displayed.
Figure 19: Add a New Address

3. Enter the information in the Subject Address Details pane as tabulated in Table 13 .
4. Click Save. A confirmation message is displayed and the Subject Address information is updated. If you click Clear, all the fields are set to default values that are blank.
Use this section to view, modify, and delete the phone number or phone numbers associated with the subject. When you identify a phone number is not associated with the subject, you can also add a new phone number and associate it with the selected subject.
To view, delete, and modify phone number, follow these steps:
1. On the Subject Information pane, go the Phone pane.
2. To
edit the existing phone number, select the required record number. click
 .
The Phone pane is displayed.
.
The Phone pane is displayed.
Figure 20: Phone

Details
3. Enter the information in the Phone pane as tabulated.
Table 13 describes fields in the Phone pane. Fields marked with asterisk * are mandatory.
NOTE |
Select the check box if you do not know the details. |
Fields |
Description |
|---|---|
Address |
Enter the address of the subject. |
City |
Enter the city of the subject. |
Country |
Enter the country of the subject. |
State |
Enter the state where of subject is residing. |
Zip/Postal Code |
Enter the area zip or postal code of subject. |
4. Click Save. A confirmation message is displayed and the phone details are updated.
To delete the existing phone, select the required
record number from the list and click  .
The selected phone is removed from the list.
.
The selected phone is removed from the list.
Use this section to add a new phone.
To add a new phone, follow these steps:
1. On the Phone pane.
2. Click
Add  .
The Phone window is displayed.
.
The Phone window is displayed.
Figure 21: Add a New Phone

3. Enter the information in the Phone pane as tabulated in Table 13 .
4. Click Save. A confirmation message is displayed and the Phone information is updated. If you click Clear, all the fields are set to default values that are blank.
Use this section to view, modify, and delete the identification or identifications associated with the subject. When you identify a identification is not associated with the subject, you can also add a new identification and associate it with the selected subject.
To view, delete, and modify identification, follow these steps:
1. On the Subject Information pane, go the Form of Identification pane.
2. To
edit the existing phone number, select the required record number. click
 .
The Form of Identification
Details pane is displayed.
.
The Form of Identification
Details pane is displayed.
Figure 22: Form of Identification

Details
3. Enter the information in the Form of Identification pane as tabulated.
Table 13 describes fields in the Form of Identification pane. Fields marked with asterisk * are mandatory.
NOTE |
Select the check box if you do not know the details. |
Fields |
Description |
|---|---|
|
|
|
|
|
|
|
|
|
|
4. Click Save. A confirmation message is displayed and the phone details are updated.
To delete the existing phone, select the required
record number from the list and click  .
The selected phone is removed from the list.
.
The selected phone is removed from the list.
Use this section to add a new Identification.
To add a new Identification, follow these steps:
1. On the Subject Form of Identification pane.
2. Click
Add  .
The Subject Form of Identification Details
window is displayed.
.
The Subject Form of Identification Details
window is displayed.
Figure 23: Add Subject Form of Identification

3. Enter the information in the Subject Form of Identification pane as tabulated in Table 13 .
Click Save. A confirmation message is displayed and the Subject Form of Identification information is updated. If you click Clear, all the fields are set to default values that are blank.
Use this section to view, modify, and delete the subject alternate name or names associated with the subject. When you identify a subject alternate name is not associated with the subject, you can also add a new subject alternate name and associate it with the selected subject.
To view, delete, and modify subject alternate name, follow these steps:
1. On the Subject Information pane, go the Subject Alternate Name pane.
2. To
edit the existing subject alternate name, select the required record number.
click  . The Subject
Alternate Name pane is displayed.
. The Subject
Alternate Name pane is displayed.
Figure 24: Subject Alternate Name

Details
3. Enter the information in the Subject Alternate Name pane as tabulated.
Table 13 describes fields in the Subject Alternate Name pane. Fields marked with asterisk * are mandatory.
NOTE |
Select the check box if you do not know the details. |
Fields |
Description |
|---|---|
|
|
|
|
|
|
|
|
|
|
4. Click Save. A confirmation message is displayed and the Subject Alternate Name details are updated.
To delete the existing subject alternate name,
select the required record number from the list and click  . The selected
subject alternate name is removed from the list.
. The selected
subject alternate name is removed from the list.
Use this section to add a new subject alternate name.
To add a new subject alternate name, follow these steps:
1. On the Subject Alternate Name pane.
2. Click
Add  .
The Subject Alternate Name Details
window is displayed.
.
The Subject Alternate Name Details
window is displayed.
Figure 25: Subject Alternate Name

3. Enter the information in the Subject Alternate Name Details pane as tabulated in Table 13 .
4. Click Save. A confirmation message is displayed and the Subject Alternate Name information is updated. If you click Clear, all the fields are set to default values that are blank.
Use this section to view, modify, and delete the email address or addresses associated with the subject. When you identify a email address is not associated with the subject, you can also add a new email address and associate it with the selected subject.
To view, delete, and modify email address, follow these steps:
1. On the Subject Information pane, go the Email Address pane.
2. To
edit the existing email address, select the required record number. click
 .
The Email Address pane is displayed.
.
The Email Address pane is displayed.
Figure 26: Email Address

Details
3. Enter the information in the Email Address pane as tabulated.
Table 13 describes fields in the Email Address pane. Fields marked with asterisk * are mandatory.
NOTE |
Select the check box if you do not know the details. |
Fields |
Description |
|---|---|
|
|
|
|
|
|
|
|
|
|
4. Click Save. A confirmation message is displayed and the Email Address details are updated.
To delete the existing email address, select
the required record number from the list and click  .
The selected email address is removed from the list.
.
The selected email address is removed from the list.
Use this section to add a new email address.
To add a new email address, follow these steps:
1. On the Email Address pane.
2. Click
Add  .
The Email Address window is displayed.
.
The Email Address window is displayed.
Figure 27: Email Address

3. Enter the information in the Email Address pane as tabulated in Table 13 .
4. Click Save. A confirmation message is displayed and the Email Address information is updated. If you click Clear, all the fields are set to default values that are blank.
Use this section to view, modify, and delete the website (URL) address or addresses associated with the subject. When you identify a website (URL) address is not associated with the subject, you can also add a new website (URL) address and associate it with the selected subject.
To view, delete, and modify website (URL) address, follow these steps:
1. On the Subject Information pane, go the Website (URL) Address pane.
2. To
edit the existing website (URL) address, select the required record number.
click  . The Website
(URL) Address pane is displayed.
. The Website
(URL) Address pane is displayed.
Figure 28: Website (URL) Address

Details
3. Enter the information in the Website (URL) Address pane as tabulated.
Table 13 describes fields in the Website (URL) Address pane. Fields marked with asterisk * are mandatory.
NOTE |
Select the check box if you do not know the details. |
Fields |
Description |
|---|---|
|
|
|
|
|
|
|
|
|
|
4. Click Save. A confirmation message is displayed and the website (URL) address details are updated.
To delete the existing website (URL) address,
select the required record number from the list and click  . The selected
website (URL) address is removed from the list.
. The selected
website (URL) address is removed from the list.
Use this section to add a new website (URL) address.
To add a new website (URL) address, follow these steps:
1. On the Website (URL) Address pane.
2. Click
Add  .
The Website (URL) Address window
is displayed.
.
The Website (URL) Address window
is displayed.
Figure 29: Add Website (URL) Address

3. Enter the information in the Website (URL) Address pane as tabulated in Table 13 .
4. Click Save. A confirmation message is displayed and the Website (URL) Address information is updated. If you click Clear, all the fields are set to default values that are blank.
Use this section to view, modify, and delete the account or accounts associated with the subject. When you identify an account is not associated with the subject, you can also add a new account and associate it with the selected subject.
To view, delete, and modify account, follow these steps:
1. On the Subject Information pane, go the Account Information pane.
2. To
edit the existing account, select the required record number. click  .
The Account Information pane is
displayed.
.
The Account Information pane is
displayed.
Figure 30: Account Information

Details
3. Enter the information in the Account Information pane as tabulated.
Table 13 describes fields in the Account Information pane. Fields marked with asterisk * are mandatory.
Fields |
Description |
|---|---|
|
|
|
|
|
|
|
|
|
|
4. Click Save. A confirmation message is displayed and the Account Information details are updated.
To delete the existing account, select the
required record number from the list and click  .
The selected account is removed from the list.
.
The selected account is removed from the list.
Use this section to add a new account.
To add a new account, follow these steps:
1. On the Account Information pane.
2. Click
Add  .
The Account Information window
is displayed.
.
The Account Information window
is displayed.
Figure 31: Add Account Information

3. Enter the information in the Account Information pane as tabulated in Table 13 .
4. Click Save. A confirmation message is displayed and the Account Information is updated. If you click Clear, all the fields are set to default values that are blank
Use this section to view, modify, and delete the financial institution or institutions associated with the subject. When you identify a financial institution is not associated with the subject, you can also add a new financial institution and associate it with the selected subject.
To view, delete, and modify financial institution, follow these steps:
1. On the Subject Information pane, go the Relationship with Financial Institution pane.
2. To
edit the existing financial institution, select the required record number.
click  . The Relationship
with Financial Institution pane is displayed.
. The Relationship
with Financial Institution pane is displayed.
Figure 32: Relationship with Financial Institution

Details
3. Enter the information in the Relationship with Financial Institution pane as tabulated.
Table 13 describes fields in the Relationship with Financial Institution pane. Fields marked with asterisk * are mandatory.
Fields |
Description |
|---|---|
|
|
|
|
|
|
|
|
|
|
4. Click Save. A confirmation message is displayed and the Relationship with Financial Institution details are updated.
To delete the existing account, select the
required record number from the list and click  .
The selected account is removed from the list.
.
The selected account is removed from the list.
Use this section to add a new account.
To add a new account, follow these steps:
1. On the Relationship with Financial Institution pane.
2. Click
Add  .
The Relationship with Financial Institution
window is displayed.
.
The Relationship with Financial Institution
window is displayed.
Figure 33: Add Relationship with Financial Institution

3. Enter the information in the Relationship with Financial Institution pane as tabulated in Table 13 .
4. Click Save. A confirmation message is displayed and the Relationship with Financial Institution is updated. If you click Clear, all the fields are set to default values that are blank
**************>
5.
To record the information on a selected report, users can use the Audit Details window to update the details. An Analyst, Auditor, or Supervisor can add comments to a report in any status.
To add comments to a report, follow these steps:
1. In
the Reports Details page,
click Audit ![]() . The Audit Details window
is displayed.
. The Audit Details window
is displayed.
Figure 34:

Comments
2. Enter the comments in the Comments field.
NOTE |
You can enter up to 255 characters. |
3.
4. Click Done. The Audit Details tracks both actions and comments entered.
Use the Narrative option to summarize any suspicious activity and to mention the action taken by the reporting entity.
To use the Narrative option, follow these steps:
1. In
the Reports Details page,
click Narrative ![]() . The Description
of Activity window
is displayed
. The Description
of Activity window
is displayed
2. .
Figure 35:

Description of Activity
3. Enter the following information in the respective text fields. Fields marked with * are mandatory.
§ Description of Suspicious Activity: Enter the summary of the suspicious activity.
§ Action Taken by Reporting Entity: Enter the action taken by the reporting entity.
4. Click Save. A confirmation message is displayed.
5. Click OK. The updated Report Details page is displayed.
The Audit section tracks both actions and comments entered while performing the Narrative action.
Use the Audit section to view the audit history of a report. It provides complete details of the actions performed on the report and comments provided by the users in the various statuses.
To use the Audit option, follow these steps:
1. In
the Reports Details page,
click Audit  .
The Audit Details window is displayed.
.
The Audit Details window is displayed.
Figure 36:

Audit Details
The Audit captures the following actions:
§ Created From Case
§ Created Manually
§ Modified Reporting Entity
§ Modified Account Involved Details
§ Modified Person or Account Owner details
§ Modified Transaction Details
§ Modified Suspicious Activity Description
§ Modified Narrative and Action
§ Added New Document
§ Modified Document
§ Removed Document
§ Edit/ Delete Report
1 Originating Report
2 New Report
§ E-File Generation Unsuccessful
§ Acknowledgment Details
3 If the report is accepted then Upload Acknowledgment (Comments displayed - Report is Accepted)
4 If the report is rejected then Upload Acknowledgment (Comments displayed- Report is Rejected along with error message)
The Actions section displays all the actions taken on the report. The details displayed in this window are described in Table 23 .
While analyzing the report, you can also add additional documents to support your analysis. This additional information aids in taking a correct decision on the report. When you attach a document to a report, the status of that report does not change. However, the attachment is added to the report’s history.
An Analyst or a Supervisor can attach or delete documents in all statuses except when the report is in View Only mode. For more information on user roles, see Table 5 .
To attach a document, follow these steps:
1. In
the Reports Details page,
click Upload Documents ![]() .
The Upload Documents window
is displayed.
.
The Upload Documents window
is displayed.
Figure 37:
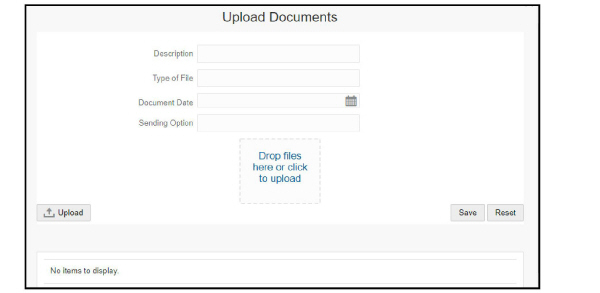
Upload Documents
2. Enter the following information in the Add Document pane as tabulated.
Table 24 describes fields in the Add Document pane. Fields marked with asterisk * are mandatory.
3. Click Drop Files Here or Click to Upload to select the document from your computer. The selected file is displayed in the document list. The document list provides the information of the document such as file name, size of the document, and type of document.
Click Delete  to
remove the document from the list.
to
remove the document from the list.
4. Select the document from the list and click Upload. The document is attached to the selected report.