3. Deploying Application Interface WebServices
3.1 Creating Data Sources for WebServices
it is assumed that a managed server is already created for the following web service deployment(s) as per the process detailed in Application Installation guide section - 3.2 Creating Domain and Servers.
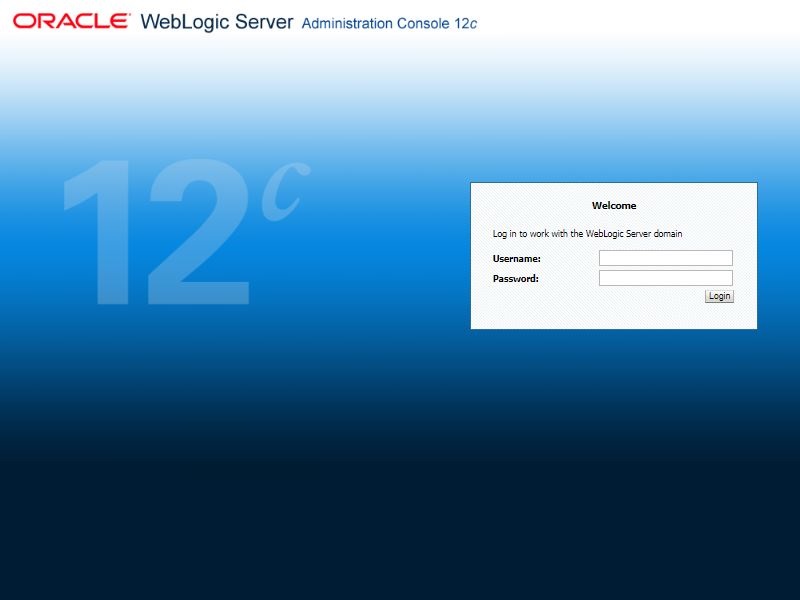
- Login to WebLogic Server 12c console (http://hostname:port/console).
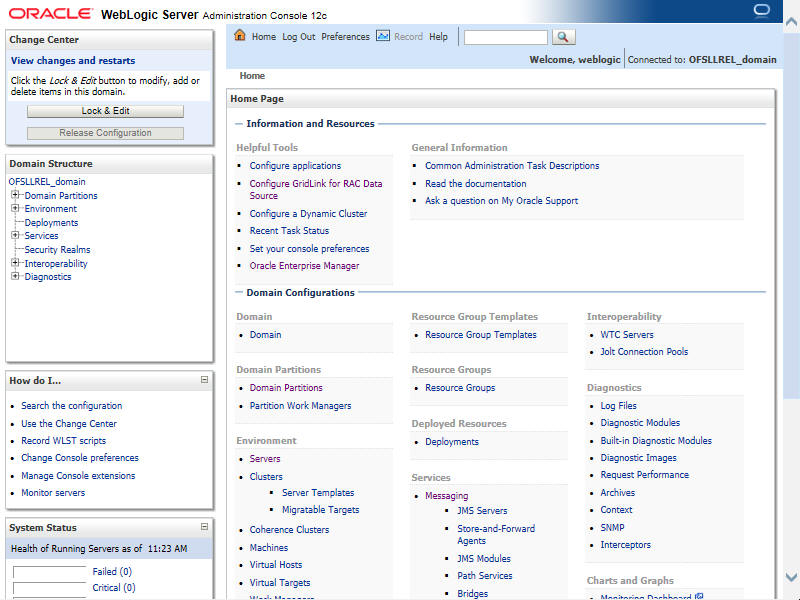
- The following window is displayed.
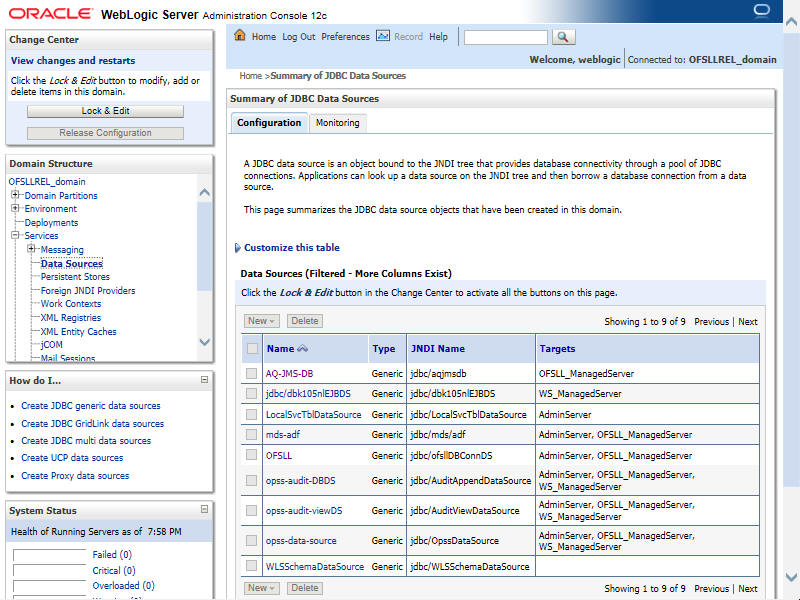
- Click Domain Name > Services > Data Sources. The following window is displayed.
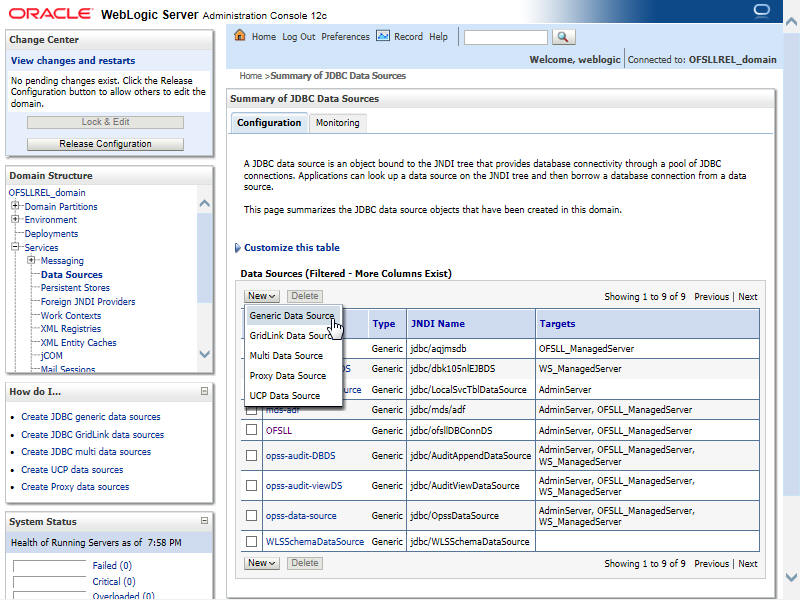
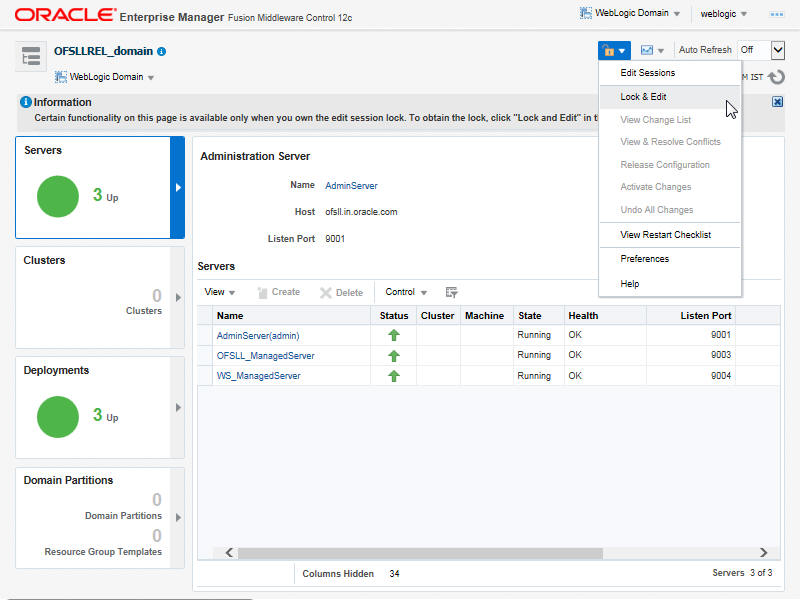
- Click ‘Lock & Edit’ button on the left panel. Click ‘New’ on right panel and select ‘Generic Data Source’.
- Specify the following details:
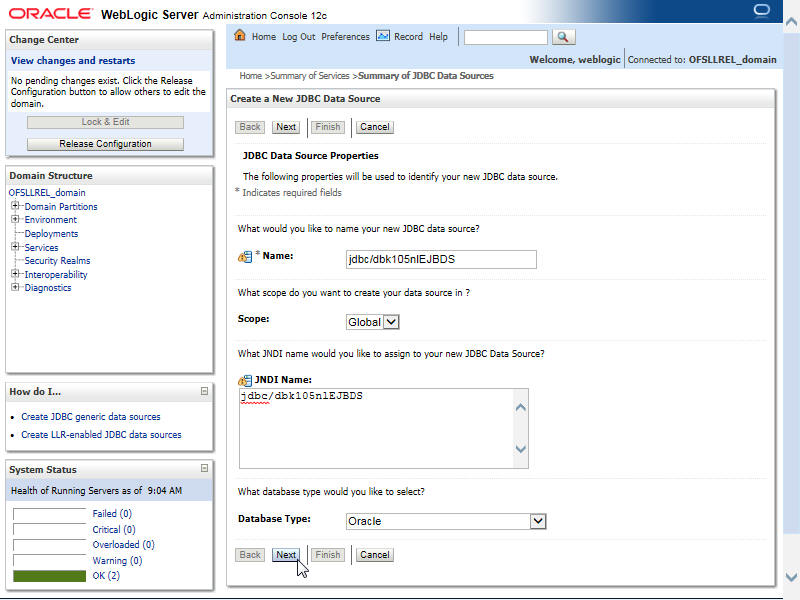
- Enter Data source Name.
- Enter JNDI Name as ‘jdbc/dbk105nlEJBDS’.
- Select ‘Oracle’ as Database Type.
- Click ‘Next’. The following window is displayed.
- Select the Database Driver ‘Oracle's Driver(Thin) for Instance connections;Versions:Any’ as shown.
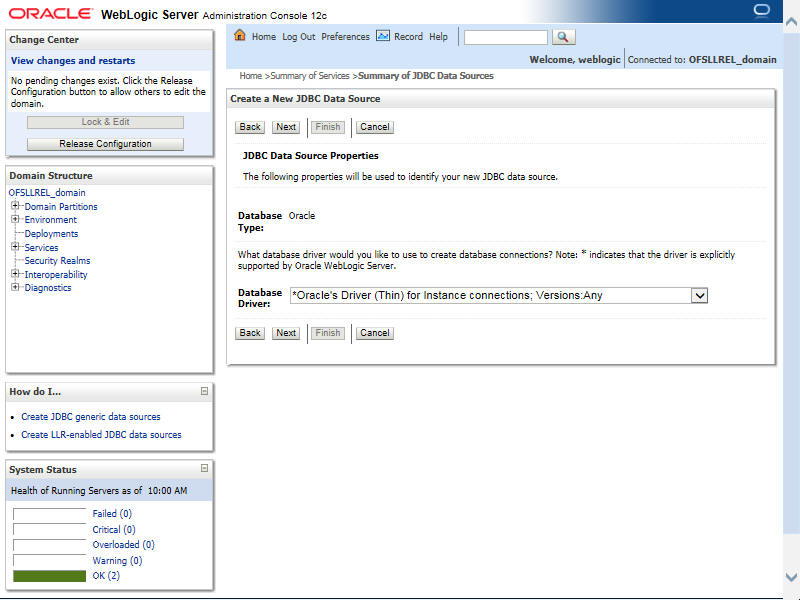
- Click ‘Next’. The following window is displayed.
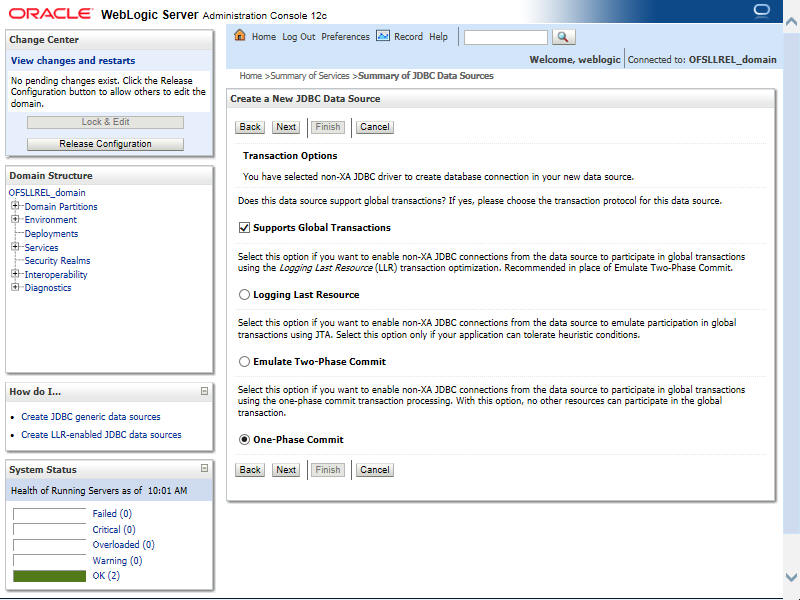
- Click ‘Next’. The following window is displayed.
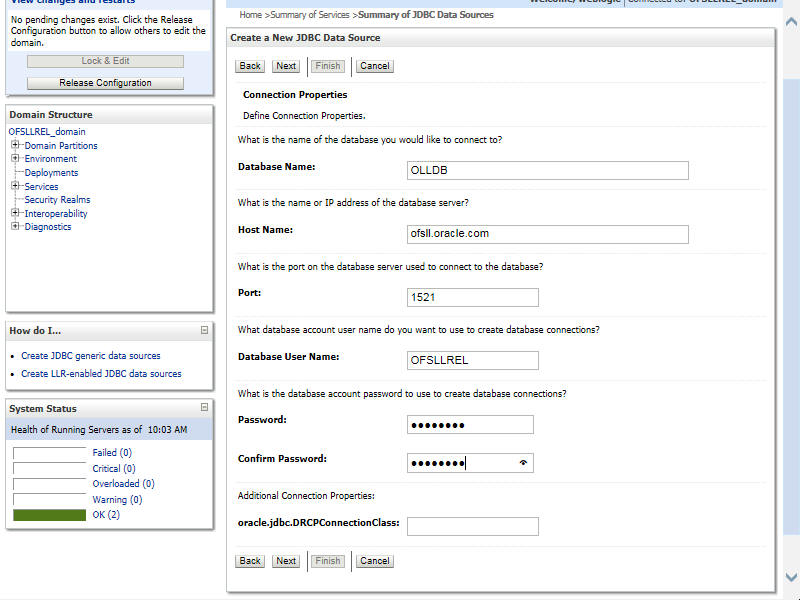
- Enter the Database details.
- Click ‘Next’. The following window is displayed.
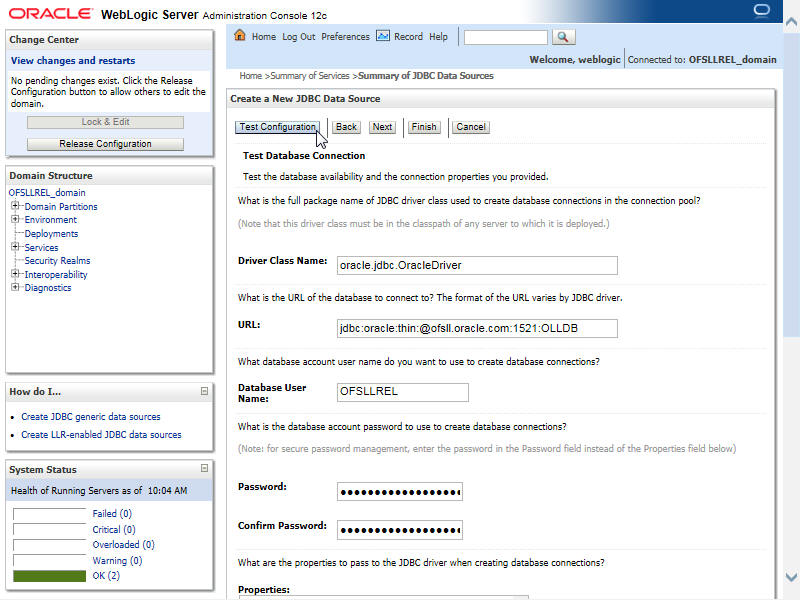
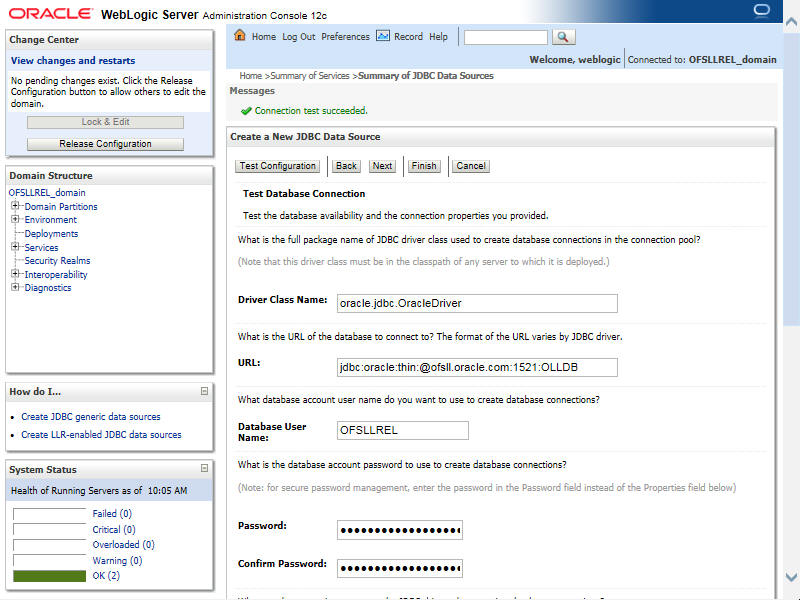
- Click ‘Test Configuration’. The following window is displayed indicating a confirmation message as ‘Connection test succeeded’.
- Click ‘Next’. The following window is displayed.

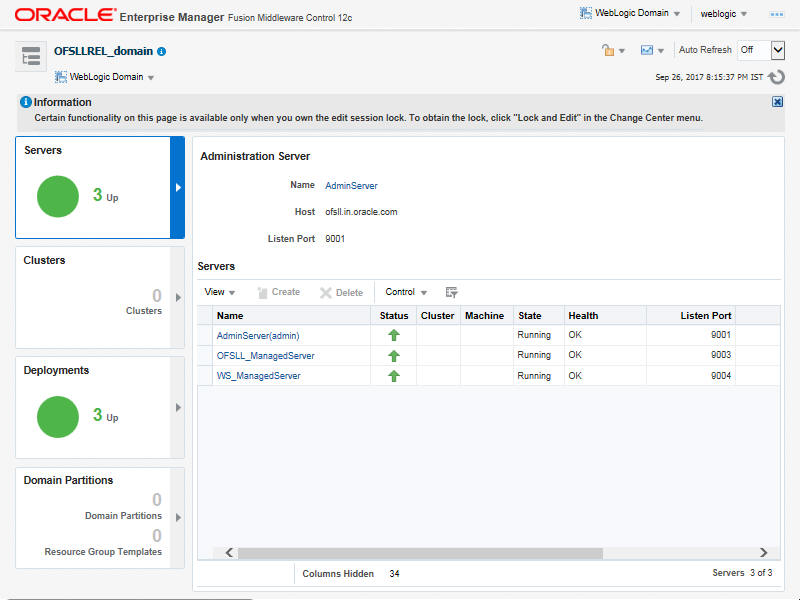
- Select ‘WS_ManagedServer’ as the target Web service Server and click ‘Finish’. The following window is displayed.
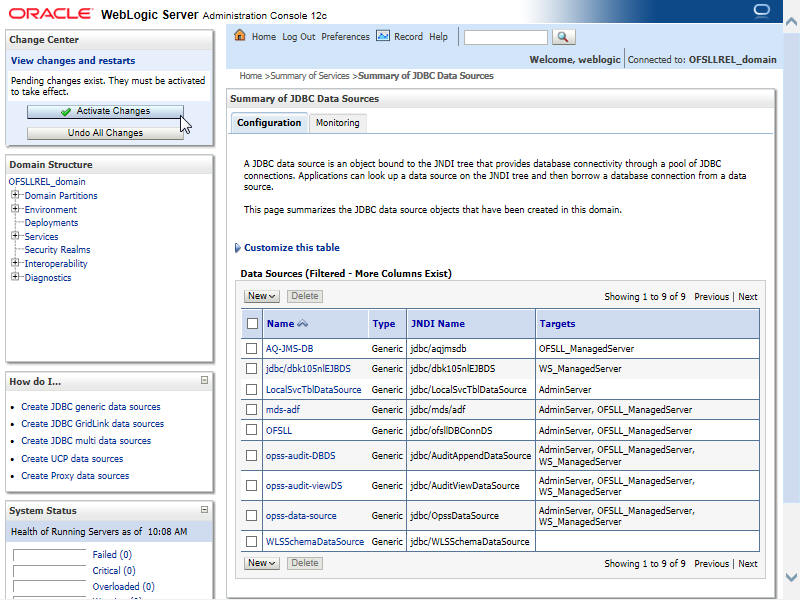
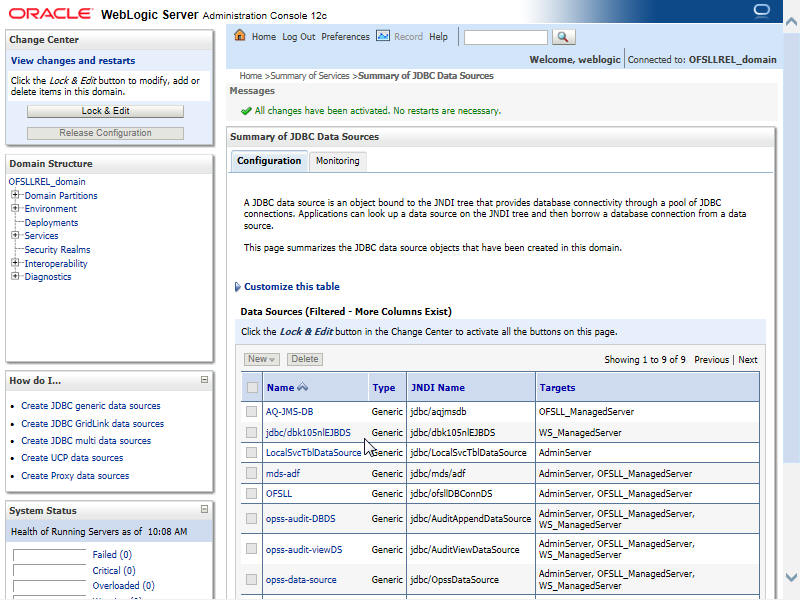
- Click ‘Activate Changes’.
Similarly follow the above steps to create the following data sources:
- jdbc/dbkwsDS
- jdbc/IN1HukWznG0b4esj
3.2 Working with SSL
It is not recommended to run OFSLL WebServices with the test certificates in production. You have to get:
- Vendor public production key/certificates for SSL handshake. These have to be imported into weblogic truststore.
- RO public production key/certificates to validate digital signature in the RO inputs. This has to be imported into dls_cacerts keystore mentioned in the configuration file.
- Generate production grade public/private key signed by appropriate CA. The public key has to be shared with RO so that they can validate digital signature in OFSLL requests. The corresponding private key should not be shared, should be imported into dls_cacerts keystore mentioned in the configuration file and used to add the digital signature in RO requests.
Additional Notes
- While testing with the test certificates, you may get error: ‘Signature verification failed because RSA key public exponent [3] is too small’.
- As a fix, you need to add the following in the start-up script: ‘Dweblogic.security.SSL.allowSmallRSAExponent=true’
- You may encounter error: ‘java.security.InvalidKeyException: Illegal key size or Cipher not initialize’.
- As a fix add the following in the start-up script: ‘Dweblogic.security.SSL.nojce=true’
- You may encounter error: ‘java.security.InvalidAlgorithmParameterException: the trustAnchors parameter must be non-empty’.
- As a fix remove the ‘-DUseSunHttpHandler=true’ SSL option if any from the startup script.
3.2.1 Steps to Import Certificates to keystore
- The JKS(dls_cacerts) should be available under /WEB-INF/classes/config.
- Save all the certificates from the vendor website. Note to save the certificates in "Base-64 encoded X.509(.CER)" and with extn .cer. Steps for saving certificates from the vendor website:
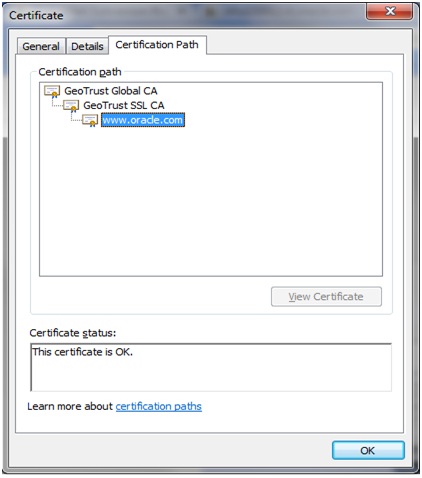
- Click on the padlock and choose ‘View Certificates’.
- Click on the Certification Path tab and select the certificate with the ‘Name’ and ‘Issued To’ the same as the user-defined ID.
- Go to the Details tab.
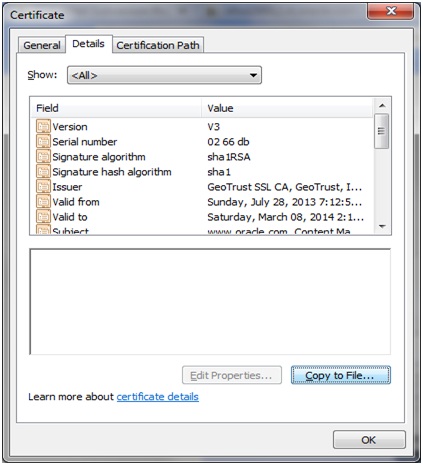
- Click on the ‘Copy to File’ button, and click ‘Next’. Select ‘Base-64 encoding’ and save the file somewhere on your local computer.

- Run following command to import certificate into JKS(dls_cacerts)
- "keytool -keystore <Key store Path> /dls_cacerts -import -trustcacerts -file <Certificate location in file system>\xxx.cer -alias <alias as mentioned in config file>
- Run following command to view details of certificate like expiration date of certificate etc.
- "keytool -list -rfc -alias alias <alias as mentioned in config file> -keystore <Key store Path> /dls_cacerts
- "keytool -list -v -alias alias <alias as mentioned in config file> -keystore <Key store Path> /dls_cacerts
For more details on keytool refer the link: http://docs.oracle.com/javase/7/docs/technotes/tools/windows/keytool.html
3.2.2 Enable SSL Debugging
SSL debugging can be enabled by adding the following to managed server start-up script: ‘Dssl.debug=true’
3.2.3 Connecting to service supporting only TLS protocol
For WLS 12c by default (acting as a client) will send sslv2 hello for the SSL handshake to TLS service. The TLS service will not respond to SSLv2 hello and the connection will be dropped.
The fix for the problem is to set Dweblogic.security.SSL.protocolVersion=TLS1 at the Managed server level in which the WebServices have been deployed.
3.3 Create RouteOne Credentials and System Policies
In order Configure RouteOne, you need to create credentials and system policies.
- Login to Oracle Enterprise Manager 12c (http://hostname:port/em).
- On the left panel, right click on OFSLLREL_domain and select Security > System Policies > Credentials. The following window is displayed.

- Click ‘Create Map’. The following window is displayed.

- Enter Map Name as ‘ofsll.int.routeone’ and click ‘OK’.
- Click ‘Create Key’. The following window is displayed.
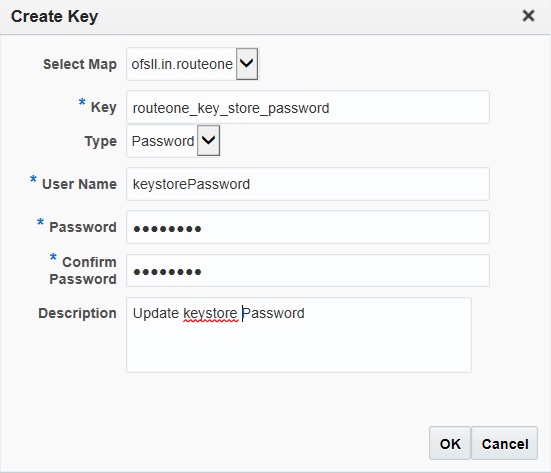
- Click ‘OK’.
Similarly you need to create the following Maps and corresponding keys as indicated in following table.
Maps |
Key Name |
Username |
Password |
Description |
ofsll.int.routeone |
routeone_key_store_pd |
keystorePassword |
changeit |
The keystore password |
routeone_key_alias |
roKeyAlias |
routeone_pub_tst |
RouteOne's public key alias name.The public key is needed to verify the xml signature of the request. |
|
routeone_sscro_key_pd |
sscroKeyAlias |
ssc_routeone |
OFSLL's private key alias name. The private key is used to sign xml response to RouteOne |
|
routeone_sscro_key_passsword |
sscroKeyPassword |
demotestSSCR1 |
OFSLL's private key password |
You need to provide access permission for the below mapping. For details on how to set the access permission, refer to point 9 in ‘Create Credentials and System Policies’ topic available in Application Installation Guide.
Permission Class |
Resource Name |
Permission Actions |
oracle.security.jps.service.credstore.CredentialAccessPermission |
context=SYSTEM,mapName= ofsll.int.routeone,keyName=* |
read |
3.4 Deploying Webservices
3.4.1 Deployment of WebServices in Enterprise Manager
- Download and unzip the WebServices - ofsllxws.zip.
- Following is a mapping of which EAR is needed for which service:
dbkls-xxws.ws.app-dt.ear
dbkls-xxws.ws.app-ds.ear
dbkls-xxws.ws.app-ro.ear
DT Interface: To receive loan application from dealer track
DS Interface: To receive edocs application update
RO Interface: To receive loan application from route one
DT Interface: To receive loan application/deal update from dealer track
DS Interface: To receive edocs comment update
RO Interface: To receive loan application/deal refresh from route one
DT Interface: To receive comments from dealer track
DS Interface: To receive edocs location update
RO Interface: To receive comments from route one
LOSPostStatusRequestService: To post comments to dealer track
LOSPostStatusRequestService: To post comments to route one
LOSPostStatusRequestService: To post application status to dealer track
LOSPostStatusRequestService: To post application status to route one
ILOSPostDealerDetailsService: To post dealer details to dealer track
ILOSPostDealerDetailsService: To post dealer details to dealer track
LOSEContractService: To recieve contract information from RouteOne
- Unzip all the ear files present:
- dbkls-xxws.ws.app-dt.ear
- dbkls-xxws.ws.app-ro.ear
- dbkls-xxws.ws.app-ds.ear
- Open each of the unzipped files and unzip the war file.
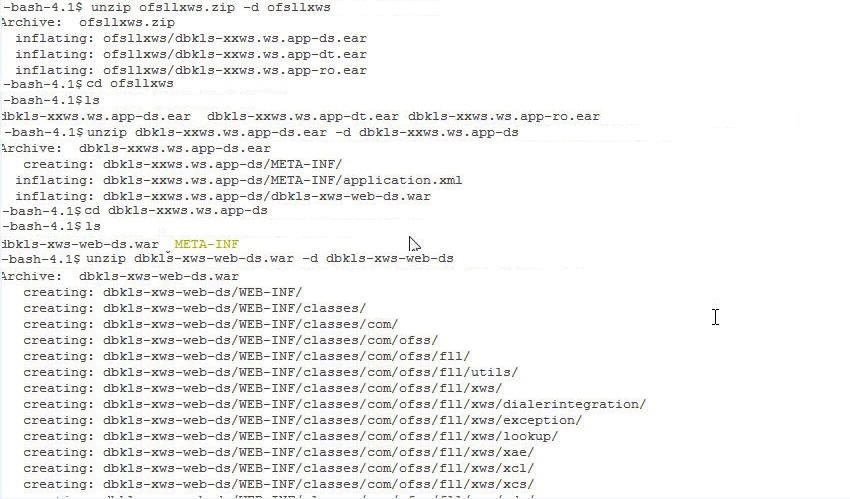
- It creates a WEB-INF file

After unzipping the war file to directory, the directory will have the following structure
- / dbkls-xxws.ws.app-ds / dbkls-xxws.ws.app-dt / dbklsxxws.ws.app-ro
WEB-INF (directory)
---->classes (directory)
- config
- class files (in package folders)
-----> lib (directory)
- OfsllCommonCSF.jar
------> wsdl (directory)
- *.wsdl
-----> *-java-wsdl-mapping.xml
-----> web.xml
-----> weblogic.xml
-----> weblogic-webservices.xml
-----> weblogic-webservices-policy.xml
-----> webservices.xml
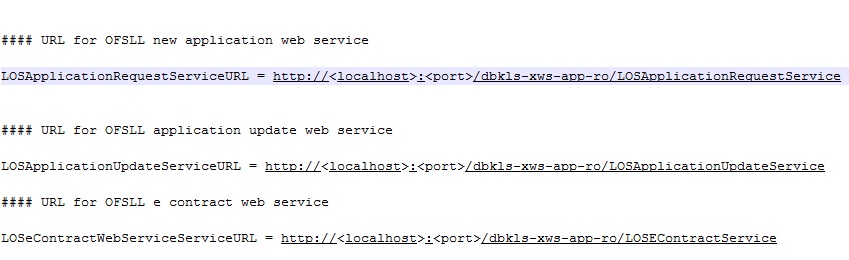
- To edit the web interface config files, navigate to the above WEB-INF > classes > config. Edit the following configuration files with the application url and port.
For complete details on configuration parameters, refer to “Configuration parameters” section in Appendix chapter.
- ds_servlet_init.conf-This is the configuration file only for edocs servlet interface
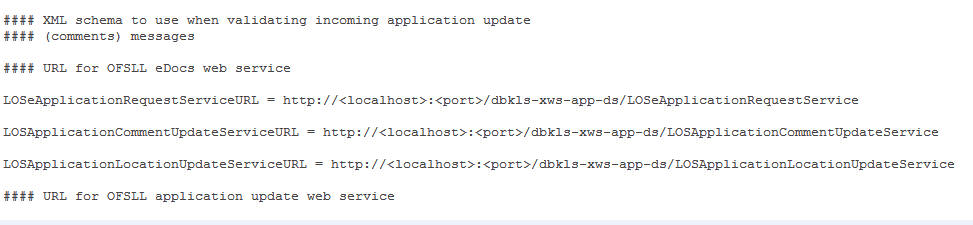
- dt_servlet_init.conf- This is the configuration file only for dealer track servlet interface

- ro_servlet_init.conf- This is the configuration file only for route one servlet interface
- Login to Web Logic application server enterprise manager (e.g.: http://hostname:port/em)
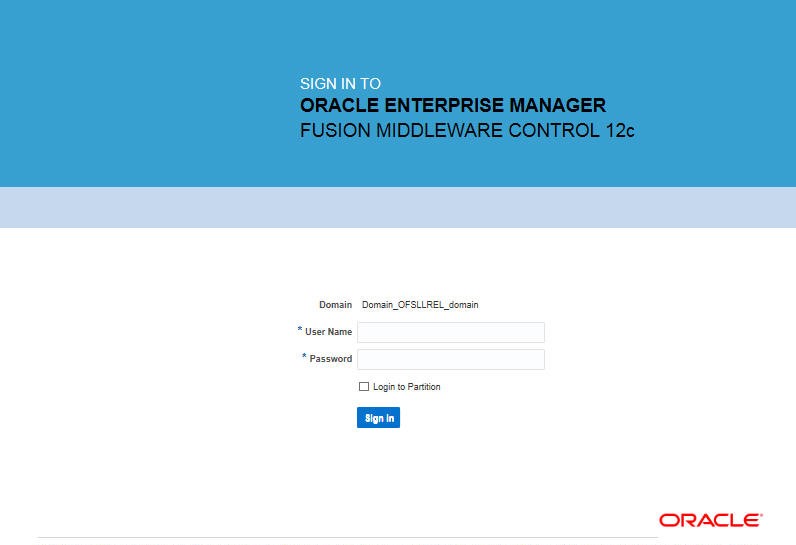
- Enter valid login credentials. The following window is displayed.
- Expand the weblogic domain present in the left pane. The following window is displayed.
- Right click on ‘WS_ManagedServer’ in left panel, select Application Deployment > Deploy.

- The following window is displayed.
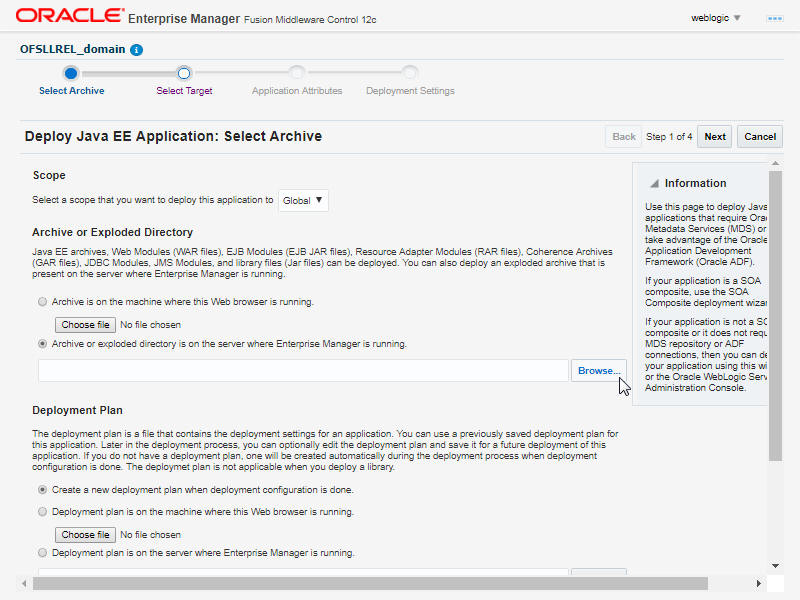
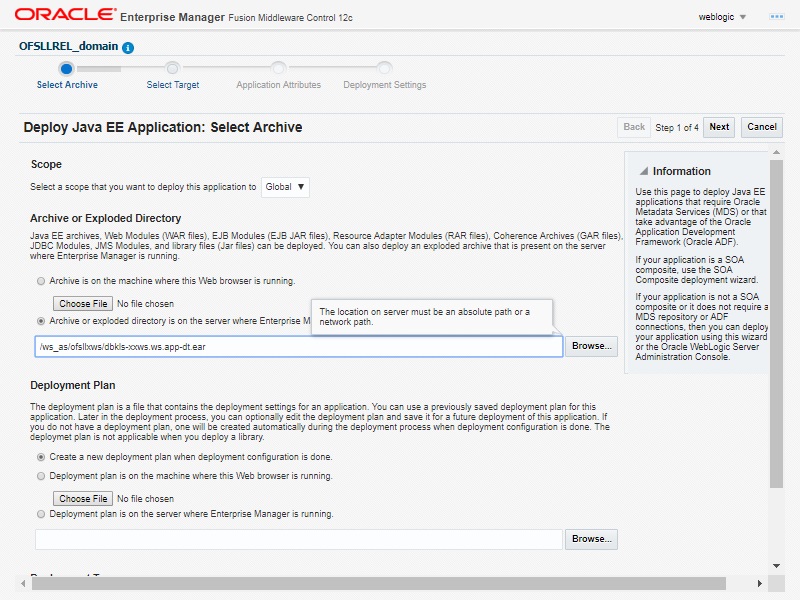
- Browse to the folder containing the WebService.
Eg: /ws-as/ofsllxws/dbkls-xxws.ws.app
Click ‘Next’.
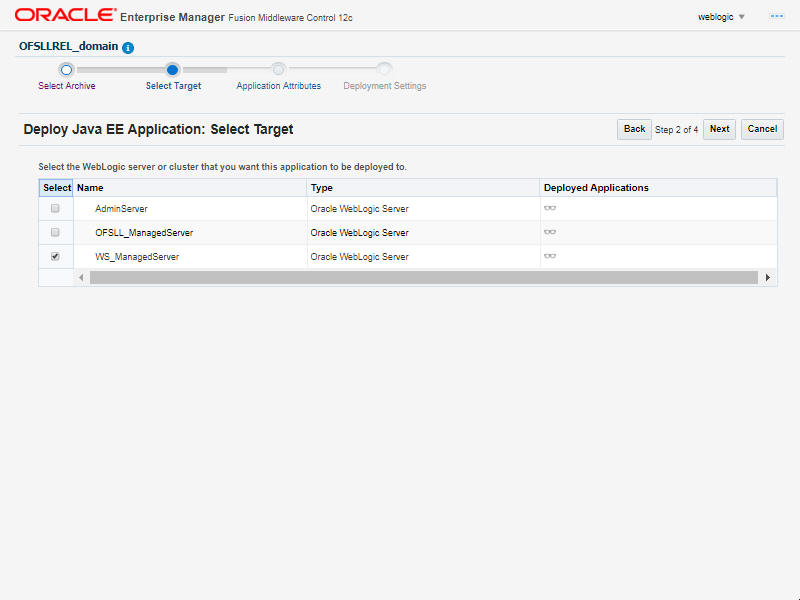
- The following window is displayed. Select the server on which the WebService needs to be deployed. Click ‘Next’.
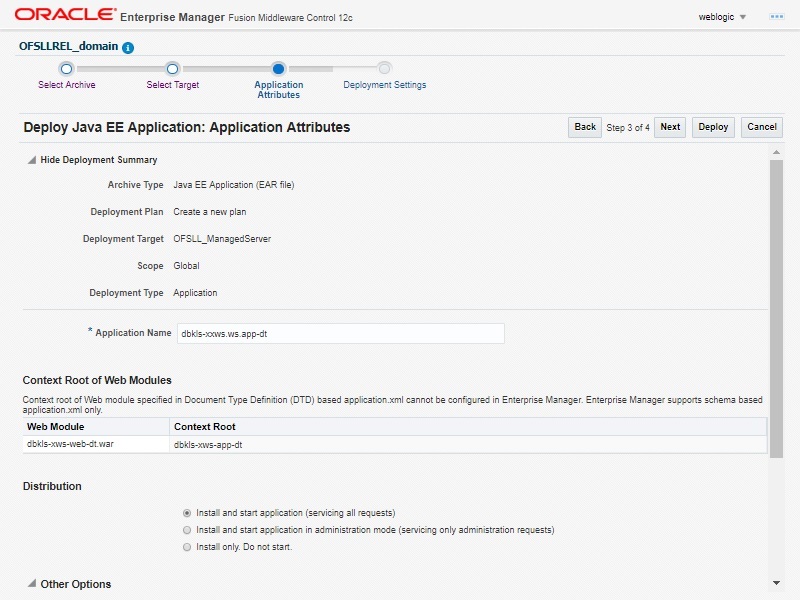
- The following window is displayed. Check the context root and select the Distribution option as ‘Install and start application (servicing all requests)’. Click ‘Next’.
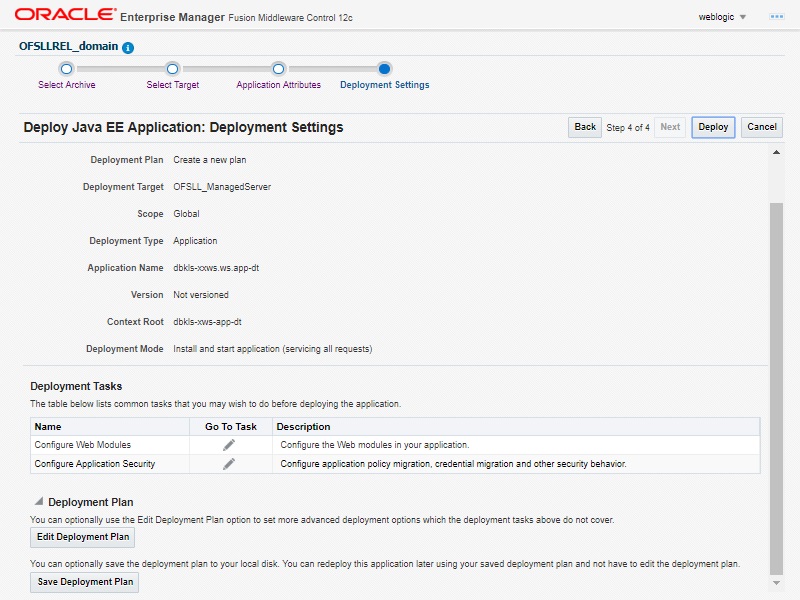
- The following window is displayed. Click ‘Deploy’.
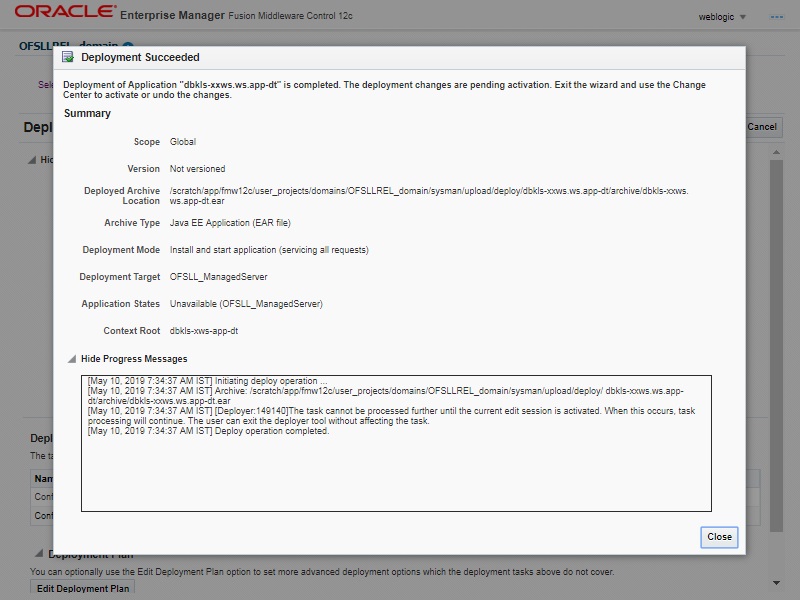
- The following window is displayed. Click ‘Close’.
- If required, similarly deploy rest of the WebServices.
- In case the context root has to be changed for the WebServices, it can be changed by editing the application.xml or through the console. To change through console, login to WebLogic Server 12c console (http://hostname:port/console).
- Go to Deployments > <select the service deployment> > Configuration General and modify the context root to the recommended name as follows:
Service
Service EAR
Recommended Context
Remark
Edocs Interface
dbkls-xxws.ws.app-ds.ear
dbkls-xws-app-ds
If this the recommended context name is not used, then the Service URLs in the configuration files needs to be changed
Dealer Track Interface
dbkls-xxws.ws.app-ds.ear
dbkls-xws-app-dt
If this the recommended context name is not used, then the Service URLs in the configuration files needs to be changed
Route One Interface
dbkls-xxws.ws.app-ro.ear
dbkls-xws-app-ro
If this the recommended context name is not used, then the Service URLs in the configuration files needs to be changed
- Ensure that the application status is ‘Active’.