2. Limits
The functions and actions provided by the Oracle Banking Enterprise Limits and Collateral Management are explained below. All functions explained below, come under Limits in the Menu Browser.
This chapter contains the following sections:
- Section 2.1, "Maintaining Line Code details"
- Section 2.2, "Facilities Maintenance"
- Section 2.3, "Account/Contract Balance Maintenance for Netting"
- Section 2.4, "Ear Marking Maintenance"
- Section 2.5, "Queue Maintenance"
- Section 2.6, "Breach Tracking for Main Line Facility Utilization Transactions"
- Section 2.8, "About Approval By Email"
- Section 2.9, "Facilities Amount Transfer Maintenance"
- Section 2.9, "Facilities Amount Transfer Maintenance"
- Section 2.10, "Dual Authorization of Utilization Transaction"
- Section 2.10, "Dual Authorization of Utilization Transaction"
2.1 Maintaining Line Code details
You can create and maintain line codes in the ‘Line Code Maintenance’ screen. Using this screen you can maintain line code details. These details are populated to ‘Facilities Maintenance screen’ (GEDFACLT).You can invoke the ‘Line Code Maintenance’ screen by typing ‘GEDLNCOD’ in the field at the top right corner of the Application tool bar and clicking the adjoining arrow button.
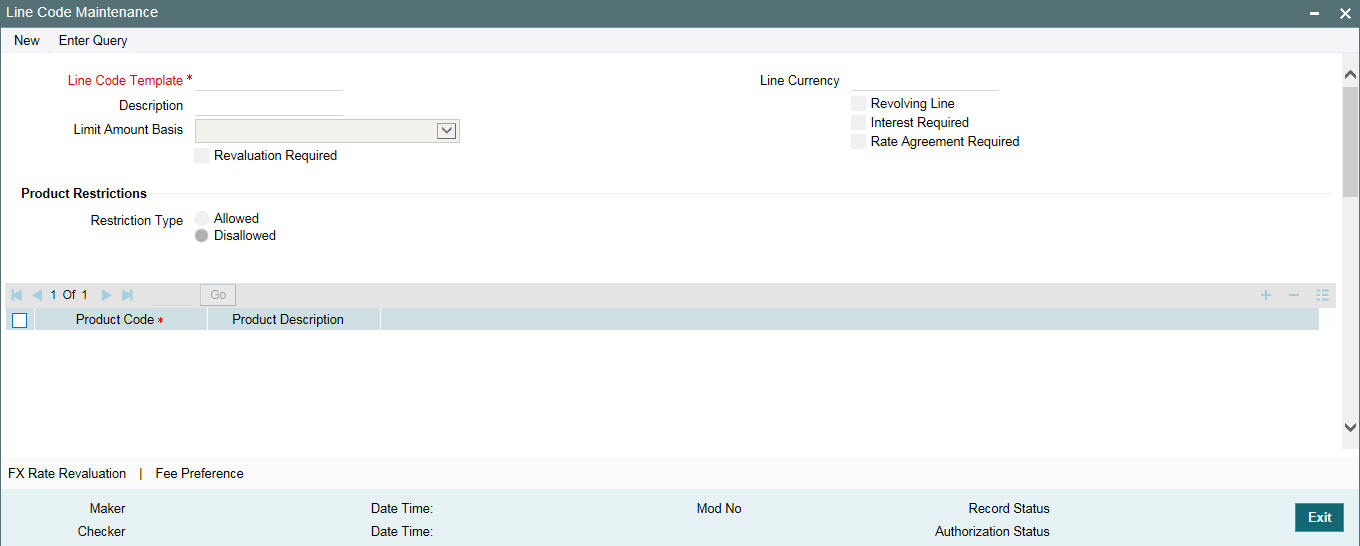
Line Code Template
Specify a unique code for the Line Code Template.
Description
Specify the description of the Line Code.
Limit Amount Basis
The value for Limit Amount can be maintained as the following:
- Limit Amount Basis
- Limit Amount + Collateral Contribution Limit Amount
- Min(Limit Amount, Collateral Contribution)
Line Currency
Specify the currency in which the Line Code is to be defined.
Revolving Line
Select this check box to indicate that the credit line is Revolving. A revolving credit line indicates that a repayment of the utilized credit should reinstate the credit limit of the customer.
Interest Required
Select this check box to indicate the facility is applicable for interest calculation.
Revaluation Required
Identifies if the facility has to revalued or not.
Rate Agreement Required
If this check box is selected, then rates are taken based on FX rate fixing. If this check box is not selected, then rates are taken from 'Currency Exchange Rates Input' screen based on the maintenance done in ‘Global Exposure Parameter’ screen.
The system picks the rate/rate code and updates the utilization across the facility linked to the contracts.
Product Restriction type
You can restrict the limit available under this line to a specific product by selecting allowed/ disallowed option.
If you choose the restriction type as 'Allowed', click the button and select the Product code from the
list to indicate that they are allowed to use the line.
If you choose the restriction type as 'Disallowed', click the button and select the Product code from the
list to indicate that they are not allowed to use the line.
Product Code
Specify the product code from the LOV for the Product Restriction.
Product Description
The product code description is displayed.
Branch Restriction type
You can restrict the limit available under this line to a specific branch by selecting allowed / disallowed option.
If you choose the restriction type as 'Allowed', click the button and select the Branch code from the
list to indicate that they are allowed to use the line.
If you choose the restriction type as 'Disallowed', click the button and select the Branch code from the
list to indicate that they are not allowed to use the line.
Branch
Specify the branch code from the LOV for the Branch Restriction.
Branch Description
Branch Code description is displayed.
Tenor Restrictions
You can define the limits based on the tenor of the contracts that utilize the limit.
Tenor
Specify the Tenor Name.
Days
Number of days corresponding to the tenor.
2.1.1 FX Rate Fixing
Provision to fix a rate between a 'Transaction Currency' and 'Facility Currency'.
Currently, system picks the rates for utilization transaction based on the maintenance at Parameter level in 'Global Exposure Parameter Detail’ screen.
A fixed rate can be provided or a set of parameters like rate type and rate indicators can be maintained, and the rate pick up is derived based on these parameters.
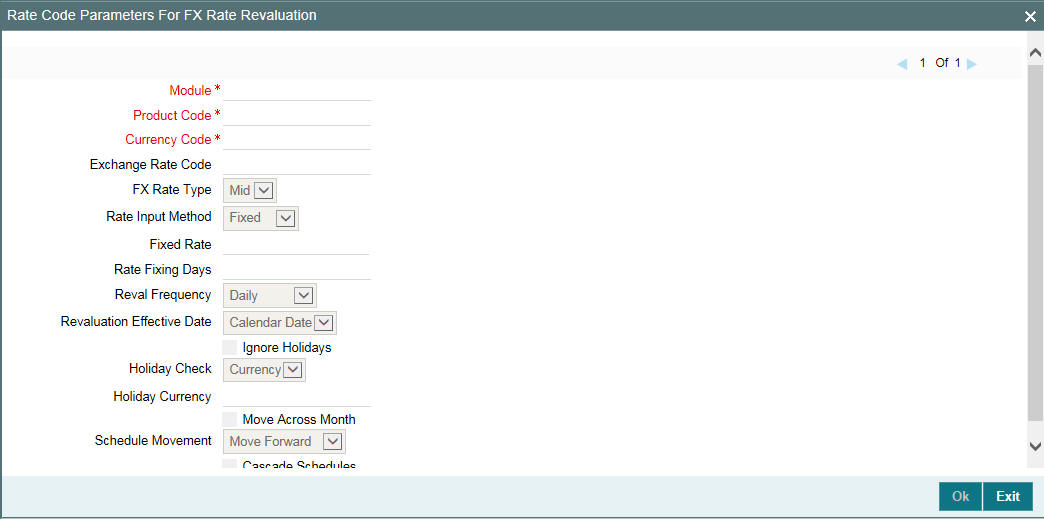
Module
Specify the associated module from the adjoining option list.
Product Code
Based on the module, the product code appears accordingly.
Currency Code
Specify the valid currency code. The ‘Currency Code’ cannot be same as ‘Line Currency’.
Exchange Rate Code
Specify the exchange rate code. These rate codes are picked from the Currency Rate Type Definition screen (CYDCRATY).
‘Exchange Rate Code’ field entry is required if the Rate Input Method is ‘Derived’. An error appears if 'Exchange Rate Code’ has a value and ‘Rate Input Method’ is ‘Fixed’.
FX Rate Type
You can either select ‘Mid’, or ‘Sell’ or ‘Buy’.
Rate Input Method
You can either select ‘Fixed’ or ‘Derived’.
- Fixed- Fixed rate provided at the FX level would be picked up.
- Derived- Based on Exchange Rate Code, FX Rate Type, and Rate Fixing Days provided, Rate would be derived.
The system revaluates only those contracts for which ‘Rate Agreement Required' and 'Revaluation Required' are selected.
The Next Reval Date is updated for each of the contracts created based on these FX Maintenances.
- Derived Rate Input Method Type -'Revaluation Frequency', 'Revaluation Effective Date' and ‘Holiday Treatment’ chosen at the facility level.
- Fixed Rate Input Method Type- Today’s Date.
After the End Of Day process, the facility would be revaluated with the modified values for Fixed and Derived Rate Input Method Type.
Fixed Rate
Specify the fixed rate.
‘Fixed Rate’ field entry is required if the ‘Rate Input Method’ is ‘Fixed’. An error appears if 'Fixed Rate' has a value and ‘Rate Input Method’ is ‘Derived’.
Rate Fixing Days
Specify the rate fixing days. The allowed values are 0-5.
In case of 'Derived', rate fixing days as T-0, Rate maintained at the 'Currency Exchange Rates Input' screen is taken.
Rate fixing days as T-1 to T-5, rate would be picked up from the History of 'Currency Exchange Rates Input' screen for the respective date.
Reval Frequency
You can either select ‘Daily’, ‘Weekly’, ‘Monthly’, ‘Quarterly’, ‘Half Yearly’, ‘Yearly’, ‘Ad Hoc’ or ‘None’.
Ensure to select 'Reval Frequency' if you have selected 'Revaluation Required' and 'Rate Agreement Required' check box in the 'Line Code Maintenance' screen.
Adhoc - Fixed rates are revaluated only on modification of rate at facility level. So, the frequency for fixed rates are maintained as ‘Ad Hoc’
None - If you need to suppress currency revaluation for a certain combination of ‘Module’, ‘Product Code’ and ‘Currency Code’, the ‘None’ can be selected as the Frequency.
For ‘Daily’, ‘Weekly’, ‘Monthly’, ‘Quarterly’, ‘Half Yearly’ and ‘Yearly’, next revaluation date is computed based on the Frequency selected.
Note
Reval frequency supported for 'Fixed' rate input method are 'ADHOC' and 'NONE'. For 'Derived' reval frequency except 'ADHOC' rate input method all other are supported.
Revaluation Effective Date
You can either select ‘Calendar Date’ or ‘Value Date’.
Calendar Date – For example, Revaluation date is 15th July, and Frequency is monthly, Next Reval Date would be 1st August.
Value Date - For Example, Revaluation date is 15th July, and Frequency is monthly, Next Reval Date would be 15th August.
Holiday Treatment
Ignore Holidays
If this check box is selected, then holiday treatment is not applied to calculate the next date. If this check box is not selected, then ‘Holiday Preferences’ settings are validated.
Move Across Month
If this check box is selected, then the system moves the date to next month. If this check box is unselected, then the system moves the date to next date.
Example
Working Day |
30-Aug |
1-Sep |
Holiday |
31-Aug |
|
Schedule Movement |
Move Forward |
|
Calculated Next Date |
31-Aug |
|
In above mentioned example, if ‘Move Across Month’ is selected, then the system moves next date to 1-Sep. If ‘Move Across Month’ is not selected, then the system changes next date to 30-Aug.
Schedule Movement
Move Forward
In case calculated next date is holiday then date should be moved forward. In this case fee liquidation moves to 1st Sep which is next working date
Move Backward
In case calculated next date is holiday then date should be moved backward. In this case, fee liquidation moves to 30th Aug which is previous working date
Cascade Schedules
If cascade schedules is selected, then the next date is calculated on based on previous schedule date instead of start date.
Holiday Check
If holiday treatment is applicable, then you can select ‘Local’, ‘Currency’ or ‘Both’ based on your holiday maintenance.
If 'Both' is selected and 'Branch' or 'Currency' is holiday, then holiday processing setting is considered.
Holiday Currency
If holiday check is maintained as ‘Currency’ or ‘Both’ then currency code to be maintained here.
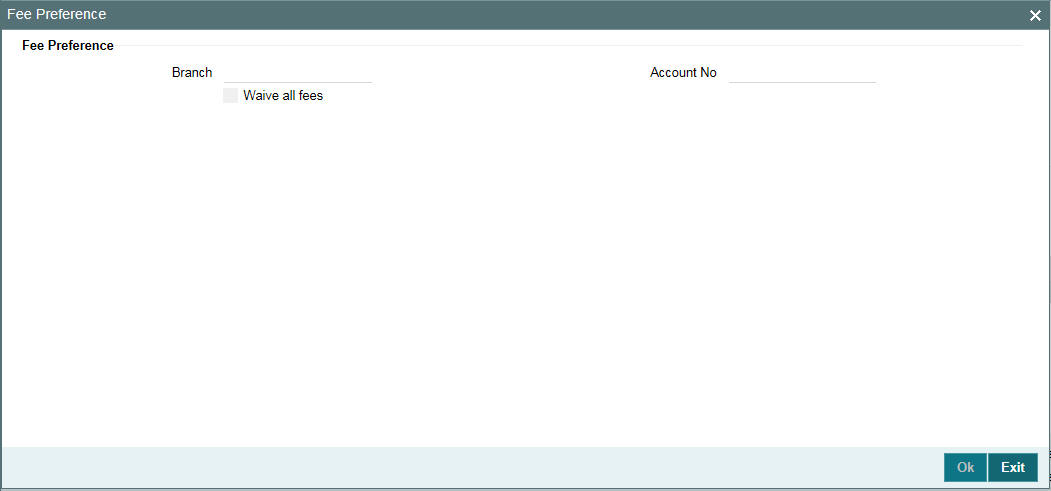
2.1.2 Fee Preference
Branch
You can maintain branch code in this screen and this value gets defaulted in ‘Facilities Maintenance’ screen.
Account No
You can maintain account number in this screen and this value gets defaulted in ‘Facilities Maintenance’ screen.
Waive all fees
Select this check box if you want to waive all the fees.
2.2 Facilities Maintenance
You can maintain credit limits for a Line Code - Liability Code combination in the ‘Facilities Maintenance’ screen. You can invoke the ‘Facilities Maintenance’ screen by typing ‘GEDFACLT’ in the field at the top right corner of the Application tool bar and clicking the adjoining arrow button.
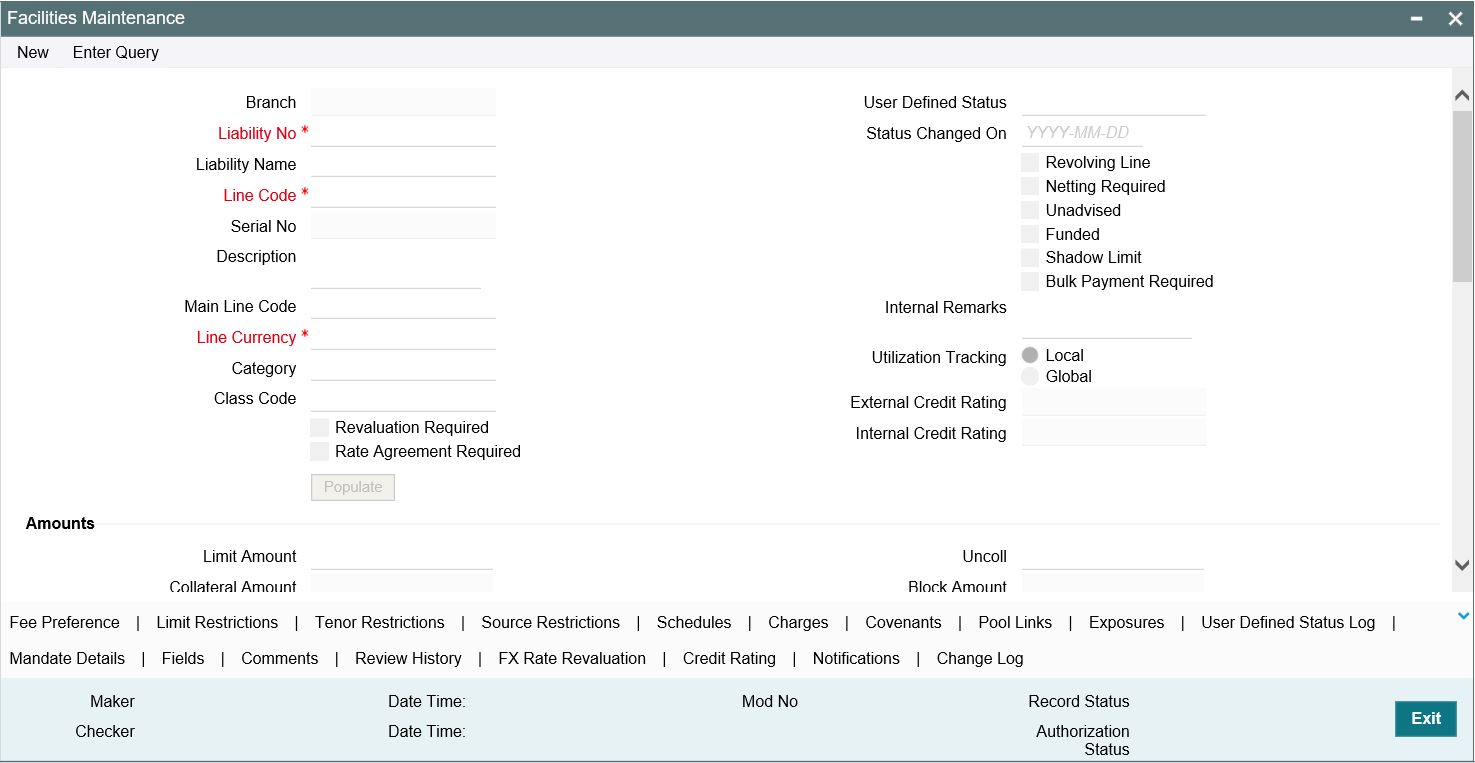
Specify the following details:
Facility Branch
By default, the system displays the branch code in which facility has been created.
Liability Number
Specify the Liability number here.
Line Code
Specify the Line Code to which the liability ID is to be associated with. Allocating credit limits for the Line-Liability combination can be done. The customer(s) who fall under this Liability Code avails credit facilities under this Credit line.
By linking a Credit Line to a Liability code the customer also gets linked to the Credit Line. This is true because a Liability code has been assigned to every credit seeking customer and the credit facilities granted to the customer are defined and tracked with this code.
You can either enter the Line Code or take from a LOV which picks the Line Code details maintained in the ‘GEDLNCOD’ screen.
Serial Number
Each time a Liability - line code combination is specified, Oracle Banking ELM system always defaults 1 as serial number. Thus, for every new record entered for a Liability No-Line Code combination, a serial number is defaulted to 1. The Liability - Line- Serial number forms a unique combination for facility identification.
Note
If a second facility is created with the same line code then an error appears on save. To create multiple facilities, you can also select the line code from the LOV and default the values by clicking on ‘Populate’ button. Then value of line code can then be changed and save.
Description
Give a brief description of the facility here.
Main Line Code
Specify the main line code if the created facility is a sub line.
If the main line code is not specified, then the system defaults the line code as the main line code.
Line Currency
Specify the currency in which the facility is defined. The currency that has been selected have the following implications:
- The limit amount that has been specified for this Line-Liability combination is taken to be in this currency.
- The line that has been defined is available for Utilization only in the line currency, unless specified otherwise under Currency Restrictions in this screen.
Once the entry is authorized you cannot change the currency.
If the limit allotted to this Line-Liability combination can be utilized by accounts and transactions in currencies other than the limit currency, the limit utilization is arrived at by using the mid-rate for the currency pair as of that day.
Category
Select the facility category from the list available here.The list displayed here is based on maintenance done in 'Category Maintenance' screen.
Class Code
Select fee class from class code adjoining option list.
Revaluation Required
Identifies if the facility has to revalued or not.
Rate Agreement Required
If this check box is selected, then rates are taken based on FX rate fixing. If this check box is not selected, then rates are taken from 'Currency Exchange Rates Input' screen based on the maintenance done in ‘Global Exposure Parameter’ screen.
The system picks the rate/rate code and updates the utilization across the facility linked to the contracts.
Revolving Line
Select this check box to indicate that the credit line is Revolving. A revolving credit line indicates that a repayment of the utilized credit should reinstate the credit limit of the customer. You can modify the preference, as required.
Netting Required
This check box is deselected by default, indicating that netting is not required for the facility. You can select this check box to enable netting for the facility.
Unadvised
Select this check box to indicate that the facility is unadvised.
Note
Charges can be collected on the utilization transactions for facilities that are unadvised. For this purpose SDEs ADVISED_LINE and COMMITMENT_CUR_UTIL can be used while setting up the charge rule at the CL product creation level.
Funded
Indicate whether the line is fund based or non fund based.
Shadow Limit
Select this check box to indicate that utilization amounts should be updated only for the facility and mainlines for the facility. Thus, when a utilization request is processed, the system updates the utilization amount only at the facility level and leaves the utilization amount at the liability level untouched.
The mainline and sub-lines of a facility need to have the same preference. This implies that you can enable this option for a sub-line only if the mainline has this option already enabled. Similarly, you cannot create a sub-line as a ‘Shadow Limit’ if the mainline does not have this facility.
Note
You cannot modify this option after you authorize the facility.
Bulk Payment Required
Select this check box to indicate if bulk payment is required. If you specify here that bulk payment is required for the liner, then the same is maintained at the ‘Bulk Payments’ screen.
For more information about the ‘Bulk Payments’ screen, refer to the section, ‘Making Bulk Payments against loan or commitment’ under the Chapter ‘Operations’ of the ‘Retail Lending’ user manual.
Note
You can use this feature if ELCM standalone has FCUBS as the product processor.
User Defined Status
Specify status of the facility (For example, NORM for normal, BLOCKED, and so on) from the list available here The list displayed here is based on maintenance done in 'User Define Status Summary' screen.
Status Changed Date
Specify the date on which you want to change the status. You can specify a date before the line start date to block the line till the specified date. In addition, you can set a date prior to the application date.
Internal Remarks
Specify the internal remarks as limits terms and conditions.
Utilization Tracking
It signifies if the utilization tracking of the facility is done locally or globally.
Amounts
Specify the following details:
Limit Amount
Specify the limit for the facility. If you have maintained schedules for limits, the system automatically updates the limit amount here on the dates specified for each limit in the schedule.
Collateral Amount
System defaults the Collateral Amount on save, based on the pools linked in the 'Pool Links' sub screen.
Transfer Amount
System displays the transfer amount resulting from 'Facilities Amount Transfer' transactions. The value displayed has either the sign "-" or "+", indicating whether the amount is transferred from or to the line. If the sign is "-", then the amount is transferred from the line and if it is "+", then the amount is transferred to the line.
Effective Line Amount
The system displays the effective line amount.
Effective Line Amount Basis
For defining drawing power of line the elements mentioned below are treated as the basis for the effective line amount calculation.
- Line Amount + Collateral
- Line Amount
- Minimum of Line Amount and Collateral
Note
EFF_LIMIT_AMOUNT can be used while setting up the IC rule for interest calculation based on facility effective limit amount.
Maintenance Value date
The value date on which facility amount is modified. That is, the date on which facility amount modified is earlier than ‘Line Start Date’ for an active credit line.
When an amendment is done on a facility like limit amount, basis, and so on, if maintenance value date is given as a back value date, modification takes effect from the given maintenance value date and appropriately value dated balance is updated. If maintenance value date is not entered during amendment, processing date is default updated. However, maintenance value date cannot be prior to line start date.
In case of future dated lines, any amendment done between the booking date and line start date, maintenance value date is updated as 'Line Start Date'.
Uncollected Amount
The system displays the uncollected amount.
Block Amount
Specify the block amount.
Approved Limit Amount
This is the maximum limit amount allowed for the facility and must be specified whenever you maintain schedule limits. System ensures that neither the ‘Limit Amount’ maintained here nor the schedule ‘Limit Amount’, maintained as part of the limits schedule is greater than the limit specified here".
Max Daily Limit
Specify the maximum daily limit.
Daily Light Limit
Specify the daily light limit.
Utilization
This section contains the following details:
Available Amount
The system displays the available amount.
Date of First OD
The system displays the date of first OD.
Date of Last OD
The system displays the date of last OD.
Netting Contribution
The system displays the netting amount in GEDACCNT screen.
The system displays the netting contribution if:
- The facility is linked in the ‘Netting Account’ screen.
- ‘Netting Required’ is checked at Liability level, Facility level, and Netting Account level.
Last New Utilized Date
The system displays the last new utilized date.
Amount Utilized Today
The system displays the amount utilized on the current date.
Utilization Amount
The system displays the utilization amount.
Tanked Utilization
The system computes and displays the utilization amount that can be set in the 'Tanked Utilization' field.
As part of EOD process, the utilization amount is set in the 'Tanked Utilization' field.
During EOD process, this utilization amount is updated as indicated below:
- Based on the liability which is linked to the transaction as per the contract
- Based on the collaterals that is linked to the transaction.
- Based on the collaterals pool which is linked to the transaction.
After BOD process, the amount is cleared from the 'Tanked Utilization' field and it is updated in the utilization amount.
Processing future dated credit line
A future dated credit line is a credit line that has a value date later than the date on which it is booked. You can create credit line with value date as future date for the following lines.
- Main-Lines
- Sub-Lines
You can create future dated sub-lines only for active main-lines. Both main-line and sub-line cannot be created with future value date.
System validates that only active main lines can be linked to a future dated sub-line and only active lines are list in LOV against main line.
Availability
Specify the following details:
Line Start Date
Specify the line start date. If not specified, system defaults the line start date as the current application date. In case ‘Line Start Date’ is not specified line start date takes current application date. Once such a record is authorized, line start date cannot be edited.
However, if a line is created with future date, this ‘Line Start Date’ can be modified after authorization. However, modified date cannot be prior to current business date.
You can book a future dated credit line using ‘Line Start Date’.From this date the credit line becomes active. You cannot enter the back date, that is, the date prior to system date. If line start date falls on a holiday, an override message appears.Initiation event of the future dated facility is triggered on ‘Line Start Date’ with contingent entries.
Expiry Date
Specify the expiry date for the facility. If the limit amount assigned to the facility is not utilized within the specified expiry date then the Available check box remains deselected. This freezes the line for the respective liability.
The freezing of the line code is part of the Oracle Banking ELCM EOD Batch.
The Oracle Banking ELCM system does not allow the expiry date of a facility to exceed the expiry date of linked collateral(s).
When a Facility record is saved, the system compares the expiry date of all the collaterals in the Pool which is linked to the Facility. An error message is shown if any expiry dates are less than the expiry date of the Facility.
If the expiry date falls on a holiday maintained in the branch, then system displays the error message ‘Facility Expiry Date falls on a branch Holiday’.
The facility shall not be available on the maturity/expiry but you can modify the facility on the expiry date if required.
Available
If the Line facility is available then this check box is selected.
The Oracle Banking ELCM system tracks the status of both the Contract and the Facility. When the status of the Contract changes to PDO, then the Facility becomes unavailable.
This check box is disabled if the ‘Line Start Date’ is provided as future date, that is the credit line is in inactive state. It is enabled on the date when the credit line becomes active.
The product processor gives an ASCII file including all the facilities which need to be frozen. Oracle Banking ELCM initiates an amendment event and then deselects the 'Available' check box.
Book Date
Specify the date on which the credit line is booked in the system. The system date is defaulted. You cannot modify this date.
Note
Amendments to facility between booking date and line start date is considered at the time of initiation of contract on line start date
Available check box gets automatically selected on line start date BOD and facility is available for utilization.
Availment Date
Specify the availment date on which the first utilization should take place. If the limit amount assigned to the facility is not utilized within the specified availment date then the available check box is disabled. This freezes the line for the respective liability.
Exception
Specify the following details:
Exception Transaction Amount
Specify the Exception transaction amount. During utilization transaction when the utilization amount crosses the specified exception transaction amount, there is a breach of the limit amount. This is a credit exception in the transaction. You can use the ‘Multi-authorisation’ screen for authorising such a transaction.
Note
The utilization transaction can also be authorized or rejected using the "Multi Authorization Maintenance screen based on the system configuration.
Exception Breach Percentage
Specify the Exception Breach Percentage. During utilization transaction when utilization amount crosses the specified Exception Breach Percentage, there is a breach of the limit amount. This is a credit exception in the transaction. You can use the ‘Multi-authorisation’ screen for authorising such a transaction.
Note
The utilization transaction can also be authorized or rejected using the ‘Multi Authorization
Maintenance’ screen based on the system configuration.
Limit Status
Select the status of the limit from the adjoining drop-down list. The options available are:
- Active
- Closed
- Frozen
Next Review Date
Based on the review frequency, the system displays the next limit review date. This date is derived by adding the frequency days to the current date.
If you do not select any of the provided review frequency and set it to blank, then you need to manually enter the next review date.
The next review date must always be before the facility expiry date.
Review Frequency
Select the frequency at which the limit should be reviewed. The options available are:
- Monthly
- Quarterly
- Half yearly
- Yearly
- Blank - if you select this, you need to specify the next review date.
Closure Reason
Specify the reason for limit closure. The system also displays the closure reason based on CAM process flow.
Freeze Reason
Specify the freeze reason of the limit. The system displays this based on CAM process flow.
Note
The following SDEs are not applicable for ELCM based interest calculation.
- ELCM based interest calculation SDEs,
- Limit_Amount, Eff_Limit_Amount
- Matured_Amount - If you repay the already utilized amount, then the repay credit will update on the Matured_Util field of the 'Getm_facility' table.
Note
In case of granular access, facility details maintained for allowed list of customers are allowed to view, query, modify, authorize, re-open, copy, delete, and so on based on the user/users preferences selected in ‘Access Group Restriction’ tab available in the ‘User Maintenance’ screen. For more information, refer to Common Core - Security Management System User Guide.
2.2.1 Maintaining Facility Event Details
The 'Facility Event Details' screen is used to view the event details related to the facility online.
You can click ‘Events’ button or type’ GEDFEVNT’ in the field at the top right corner of the application toolbar and click the adjoining arrow button to invoke this screen.
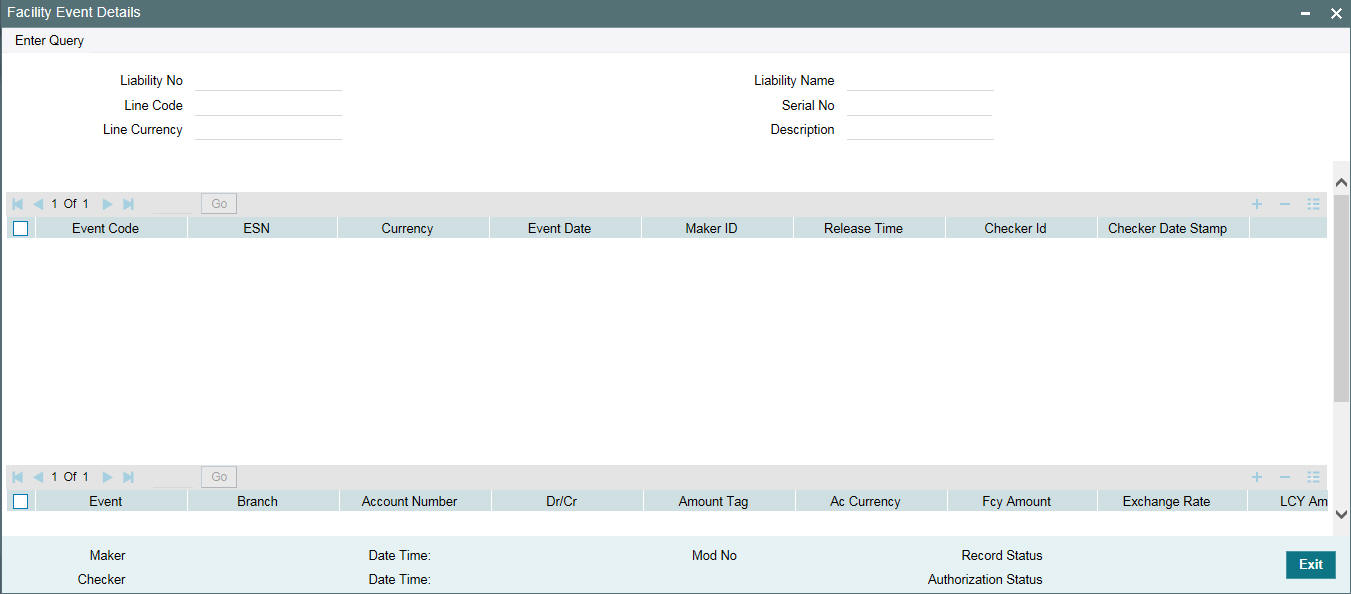
Liability No
Facilities have to be linked to a liability. Specify the liability number for which the facility is linked.
Liability Name
Specify the liability name.
Line Code
Specify the line code to be used for facility. If a line code is linked to a facility then it is required to track the limits of the linked line.
Serial No
Indicates the ELCM generated unique identifier for the facility. The ‘Serial No’ field is disabled and it gets defaulted from the ‘Facilities Maintenance’ screen.
Line Currency
Specify the currency in which the facility is defined. The currency that has been selected have the following implications:
- The limit amount that has been specified for this Line-Liability combination is taken to be in this currency.
- The line that has been defined is available for Utilization only in the line currency, unless specified otherwise under Currency Restrictions in this screen.
Once the entry is authorized you cannot change the currency.
If the limit allotted to this Line-Liability combination can be utilized by accounts and transactions in currencies other than the limit currency, the limit utilization is arrived at by using the mid-rate for the currency pair as of that day.
Description
Specify the facility description.
Event details can be fetched based on the following filter conditions.
- Liability Number
- Line Code
- Serial Number
2.2.2 Maintaining Fee Details
You can add fee details on the facility maintenance using ‘Fee Details’ screen. To invoke this screen, click ‘Fee Preference’ button on the ‘Facility Maintenance’ screen.

Fee Rule Preferences
Specify the following:
Holiday Treatment
Ignore Holidays
If this check box is selected, then holiday treatment is not applied to calculate the next date. If this check box is not selected, then ‘Holiday Preferences’ settings are validated.
Move Across Month
If this check box is selected, then the system moves the date to next month. If this check box is unselected, then the system moves the date to next date.
Example
Working Day |
30-Aug |
1-Sep |
Holiday |
31-Aug |
|
Schedule Movement |
Move Forward |
|
Calculated Next Date |
31-Aug |
|
In above mentioned example, if ‘Move Across Month’ is selected, then the system moves next date to 1-Sep. If ‘Move Across Month’ is not selected, then the system changes next date to 30-Aug.
Schedule Movement
Move Forward
In case calculated next date is holiday then date should be moved forward. In this case fee liquidation moves to 1st Sep which is next working date.
Move Backward
In case calculated next date is holiday then date should be moved backward. In this case, fee liquidation moves to 30th Aug which is previous working date.
Verify Funds
You can select this check box if ECA check is required. If this check box is selected, then liquidation of fees follows the ECA process (as opted for full or partial liquidation). If this check box is not selected, then the system does a force post for all fees components.
Partial Liquidation
If this check box is selected, then partial liquidation/recovery is allowed based on the balance amount of fees available in CASA. If this check box is not selected, then system will opt to recover full amount of fees and will not try for partial liquidation/recovery in case of insufficient CASA balance.
Note
If this check box is selected and ‘Verify Funds’ check box is not selected, then an error appears on save of facility. If this check box is not selected and ‘Verify Funds’ check box is selected an override appears on save of facility and then full liquidation happens. Only if both the check boxes are selected then partial liquidation is allowed.
Cascade Schedules
If cascade schedules is selected, then the next date is calculated on based on previous schedule date instead of start date.
If fee liquidation date for one of the liquidation cycle is changed based on holiday processing setting and if cascade schedule is selected future liquidation dates of corresponding fee gets modified as per the newly arrived liquidation date.
Holiday Check
If holiday treatment is applicable, then you can select ‘Local’, ‘Currency Holiday’ or ‘Both’ based on your holiday maintenance.
If 'Both' is selected and 'Branch' or 'Currency' is holiday, then holiday processing setting is considered.
Holiday Currency
If holiday check is maintained as ‘Currency’ or ‘Both’ then currency code to be maintained here.
Rule
Click 'Populate' of the 'Facility Maintenance' screen to display the fee rules linked to the fee classes in the 'Fee Preference' sub-screen.
Fee Start Date
Specify the date from which the fee needs to be calculated. If fee start date is left blank, then 'Line Start Date' is defaulted. The fee start date cannot be before 'Line Start Date'.
Fee End Date
Specify the date, till the fee needs to be calculated. If it is blank, on save system defaults the 'Line Expiry Date' as 'Fee End Date'.
Fee Type
Displays whether the 'Fee Type' is 'Rate' or 'Amount'. These values get defaulted from the 'Fee Rule Maintenance' screen.
User Input Fee Amount
The fee amount is entered if the fee is of ‘User Input Fee’.
SDE Type
If the fee is based on any SDEs, the SDE which is linked to that fee is displayed.
Component Type
Indicates the ‘Slab’ or ‘Tier’ fee component type. This value is fetched from the GEDRULES.
Rate Amount
Specify the applicable fee rate or amount. For ‘Slab’ component type both fee rate and amount are applicable whereas for ‘Tier’ component type only fee rate is applicable.
Fee Currency
The system defaults the fee currency as line currency on facility creation. It is a read -only field.
Branch
Indicates the Branch code. You can either enter the branch code or select the branch code from the adjoining option list.
Account Number
Account number configured in 'Fee Class Maintenance' screen (customer debit) for the corresponding fee rule which gets defaulted in this field. If required you can modify.
Select the account number from the adjoining option list. A list of all valid accounts related to customer linked to liability are displayed here.
Account Currency
Once you select the account number, the account currency is defaulted.
Liquidate Method
The liquidation method of fee maintained in 'Fee and Accounting Class Maintenance' screen, whether it is 'Arrears' or 'Advance' is displayed here.
Liquidation Preference
The liquidation preference of fee maintained in 'Fee and Accounting Class Maintenance' screen whether it is 'Auto' or 'Manual' is displayed here.
Start Date
The date in which the fee has to be liquidated is defaulted from 'Fee and Accounting Class Maintenance' screen.
Start Month
The month in which the fee has to be liquidated is defaulted from 'Fee and Accounting Class Maintenance' screen.
Waived
While maintaining a facility, we can waive the specific fee linked to class in the fee preference.
Defer Liquidation
If an individual fee in a facility is to be deferred for a fee liquidation cycle, then this check box allows you to defer liquidation of fees attached to a credit line.
Defer check box is not selected by default at the time of facility creation. If defer check box is selected during facility creation, entering defer liquidation days is mandatory.
Likewise for a fee which is attached during facility creation, defer check box is available for selected as part of amendment for the particular liquidation cycle.Fee which is marked as deferred gets liquidated on the deferred liquidation date after that the defer check box gets cleared and defer liquidation days field is blank which gets enabled if you mark the fee of next liquidation cycle as defer.
Defer Liquidation Days
The number of days fee liquidation is to be deferred. That is, number of days after which fee is liquidated from its original liquidation date.
Note
- Defer fee liquidation is applicable for all fees with 'Liquidate Method' as ‘Arrears’ and 'Liquidation Preference' as ‘Auto’.
- Defer fee liquidation is not applicable if the fee 'Liquidation Frequency' is ‘One time’ or ‘Daily’. If liquidation frequency is ‘Monthly’/’Quarterly’/’Half Yearly’/’Yearly’, then the maximum number of days deferred can be 30.
- Defer fee liquidation is not applicable for fees with 'Liquidate Method' as ‘Arrears’ and 'Liquidation Preference' as ‘Manual'.
- Deferment of fee liquidation is applicable only for the current fee cycle. Not applicable for future or previous fee cycles.
- Fee liquidation event and entries are triggered on the new liquidation date.
- Backdated utilizations triggers fee re-calculations only for the current cycle. It does not affect the previous cycle fees (both fee calculations and accruals). The fees, which have been liquidated (non-deferred) or are to be liquidated on new deferred date is not recalculated.
- For fees with holiday processing applicable, new deferred liquidation date is arrived at by adding the defer number of days to the original liquidation date calculated based on applicable holiday processing rule. However, if the deferred liquidation date falls again on a holiday, fee liquidation event is triggered on the same day with accounting.
- ECA processing considers the new fee liquidation date as a result of deferred fee liquidation.
Effective Dates
Specify the dates from which the fee rate details are applicable for the specific fee linked in the ‘Fee Rule Preference’ screen.
Fee Rate Details
Specify the following:
Basis Amount
Specify the fee basis amount.
Rate
Specify the fee rate in percentage
Amount
Specify the fee amount.
External Pricing Required
This value is defaulted based on the class selected in 'Fee and Accounting Class Maintenance' screen and you cannot modify this value.
Compute Ext Pricing
This button is enabled only if ‘External Pricing Required’ check box is selected in ‘Fee Rule Maintenance’ screen. You need to provide the effective date for fee component and click ‘Compute Ext Pricing’ button. The system fetches the pricing value for the date selected from the external pricing and billing system.
2.2.3 Maintaining Limit Schedules
The limit assigned to a customer under a revolving line can be reduced. You can define these details while maintaining limits for a customer. From the Facilities Maintenance screen, click ‘Schedules’ button.
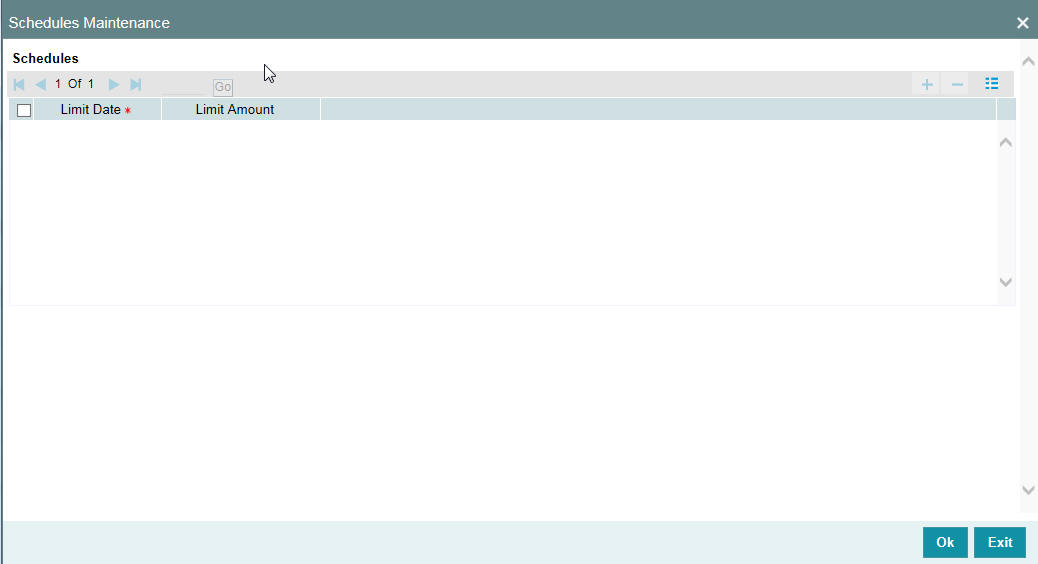
For a liability code and credit line combination, you can define limit schedules and indicate the limit that is applicable for the period. You can enter a negative limit amount. However, the ‘Limit Date’ should not be earlier than the ‘Limit start date’ and later than the ‘Limit Expiry Date’.
The Facility batch which runs at BOD checks the limits schedule for a facility and if a schedule is due on the current date in the branch. If so, it updates the limit amount for the facility for which the schedule is due with the schedule limit amount.
Limit Date
Specify the limit date. The limit date cannot be earlier than current business date.
The limit date cannot be earlier than 'Line Start Date'. It should be future date of 'Line Start Date'.
Schedules Limit Amount
Specify the limit amount for the specific limit date.
You need to enter details in this screen only for transactions that involve a Tenor (Example, Loans, Money market transactions, and so on). Through this screen you can specify a list of Tenors and the associated limit that tenor based transactions can utilize under this line.
For example, you have defined a limit schedule for a facility for your client ABC Corporation where the Limit Amount initially is USD 1 million and the start date for the facility is Jan 01,2009. The schedule is as shown below:
Limit Date |
Limit Amount |
February 01, 2009 |
500000 |
March 02, 2009 |
800000 |
April 03, 2009 |
400000 |
May 04, 2009 |
900000 |
In this case, during BOD on Feb 01, 200r, the limit mount is updated to USD 500,000 and on Mar 02, 2009 it is modified again to USD 800,000. If the batch does not run on Mar 02, 2009, it will be run on Mar 03, 2009. Accordingly, the ‘Scheduled Limit Amount’ defined for Mar 02, 2009 Schedule is updated as Facility Limit Amount.
During EOD, the system processes limits schedules and revision process takes place for the facilities as per the scheduled date. It processes the limit schedules till next working day and marks all the schedules till date as processed.
When the Facility Start Date and Schedule Date falls on the same day, then on save of Facility record, you get an override message for confirmation on updating the limit amount of Facility as per the schedule amount.
While processing, if there are any errors or overrides, it should be logged. The following are the possible errors:
- Available amount is negative for the facility.
- The Tenor Limit Amount exceeds the Line Approved Limit Amount as the validation of the Tenor Limit Amount is against the Approved Limit Amount.
- The amount cannot exceed the overall limit specified for the liability id.
- The Main Line Limit cannot be less than any of its Sub Line Limit.
- The Sub Line Limit cannot exceed the Main Line Limit.
Example
Assume the following:
- Liability - GROUPLIAB
- Line - SHTLLIMIT
- Serial - 1
- Start Date - 01-Jul-2009
- Limit Currency - USD
- Limit Amount - 50000
Schedules:
Limit Date |
Limit Amount |
15-July-2009 |
60000 |
28-July-2009 |
65000 |
30-July-2009 |
75000 |
15-Aug-2009 |
80000 |
- System Date - 14-Jul-2009
- Limit Amount - 50000
- On 14-Jul-2009 EOD, limit revision process takes the 15-Jul-2009 schedule and update 60000 as limit amount. The revised limit is enforced or effective on 15-Jul-2009.
- System Date - 15-Jul-2009
- Limit Amount - 60000
Schedules:
Limit Date |
Limit Amount |
15-July-2009 |
60000 |
28-July-2009 |
65000 |
30-July-2009 |
75000 |
15-Aug-2009 |
80000 |
- System Date - 27-Jul-2009
- Limit Amount - 60000
- Next working Day - 30-Jul-2009
On 27-Jul-2009 EOD, the limit revision process picks 28-Jul-2009 and 30-Jul-2009 schedules and update 75000 as limit amount. The revised limit is enforced / effective on 30-Jul-2009.
- System Date - 30-Jul-2009
- Limit Amount - 75000
Schedules:
Limit Date |
Limit Amount |
15-July-2009 |
60000 |
28-July-2009 |
65000 |
30-July-2009 |
75000 |
15-Aug-2009 |
80000 |
2.2.4 Specifying Covenant Details
The covenant details can be captured for facility in the ‘Covenant Details’ screen. Click ‘Covenants’ to invoke this screen.
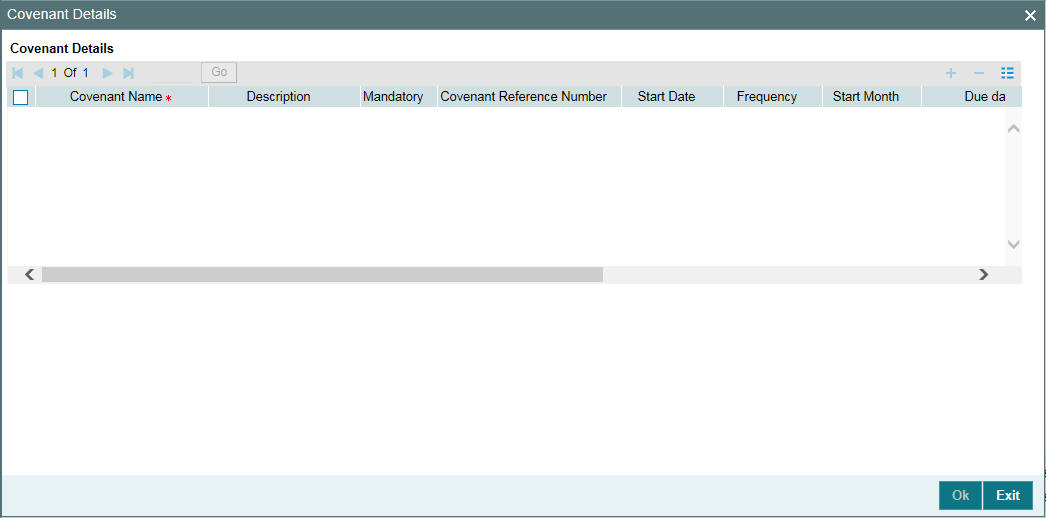
Multiple covenants can be entered in the screen shown below. You can customize the details of each covenant recorded here.
Covenant Name
Select the covenant name from the list available here. The list displays the covenant names maintained in Covenant Maintenance screen. Based on the covenant selected, all other details of the covenant maintenance will be brought here.
Mandatory
Mandatory/Non mandatory details are shown on choosing a covenant name. You may change this.
Covenant Reference Number
Indicates the covenant reference number.
Start Date
Start date is defaulted to current business date when covenant is linked to a facility and you cannot modify it.
Frequency
Frequency of the specified covenant is defaulted here based on the details maintained at ‘Covenant Maintenance’ screen.You may change the frequency shown here on choosing a covenant name.
Start Month
Start month of the specified covenant is defaulted here based on the details maintained at ‘Covenant Maintenance’ screen. You may change the 'Start Month' shown here on choosing a covenant name. Start month is mandatory when frequency is quarterly and above.
Due date
Due date of the specified covenant is defaulted here based on the details maintained at ‘Covenant Maintenance’ screen. You may change the Due Date shown here on choosing a covenant name. Due date is mandatory when frequency is monthly and above.
Revision Date
Indicates the date on which covenant has to be revisited for review.
Revision date is derived by system and updated when covenant is saved – based on combination of start date + (combination of frequency and due date and start month).
Examples for the revision date calculation of different frequencies.
System date -5th April 2019
- Daily-6th April 2019
- Weekly-12th April 2019
- Monthly-10th May 2019 (Due date provided-10)
- Quarterly-2nd June 2019 (Due date provided-2, Start month- June)
- Half yearly-1st Feb 2020 (Due date provided-1, Start month-Feb)
- Yearly- 10th July 2020 (Due date provided-10,Start month-July)
System date -5th August 2019
- Daily-6th August 2019
- Weekly-12th August 2019
- Monthly-10th September 2019 (Due date provided-10)
- Quarterly-2nd June 2020 (Due date provided-2, Start month- June)
- Half yearly-1st Feb 2020 (Due date provided-1, Start month-Feb)
Yearly- 10th July 2020 (Due date provided-10,Start month-July)
Notice Days
Specify the notice days, that is, the number of days prior to revision date of the covenant. The period during the notice days are the notice period. Notice days are mandatory when frequency is weekly and above. You can change the Notice Days details which are displayed here on choosing a covenant name
Grace Days
Specify the grace days, that is, the number of days after the revision date of the covenant that the covenant will be available for tracking. You can change the Grace Days details which are displayed here on choosing a covenant name.
Remarks
Remarks if any specified for the covenant at the ‘Covenant Maintenance’ screen are defaulted here. It can also be changed here.
Covenant Reference Number
Indicates the covenant reference number.
2.2.5 Tracking Exposure for a Line
The facility defined can be tracked for particular exposures.
The exposure details can be captured for facility in the ‘Exposure Details’ screen. Click ‘Exposure’ to invoke this screen.
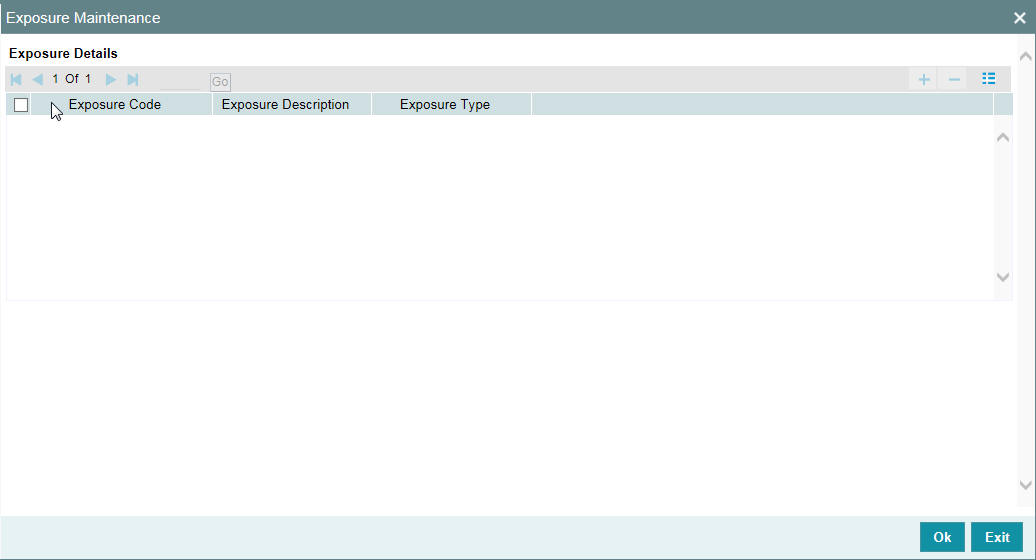
Exposure Code
Select the exposure code from the option list available here. The list displays the exposure codes maintained in Exposure Maintenance screen. Based on the exposure selected, all other details of the exposure maintenance is displayed here.
Description
The system displays the description of the selected exposure code.
Exposure Type
The system displays the exposure type to which the selected exposure code is associated.
2.2.6 Capturing Facility Main Line Change Maintenance Details
In case, if the main line has been changed, the utilization transactions linked to the sub-line also needs to be changed. Using this screen, all the utilization transactions done in facility which has a main-line change, would reflect the utilization transaction changes in the new main line. These changes happen after processing EOD.
You can invoke the ‘Facility Main Line Change Maintenance’ screen by typing ‘GEDFMLCG' in the field at the top right corner of the Application tool bar and clicking the adjoining arrow button.
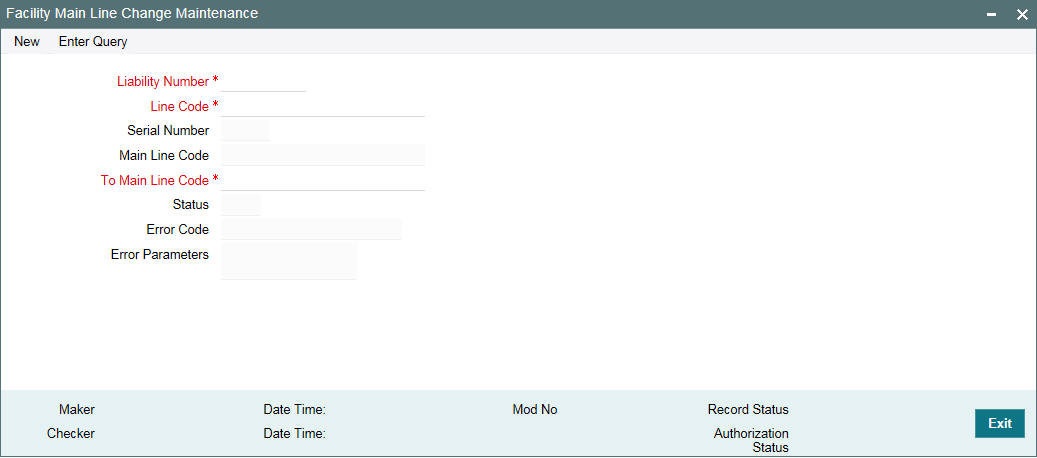
Liability Number
Specifies the liability number of the utilization transaction. Specify the valid liability number available in the ELCM system.
Line Code
Specify the Line Code to which the liability ID is to be associated with.
Serial Number
Each time a customer - line code combination is specified, ELCM module assigns a unique serial number to the combination. This serial number is unique to the line-liability code combination. Thus, for every new record entered for a Line-Liability combination, a new serial number is generated. The Line - Liability - Serial number forms a unique combination.
Main Line Code
Specify the main line code if the created facility is a sub line. If the main line code is not specified, then the system defaults the facility code as the main line code.
To Main Line Code
The new main line code to which the utilized amount is transferred.
Status
The status of the line is displayed.
Error Code
Specifies the error code of the transaction.
Error Parameters
Specifies the error parameters associated to the transaction.
2.2.7 Capturing Facility Maintenance Charges Details
To capture facility maintenance charge details, click ‘Charges’ button.
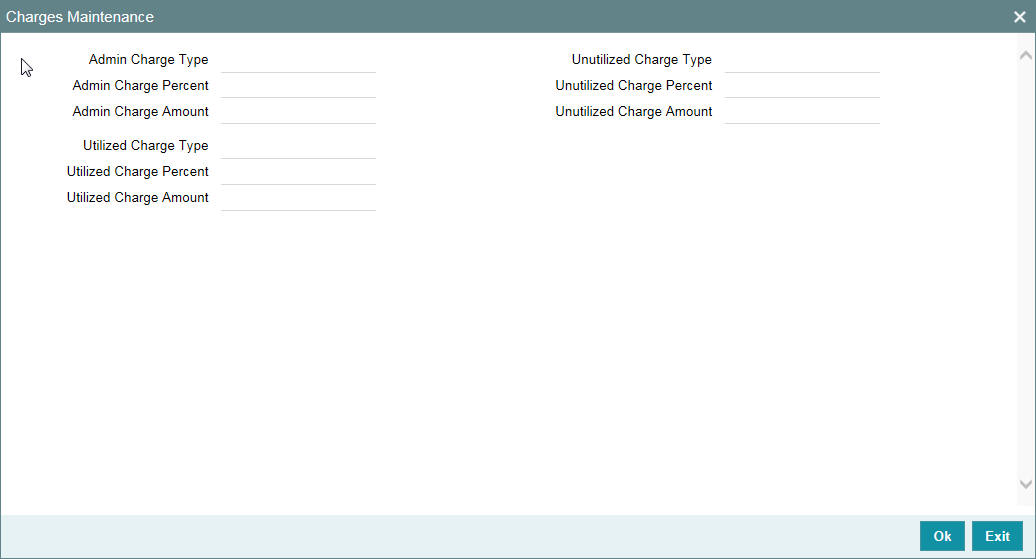
Admin Charge Type
Administrations charges as a part of creation of new line can be specified here. Charge can be a fixed amount or a percentage of the Limits amount.
Unutilized Charge Amount
Specify the charge amount that has to be collected on a certain frequency (daily, monthly, and so non) based on the unutilized amount. Charge can be a fixed amount or a percentage of the unutilized amount.
Utilized Charge Amount
Specify the charge amount that has to be collected on a certain frequency (daily, monthly, and so on) based on the utilized amount. Charge can be a fixed amount or a percentage of the utilized amount.
Note
‘Charge’ sub-screen captures the details and stores it. However, this information does not have any impact on the processing of charges in the application.
2.2.8 Maintaining Collateral Pool Linkages
For collateral Contribution in Total Effective line amount, the pool code maintained for that particular Liability ID has to been linked, which can be achieved using this sub-screen. From the Facilities Maintenance screen, click on the ‘Pool Links’ button.
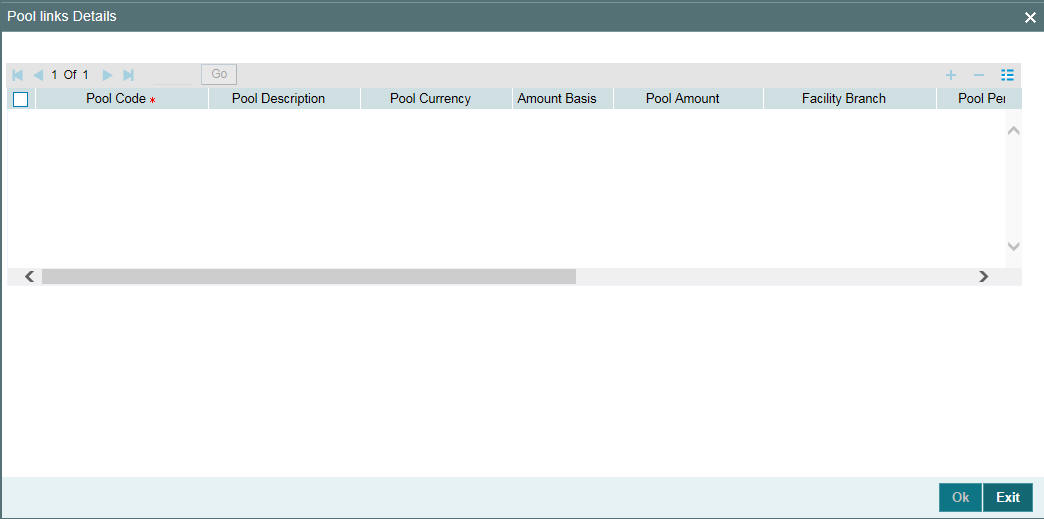
Pool Code
Select the pool code from the adjoining list. The list displays all the pool codes associated for that liability ID.
Pool Description
System displays the pool description based on the selected pool code.
Pool Currency
System displays the pool currency based on the selected pool code.
Amount Basis
You can either select ‘Percentage’ or ‘Amount’
If 'Percentage' is selected, then system allows you to enter the percentage only and not the 'Linked Amount'. The 'Linked Amount' is appropriately calculated by the system and it is not editable. The value of the percentage must be from range 0 to 100.
If 'Amount' is selected, then the system allows you to enter the amount only and not percentage. When amount is entered, the system appropriately calculates the percentage. Ensure to maintain amount in positive.
If the 'Amount Basis' is selected as ‘Amount’ and 'Collateral Pool Value' is modified, then the percentage linked gets recalculated based on the modified 'Collateral Pool Value'.
You can modify the linkage at facility level from percentage to amount and vice-versa.
The system ensures that total of pool value linked to one or multiple facilities is not more than the collateral pool value.
Pool Amount
System displays the pool amount based on the selected pool code.
Facility Branch
Select the branch code from the adjoining list.
Pool Percentage
System displays the pool %.
Linked Amount
System displays the facility amount In Pool currency.
Pool Percentage and Linked Amount
In case 'Collateral Pool Value' is increased in 'Collateral Pool Maintenance' screen, then the 'Linked Amount' is modified only if the 'Amount Basis' is 'Percentage'.
If the 'Amount Basis' is 'Amount', then the 'Linked Amount' is retained as is. However based on the changed 'Collateral Pool Value', the 'Pool Percentage' is re-calculated considering the retained amount.
In case 'Collateral Pool Value' is decreased, modified amount of collateral pool is validated with all the 'Linked Amount' in various facilities (either percentage or amount) and if the total amount linked is less than modified amount then modification of collateral pool value is to be allowed. Wherever 'Percentage' is considered for linking collateral pool value to facility
If the 'Collateral Pool Value' decreased amount is less than the total 'Linked Amount' in various facilities, then an appropriate error message appears.
Facility Currency
System displays the facility currency
Linked amount in Facility Ccy
System displays the facility amount.
Percentage Of Contract
System displays the percentage of contract.
Pool Linkages multi entry block does two functions:
Firstly, on clicking ‘Plus’ button you can link one row of the available pool amount (that is, Pool amount – Pool Utilized) to that Line code for which the collateral contribution is required. Secondly, it displays at any point in time the pool amount (in percentage terms) utilized by various Line Codes and Contracts.
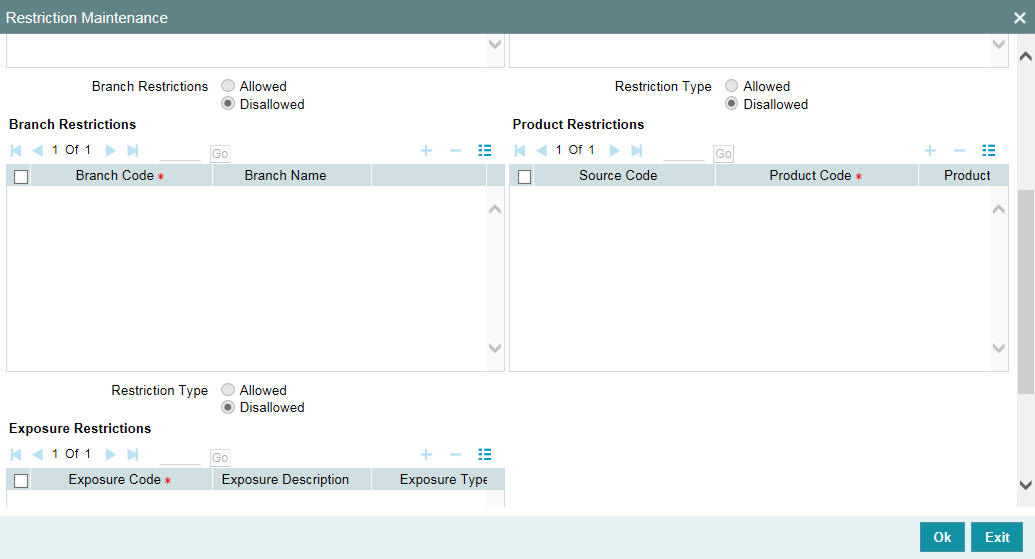
2.2.9 Maintaining Restrictions for a Line
By default, all customers, branches, and products maintained in your bank can utilize the limit defined for a credit line. You can also define the limit for a line in any currency. However, you can opt to restrict the limit available under a credit line to specific customers, branches, products and currencies.
You can define these restrictions in the Limits Restrictions screen. To invoke this screen, click ‘Limit Restrictions’ button from the Facilities Maintenance screen.
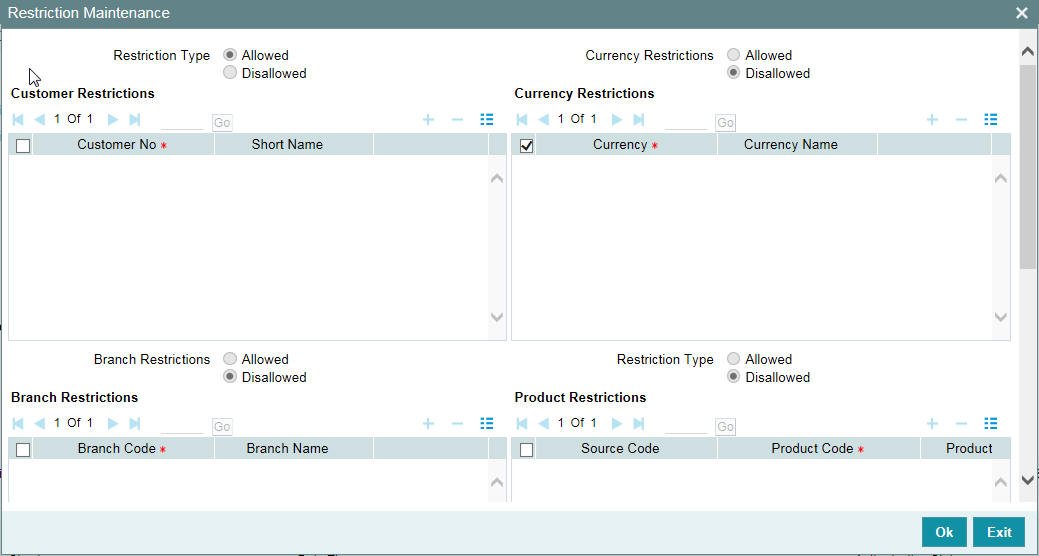
Restriction Type
Select the restriction type for each restrictions defined for the facility from the following options:
- Allowed
- Disallowed
Customer Restrictions
Customer No
Select the customer number from the adjoining option list.
Short Name
Specify the short name for the customer.
Currency Restrictions
Currency Code
Specify the currency code for the Currency Restriction.
Currency Name
System displays the currency name for the currency, as maintained in the 'Currency Definition' screen based on the selected 'Currency Code’.
Branch Restrictions
Branch Code
Specify the branch code for the Branch Restriction.
Branch Name
System displays the branch name for the branch, as maintained in the 'Branch Parameters Maintenance' screen based on the selected 'Branch Code’.
Ext System Restrictions
External System
Specify the external system for the External System Restriction.
Description
System displays the description for the external system, as maintained in the 'External System Maintenance' screen based on the selected 'External System' chosen Exposure Restrictions
Exposure Name
Specify the exposure name for the Exposure Restriction.
Exposure Description
System displays the description for the exposure, as maintained in the 'Track Exposure Maintenance' screen based on the selected 'Exposure Name'.
Product Restrictions
Product Code
Specify the product code for the Product Restriction.
Product Description
System displays the description for the product based on the selected 'Product Code'
2.2.10 Maintaining Customer Restrictions for a Line
To recall, you can assign a limit to a Line - Liability combination. A liability code can have several customers linked to it. By default, the line that you define is available to all customers linked to the liability code.
You can restrict the limit available under this line-liability combination to specific customers. If you choose the restriction type as 'Allowed', click on the ‘Plus’ button and select the customer code from the list to indicate that they are allowed to use the line. If you choose the restriction type as 'Disallowed', click on the ‘Plus’ button and select the customer code from the list to indicate that they are not allowed to use the line. Once you choose restriction type as 'Allowed', you can restrict a customer(s), from using the credit under a line by highlighting the code that identifies the customer and clicking on the ‘Minus’ button". You can remove the restrictions earlier imposed on a customer, that is, (allow a restricted customer usage of the limit under a line). To allow a restricted customer usage of a line, select the customer code from the list and click on the ‘Plus’ button.
2.2.10.1 Maintaining Branch Restrictions for a Line
You can restrict the usage of a credit line that you have defined to certain branches of your bank. If you choose the restriction type as 'Allowed', click on the ‘Plus’ button and select the branch code from the list to indicate that those branches of your bank can use the line.If you are choose the restriction type as 'Disallowed', click on the ‘Plus’ button and select the branch code from the list to indicate that those branches of your bank are not allowed to use the line.
Once you choose restriction type as 'Allowed', you can disallow a branch(s) from using this line by selecting code that identifies the branch and clicking on the ‘Minus’ button. You can remove the restrictions earlier imposed on a branch that is, to allow a restricted branch usage of the limit under this line. To allow a restricted branch usage of a line, select the code that identifies the branch from the option list and click on the ‘Plus’ button.
2.2.10.2 Maintaining Currency Restrictions for a Line
Just as you can restrict the limit defined for a line to specific customers, branches, and products, you can restrict it to specific currencies. Once you choose the restriction type as 'Allowed', select the currencies to which you would like to restrict application from the available option list.The list of currency codes you choose in this field is described in the adjacent column.
To remove a currency from the list of allowed currencies, highlight the currency code and click on the ‘Minus’ button. To add a currency to the list of allowed currencies, click on the ‘Plus’ button, and choose the currency from the option list available.
2.2.10.3 Currency Restrictions at Facility Level
- Sub-line currency is one of the currencies allowed at main line level and the system does not allow you to create sub-line in any other currency.
- Allowed currencies at the sub-line level should be equal to or a sub set of the allowed currencies at the main line level.
- Once a utilization is linked to the sub-line or main line in a certain currency, you are restricted from removing the respective currency from the facility. The system throw an error that “Utilization Exist with the Currency. Hence it cannot be removed from the allowed currencies”.
- For a utilization attached to either the sub-line or the main-line directly, the system should check that the utilization currency is among the allowed currencies at the facility level, including that of the main-line. The same should be applicable for Block transaction. If it is different, system throws an error that “Utilization Currency is not an Allowed Currency at the Facility Level”.
- During block transaction, the system converts the currency in the block amount if Block and Facility (GEDFACLT) are in different currencies after considering the rate maintained at GEDPARAM
- If you provide the fixed/derived rate at the facility level (GEDFACLT), the same is picked up during the utilization for the currency conversion.
- When the main-line and sub-line are in different currencies, rate for conversion between sub-line and main-line is to be picked from GEDPARAM.
- The system checks the consistency of currency of the sub-line and allowed currencies at the main-line.
- The system ensures that the utilization currency is among the allowed currencies of the facility(ies) attached, including that of the main-line, in case the utilization is attached to sub-line.
2.2.10.4 Maintaining Exposure Restrictions for a Line
You can also define the types of exposures that should be allowed (or disallowed) for a line. Based on the list you maintain, the system displays an error message if a utilization request with a transaction exposure is received where the exposure for the facility is either disallowed or not maintained as part of the allowed exposures.
Indicate if the exposure codes that you are specifying should be allowed or disallowed. From the option list available, select the exposure codes. The system defaults the description of the chosen exposure codes. To remove an exposure code from the list, highlight the code and click on the ‘Minus’ button. To add to the list, click on the ‘Plus’ button, and choose the exposure code from the option list available.
While saving the record, if the exposures disallowed here are found to be linked to existing Facility Exposures or Customer Liability Exposures, the system displays an error message and does not save the details.
2.2.10.5 Maintaining Product Restrictions for a Line
You can define the types of products that should be allowed or disallowed for a line. To add a product to the list of allowed products, click on the ‘Plus’ button and select the Source and Product Code from the adjoining option lists. The system defaults the description of the chosen source and product code.
To remove a product from the list of Allowed Products, select the Product Code and click the ‘Minus’ button.
Note
System considers both the source and the product code to validate the restriction.
2.2.11 Defining Tenor Based Restrictions
You can define Limits based on the tenor of the contracts that utilize the limit.
Click ‘Tenor Restrictions’ button from the Facilities Maintenance screen to maintain Tenor restrictions for the limit you have specified for the Line-Liability combination.

Tenor
Specify the name of the tenor.
Tenor (Days)
Specify the number of days.
Limit
Specify the limit for the tenor in days.
Utilization
System displays the utilization amount for the specific tenor in days, based on the utilization of the facility in 'Schedules' sub-screen.
2.2.11.1 Maintaining Tenor Restrictions for a Main Line
For a main line, you can:
- Specify the list of tenor restrictions for which you would like to limit your exposure.
- Assign limits for the Tenor restrictions.
2.2.11.2 Maintaining Tenor Restrictions for a Sub-Line
You can define a sub-line tenor list and also define limits for each of them. To recall, a sub- line falls under the umbrella of the Main Line to which it is linked. Therefore, the maximum tenor that you define for a sub-line should not exceed the maximum tenor defined for the main line to which it is linked. The limit amount that you define for each sub-line tenor cannot be higher than the tenor limit defined for the main line to which it is linked.
Tenors and limits can be placed at both the sub-line and main-line levels. But the maximum tenor of a sub-line cannot exceed the maximum tenor defined for the main-line to which it is linked.
Example
You define a Line LOANS and link it to the Liability Code CREATIVITY INC. (the Liability and the Customer Code in this case are the same). The limit set for this line - LOANS is $ 1million.
- Main Line Code
- Loans
You define a credit limit of $ 1 million for Creativity Inc. under this Credit Line. You also specify the tenor Restrictions for the line to be the following 30D, 60D, and 90D.
Main Line Tenor List |
Limit |
30D |
0.5M |
60D |
0.3M |
90D |
0.25M |
The loans that this customer can avail can be further classified into Short, Medium, and Long
Term Loans.
For our example we shall make Short Term, Medium Term and Long Term loans as sub-lines under the Main Line Loans. It is only when you link these credit lines to the Credit Line Loans that it becomes a Main line.
Sub-line code
- STLOANS
- MTLOANS
- LTLOANS
You can define a tenor list and have tenor based limits for both the Main Line and Sub-lines. So we shall also maintain tenor based limits for the sub-line STLOANS (as shown in the table below):
Sub- line Tenor List |
Limit |
30D |
0.3M |
60D |
0.2M |
90D |
0.1M |
You can add to the list of tenors maintained for a Main Line by specifying the Tenor restriction under the head Tenor and clicking on the ‘Plus’ button. If you want to remove a tenor restriction from the list of tenor restrictions highlight it and click the ‘Minus’ button.
2.2.12 Maintaining Source Restrictions
You can specify which sources are allowed or restricted to access the facility in ‘Source Restrictions’ screen. Click on ‘Source Restrictions’ button in ‘Facilities Maintenance’ screen to invoke this screen.
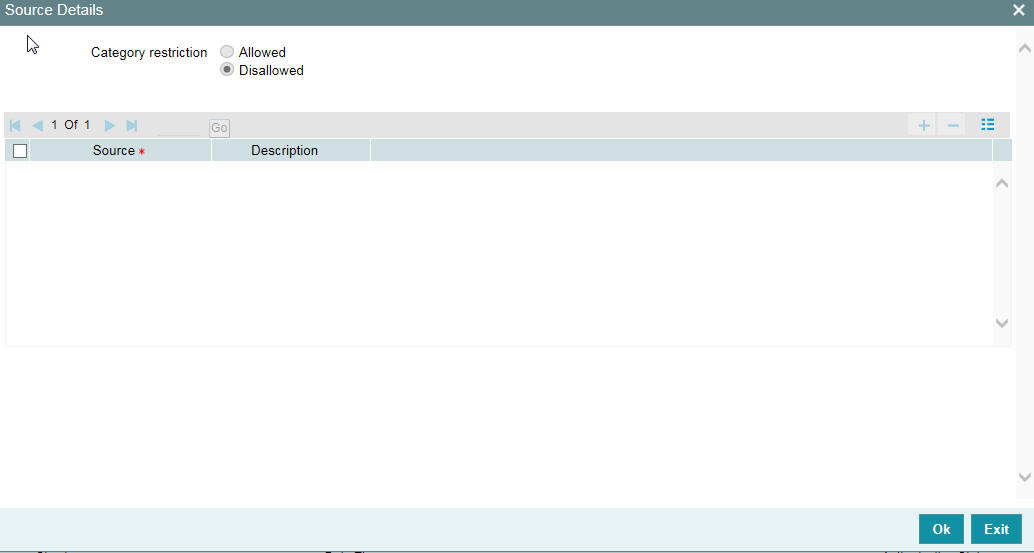
Restriction Type
To maintain an allowed list of liability restrictions choose the ‘Allowed’, option. To maintain a disallowed list of liability restrictions, choose the ‘Disallowed’ option.
Default value of this field will be’ Disallowed’. If you select restriction type as ‘allowed’, then you have to input at least one record.
Source
Specify the source from the adjoining option list.
Description
Give a brief description about the System restriction here.
2.2.13 Maintaining Mandate Details
You can maintain mandate information for specific line codes using ‘Mandate’ screen. Click ‘Mandate’ button on ‘Facility Maintenance’ screen.
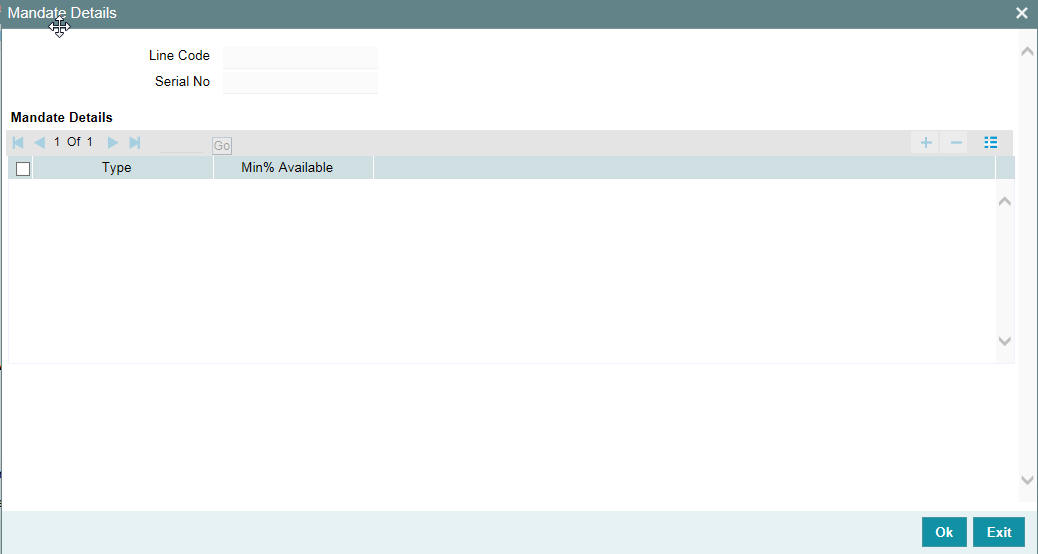
You can specify the following details here:
Line Code
Specify the line code for which the mandate has to be maintained. The system displays the line code from the main screen of facility.
Serial Number
The system displays the line serial number of the line code maintained.
Mandate Details
Collateral Type
Specify the collateral type required for validating mandate for the utilization transaction. The option list displays all valid collateral types maintained in the system. Choose the appropriate one.
You can add more rows to the list using add button.
Min % Available
Specify the minimum percentage of the specific collateral type to be collected while processing the utilization transaction against the line code specified. The system verifies whether the mandate percentage of the line utilization amount is greater than the collateral limit contribution. If the mandate percentage is higher, the system displays an override message. You may choose to continue or cancel the maintenance.
2.2.14 Comments on Facility
You can add your comments on the facility maintenance using ‘Comments’ screen. To invoke this screen, click ‘Comments’ button on the ‘Facility Maintenance’ screen.
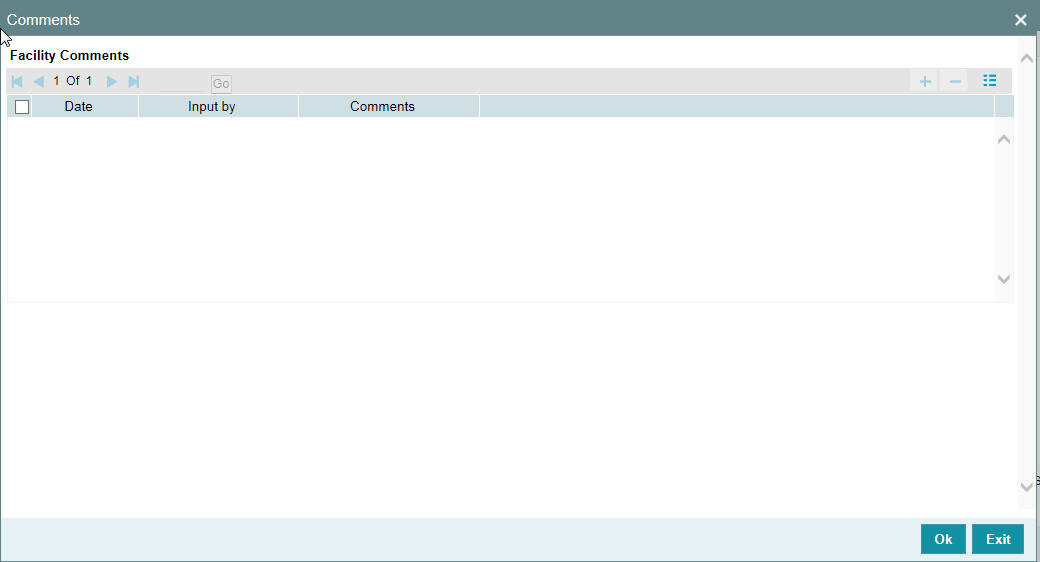
Following fields are available for capturing the comments.
Date
The system displays the current system date.
Input by
The system displays the user ID of the user of the current session.
Comments
Type in the comments that you wish save. This is a free text field where you can type in your comments.
The comments that you maintain here is displayed in the Credit Desktop also. For details, refer to the chapter ‘Credit Desktop’ in this user manual.
Once you have captured the above details, click ‘OK’ button to navigate to the ‘Facilities Maintenance’ screen.
2.2.15 FX Rate Revaluation
You can access this screen by clicking ‘FX Rate Revaluation’ in ‘Facilities Maintenance’ screen.

The values in this screen gets defaulted from ‘Line Code Maintenance’ screen on providing the 'Line Code' which is saved in ‘Line Code Maintenance’ screen and clicking 'Populate'.
Or
You can enter the ‘Line Code’ in ‘Facilities Maintenance’ screen and provide the ‘FX Rate Revaluation’ details.
You can change these values. On saving a facility with the ‘Module’, ‘Product Code’ and ‘Currency Code’ combination, it cannot be modified further.
For more information about this screen, refer to ‘Maintaining Line Code details’ section.
2.2.16 Facility Credit Rating and History
You can access this screen by clicking ‘Credit Rating’ in ‘Facilities Maintenance’ screen.
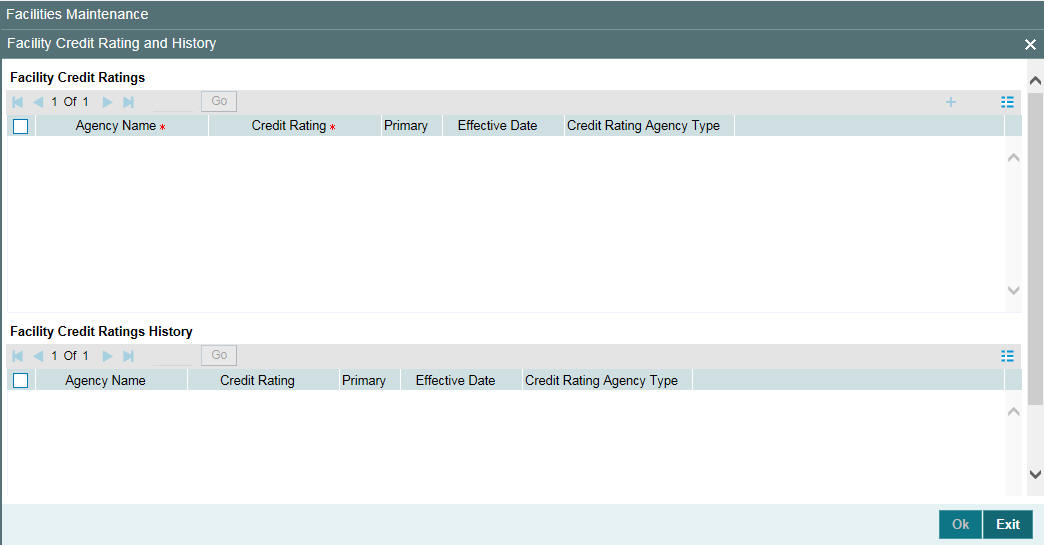
Facility Credit Ratings
Agency Name
Select the credit rating agency name from the adjoining option list.
Credit Rating
Select the credit rating from the adjoining option list. You can maintain multiple external credit rating agencies for a single facility.
However, you can maintain only one internal credit rating agency for a single facility.
Primary
Select one of the Credit ratings as the primary rating for facility
The ratings from multiple agencies of external type can be assigned to a facility of which one should be marked as primary.
Only one internal credit rating can be maintained which by default is considered 'Primary'.
The internal credit rating marked as 'Primary' is shown in 'Internal Credit Rating' field of 'Facilities Maintenance' screen. Similarly, external credit rating marked as 'Primary' is shown in 'External Credit Rating' field of 'Facilities Maintenance' screen.
The modification of primary from one agency to another is allowed.
Note
When a primary credit rating at facility level is modified to a rating with a lower priority, then an alert is triggered. The alert of such facilities is displayed in the dashboard.
Effective Date
Specify the effective date while associating a credit rating to a facility.
It is mandatory to select the effective date while associating the credit rating. Effective date can be backdated and not future dated. For the same agency, multiple ratings cannot be assigned for the same effective date.
If multiple modifications are done for a particular agency with the same effective date, then the last modification is taken into consideration
Credit Rating Agency Type
Select the agency type as “Internal’ or External’. These values get defaulted from the ‘Credit Rating Agency Maintenance’ screen.
Facility Credit Rating History
Credit Rating and Effective Date
If the credit rating for a specific agency is modified along with the Effective date at a facility level, then the existing is recorded in the ‘Facility Credit Ratings History’ section.
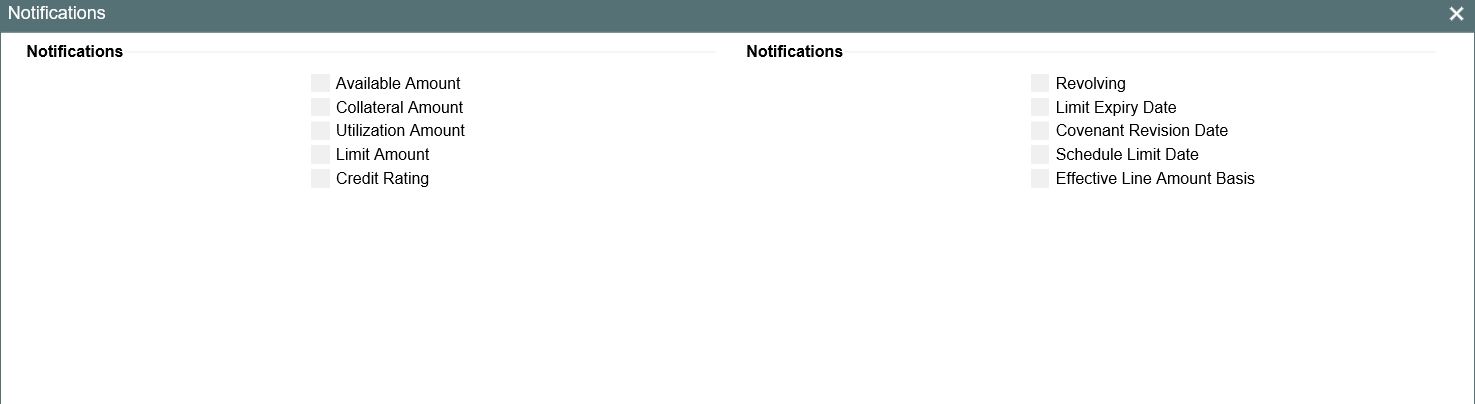
2.2.17 Notifications
Notification sub-system enables the particular facility record to be a candidate for notification whenever the record is amended. At least one of the out of box supplied fields in notification sub-system to be enabled to bring this facility under the purview of generating notification. When values in field/s enabled for notification are modified as part of direct updating or as part of batch updating, all details of the facility is sent in the notification message along with old and new value details of the fields enabled for notification.
Notification messages are logged in a table with unique reference number. A new quartz job is required to read notification messages and publish it on configured queue/topic.
To configure the fields for notification message, click ‘Notification’ subsystem.
Field name |
Screen |
Modification |
Old value relevance |
Notification triggered when |
Limit amount |
GCDFACLT - main screen |
Direct/Batch |
Yes |
When limit amount changes |
Effective line amount basis |
GCDFACLT - main screen |
Direct |
Yes |
When effective line amount is changed |
Collateral amount |
GCDFACLT - main screen/Pool links |
Direct/Batch |
Yes |
When changes done in pool links screen or when collateral value changes |
Revolving to non-revolving |
GCDFACLT - main screen |
Direct |
Yes |
When revolving check box is selected/cleared |
Available amount |
GCDFACLT - main screen |
Derived value in screen when base value gets modified Direct/Batch |
Yes |
When available amount changes based on changes on account of utilization, blocking, limit amount changes, so on |
Utilization amount |
GCDFACLT - main screen |
Direct |
Yes |
Overall utilization amount changes |
Limit expiry date |
GCDFACLT - main screen |
Batch |
No |
When limit expiry date cross application date |
Limit date |
GEDFACLT - Schedules sub-screen |
Batch |
No |
On reaching the Limit date maintained at the Limit Schedule |
Covenant revision date |
GEDFACLT - covenants sub-screen |
Batch |
No |
When revision date is crossed and covenant expires |
Credit rating change |
GEDFACLT - credit rating |
Direct |
Yes |
When credit rating changes for an existing record. |
2.2.18 Change Log
You can see the history of all the facility changes that have happened for a selected facility. For each facility, you can view the record details, remarks, warnings, fields that are modified.
You should be able to view the details of particular record of that screen by using the change log button. The result should list all the modifications on the particular record.

In 'Change Log View' subsystem, you can only view the old and new values of the following fields and the dependent fields that are modified.
Records section
- Modification Number
- Modification Status
- First Authorization Status
- Authorization Status
- Maker Id
- Maker Date Stamp
- First Checker Id
- First Checker Date
- Checker Id
- Checker Date Stamp
- View Change
Remarks
- Maker Remarks
- Maker Override Remarks
- First Checker Remarks
- Checker Remarks
Warnings Section
- Warning Code
- Warning Description
Fields Section
- Field Name
- Old Value
- New Value
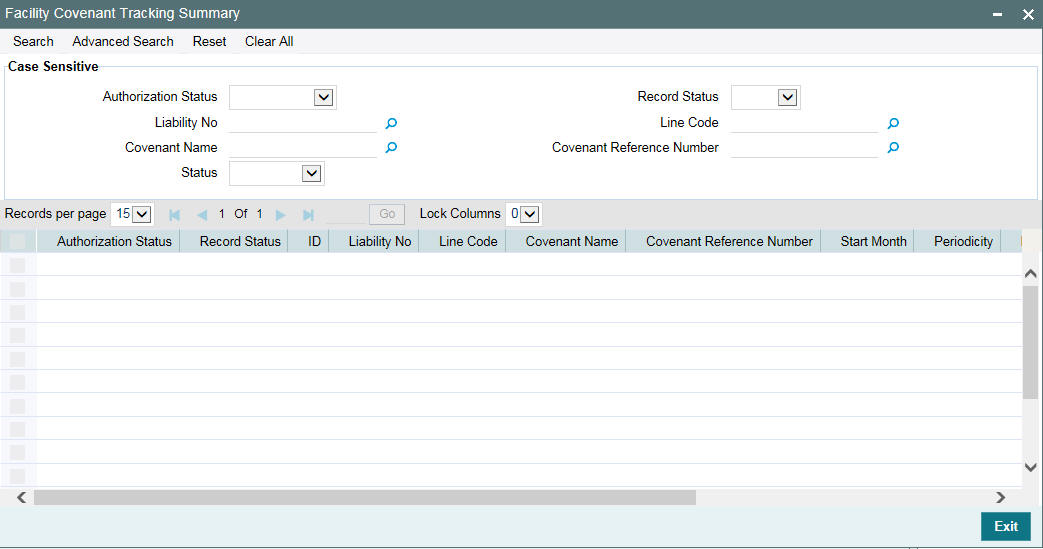
2.2.19 Viewing Facility Covenant Tracking Summary
You can view summary of covenants attached to the facility for tracking using the ‘Facility Covenant Tracking Summary’ screen. You can view applicable covenants for a particular facility from the list of covenants maintained in the system.
You can open detailed screen using this screen. You can query the records based on the search criteria.
You can invoke this screen by typing ‘GESCOVTR’ in the field at the top right corner of the Application tool bar and clicking the adjoining arrow button.
2.2.20 Tracking Facility Covenant Details
The captured covenants as part of facilities can be tracked using 'Facility Covenant Tracking Details' screen.
You can invoke the ‘Facility Covenant Tracking Details’ screen by typing ‘GESCOVTR’ (Facility Covenant Tracking Summary) and on clicking the queried record ‘GEDCOVTR’ (‘Facility Covenant Tracking Details’) is opened with the details of the covenant.
You can unlock and update the status of the covenant here.
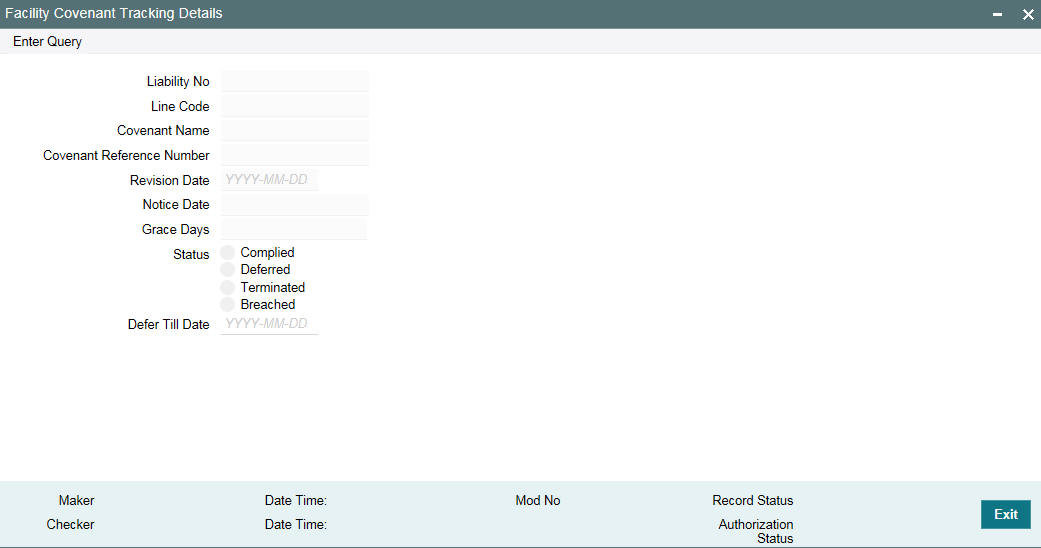
Liability Number
Indicates the liability number for which the facility is linked.
Line Code
Indicates the line code.
Covenant Name
Indicates the covenant name.
Covenant Reference Number
Indicates the covenant reference number for the facility being maintained.
Revision Date
Indicates the date on which covenant has to be revisited for review.
Revision date is arrived by the system for a particular facility covenant based on start date + (combination of frequency & due date & start month) at the time of save.
Notice Date
Indicates the date on which covenants can be tracked for compliance before revision date in advance based on notice days configured.
Grace Days
Indicates the grace days for the next due/revision date allowed for facility covenant.Status
You can select the covenant status as the following:
- Complied
- If the status of the covenant is not compiled on or before revision date, then the status is updated as breached by batch process immediately after revision date.
- If the covenant has the grace days configured, compliance can be marked till the grace period end date. The status gets updated as breached only after grace period end date if compliance is not marked by then.
- Compliance on the breached covenant can be marked after which the covenant for next frequency is enabled with the next revision date duly considering the original revision date + frequency.
- Once compliance is marked for a particular frequency, record for the next frequency with blank status is available in DB and accordingly revision date get updated in collateral/facility
- Deferred
- Covenants can be deferred for a defined period during which time covenants are not available for tracking. When covenants are breached, it cannot be deferred. Deferment can be done before the covenant becomes breached.
- Terminated -
- Covenants can be stopped from further tracking by updating the status as 'Terminated'. Only covenants which are either complied or deferred status can be terminated. Breached covenants cannot be terminated.
- Breached
- Covenants which are not complied within next revision date is marked as breached.
- When covenants pertaining to multiple frequency are breached, all of them are available for tracking
Defer Till Date
In case the status is ‘Deferred’, then you need to specify this date
You need to specify the date so that covenants falling during this period are not tracked. After end of deferment date, covenants are applicable and available for tracking.
2.2.20.1 Including Netting Amount in Facility’s Netting Contribution
You can set the available amount under a Facility to include the Netting Amount too. To enable this feature you must check the ‘Netting Required’ check box in the following levels:
- Account Netting level
- Liability level
- Facility level
Once the netting option is enabled in the above levels the Netting amount maintained as a part of Account Netting screen is added to the available amount of the facility in facility currency. The netting amount field in the facility screen is displayed in the Netting Contribution field for the facility in facility currency.
Account Netting
When you authorize an account netting transaction with contract type ‘AC’ and netting enabled, then the netting amount is included in the facility in facility currency after netting has been enabled in Liability level & Facility level. Here the Netting Amount is updated accordingly.
When you modify an Account Netting Record and deselect the Netting check box, then the system automatically subtract the netting amount from the Available Amount and the Netting Amount for the corresponding facility
When you modify an Account Netting Record and select the Netting check box, then the system automatically add the netting amount to the Available Amount and the Netting amount for the corresponding facility.
When an Account Netting Record is closed and authorised, the system automatically subtract the netting amount from Available Amount and the Netting Amount for the corresponding facility.
When an Account Netting Record is re-opened and authorised, the system should automatically add the netting amount to Available Amount and the Netting Amount for the corresponding facility.
Facility
When the Netting option is deselected and the modification is authorised, the system automatically set the netting amount to zero and recalculate the available amount. Likewise, when the netting option is enabled, the system update the netting amount based on all the Account Nettings which have Netting option enabled for the facility.
Liability
When the Netting option is deselected and the modification is authorised, the system automatically set the netting amount of all its facilities to zero and recalculate the available amount. Similarly when the netting option is enabled the system updates the netting amount based on all the Facilities and Account Nettings records, which have Netting option enabled for the liability.
2.2.21 Viewing Previous Credit Limit Changes
You can view previous changes made to the credit limit using the ‘Facilities Summary’ screen. You can invoke this screen by typing ‘GESFACLT’ in the field at the top right corner of the Application tool bar and clicking the adjoining arrow button.
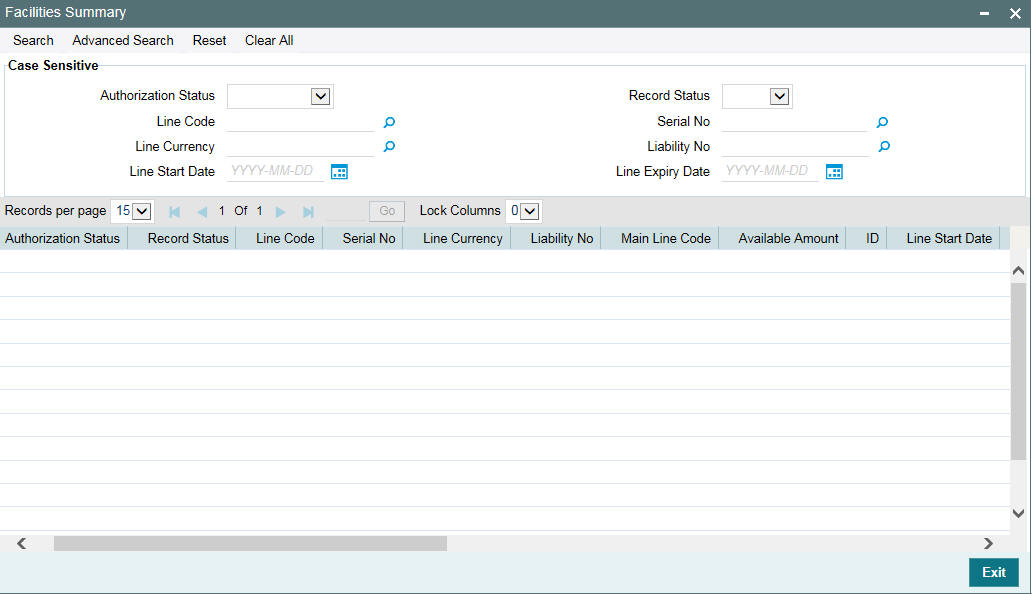
You can query on records based on all or any of the following criteria:
- Authorization StatusLine CodeLine Currency
- Line Start Date
- Record Status
- Serial No
- Liability No
- Line Expiry Date
Click ‘Search’ button. The system identifies all records satisfying the specified criteria and displays the following details for each one of them:
- Authorization Status
- Record Status
- Line Code
- Serial No
- Line Currency
- Liability No
- Main Line Code
- Available Amount
- ID
- Line Start Date
- Line Expiry Date
- Last New Util Date
- Availability Flag
- Date of First OD
- Date of Last OD
- Amount Utilized
- Utilization
- Available Date
- Tanked Util
- Netting Amount
- Branch
- Limit Amount
To view any previous changes made to the credit limit, double-click the corresponding record. A detailed screen appears containing changes made.
Note
This is a view-only screen hence you cannot make any modifications in this screen.
2.2.22 Viewing Facility Log Details
You can view the list of changes on the facility selected for a given date or range of dates. Facility log summary provides an option to search the record based on ‘Liability No’, ‘Line Code’, ‘Serial No’ ‘From Date’, and ‘To Date’.
You can view the 'Facility View Summary' screen by clicking on the queried record.
You can invoke this screen by typing ‘GEDFACHT’ in the field at the top right corner of the Application tool bar and clicking the adjoining arrow button.
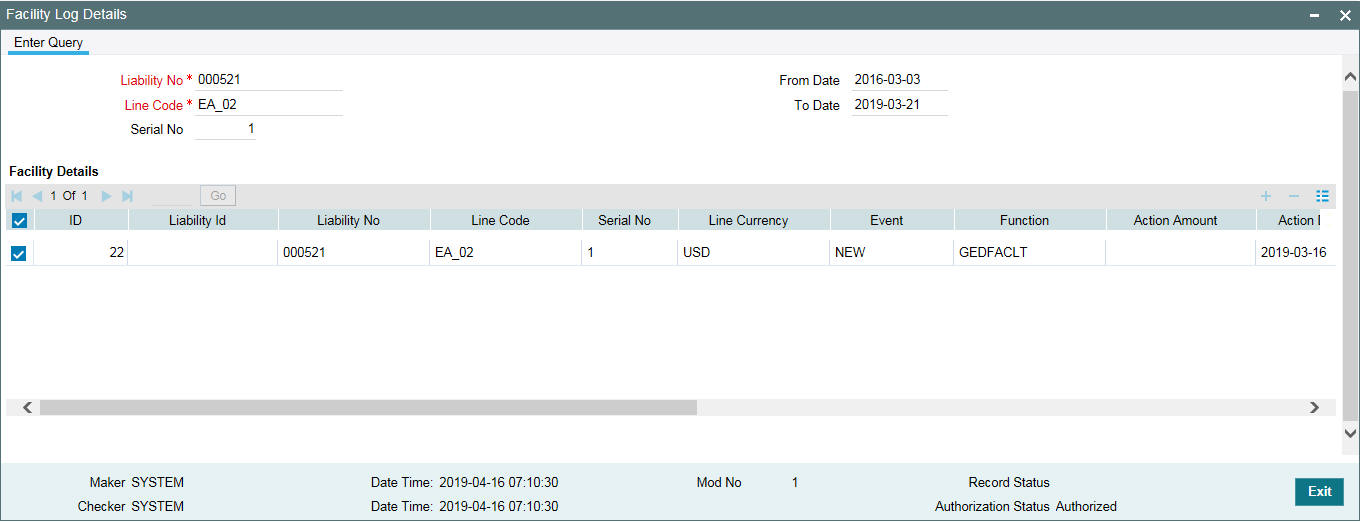
You can view the indicative list of changes as below.
- Revolving to non-revolving and vice-versa
- Adding a main line code/removing existing main line code
- Adding a category/removing a category
- Limit amount increase/decrease
- Facility expiry
- Reopening/enabling after expiry
- Linking collateral pool to facility
- Increasing/decreasing collateral pool value at facility level
- Adding/deleting a mainline before utilization
- Change effective line basis
- Amendment to approved amount
- Modification of limit expiry date
- Modification of exception transaction amount
- Modification of exception breach percentage
- Increase or decrease limit through limit schedule
- Increase or decrease collateral pool value
- FX rate revaluation – amendments which impact facility
- Exception breach transactions
Impact on facility on account of amendments in other functions or batches triggering
- Increase/decrease collateral value
- Facility transfer
- Facility blocking
- Facility utilization
- Facility de-utilization
- Currency revaluation impacting facility
- Fee liquidation/fee reversal
2.2.23 Viewing Facility Summary Details
You can view the list of changes made to the facility using the ‘Facility View Summary’ screen. You can invoke this screen by typing 'GEDFACHT' in the field at the top right corner of the Application tool bar and clicking the adjoining arrow button.and querying a record by providing a Liability no and Line code, clicking on the queried record opens the 'Facility View Summary’ (GEDFACDT) screen.

2.2.24 Processing of Advanced and Manual Facility Fees
Oracle Banking ELM supports 'Advanced Fee' and 'Manual Payment' of fee for facility.
The steps involved in processing advanced and manual fee payment is as follows:
Advanced Fee
You can capture ‘Liquidation Method’ as 'Advanced' in ‘Fee & Accounting Class Maintenance’ screen for a rule code in 'Rule Preferences' screen
At time of facility creation in 'Facility Maintenance' (GEDFACLT) screen, this value gets defaulted as ‘Advanced’ in ‘Liquidate Method’ field in facility ‘Fee Details’ screen.
You can choose your own schedule start by selecting ‘Start Date’ and ‘Start Month’ in ‘Fee Rule Preferences’ section.
The following are the various advanced fee scenarios:
- Advanced fee can be of type 'User Input' or 'Rate/Amount' selected in 'Fee Rule Maintenance' screen.
- 'User Input' can only be specified in terms of amount value
- 'Rate/Amount' is based on the underlying SDE selected in SDE Type
- For 'User Input' or 'Amount', the value specified is considered for the whole liquidation cycle (frequency) and accrued accordingly based on the day basis.
For example,
Fee Amount = 2400, Accrual Frequency = Daily, liquidation frequency = Monthly, Days in month = 30, Day Basis = Actual/Actual
Fee accrued per day is 2400/30 = 80. This process is repeated for every schedule (in this case every month)
- Advance fees can be collected/liquidated both manually or automatically (configured in liquidation preference in Fee & Account Class Maintenance screen as 'Manual' or 'Auto')
- If 'Manual' then fee type has to be ‘User Input’
- For fee type as ‘User Input’ and liquidation as 'Manual', advanced Fee is collected manually from 'Manual Fee Payment' screen.
- FLIQ event is triggered once the record is saved in 'Manual Fee Payment' screen.
- You are not allowed to make advance payments.
- If 'Auto' then fee type can be either 'User Input' or 'Rate/Amount'.
- For fees types as 'User Input' and liquidation as 'Auto', advanced fee is collected automatically on the day of facility creation and then based on the frequency.
- For fees types as 'Rate/Amount' and liquidation as 'Auto', advanced fee is collected automatically on the day of facility creation (and then based on frequency) if the underlying SDE’s have balances
Note
- If on facility start date, the SDE closing balance is 0 the fee is not collected.
- Fees are collected from the date the balances are updated
- In this case, if the balances are updated in mid of the fee liquidation cycle the fees are adjusted as part of PRLQ (PRLQ_REC/PRLQ_PAY) event triggered on cycle last date.
- Fee accrual starts from the date the balances are updated
Manual Fee
You can capture ‘Liquidation Method’ as 'Manual' in ‘ Fee & Accounting Class Maintenance screen for a rule code in 'Rule Preferences' screen
At time of facility creation in 'Facility Maintenance' (GEDFACLT) screen, this value gets defaulted as ‘Manual’ in ‘Liquidate Method’ field in facility ‘Fee Details’ screen.
Manual Liquidation screen
You can do manual fee payment by selecting facility detail and limit date in 'Manual Liquidation' screen.
You can invoke the ‘Manual Liquidation’ screen by typing ‘GEDFCFPT’ in the field at the top right corner of the Application tool bar and clicking the adjoining arrow button.
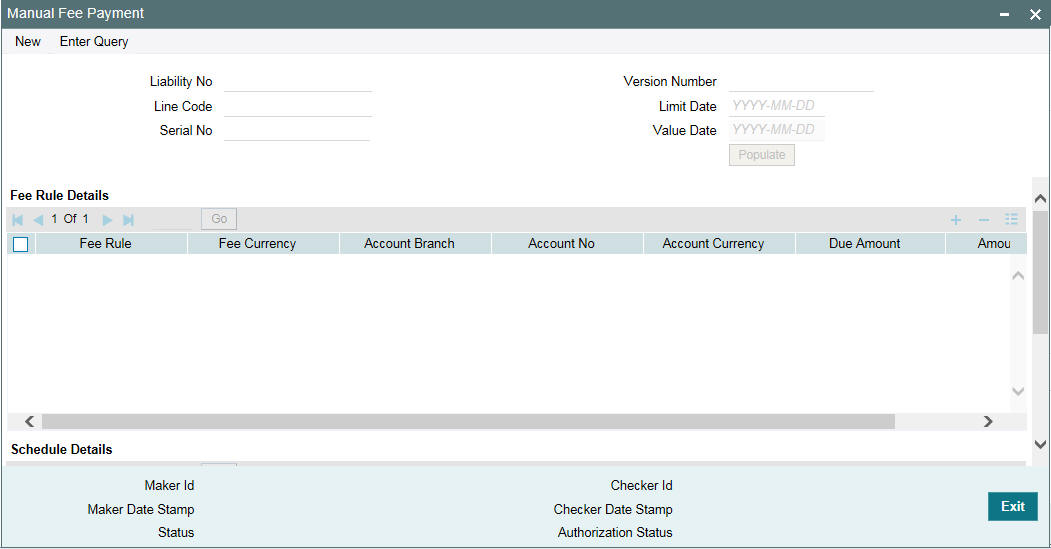
Once you select the 'Liability No', ‘Line Code’, and ‘Limit Date’ and click 'Populate', the 'Fee Rule Details' and 'Schedule Details' sections get displayed.
The ‘Serial No’ field is disabled and it gets defaulted from the ‘Facilities Maintenance’ screen.
It shows the summary of amount due and amount scheduled for a particular fee starting from start date to limit date.
Note
Payment can be done till today's date only. Reversal of payment is allowed for latest version and today paid payment only.
As part of manual liquidation of facility fees, FLIQ (Fee Liquidation) event is triggered and appropriate entries are passed by system.
REVP (Reverse Payment) and RPRL (Reverse Pay/Receive Liquidation) events are system generated events when reversal of manual payment and pay-receive liquidation is opted for which accounting entries are internally generated by the system.
2.2.25 Processing of (ECA) and Partial/Full Fee Liquidation
- ECA request for fee liquidation is not created from ELCM where GL is chosen as settlement account.
- For fees where liquidation start month and date are opted, ECA request
is triggered as below:
- Arrears Fees – On selected month and date with amount due till that day.
- Advance fees – ECA request on facility start date with amount from facility start date till selected month and date.
- ECA request is triggered for fee liquidation events (FLIQ and PRLQ - PRLQ_REC) and not for events like FACR.
- No ECA requests are triggered for fees associated with facilities in closed, expired or inactive status.
- No ECA requests are triggered for the fees that are waived.
- You can verify fee amount for each liquidation cycle, recovered and due from ‘Facility Fee Summary’ screen.
- You can Approve/Retry the rejected ECA request from ‘ECA Queue’ screen
- When you choose to approve, fee gets liquidated and force posted irrespective of available balance in CASA (in GESFRTRY)
- The different ECA request are below:
- P – Processed
- E - Error
- T – Timed Out
- A – Approved
- U - Unprocessed
ECA Request for Auto Liquidation
- As part of ELCM batch process, amount due for liquidation for a fee is sent to the DDA system for approval based on (ECA_CHECK_REQD) parameter maintained in GEDPARAM table and verify funds flag at account and contract level. Only after receiving an approval from the DDA system, the system proceeds with liquidation of the fee component.
- ELCM sends a consolidate request to the ECA - one for each facility contract. As the settlement account is configured for each fee component in ELCM, multiple settlement accounts for a facility is possible. ELCM for a due date groups the total amount due from each account and generate one ECA request for a facility and due date.
a. Full Liquidation
- Fees are liquidated if only balance is fully available
- Example
- Fee 1 = 100, Fee 2 = 300
- ECA Request for = 400
- Amount in CASA = 300
- ECA response will be Rejected and no liquidation takes place
- Fee 1 and 2 will be updated as due
b. Partial Liquidation
- Fees are liquidated to the extent of available
- Example
- Fee 1 = 100, Fee 2 = 300
- ECA Request for = 400
- Amount in CASA = 300
- ECA response is Approved and partial liquidation takes (Fee 1 liquidated to 100 and Fee 2 liquidated to 200)
- Fee 2 is updated as due with amount 200.
- The due amount when sent as part of ECA request will be in account/facility currency.
- As part of the ECA request, ELCM module sends the following additional preferences configured at a class/facility product level.
- Partial Liquidation Allowed (PARTIAL_BLOCK_REQUIRED): If the flag is set as ‘N’, then ECA system sends a fail approval in case the total amount requested is not available in the account.
- Partial Liquidation Allowed (PARTIAL_BLOCK_REQUIRED): If the flag is set as ‘Y’, then ECA system sends a pass approval in case the total amount requested is not available in the account. Block to the extent of available amount is put and whatever fees can be recovered (in the order sent) is recovered
- In case of multiple fees that are due from the customer as part of Auto Liquidation, ELCM places a ECA request based on internal order of fee maintenance in ELCM.
- Also applicable in case of multiple facilities using the same CASA and fees falling on same liquidation date – internal sequence of facility the same used for batch process is utilized for ECA request generation.
- First process in ELCM batch would compute the amount due for a fee as part of Auto liquidation and place the request into ECA table with the current status as ‘Unprocessed’. A Java program would constantly poll the table for any unprocessed records and transform the records into an ECA request XML and place the same into a IN queue of the external system configured.
- Upon receipt of any response from the DDA system in the OUT queue of ELCM module, the response would be parsed by the JAVA program and update the status response status (Approved/Rejected) in GETB_ECA_REQ_MASTER and GETB_ECA_REQ_DETAIL table.
- Single block reference is sent by UBS for all fee rules in the facility.
- When ECA block is successfully (APPROVED) created on the accounts (Partial / Full), liquidation happens in ELCM module and perform accounting.
- When ECA block is unsuccessfully (REJECTED) created on the accounts (Partial / Full), other activities continue and the exception is logged - Fee not liquidated
- ECA request for auto liquidation will not be created from ELCM where GL is chosen as settlement account. For example, for a contract having fee component and GL is chosen as a settlement account then no ECA request will be created by ELCM. However, if GL is chosen only for one of the fee component and for another a valid customer account is chosen as settlement account, then ECA request will be created only for that fee component.
- When Auto Liquidation process is run for more than one day as part of EOD processing (due to holiday settings), then Auto liquidation for the fees that are due for a day can be processed only after Auto liquidation is processed successfully for the preceding day.
- On account of holiday processing, fees pertaining to multiple liquidation cycles getting triggered together, order of processing will be based on the order in which request sent – oldest first and latest last. Request for each liquidation date will have separate block reference.
- In a situation where ECA block is successful, but subsequent processing in ELCM fails auto retry mechanism will be available.
- ECA check during auto liquidation is a batch process
- This is applicable for advance fees as well as the fees with auto liquidations are liquidated post successful completion of GEBUTILS batch
- PRLQ Event for Advance fee works as is and ECA requests are generated on the day they (PRLQ_REC) is triggered and work with the explained behaviour of blocking/recovery.
- Partial Liquidation Allowed option affects the fees that needs to be collected from customer as part of PRLQ (PRLQ_REC) – fees are collected from customer based on the flag
- If a PRLQ fee is unable to be collected (ECA REJECT or ECA APPROVE for partial), it will be marked as overdue.
- The uncollected PRLQ fee is tracked separately and retried for recovery
- Fees for new cycle continues the normal process but should be collected only when all overdue fees are cleared
- If an advanced fee is not collected on facility start date and the due amount increases (due to utilization), then ECA request will include the full due amount on cycle end date as part of PRLQ.
- Due fees (ECA response as REJECTED) is logged separately as OVERDUE and retried for recovery based on the defined frequency specified.
- Fees for new cycle continues the normal process but should be collected only when all overdue fees are cleared
- System allows user to Reject/Retry the Rejected ECA request from ECA Queue screen
- System passes the accounting entries to external system only for the authorized contract with handoff status as Y after unblocking of the amount
- Below scenarios depict the behaviour of fees with auto liquidation and ECA check.
Scenario |
Fee Rules |
Liquidation Amt |
CASA Balance |
Verify Funds |
Partial Liquidation Allowed |
Consolidated Request to UBS |
Amt Liquidated |
Remarks |
1 |
Fee1 |
100 |
500 |
Yes |
Yes* |
Sum of all fees = 750 |
100 |
Collected |
Fee2 |
200 |
200 |
Collected |
|||||
Fee3 |
150 |
150 |
Collected |
|||||
Fee4 |
250 |
50 |
Partially Collected |
|||||
Fee5 |
50 |
0 |
Not Collected as CASA balance exhausted |
Scenario |
Fee Rules |
Liquidation Amt |
CASA Balance |
Verify Funds |
Partial Liquidation Allowed |
Consolidated Request to UBS |
Amt Liquidated |
Remarks |
2 |
Fee1 |
100 |
500 |
Yes |
No* |
Sum of all fees = 750 |
0 |
Not Collected |
Fee2 |
200 |
0 |
Not Collected |
|||||
Fee3 |
150 |
0 |
Not Collected |
|||||
Fee4 |
250 |
0 |
Not Collected |
|||||
Fee5 |
50 |
0 |
Not Collected |
- When a fee is auto liquidated, verify funds (ECA check) is performed. It would depend upon maintenances for verify funds (ECA check) present at GEDPARAM, facility and account levels. Following scenarios are handled here:
a. Scenario 1: Verify funds (ECA check) is required and verify funds response is approved.
- For Partial Liquidation
- Normal fees Liquidation
- Fee liquidation as result of PRLQ
- For Full Liquidation
- Normal fees Liquidation
- Fee liquidation as result of PRLQ
b. Scenario 2: Verify funds (ECA check) is required and verify funds response is rejected
- For Partial Liquidation
- Normal fees Liquidation
- Fee liquidation as result of PRLQ
- For Full Liquidation
- Normal fees Liquidation
- Fee liquidation as result of PRLQ
c. Scenario 3: Verify funds (ECA check) is not required
- Normal fees liquidation
- Fee Liquidation as part of PRLQ
d. Scenario 4: Verify funds (ECA check) is required, contract is entered in unauthorized mode
- For Partial Liquidation
- For Full Liquidation
ECA Request for Manual Liquidation
- Manual Liquidation is applicable for both Advance and Arrears fees through GEDFCFPT screen
- Partial Liquidation Allowed option does not have any effect on fees with manual liquidation – this flag is not applicable for fees with manual liquidation.
- User can chose to enter the fee the fee that needs to be liquidated and can opt for partial if sufficient balance is not available.
- After capturing the necessary details in GEDFCFPT screen and click ‘Save’, ELCM will place an ECA request for the amount requested for the payment.
- System displays the success or failure message based on response received from DDA system
- When the ECA request is approved by the DDA system, the saved record in GEDFCFPT needs to be manually authorized.
- ELCM will process the payment request and update the tables and post liquidation entries as part of back ground process and payment status will be in unauthorized state.
- Authorization of payment is possible only after the liquidation process is completed and entries are posted.
- When the ECA request is rejected by the DDA system, the saved record in GEDFCFPT needs to be manually deleted.
- When manual payment is deleted for unauthorized contract, an undo
ECA should be sent to the DDA system.
- Block if processed should be unblocked
- If there are multiple fees to be manually liquidated and if for one the ECA request is rejected, user needs to manually delete the payment instruction for that fee component and proceed with the approved ones.
- Even in the case of rejection on account of insufficient CASA balance, UBS/DDA system will indicate the amount that can be blocked in CASA.
- User can then take a call how the amount needs to be apportioned across fee components.
- Similarly, ELCM generates reversal entries upon reversal of record (payment reversal) in GEDFCFPT.
- Block if processed should be unblocked.
- In case where actual accounting to DDA system is not generated post
ECA approval, ELCM generates both actual entries for liquidation with
block number and its reversal.
Actions
System Response
After getting ECA response as ‘Approved’, if you try to delete the payment
The system should undo ECA with the approved block number
- System allows you to ‘Reject/Retry’ the Rejected ECA request from ‘ECA Queue’ screen
- System passes the accounting entries to external system only for the authorized contract with handoff status as ‘Y’ after unblocking of the amount
- Below are the sample scenarios which depicts the functionality further.
Scenario 1:
Fee Rules |
Liquidation Amt |
CASA Balance |
Verify Funds |
Partial Liquidation Allowed |
Consolidated Request to UBS |
UBS Response |
Amt Liquidated |
Remarks |
Fee1 |
100 |
500 |
Yes |
NA |
Sum of all fees = 750 |
Rejected. |
100 |
User chooses to fully collect |
Fee2 |
200 |
200 |
User chooses to fully collect |
|||||
Fee3 |
150 |
150 |
User chooses to fully collect |
|||||
Fee4 |
250 |
50 |
User chooses to partially collect |
|||||
Fee5 |
50 |
0 |
User chooses not to collect. |
Scenario 2:
Fee Rules |
Liquidation Amount |
CASA Balance |
Verify Funds |
Partial Liquidation Allowed |
Consolidated Request to UBS |
UBS Response |
Amount Liquidated |
Remarks |
Fee1 |
100 |
500 |
Yes |
NA |
Sum of all fees = 750 |
Rejected. |
100 |
User chooses to fully collect |
Fee2 |
200 |
100 |
User choses to partially collect |
|||||
Fee3 |
150 |
150 |
User choses to fully collect |
|||||
Fee4 |
250 |
100 |
User chooses to partially collect |
|||||
Fee5 |
50 |
50 |
User chooses to partially collect |
- When a fee is manually liquidated through GEDFCFPT screen, verify funds (ECA check) is performed. It would depend upon maintenances for verify funds (ECA check) present at GEDPARAM, facility and account levels. Following scenarios are handled here:
a. Scenario 1: Verify funds (ECA check) is required and verify funds response is approved
- Sub Scenario a.1: Contract is authorized – fee liquidated
- User chooses to fully liquidate
- User chooses to partially liquidate
b. Scenario 2: Contract is reversed – Reverse option in GEDFCFPT
c. Scenario 3: Verify funds (ECA check) is required and verify funds response is rejected
- Sub Scenario c.1: CASA balance not available
- Sub Scenario c.2: User chooses to liquidate fees partially
- Sub Scenario c.3: User chooses to liquidate only selective fees
d. Scenario 4: Verify funds (ECA check) is not required
d.Scenario 5: Verify funds (ECA check) is required, contract is entered in unauthorized mode.
2.2.25.1 Facilities Fees Retry
You can Approve/Retry the rejected ECA request from 'Facilities Fees Retry' screen.
You can invoke this screen by typing ‘GESFRTRY’ in the field at the top right corner of the Application tool bar and clicking the adjoining arrow button.
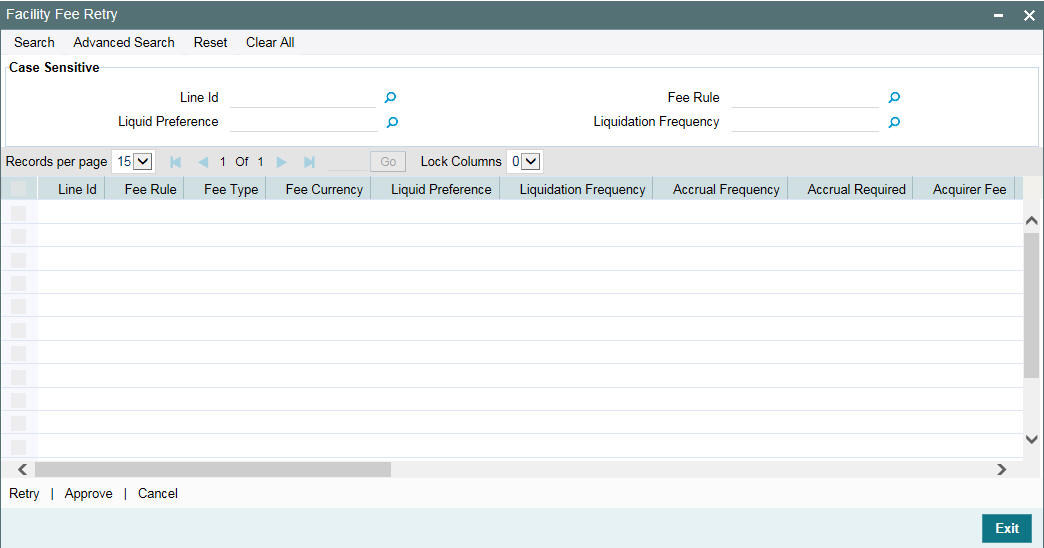
2.2.25.2 Facility Fee Summary screen
Using 'Facility Fee Summary' screen you can verify what is the fee amount for each liquidation cycle, what is recovered and what is due.
You can invoke this screen by typing ‘GESFEEVW’ in the field at the top right corner of the Application tool bar and clicking the adjoining arrow button.
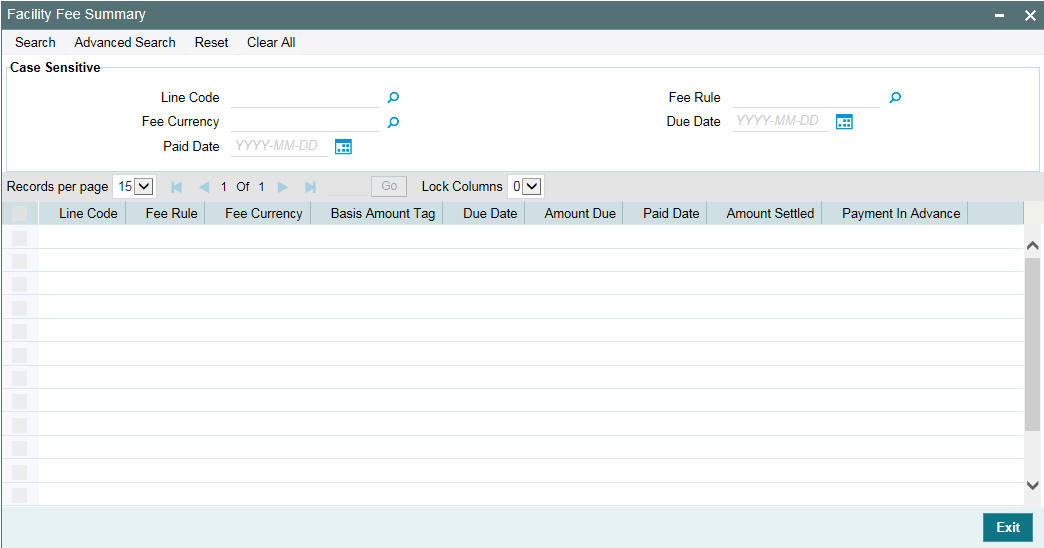
2.3 Account/Contract Balance Maintenance for Netting
To pool balances across accounts/contracts for netting, account/contract balance information has to be maintained. You can perform this maintenance in the ‘Account/Contract Balance for Netting’ screen.
You can invoke the ‘Account/Contract Balance for Netting’ screen by typing ‘GEDACCNT’ in the field at the top right corner of the Application tool bar and clicking the adjoining arrow button.
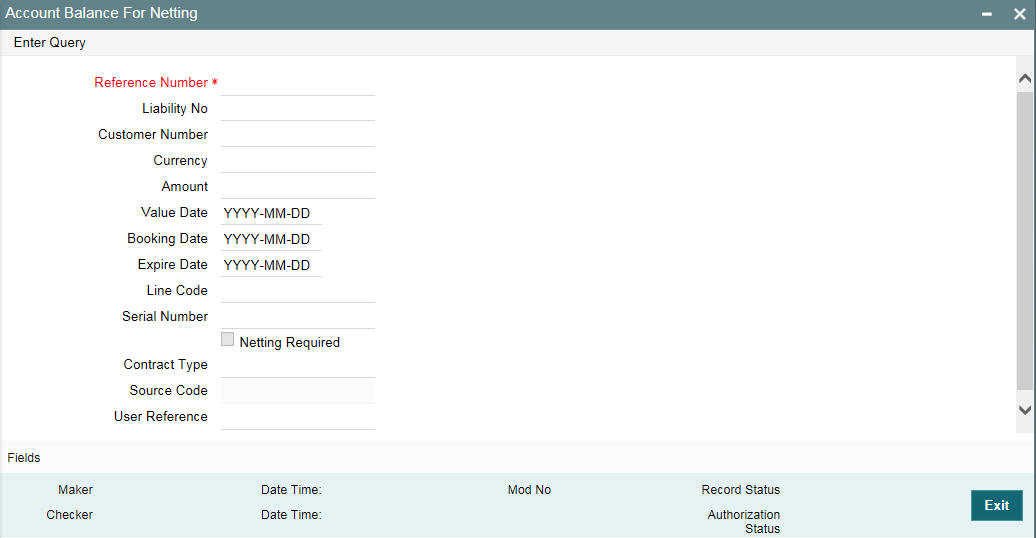
Reference Number
Specify the reference number, which is the account number or the contract reference number for which the balance has to be considered.
Contract Type
The ‘Contract Type’ field will show ‘AC’ by default for the account netting facility. In this case you must also define the facility code (Line Code) to which the netting amount is to be added.
If the account is a Term Deposit account which you wish to link as collateral to a collateral pool, then specify a Contract Type other than ‘AC’. Here you need not specify the facility code.
For more details on linking Term Deposit accounts/contracts as collaterals, refer the section ‘Collaterals Maintenance’.
Customer Number
Specify the customer number to which the Reference number belongs to.
Currency
Specify the currency based on which the balance amount of the account/contact has to be considered. Once authorized, this entry will be non-amendable.
Amount
Specify the account/contract balance amount for netting.
Value Date
Specify the date from when this account/contract is valid for netting.
Booking Date
Specify the booking date when the account/contract was created.
Expiry Date
Specify the date till when this account/contract is valid for netting.
Liability Number
Specify the liability number to which the Reference number is linked.
Line Code
Specify the line code for the account/contract.
Serial Number
System displays the Serial Number for the line chosen in the field 'Line Code'. The ‘Serial No’ field is disabled and it gets defaulted from the ‘Facilities Maintenance’ screen.
Netting Required
Select this check box to indicate that the netting amount defined in the 'Account/Contract Balance for Netting' screen is updated in the 'Netting Contribution' field for the specific facility for which 'Netting Required' check box is selected. You can have the Facility to display the Netting Amount in the 'Netting Contribution' screen. For more details on this feature, refer the section 'Including Netting Amount in Facility’s Netting Contribution' in this document.
2.4 Ear Marking Maintenance
You can use the ‘Ear Marking Maintenance’ screen for blocking of funds for a Facility.
You can invoke the ‘Ear Marking Maintenance’ screen by typing ‘GEDBLOCK’ in the field at the top right corner of the Application tool bar and clicking the adjoining arrow button.
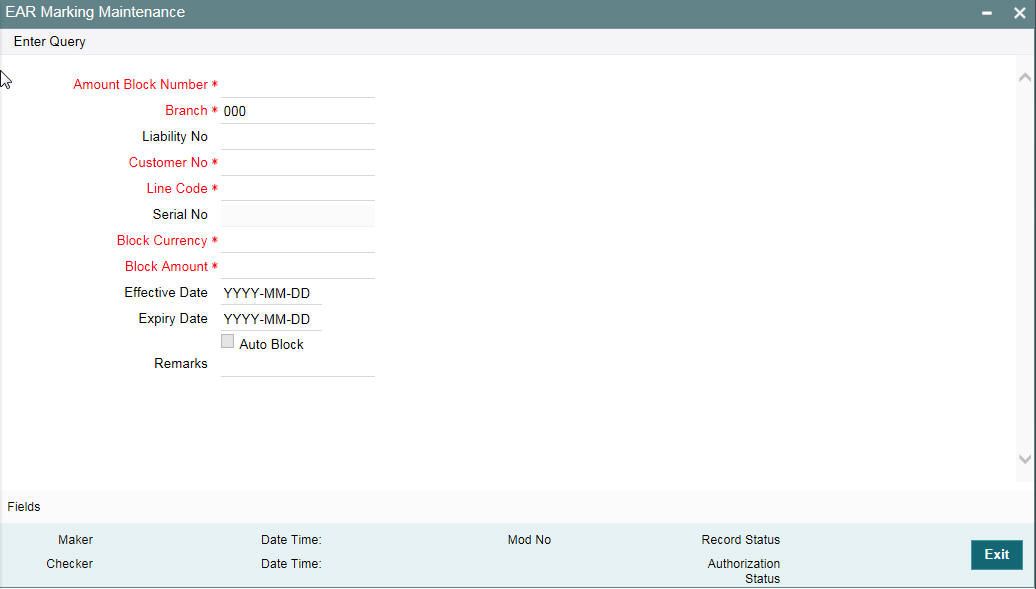
Block Number
Specify the unique number which is to be assigned for every block that has been created.
Branch
Specify the branch in which the block has been created.
Liability Code
Specify the liability code for which the amount block is to be done.
Customer Number
Specify the customer for whom the amount block is to be done.
Line Code
Specify the Line code for which the amount block is to be done.
Serial Number
System displays the serial number for the line chosen in the field 'Line Code'.
Block Currency
Specify the currency based on which the Block amount for the facility has to be considered. Once authorized, this entry is non-amendable.
Block Amount
Specify the amount to be blocked for ear marking. The block amount cannot be a negative value.
Effective Date
Specify the date from when this block amount for that facility becomes effective.
Expiry Date
Specify the date till when this block amount for that facility is applicable.
Auto Block
Check this box to indicate that the system should automatically create block for the specified amount for the specified facility. This check box is deselected by default indicating that the block on the facility is manual.
Remarks
Add remarks about the ear marking maintenance, if any.
2.5 Queue Maintenance
This section contains following topics.
2.5.1 Exception Queue Maintenance
You can maintain exception queue records with their respective user roles allowed for authorization in the ‘Exception Queue Maintenance’ screen.
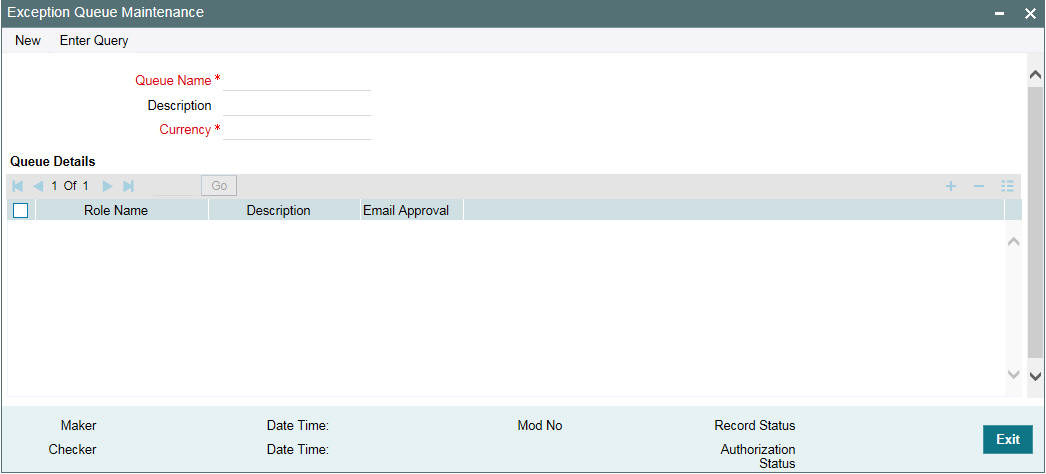
You can invoke the ‘Exception Queue Maintenance’ screen by typing ‘GEDQUEMN’ in the field at the top right corner of the Application tool bar and clicking the adjoining arrow button.
Queue Name
Specify the Queue Name.
Description
Give a brief description of the queue here.
Currency
You can choose the appropriate currency from the option list.
You can configure different queues with currency combination. Queue configured with a particular currency when used in 'Exception Queue Slab Maintenance' determines the queue which needs to be considered for routing dual auth transaction for approval based on utilization amount in facility currency.
Queue Details
Here you can specify multiple user roles for a Queue name. For each record you must specify the Role Name, that is, the user role allowed for authorization. System then defaults the description for the role.
Email Approval
You can select this check box in case e-mail needs to be sent to the users attached to role.
2.5.2 Exception Queue Slab Maintenance
As a part of Credit Exception management, the Transaction authorizer details and breached authorizer details can be entered in the ‘Transaction Authorize Maintenance’ screen.
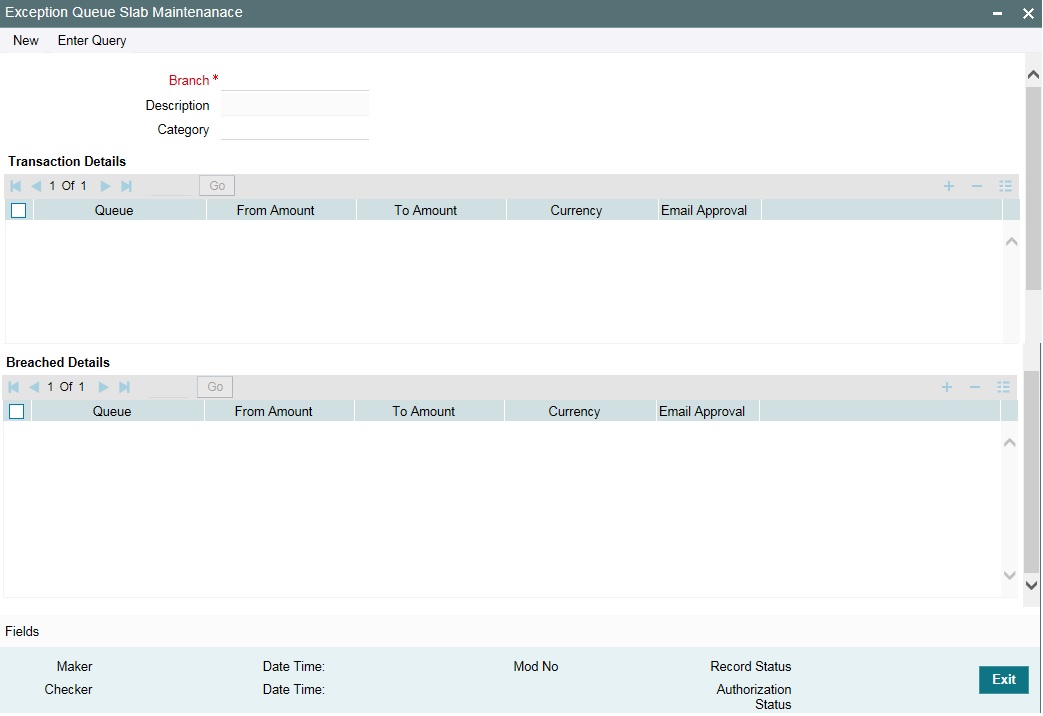
You can invoke the ’Exception Queue Slab Maintenance’ screen by typing ‘GEDTAUTH’ in the field at the top right corner of the Application tool bar and clicking the adjoining arrow button.
The transaction authorizer queue first checks for authorizers maintained for that particular branch and category during a utilization transaction for that branch. If no authorizers are maintained for that branch then a default authorizer is assigned to all branches.
The Default Authorizer details are used for processing Credit Exception management.
Branch
Specify the branch for which the maintenance is being done.
Description
The description for the branch chosen in the field 'Branch' is displayed here.
Remarks
Specify the remarks about the Transaction Authorize Maintenance.
Category
Specify the category for which the transactions authorize maintenance is being done. Having specified the category for the liability and the facility, the transaction authorize maintenance can be done for the same category. When the Exception Txn Amount or Exception Breach Percentage gets breached for a line belonging to the same category as defined in the transaction authorize maintenance, the transaction is available in the queue defined in the transaction authorize maintenance for the specific category.
Transaction Details
Here for each record you can specify the following:
- Queue Name – Specifying this in turn fetches all the user roles attached to the queue name. During utilization transaction users having these roles have to perform the authorization for the corresponding amount range.
- From Amount and To Amount – For specifying the amount range
- Currency - In this screen while creating different slabs, the currency is defaulted from 'Exception Queue Maintenance' screen. This feature allows in picking appropriate queue based on utilization transaction amount in a particular currency.Thereby, dual authorization transaction can be sent to appropriate role.
- Email Approval - If selected, e-mail is sent to the users attached to the role if the breach falls in particular slab
Breached Details
Here for each record you can specify the following:
- Queue Name – Specifying this in turn fetches all the user roles attached to the queue name. During utilization transaction users having these roles have to perform the authorization on Breached Transaction amount blocks.
- From Amount and To Amount – For specifying the amount range to define the block of amount
- Currency - In this screen while creating different slabs, the currency is defaulted from 'Exception Queue Maintenance' screen. This feature allows in picking appropriate queue based on utilization transaction amount in a particular currency.Thereby, dual authorization transaction can be sent to appropriate role.
- Email Approval - If selected, e-mail is sent to the users attached to the role if the breach falls in particular slab.
2.6 Breach Tracking for Main Line Facility Utilization Transactions
Oracle Banking ELCM allows you to track all the utilizations of a facility which includes the following:
- Main line facility level
- Child facility level
2.6.1 Breach tracking at main line and child facility level
- In case a utilization transaction breaches the exception transaction then the transaction goes for dual authorization. Likewise, because of the utilization transaction, if the total utilization breaches the exception breach percentage configured at facility level, then also the exception transaction goes for dual authorization.
- The dual authorization transaction is routed to appropriate role based on the queue maintenance.
- Dual authorization transaction is routed to appropriate queue considering the utilization transaction amount considering slabs configured for branch and category through ‘Exception Queue Slab Maintenance’ screen.
- Utilization transaction done at a facility level looks into exception transaction amount and exception breach percentage configured at that particular facility level for sending to dual authorization. For a child line having a main line attached, since the utilization transaction at child line level also updates the main line, utilization transaction goes for dual authorization if the transaction amount breaches the configurations at respective child and main line.
- Currency and amount of utilization transaction at line level is to be considered to decide the appropriate queue to which dual authorization transaction is to be sent for approval.
- Based on facility level configurations for exception transaction amount/percentage, if utilization transaction breaches the configured amount/percentage at both child and main line level, then multiple dual auth transactions are triggered based on configuration.
- Both dual authorization transactions pertaining to child and main lines have to be authorized.
- For a facility where in facility transfer out has taken place because of which the available amount would have come down, utilization transaction will be sent to dual authorization if the overall utilization breaches the exception breach percentage configured considering this available balance after facility transfer.
- If multiple users are available in a particular role and if one of the users approves the transaction, transactions gets approved. Likewise, if one of the users rejects the transaction, same gets rejected.
- Both child and main line level dual auth transactions are to be approved by the configured users for approval of the utilization transaction. If either of the child or main line dual auth transaction is rejected, then the utilization transaction gets rejected.
- If the utilization currency is different from facility currency, then the utilization amount is converted to facility amount currency and validated with exception transaction amount and if the same is breaching, appropriate queue/slab applicable for the amount/currency is picked for routing the transaction.
- When different branches involved in utilization transactions, that is main line in one branch and child line in a different branch, then appropriate branch/category combination configuration is considered.
2.6.1.1 Examples
When a single line configured with both breach transaction amount and breach exception percentage.
Scenario 1 - Utilization transaction resulting in breach of EITHER exception transaction amount or exception breach percentage – single transaction will go for dual authorization
- If one role is configured for a particular queue – all users in the role will get dual auth transaction. If one of them approves, entire transaction gets approved. If one of them rejects, entire transaction gets rejected. No action required from other users.
- If multiple roles are configured for a particular queue – all users in all configured roles will get dual auth transaction. If one of them approves, entire transaction gets approved. If one of them rejects, entire transaction gets rejected. No action required from other users.
Scenario 2 – Utilization transaction resulting in breach of BOTH exception transaction amount AND exception breach percentage – two transactions will go for dual authorization
- Since it is for the same facility both the transactions will go for the same queue considering the amount of utilization transaction considering the following.
- If one role is configured for a particular queue – all users in the role will get dual auth transaction. If one of them approves, entire transaction gets approved. If one of them rejects, entire transaction gets rejected. No action required from other users.
- If multiple roles are configured for a particular queue – all users in all configured roles will get dual auth transaction. If one of them approves, entire transaction gets approved. If one of them rejects, entire transaction gets rejected. No action required from other users.
When a child line having main line and both the lines configured with both breach transaction amount and breach exception percentage
Scenario 1 - Utilization transaction resulting in breach of EITHER exception transaction amount or exception breach percentage of both child and main lines - TWO transactions will go for dual authorization
- If one role is configured for a particular queue – all users in the role will get dual auth transaction. If one of them approves, entire transaction gets approved. If one of them rejects, entire transaction gets rejected. No action required from other users.
- If multiple roles are configured for a particular queue – all users in all configured roles will get dual auth transaction. If one of them approves, entire transaction gets approved. If one of them rejects, entire transaction gets rejected. No action required from other users.
- Action to be taken on both the transactions for ensuring completion of the transaction. If both the transactions are approved, utilization transaction gets approved. If either of the transactions is rejected then utilization transaction gets rejected.
Since two different facilities are involved, considering queue configuration for different slabs for a combination of branch and category, appropriate queue is selected for routing dual authorization transaction for approval.
- If one role is configured for a particular queue – all users in the role will get dual auth transaction. If one of them approves, entire transaction gets approved. If one of them rejects, entire transaction gets rejected. No action required from other users.
- If multiple roles are configured for a particular queue – all users in all configured roles will get dual auth transaction. If one of them approves, entire transaction gets approved. If one of them rejects, entire transaction gets rejected. No action required from other users.
- Action to be taken on all the transactions for ensuring completion of the transaction. If all four the transactions are approved, utilization transaction gets approved. If any one of the transactions is rejected then utilization transaction gets rejected.
2.7 Multi Authorization Maintenance
Multi authorisation maintenance can be done through the ‘Multi Authorization Maintenance’ screen. Using this screen, user you can get a list of transactions which requires authorization.
You can invoke the ‘Multi Authorization Maintenance’ screen by typing ‘GEDDAUTH’ in the field at the top right corner of the Application tool bar and clicking the adjoining arrow button.
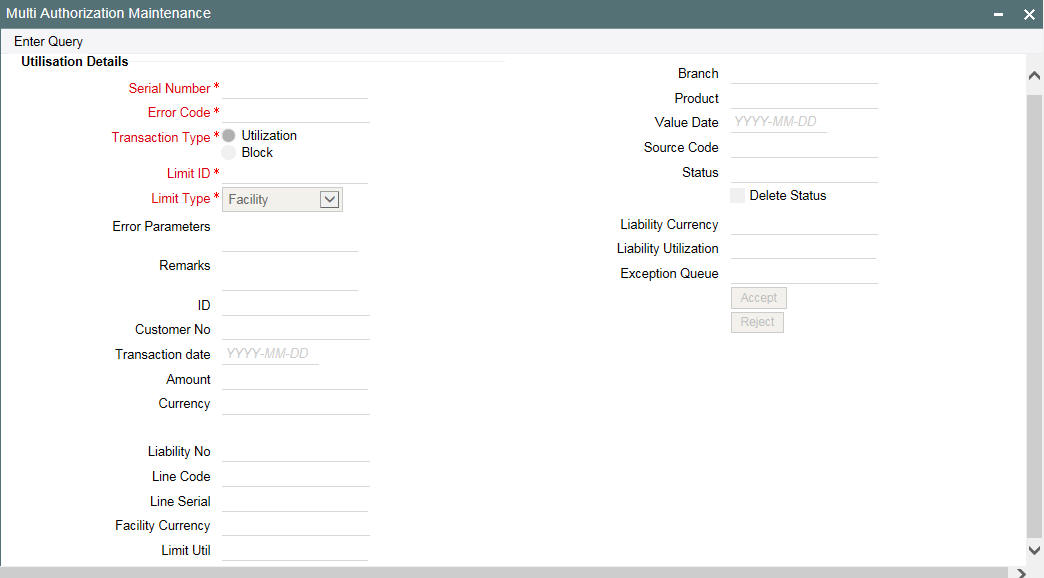
Whenever Utilization Transactions has been breached then the utilization transaction would require multiple authorizations. Transactions which are breached can be authorized using UI Multi Auth screen.
Whenever utilization transaction has been breached this screen has to be used by the authorizer to either ‘Accept’ or’ Reject’ the breached transaction. The following fields mentioned below indicate all the values that is associated with the transaction. The fields are all display fields and cannot be edited for a transaction using this screen. Only ‘Accept’ or ‘Reject’ for authorization of the breached transaction is allowed.
Serial Number
Indicates the Oracle Banking ELCM generated unique identifier for the transaction.
Specifies the exception queue in which transaction has been parked.
Error Code
Specifies the error code of the transaction.
Transaction Type
You can either select the transaction type as ‘Utilization’ or ‘Block’
Limit ID
The authorizer can select the appropriate dual authorization transaction by selecting the list of values against the 'Serial Number' along with 'Limit ID'.
Limit Type
You can either select ‘Facility’, ‘Liability’, ‘Collateral’, or ‘Collateral Pool’.
Error parameter
Specifies the error parameters associated to the transaction.
Remarks
You can enter your remarks associated with the transaction.
Utilization ID
Specifies the Oracle Banking ELCM utilization ID.
Customer Number
Specifies the Customer Number of the utilization transaction. Customer Number entered should be valid Customer Number in Oracle Banking ELCM system.
Transaction Date
Indicates the date and time when the transaction was entered in the external system.
Utilization Amount
Indicates the Utilization Amount.
Utilization Currency
Indicates the currency of the utilization transaction. Currency code entered should be a valid currency code in Oracle Banking ELCM system.
Liability Number
Specifies the liability number of the utilization transaction. Liability Number entered should be valid Liability Number in Oracle Banking ELCM system.
Line Code
Specifies the facility code of the utilization transaction. Facility Code entered should be valid Facility Code in Oracle Banking ELCM system.
Serial Number
Specifies the facility serial number of the utilization transaction.
Facility Currency
Specifies the facility currency.
Limit Util
Indicates the limit utilization amount.
Utilization Branch
Indicates the transaction branch.
Utilization Product
Indicates external product code of the utilization transaction. This is only if the utilization has been done from an external product
Value Date
Specifies the value date of the transaction. If value is not passed then system defaults to Oracle Banking ELCM present branch date.
Source
Indicates the product processor name from where the transaction has been originated. This field is as part of Header section (Source Code). This is only if the utilization has been done from an external product
Utilization status
Indicates the utilization status, possible values are A-Active, R-Reverse, L- Liquidated
Delete
Indicates whether the transaction is deleted or not. If the check box is selected then it is deleted.
Liability Currency
Specifies the liability currency.
Liability utilization
Indicates the liability utilization amount.
2.8 About Approval By Email
An automated e-mail with transaction details (breach) to be sent to checker (dual authorization) on utilization transaction/overall utilization breaching the signified values to authorize the transaction.
- Approval by e-mail is applicable for breach tracking mechanism for:
- Either main or child lines (Single Line)
- Both main and child lines
- You can configure approval by e-mail functionality for specific (usually high valued) transactions breach requiring authorization from select group of authorizers.
- This is also applicable when a utilization transaction updates the main line and requires checker’s approval (dual authorization) based on the configuration.
- Checker can approve/reject the transaction on e-mail by giving comments
- On approval, transaction is authorized and is in completed queue of maker.
- On rejection, transaction is rejected and is in pending queue of maker.
- E-mail is sent to user attached to role with the e-mail id maintained in ‘User Maintenance’ (SSDUSRDF) screen.
2.8.1 Approval By Email - Breach Tracking Mechanism
The following are common scenarios that happens for breach tracking mechanism.
- Assign multiple roles to the same queue to enable dual authorization
for a particular transaction within a particular amount range by users
belonging to different roles.
- Email approval is triggered for all the users attached to multiple roles.
- Even for auto auth user, breach transaction has to go for dual auth.
- Email Approval is triggered to multiple authorizers (as configured) and subsequent behaviour similar to breach functionality.
- Single utilization transaction can result in 4 dual auth –
2 for exception transaction breach and 2 for exception percentage breach,
that is for main line and child line separately.
- Number of email approvals triggered is 4, triggered to all the users assigned to roles in queue maintenance.
2.8.1.1 Either main or child line (Single Line)
- If multiple authorizers belonging to different role are involved based on amounts configured for different queues.
- Email approval is triggered for multiple authorizers belonging to different roles (as per the configuration)
- If either 'Exception Transaction Amount' and 'Exception Breach Percentage' is configured and assigned to multiple users for dual auth.
- Assume Queue 1 is configured to handle either 'Exception Transaction Amount' or 'Exception Breach Percentage'.
- Email Approval is triggered to all the users attached to roles of Queue1 (amount or percentage).
- System considers the first response (either ‘Approved or ‘Rejected’) within the users of Queue 1 to authorize the transaction.
- Based on the first response received within Queue1 either ‘Approved’
or ‘Rejected’.
- System send an intimation mail to other users in Queue 1 about the approval or rejection.
- Any further response is ignored and removed from the Queue1
- System either authorizes (for approved) or reject (for rejected) the utilization transaction.
- If both the breach dual authorization (amount and percentage) transactions are approved by multiple authorizer involved transaction.
- Assume Queue 1 is configured to handle ‘Exception Transaction Amount’ and Queue 2 for ‘Exception Breach Percentage’.
- Email Approval is triggered to all the users attached to roles of different queues (Queue 1 and Queue 2 ) for both amount and percentage.
- System considers the first response within the users of an individual queue (Queue 1 and Queue 2 ) to authorize the transaction.
- Approve/Reject response can be triggered in any of the queues irrespective
of each other.
- The first response from either queue is stored and wait for the response from other one.
- System considers the ‘Approved’/’Reject’ response from both queues (Queue1 and Queue 2 ) to authorize/reject the utilization transaction.
- Assuming the first response received within Queue 1 is ‘Approved’.
- System sends intimation mail to other users in Queue 1 about the approval.
- Any further response is ignored and removed from the Queue 1
- System waits for other response of other queue (Queue 2) before authorizing the utilization transaction.
- Assuming the first response received within Queue 2 is also ‘Approved’
- System send an intimation mail to other users in Queue 2 about the approval.
- Any further response is ignored and removed from the Queue 2
- Since Queue 2 response is also ‘Approved’, the system then authorizes the utilization transaction.
2.8.1.2 Both main and child lines
- If exception transaction is given both at child and main line level
- Email Approval is triggered as per the respective configuration for main and child lines
- Approve/Reject response can be triggered in any of the queues irrespective
of each other.
- The first response from either queue is stored and wait for the response from other one.
- If same role authorizer gets dual auth transactions for both main and child facilities and if both the transactions are approved
- Assume Queue 1 is configured to handle Exception for main line and Queue2 for Exception handling of child line (both for Amount and percentage).
- Email approval is triggered to the all the users (including same role authorizer) attached different queues (Queue1 and Queue 2) for both main and child lines (both amount and percentage).
- Approve/Reject response can be triggered in any of the queues irrespective
of each other.
- The first response from either queue is stored and wait for the response from other one.
- System considers the ‘Approved’/’Reject’ response from both main line (Queue 1) and child line (Queue2) to authorize/reject the utilization transaction.
- Assuming the first response received within Queue1 for main line
is ‘Approved’.
- System sends and intimation mail to other users in Queue1 about the approval.
- Any further response is ignored and removed from the Queue 1
- System waits for other response of other queue (Queue 2) before authorizing the utilization transaction.
- Assuming the first response received within Queue 2 is also ‘Approved’
- System sends an intimation mail to other users in Queue 2 about the approval.
- Any further response is ignored and removed from the Queue 2.
- Since Queue 2 response is also ‘Approved’, system then authorizes the utilization transaction in both main and child lines.
- If same role authorizer gets dual auth transactions for both main and child facilities and if one of the transaction is approved and the other is rejected, then the entire transaction should be rejected.
- Assume Queue 1 is configured to handle Exception for main line and Queue2 for Exception handling of child line (both for Amount and percentage).
- Email Approval is triggered to the all the users (including same role authorizer) attached different queues (Queue1 and Queue2) for both main and child lines (both amount and percentage).
- Approve/Reject response can be triggered in any of the queues irrespective
of each other.
- The first response from either queue is stored and wait for the response from other one.
- System considers the ‘Approved’/’Reject’ response from both main line (Queue 1) and child line (Queue2) to authorize/reject the utilization transaction.
- Assuming the first response received within Queue 1 for main line
is ‘Approved’.
- System sends an intimation mail to other users in Queue 1 about the approval.
- Any further response is ignored and removed from the Queue 1
- System waits for other response of other queue (Queue 2) before authorizing the utilization transaction.
- Assuming the first response received within Queue 2 is ‘Reject’
- System sends an intimation mail to other users in Queue2 about the rejection.
- Any further response sends ignored and removed from the Queue2.
- Since Queue 2 response is ‘Reject’, system rejects the utilization transaction in both main and child lines.
- When different branches involved in utilization transaction – main line in one branch and child line in a different branch, appropriate branch/category combination configuration is considered.
- Email approval is triggered to multiple authorizers (as configured) and subsequent behaviour similar to breach functionality.
- If dual authorization of breach transaction pertaining to child and main lines goes two different users, then the transaction will not get approved till both the transaction are approved. If multiple users are attached to a role configured for receiving email, all of them will get email for dual authorization approval. If one of them approves, then the transaction goes through. However, if one of them rejects, other users will be informed appropriately by e-mail.
2.8.2 Approval By Email format
This section contains the following topics:
- Section 2.8.2.1, "Email Format to the Approvers"
- Section 2.8.2.2, "Reply Format by the Approvers/checkers"
- Section 2.8.2.3, "Intimation Mail Format"
2.8.2.1 Email Format to the Approvers
The below mentioned is an example that is associated with the transaction and assists in decision making. The fields are all display fields and cannot be edited in the email. Only ‘Approve’ or ‘Reject’ for authorization of the breached transaction is allowed.
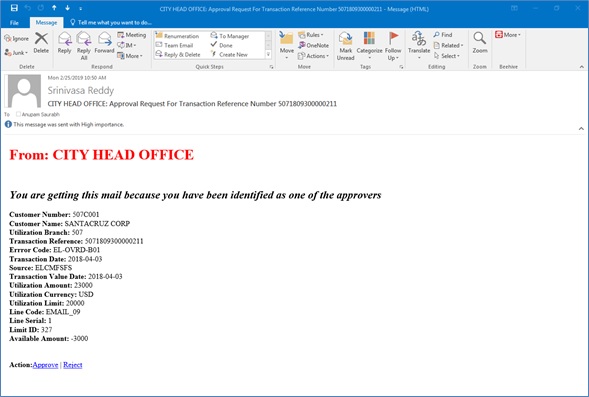
- Customer Number -Indicates the Customer Number of the utilization transaction
- Customer Name - Indicates the Customer Number of the utilization transaction
- Utilization Branch - Indicates the transaction branch.
- Error Code - Indicates the error code of the transaction.
- Transaction Date - Indicates the date and time when the transaction is entered in system.
- Transaction Value Date - Indicates the value date of the transaction
- Utilization Amount - Indicates the Utilization Amount.
- Utilization Currency - Indicates the currency of the utilization transaction
- Line Code - Indicates the facility code of the utilization transaction
2.8.2.2 Reply Format by the Approvers/checkers
This e-mail has basic transaction details and override information. On click of Approve/Reject, the below screen is displayed. Checker can enter the comments in curly brackets {}and click ‘Send’
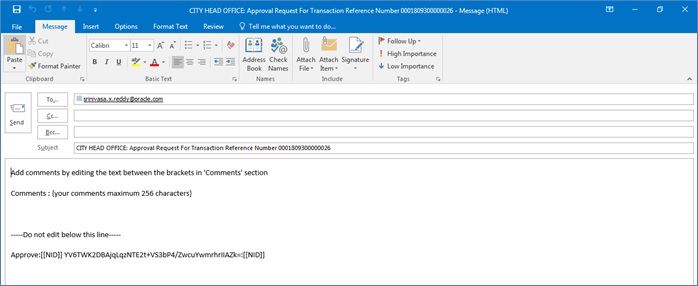
2.8.2.3 Intimation Mail Format
If transaction is already authorized or rejected then an intimation e-mail is sent to other users (checker) of the queue. It is also sent if the transaction has been approved/rejected from GEDDAUTH screen.
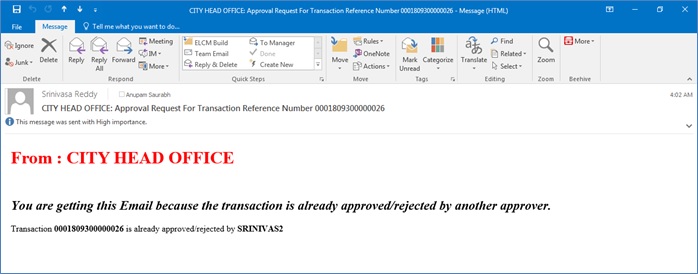
2.8.3 Approval By Email Status
You can invoke the ’Approval By Email Status’ screen by typing ‘GESEMQUE’ in the field at the top right corner of the Application tool bar and clicking the adjoining arrow button.
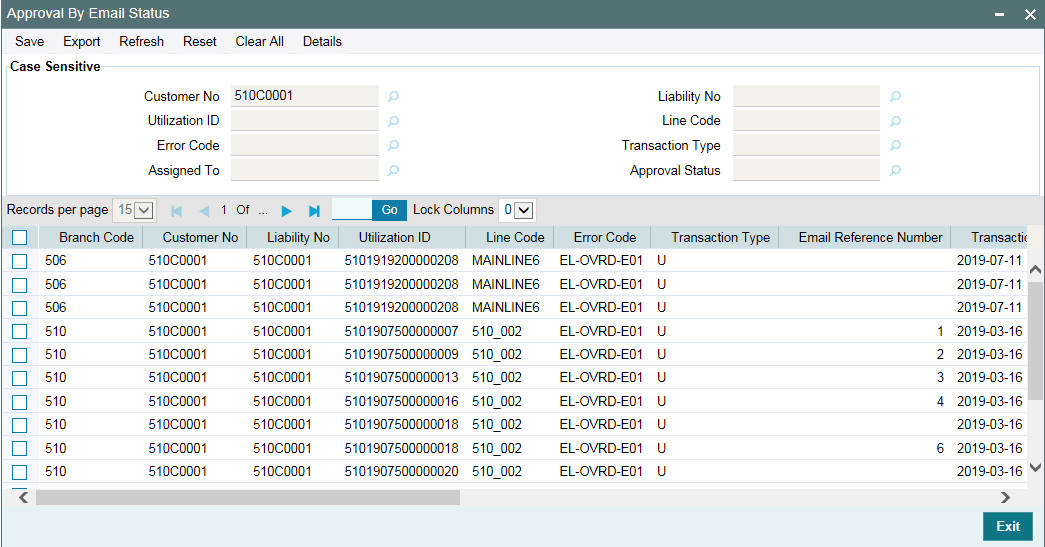
You can search for the records based on one or more of the following parameters:
- Customer No
- Utilization ID
- Error Code
- Assigned To
- Liability No
- Line Code
- Transaction Type
- Approval Status
Once you have specified the search criteria, click ‘Search’ button. The system displays the following details that match the filter criteria.
- Branch Code - Indicates the Branch Code.
- Customer No - Indicates the Customer No
- Liability No - Indicates the Liability No
- Utilization ID - Indicates the utilization transaction ID that led to breach.
- Line Code - Indicates the facility code of the utilization transaction.
- Error Code -Indicates the error code of the transaction
- Transaction Type - Indicates whether the transaction is ‘Authorized’ or ‘Unauthorized’.
- Email Reference Number - Indicates Email reference number.
- Transaction Date - Indicates the transaction date.
- Source Code - Indicates the product processor name from where the transaction has been originated
- Exception Queue - Indicates the exception queue
- Assigned To - Indicates to whom the transaction is assigned that is, checker Name
- Assignee Email - Indicates to whom the transaction is assigned that is, checker Email
- Approval Status - Indicates transaction is approved or rejected by the checker.
- Remarks - Indicates approved or rejected remarks of the transaction done by the checker.
- Approval Date- Indicates approved or rejected date of the transaction done by the checker
- Authorized - Indicates the transaction authorization status (Approved ‘A’ or Rejected ‘R’)
- Email Status - Indicates 'Y' or 'N'. If mail is sent to the checker or e-mail not sent
- Intimation Sent - Indicates 'Y' or 'N'.If intimation mail is sent to the remaining checker for that transaction or intimation mail not sent.
2.9 Facilities Amount Transfer Maintenance
Transfer of full or partial limit amounts from one facility to other within or across liabilities for certain periods is possible. It is also possible to close/cancel this transfer operation before a specified End Date.
Upon manual closure/cancellation or on automatic expiry, the system transfers the transferred amount back to the original line.
For the above functionality you must do the following maintenances.
Limit transfer details can be defined through the ‘Facilities Amount Transfer Maintenance’ screen. You can invoke the ‘Facilities Amount Transfer Maintenance’ screen by typing ‘GEDTRANS’ in the field at the top right corner of the Application tool bar and clicking the adjoining arrow button.
![]()
From Liability Number and To Liability Number
- Specify the ‘From Liability No’,that is, for whom the limit amount is to be transferred.
- Specify the ‘To Liability No’ that is, to whom the liability amount is allocated.
From Liability Name and To Liability Name
System defaults the names of the ‘From Liability’ and ‘To Liability’ when the 'From Liability Number' and 'To Liability Number' are chosen respectively.
From Line and To Line
- Specify the ‘From Line’ that is, the Line from which the line amount is transferred.
- Specify the ‘To Line’ that is, the Line to which the line amount is transferred to for a specified period.
From and To Facility Currencies
System defaults the names of the from facility currency and to facility currency when the 'From Line' & 'To Line' are chosen respectively. For effective line transfer from one line to another, the currency of both the lines has to be the same.
From Facility Start Date and End Date
System defaults the from facility start date and from facility end date when the 'From Line' is chosen. To Facility Start Date and End Date
System defaults the ‘To Facility Start Date’ and ‘To Facility End Date’ when the 'To Line' is chosen.
From Facility Available Amount and To Facility Available Amount
System defaults the ‘From Facility Available Amount’ and ‘To Facility Available Amount’ when the 'From Line' & 'To Line' are chosen respectively.
Effective From Date and Effective To Date
Specify the Effective From Date of transfer that is, the date from when the transfer of limits is effective.
Specify the Effective To Date of transfer that is, the date till when the transfer of limits is effective. This date must be greater than the Effective From Date
Transfer Amount
Specify the transfer amount to be transferred, from the 'From Line' to the 'To Line', from the 'Effective From Date' onwards.
2.10 Dual Authorization of Utilization Transaction
During Utilization Transaction process if the utilization amount crosses the breach amount specified, then the transaction requires dual authorization. Transactions which are breached can be authorized using UI Multi Auth screen. You can specify the facility maintenance breach amount and breach percentage in ELCM.
When the transaction amount entered is more than breach amount or percentage, during utilization process ELCM would flag dual authorized indicator and updates the dual authorization error code as part of response. If response from the ELCM contains dual authorization error code, then Oracle FLEXCUBE, logs the transaction details in dual authorization tables and processes it completely.
The authorization for the breached (dual auth) transactions are authorized using function ID ‘GEDDAUTH’ of ELCM.
However till the dual authorization happens Oracle FLEXCUBE, does not allow you to authorize the main transaction. You can also perform dual authorization using Oracle FLEXCUBE, screen, but system performs certain validations to ensure that Oracle FLEXCUBE, does not authorize the ELCM breach transactions.
Example
Assume that for liability ‘TATA’ line ‘TATABILL’ is created with below details. Limit amount - 10,000.00
Collateral amount - 0.00
Breach percentage - 110 (which is equal to 11,000) Breach amount - 15,000
The system calculated values: Available amount - 10,000.00
Utilized amount - 0
Assume that as part of BC, a contact line ‘TATABILL’ is linked. As part of the contact data input, when you link the line ‘TATABILL’ and press ‘Save’ button during transaction processing in ELCM, if the transaction requires dual authorization then the system displays this information to the user.
Till the dual authorization error code (breached transaction) is authorized in ELCM, Oracle FLEXCUBE does not allow the contact to be authorized. In case, if the breached transaction is rejected, then you have to delete the contact Information irrespective of whether the error code has been authorized or Contracts requiring multilevel authorization can be viewed using Oracle FLEXCUBE, function ‘OVDAUDET.
If you delete the dual authorization contract in Oracle FLEXCUBE, then the system deletes the contract details in Oracle FLEXCUBE and ELCM deletes the utilization ELCM.
Note
ELCM deletes the utilization transaction if any dual authorization error is not authorized and the system updates the status as ‘Ignored’ so that this information is not shown to the user. However if the error code is authorized, then this information is ignored.