Upload/Export Photos
Upload Photos
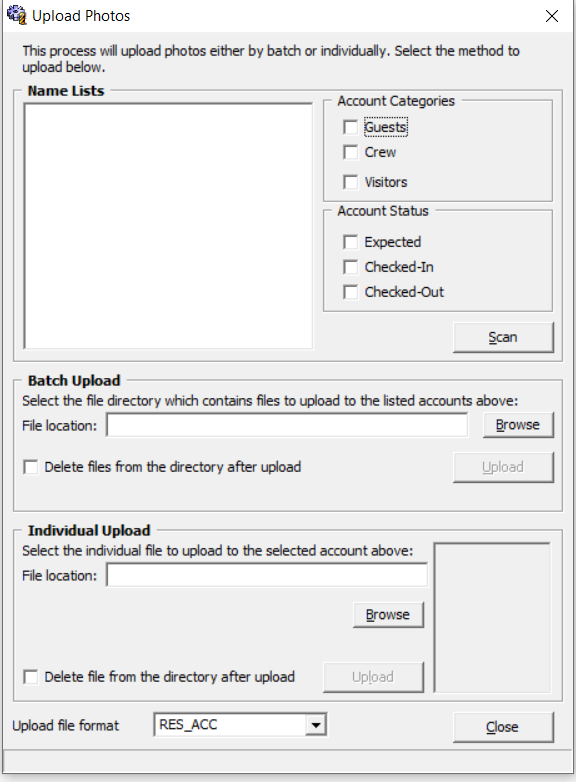
The Upload Photos allows you to upload photos either by batch or individually using the following steps:
Figure 21-1 Upload Photos

-
Click the Administration option from the main menu.
-
Select the Photo Upload option from the menu.
-
At the Upload Photos form, select the Account Categories and Account Status.
-
Click the Scan button to populate the names under the Name Lists section.
-
Browse the file location that contains the files to upload.
-
Select the Upload file format from the drop-down list.
Note:
If you are uploading the photos using the RES_ACC format, ensure the file name is the same as the guest booking number. -
Check the Delete files from directory after upload and then click Upload.
-
Click Close to exit.
Batch Upload
For batch upload to work, you need to rename every single photos of the person with the folio number so that the system recognizes them. The photos will not update correctly if you name them wrongly. For example, picture name is “123456.jpg” for folio number 123456. Once you complete renaming the photos, you can proceed to upload using the following steps:
-
Repeat the above steps.
-
At the Batch Upload section, browse and select the folder path where the photos are stored.
-
Click the Upload button and the photos upload with their unique ID, which is the reservation account number.
Individual Upload
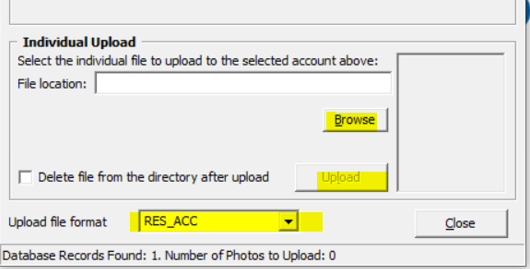
Figure 21-2 Individual Upload

-
For Individual Upload, select the file path where the photo is stored.
-
Click the Upload button and you will see the photo on the bottom right corner.
Export Photos
This function allow you to export the photos by guest type and account status. You must have Security Access rights #338 — Export Photos in Single or Batch to perform this function.
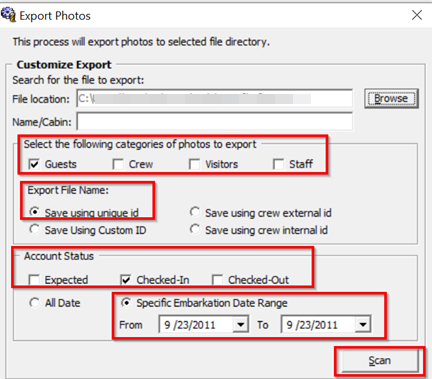
Figure 21-3 Export Photos

-
Select the Export Photo option from the Administration menu.
-
At the Export Photos, Customize Export section, browse and select a destination location.
-
Select the categories to export by selecting the respective check boxes.
-
Select the Export File Name. You can select from:
-
Save using unique ID (The unique ID is the reservation account number).
-
Save using custom ID.
-
Save using crew external ID.
-
Save using crew internal ID.
-
-
Select the Account Status.
-
You can either select All Date or specify a date range.
-
Click Scan to begin.
-
A list of names will populate in the Name Lists section.
-
Individually select the account you wish to export or click the Check All option to export all.
-
Click Export to begin export.