Applying Updates To A Target Environment
The apply process enables you to apply one or more change packages to the target environment. A typical change package apply process, would be as follows:
Apply the change package without compare to your demonstration environment.
Since the demonstration environment does not contain any customizations, there is no need to compare. This brings the demonstration environment current on the specific maintenance, overwriting the new maintenance into the demonstration environment.
Apply the change package to the first customized environment by using the 'Apply with Database Compare/Copy' option.
This uses your demonstration database as the source and this customized environment as the target. This process augments the normal Change Assistant template/job in order to compare the change project from the demonstration database to the target database.
Use the PeopleTools database compare and copy utilities to reconcile the new changes from PeopleSoft with your customizations, just as you do during an upgrade.
Once the reconciled or modified change package is created, it can then be applied without compare into all other customized environments, assuming these customized environments are the same.
To apply change packages to the target environment:
The Environment Management Hub must be up and running.
In Change Assistant, select Tools, Change Actions.
Select Apply Updates.
Select Apply Change Packages and click Finish.
Apply Change Packages Wizard starts.
You use the Apply Change Packages wizard to select the appropriate settings for a change package.
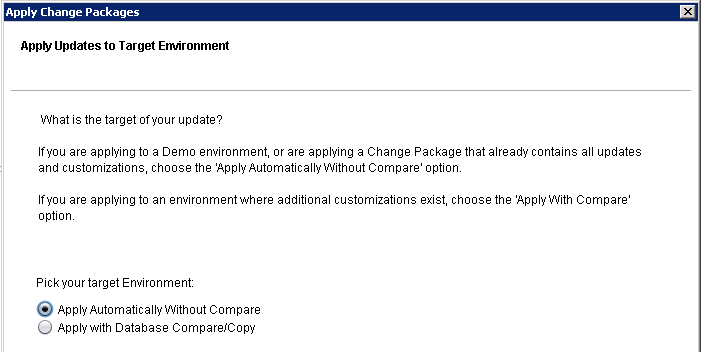
Image: Apply Updates to Target Environment
This example illustrates the fields and controls on the Apply Updates to Target Environment page. You can find definitions for the fields and controls later on this page.
|
Field or Control |
Definition |
|---|---|
| Apply Automatically Without Compare |
Applies the change package to the target environment and copies the project without initiating any compare reports or analysis. Select this option if you are:
|
| Apply With Database Compare/Copy |
Select this if you are beginning the process of migrating a PeopleSoft-delivered change package to your customized environments. In this case, you are applying to a customized environment, and this will require the use of PeopleTools' change management tools, such as compare and copy. |
Note: When applying multiple updates, a job set may not move on to the next update if there are steps in the current update with a status of Warning rather than Success. In this situation, review the logs for the steps with warnings and take any corrective measures, as needed. Then change the status of these steps from Warning to Complete to proceed to the next change package in the job set.
This section describes the apply process after you have selected the Apply Automatically without Compare option.
To apply a change package without compare:
On the Apply Updates Using the Change Impact Analyzer screen indicate whether you want to include Change Impact Analyzer analysis.
Typically, system administrators use Change Impact Analyzer to help devise a test plan based on the impact of changes.
On the Select a product line release screen indicate product line associated with the target environment.
On the Select Target Environment screen, select the database name associated with the target environment.
All PeopleSoft web servers, application servers, Process Scheduler servers, and so on, are associated with one, and only one, environment, which is determined by the database. Change Assistant will re-validate the environment.
On the Environment Preparation screen acknowledge that you have performed the recommended pre-update procedures.
On the Select File Servers screen, select the file servers that are used in conjunction with the target environment.
Note: The system uses this file server selection only as a destination to deploy files during the apply process. The file server specified is not used for execution purposes. The executables used to run steps during the apply process are those specified in the PS_HOME edit box on the Change Assistant Options page.
File server installations are not necessarily tied to any one environment, unlike application servers, web servers, Process Scheduler servers and database servers, which are associated with one, and only one, database environment. On the other hand, a single file server could be used for multiple databases, and likewise, there could be multiple file servers in your PeopleSoft implementation all supporting different application versions. So, it is necessary to prompt you to select the appropriate file server installation.
On the Enter user name and password screen, enter the user credentials required for Change Assistant to be authenticated.
Note: For the Apply without compare, only the target database is required. For the Apply with compare, credentials for both the target and source are required.
On the Select Download Directory screen, confirm the location of the change packages you intend to apply.
On the Select Change Packages screen, select change packages to install.
You can use Select All to select all the available change packages listed on the screen.
Click Next after you've selected your change packages.
At this time, Change Assistant examines all the selected change packages to determine if any of them have previously been applied.
Note: If an Unable to read change package error appears because of an unsupported change package version number, then you must install the latest release of Change Assistant.
If the change package has already been installed, you will be prompted to select one of the following options:
Do not reapply the change package.
Review each change package individually, with option to apply.
If you choose to review each change package individually, you will be prompted either not to reapply the change package or to reapply the change package (not recommended).
Select the options, then click Next.
If none of the translated languages included in a change package applies to the languages installed in the target environment, you will be prompted to select one of the following options:
Remove these change packages from my installation list.
Review each of these change packages individually, with option to apply.
If you elect to review each change package individually, you will be prompted either not to apply the change package or to apply the change package (not recommended).
After you've made your selection, Change Assistant searches for post-requisites. If there are post-requisites that are not listed in the apply list, you will be prompted to select one of the following options:
Apply these additional change packages.
The additional change packages are added to the list of selected change packages.
Note: This option is enabled only if the additional change packages are already present in your apply directory.
Remove the change packages that require post-requisites from my installation list.
Click Next.
Change Assistant searches for any missing prerequisites required by the selected change packages, and you will be prompted to make the same selections as in the previous step.
Note: If your target environment is at an application release level that is not considered to have reliable change log data, Change Assistant may falsely report that a prerequisite is missing from this environment. If this is the case, it is very important that you not elect to add the supposed missing update to your current apply list, because this would reinstall the update, which is not recommended. Therefore, if your target environment is considered to have unreliable change log data, it is very important that you review the list of missing prerequisites found by Change Assistant. If any of these updates are known to have been previously applied to your target environment, you must first manually enter these updates to your change log so that Change Assistant can accurately determine that these prerequisites have been satisfied. If you need to add entries to your change log, you will have to restart the Apply Change Packages process.
After you have selected your option, click Next.
If one or more of the change packages you are applying includes the Build and Alter template steps, you will be prompted to select one of the following methods to apply the database changes.
Automatically: Enables build scripts to be run as an automated template step.
Manually: Enables the build script to be run as a manual template step.
If one of your selected changes packages will be executing a script that includes embedded question syntax that is supported by Change Assistant, you will be prompted to enter a runtime value for the script variables.
Click Next to display a screen where you confirm your selections–target environment and change packages to apply and number of manual steps, if any, for each change package.
On the Apply Now screen, consider the options presented before applying the change project.
Field or Control
Definition
Validate Now Note: Before you initiate the apply update process, you can validate your environment connections to ensure all components are active.
Review and Apply Enables you to review the entire job to make sure it is correct before running it against an environment.
Note: If there are steps you don't want run or have already completed manually, you could set them to Complete while reviewing the job. For example, if you have already deployed some files manually to a certain PS_HOME, you could set that step to Complete to save time and avoid overwriting any custom settings.
Begin Apply Starts the update job.
The interface of the Apply Change Packages wizard is similar to what you see with the Apply Without Compare option, however, the following steps are included.
Compare project from the demo database to the development or copy of production database.
Change Assistant will compare this project between the source database and the currently selected environment (target database).
Examine the compare report step (a manual step).
You must examine the compare reports generated to determine the appropriate action (for example, whether or not to copy the object from the source database to the target database).
Copy project from the source database.
Change Assistant copies the objects from the source database to the target database, based on the actions chosen.
Extract the files from the delivered change package.
Change Assistant will extract the current change package to a temporary location (<<staging directory>>/~ExtractedCP).
Re-apply customizations.
This is a manual step.
Compare and merge files.
This is a manual step.
Export the project from the target database.
Change Assistant will export (from the target database) the project containing customize objects to a temporary location (<<staging directory>>/~ExportedProject).
Change Assistant creates a new change package in the download directory. The original change package is renamed to xxxxx.zip_datetimestamp.
Change Assistant can automatically deploy files in a change package to different servers within an environment. If the job that is running while applying the change package includes a Deploy Files chapter and contains tasks and steps, that indicates to Change Assistant to deploy the files to the agents that are running in the environment.
While Change Assistant runs deploy file steps within the job, it will query the hub for the location to deploy the files. The query is based on the server, operating system, and database platform. If the query returned from the hub matches what was defined for the file reference in the change package, Change Assistant attempts to deploy the files to the agent running on the host machine.
Change packages provided by PeopleSoft applications, are configured to deploy multiple files of the same type within one step. This can improve performance, especially when a change package contains hundreds of updated files.
When files are deployed, the step's log file lists the host name and the type of server that match the file reference and the target path on the remote host.
If the Environment Management agent is not running at the time when Change Assistant is trying to deploy files, a warning message appears stating the inability to deploy the files. Other types of problems that may occur, such as lack of disk storage space, will result in step failure.
If there is a current apply job set, the Resume Running Jobs dialog box appears automatically when you start Change Assistant, run a job, or apply change packages (start a new apply).
Select Cancel to:
Remove all jobs associated with the current apply job set that have not been run.
If a job definition is open in Change Assistant and it does not belong in the current apply job set, the job definition remains open.
If a template definition is open in the Change Assistant, regardless of whether or not it's used in the current job set, it will remain open.
Select No to keep the current apply job set and its associated jobs as they are, so that you can resume this apply job set later.
Select Delete Job Set to delete the current apply job set.