Setting Notification Options
This section provides an overview of setting notification options.
To enable an end user to send notifications from PeopleSoft components, the Notify toolbar button must be enabled on the Component Properties dialog box.
To enable the Notify toolbar button:
Open PeopleSoft Application Designer in PeopleTools.
Open the component definition for which you want to enable the Notify button.
Open the Component Properties dialog box by selecting File, Definition Properties.
Select the Internet tab in the Component Properties dialog box.
Select Notify in the Selected Toolbar Actions group box.
Save the component definition.
If Notify is cleared, the Notify toolbar is not visible for that component. If Disable Toolbar is selected in the component properties, the Notify toolbar is not visible for that component.
After enabling the Notify toolbar button, set the workflow routing options for the role.
If Notify is selected in the component properties and Allow Notifications is selected for the role, the Notify toolbar (the Notify icon at the bottom of the component’s browser page) is available in that component for all users in that role.
If Allow Notifications is cleared for the role, the Notify toolbar is not visible for all components for all users in that role.
If Allow Recipient Lookup is selected, all users in the role can search for recipients by prompting against the User Profile table or the Lightweight Directory Access Protocol (LDAP) address book.
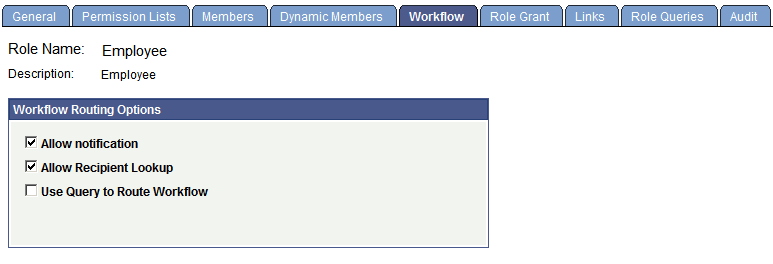
Set workflow routing options for each user role.
Image: Workflow page
This example illustrates the fields and controls on the Workflow page.
To set workflow routing options:
Select PeopleTools, Security, Permissions & Roles, Roles, Workflow.
Select the Allow Notification and Allow Recipient Lookup check boxes.
Save the page.
At runtime, the Send Notification page references the routing preferences for each recipient to determine the default delivery options. Therefore, the system assumes that:
Security administrators have set this value for any user on the User Profile page.
Users have set this value on their My System Profile pages.
Setting Preferences on the User Profile Page
To set preferences on the User Profile page:
Select PeopleTools, Security, User Profiles, User Profiles.
Enter the user ID.
Select the Workflow tab.
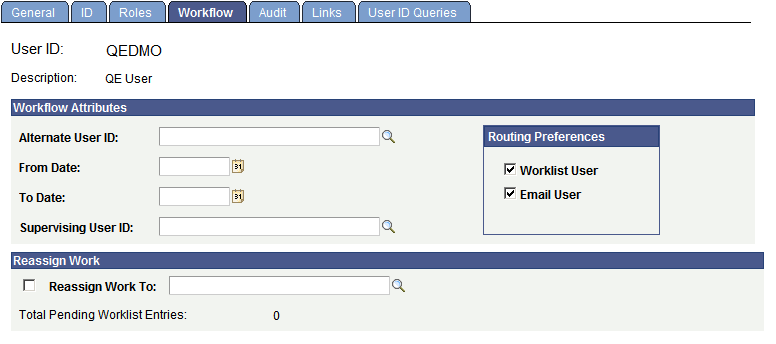
In the Routing Preferences group box, select Worklist User, Email User, or both.
Note: The Email User check box controls email notifications sent using the Send Notifications page. If the check box is not selected, email notifications are not sent to the user through the Send Notifications page. If you are sending email notifications using PeopleCode, this check box has no effect. You must create your own checking logic for sending email notifications.
Image: Routing preferences in User Profile page
This example illustrates the routing preferences in User Profile page.
Setting Preferences on the My System Profile Page
To set preferences on the My System Profile page:
Select PeopleTools, My System Profile.
In the Workflow Attributes group box, select the Email User check box, the Worklist User check box, or both.
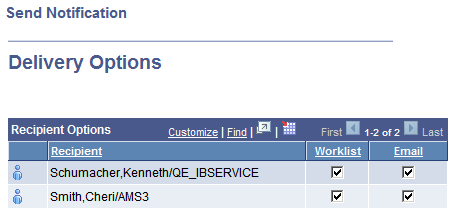
Based on the routing preferences, Delivery Options are set for each recipient, as shown in the following examples:
When you click the notify button on a page, the send notification page appears.
Image: Send Notification page
This example illustrates the fields and controls on the Send Notification page.
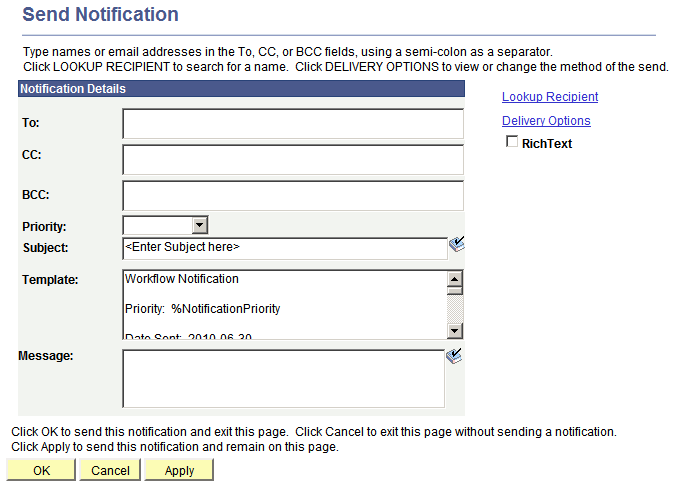
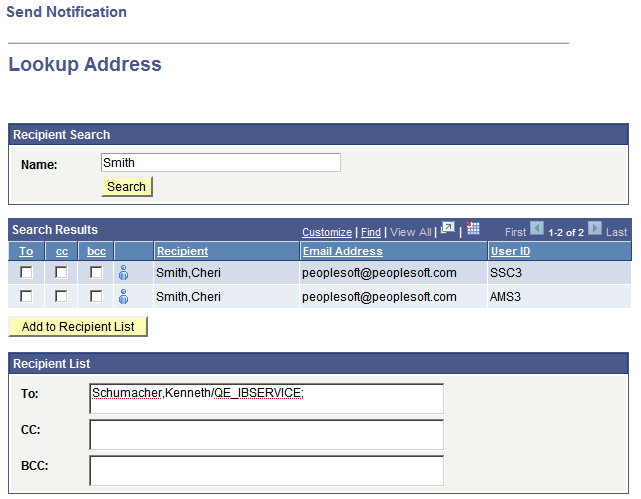
Note: Users should enter notification recipient names in the format Last_Name,First_Name.
Use the Lookup Recipient link to search for recipients.
Image: Lookup Address page (from Lookup Recipient Link)
This example illustrates the fields and controls on the Lookup Address page.
Use the Delivery Options link to select the delivery format for each recipient.
Image: Delivery Options page
This example illustrates the fields and controls on the Delivery Options page.