Configuring Custom SLA
The
SCEFCustomSLAValidation
is a component developed in API Gateway to enforce the required custom rules.
The SCEF Custom SLAs addition per application group is configured via admin
console.
The following steps are involved:
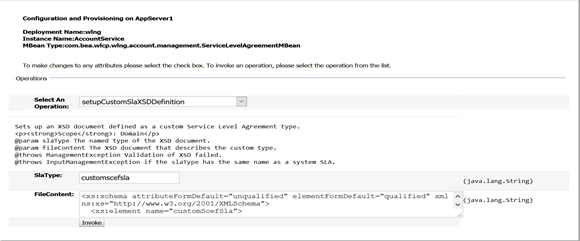
- Upload
CustomSLA XSD:
- Login to OCSG Admin Weblogic console.
- Navigate to Domain Structure → OCSG → AppServer1 → Container Services → Account Service → ApplicationSLAs → Operations (Tab)
- Select the operation
setupCustomSlaXSDDefinitionfrom the list. - Provide information
in the following fields as described:
- SlaType:
customscefsl - FileContent: Copy the
content of XSD file
customslaxsd.xsdprovided in Custom SLA XSD.
- SlaType:
- After providing the details, click Invoke.
See the below screen for reference.
Figure 2-42 CustomSLA XSD Upload Screen
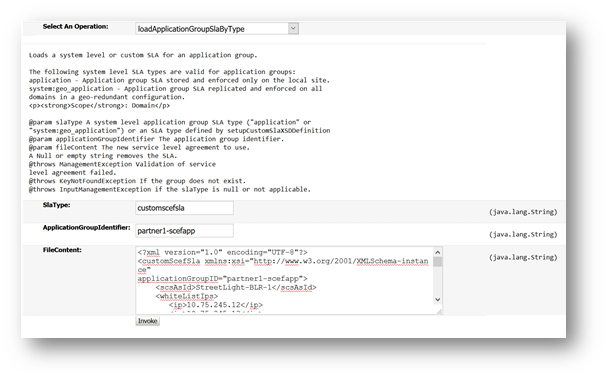
- Upload
CustomSLA XML:
- Login to OCSG Admin Weblogic console
- Navigate to Domain Structure → OCSG → AppServer1 → Container Services → Account Service → ApplicationSLAs → Operations (Tab)
- Select the operation
loadApplicationGroupSlaByTypefrom the list - Provide information in
the following fields as described:
- SlaType:
customscefsla - ApplicationGroupIdentifier:
<partnerusername>-<applicationname>For example, if
partnerusernameispartner1andapplicationnameisscefappthenApplicationGroupIdentifierispartner1-scefapp - FileContent: Prepare the XML file based on XSD file as provided in Sample Custom SLA XML
- SlaType:
- After providing all the details, click on Invoke.
See the below screen for reference.Figure 2-43 CustomSLA XML Upload Screen