Stage - 3 : Post-Setup
Running Database Scripts and Loading the MRL
The steps you take to run the database scripts and optionally load the Reference Implementation MRL (RI-MRL-example master resource library vary, depending on the type of database you are using.
| If you are using | Follow these steps |
|---|---|
| An Oracle database | Running the Oracle Database Scripts |
| A DB2 database | Running the DB2 Database Scripts |
| SQL Server database | Running the SQL Server Database Scripts |
Note: To change the Documaker Studio user passwords from the Assembly Line schema password, update this script before running it by modifying the Insert commands for the DMRES_DMUSER table.
Running the Oracle Database Scripts
Follow these steps to run the Oracle database scripts:
-
Run the scripts located in the \documaker\database\oracle11g directory. You may need to copy these files to the database server. To run these files, you must have permission to create tables and insert data into the database. These scripts create the required Document Factory administrative and processing database tables. Contact your database administrator (DBA) for assistance.
Script Description dmkr_admin.sql Creates the configuration schema and populates the tables with the entries captured during setup dmkr_asline.sql Creates the assembly line schema and the Documaker Studio default user accounts Note: The scripts enable advanced compression on certain database columns. If you do not have an Advanced Compression Options license for Oracle 11g, please remove the COMPRESS DEDUPLICATE and COMPRESS HIGH DEDUPLICATE attributes from the scripts in dmkr_asline.sql.
-
(Optional) To create sample user accounts for demonstration purposes and to test the deployment, run the following as the dmkr_admin user:
dmkr_admin_user_examples.sql
-
(Optional) ODEE includes database entries that enable the ODEE web applications to be viewed in other languages. To add support for languages other than English, perform these steps:
-
Make sure the script is executed using UTF-8 encoding so the Unicode text within the script is put into the database properly
If you are using Follow these steps SQL Developer to run the script Change the file encoding option to UTF-8 by selecting the Tools, Preferences, Environment option and then setting the Encoding option to UTF8. SQL Plus to run the script Set this environment variable (for Windows): NLS_LANG=AL32UTF8 -
Run the following scripts as the dmkr_admin user:
-
dmkr_admin_xx.sql
-
dmkr_asline_xx.sql
Where xx is the abbreviation for the desired language:
Languages Abbreviation Dutch nl English (Great Britain) en_GB French fr German de Indonesian in Japanese ja Polish pl Portuguese pt Russian ru Simplified Chinese zh Spanish es -
-
Make sure the insert statements are committed to the database.
-
-
Run this batch file from the application server to load the Correspondence MRL:
\documaker\mstrres\dmres\deploysamplemrl.bat
This loads the MRL into the database, deploying the sample resources which are used to validate the Document Factory installation.
Note: Ignore this message while running deploy sample MRl : "Did not promote Older resource, Name <TIMESTAMP> ,Type <SYS> , Ver<00001> ,Rev<00001>.
-
Continue with the steps outlined in Creating the Web Environment on page 29.
-
Run this batch file from the application server to load the Correspondence MRL:
\documaker\mstrres\dmres\deploysamplemrl.bat
This loads the MRL into the database, deploying the sample resources which are used to validate the Document Factory installation.
Note: NOTE: Ignore this message while running deploy sample MRl : "Did not promote Older resource, Name <TIMESTAMP> ,Type <SYS> , Ver<00001> ,Rev<00001>.
7. Continue with the steps outlined in Creating the Web Environment.
Running the DB2 Database Scripts
Before you run the scripts, you must create the database. Use the below instructions
Creating a DB2 database
-
Add a database in DB2 (Example name: DMKR)
-
For this new database, change the default path to be an empty directory such as
c:\db2.
-
Set the buffer space and default page size to 32K, then specify where to store the data.
Next, specify the locale and set the Code to UTF-8.
Running the scripts
Note: To run the DB scripts, confirm that 2 users have been created on the DB2 server with the names entered on the Installers database schema screens. Names are case sensitive. These names must be in keeping with the authentication method that will be used by the database and the related length restrictions. For example, if you are using OS authentication for DB2 on operating system such as AIX, the schema names are limited to 8 characters. To run the Sql scripts, the user logged in must have required permissions to create and modify tables.
Add the DB2 JDBC drivers into ODEE Factory the classpath locations below for the application to access:
documaker\docfactory\lib
documaker\docupresentment\lib
-
Example of DB2 LUW jars: db2jcc4.jar and db2jcc_license_cu.jar
Note: Contact your DBA if you need assistance locating the correct files.
2. Run the scripts located in the \documaker\database\db2 directory. You may need to copy these files to the database server. To run these files, you must have permission to create tables and insert data into the database. These scripts create the required Document Factory administrative and processing database tables.
| Script | Description |
|---|---|
| dmrk_admin.sql | Creates the Administration schema and populates the default configuration data. |
| dmkr_asline.sql | Creates the Assembly Line schema. |
3. (Optional) In order to populate the system with alternative language options, do the following:
-
Open IBM Data Studio and set font in editor for properly displaying Japanese (HG-GothicB-Sun)
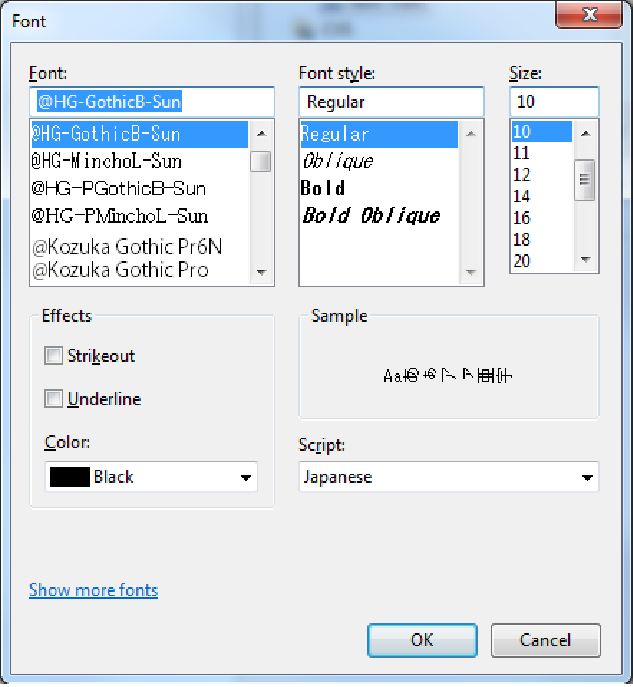
Figure 2.3.1 - Font Style Dialog -
Open the dmkr_admin_xx.sql in a text editor that displays text correctly (in the example below, Notepad properly displayed Japanese text).
-
Copy and paste the content of the script into IBM Data Studio tool editor for SQL and validate the characters are correct.
Example from Notepad, dmkr_admin_ja.sql:
INSERT INTO DMKR_TRANSLAT (SYS_ID, AL_ID, APP_ID, LOCALE_ID, GROUP_ID, ID, DISPLAY) VALUES (99, 999, 111, 'ja', 'TAGS.TAGTYPE', 'PUBS', '公開');
INSERT INTO DMKR_TRANSLAT (SYS_ID, AL_ID, APP_ID, LOCALE_ID, GROUP_ID, ID, DISPLAY) VALUES (99, 999, 111, 'ja', 'TAGS.TAGTYPE', 'RCPS', 'Âèó‰ø°ËÄÖ');
INSERT INTO DMKR_TRANSLAT (SYS_ID, AL_ID, APP_ID, LOCALE_ID, GROUP_ID, ID, DISPLAY) VALUES (99, 1000, 111, 'ja', 'TAGS.TAGTYPE', 'TRNS', '„Éà„É©„ÉŠ„ǹ„Ç؄Dz„Éß„ÉŠ');
From IBM Data Studio:

Figure 2.3.2 - IBM Data Studio -
Process the DML statements, inserts, to the correct dmkr_admin schema.
-
Validate that the content appear correctly in table by selecting the rows for review.
-
Repeat with the dmkr_asline_xx.sql targeting the dmrk_asline schema for inserts.
4. If you are using OSIntegrated security for DB2, make sure the Admin and Assembly Line users are also DB2 users.
5. (Optional) If desiring to deploy the Reference Implementation MRL (RI-MRL) resources then run the deploysamplemrl(bat|.sh) batch|script file on the Application Tier server to load MRL into the Assembly Line database schema.
Example:
Windows: ODEE_HOME\documaker\mstrres\dmres\deploysamplemrl.bat
Linux: ODEE_HOME/documaker/mstrres/dmres/deploysamplemrl.sh
6. (Optional) To create sample user accounts for demonstration purposes and/or to test the deployment with the RI-MRL, run the following SQL as the DB Admin:
dmkr_admin_user_examples.sql
Note: Note:Keep in mind that the users and sample data referenced in items 5 and 6 above are example data so that you can get a feel for the system and validate that it is installed correctly.Your Identity Management system and Master Library Resources are necessary for implementation of specific system. Once you have configured to your identity management system, you can safely remove the example users in the entities tables and the sample library in the DMRES_LBY* tables. See the DEAG for more
7. Continue with the steps outlined in Creating the Web Environment section.
Running the SQL Server Database Scripts
Follow these steps to run the SQL Server database scripts:
1. If using DB2 or SQL Server database then it is necessary to add the JDBC drivers from those products into ODEE Factory the classpath locations below for the application to access:
documaker\bin\lib
documaker\docfactory\lib
documaker\docupresentment\lib
Example of SQL Server jars: sqljdbc4.jar
2. For MS SQL Server, copy the sqljdbc4.jar file under wl_server\server\lib and
idocumaker_domain\lib if JDBC Component Schema fails to make connection.
In general, copy the sqljdbc4.jar file to the appropriate locations in the ODEE installed directories, such as documaker\bin\lib, documaker\docfactory\lib, and documaker\docupresentment\lib.
3. Run the scripts located in the \documaker\database\sqlserver2012 directory. You may need to copy these files to the database server. To run these files, you must have permission to create tables and insert data into the database. These scripts create the required Document Factory administrative and processing database tables. Contact your database administrator (DBA) for assistance.
Note: Installer sets the default index and non index File Group values (SIZE,MAXSIZE, FILEGROWTH) in the admin and as line scripts. User may need to update these values as per requirement prior to the sql file execution.
| Script | Description |
|---|---|
| dmkr_admin.sql | Creates the configuration schema and populates the tables with the entries captured during setup |
| dmkr_asline.sql | Creates the assembly line schema and the Documaker Studio default user accounts |
| Note: The names of these scripts are user-defined and may vary. | |
4. To create sample user accounts for demonstration purposes and to test the deployment, run the following as the DB Admin user:
dmkr_admin_user_examples.sql
5. (Optional) ODEE includes database entries that enable the ODEE web applications to be viewed in other languages. To add support for languages other than English, perform these steps:
-
Make sure the script is executed using UTF-8 encoding so the Unicode text within the script is put into the database properly.
If you are using Then Microsoft SQL Server Management Studio Change the file encoding option to UTF-8 by selecting the Tools, Preferences, Environment option and then setting the Encoding option to UTF8. -
Run the following scripts as the DB Admin user:
-
dmkr_admin_xx.sql
-
dmkr_asline_xx.sql
Where xx is the abbreviation for the desired language:
Languages Abbreviation Dutch nl English (Great Britain) en_GB French fr German de Indonesian in Japanese ja Polish pl Portuguese pt Russian ru Simplified Chinese zh Spanish es -
-
Make sure the insert statements are committed to the database.
6. Run this batch file from the application server to load the Correspondence MRL:
\documaker\mstrres\dmres\deploysamplemrl.bat
This loads the MRL into the database, deploying the sample resources which are used to validate the Document Factory installation.
7. Continue with the steps outlined in Creating the Web Environment sectionon
Creating the Web Environment
The steps you take to create the web environment vary, depending on the type of database you are using.
| If you are using | Follow these steps |
|---|---|
| WebLogic | Creating WebLogic User Accounts |
Creating and Deploying a WebLogic Domain
A WebLogic administrator for the WebLogic server needs to complete the following steps to create the WebLogic domain and deploy these web applications:
- Documaker Dashboard
- Documaker Administrator
-
Documaker Web Services
- Documaker Interactive:Correspondence (Optional)
-
Copy the \documaker\j2ee directory from the application (business) tier to the WebLogic server using the same directory structure as on the application tier server, assuming the Application Tier and WebLogic deployment are on separate servers.
-
Set the variables specific to your environment by editing these files within the
\documaker\j2ee\weblogic\databasetype\scripts directory (where databasetype is the type of database chosen during installation)
Example:
Windows:
c:\oracle\odee_1\documaker\j2ee\weblogic\oracle11g\scriptsLinux/UNIX:
/oracle/odee_1/documaker/j2ee/weblogic/oracle11g/scriptsIn this file Make these changes Windows: set_middleware_env.cmd Validate the MW_HOME variable’s value is set to the full path of your Oracle Middleware Home directory. • Example: SET MW_HOME=c:\oracle\middleware\oracle_home1 Linux/UNIX: set_middleware_env.sh Validate the MW_HOME variable’s value is set to the full path of your Oracle Middleware Home directory. • Example MW_HOME=/oracle/middleware/oracle_home1 weblogic_installation.properties Validate and change if necessary any of the variable values for all the properties in this file and modify the value to the right of the equal sign if necessary.
Replace the ‘<SECURE VALUE>’ (removing the single quotes) with the credentials values used on the installation screens, examples: (Note: For Windows values with backslashes (\) directory separators requires escaping with a additional backslash (e.g. \\)).
• dirWebLogicTemplates
• dirDocumakerHome (full path where the root of the j2ee folder resides on the WebLogic server.
• jdbcAdminPassword='<SECURE VALUE>'
• jdbcAslinePassword='<SECURE VALUE>'
• jmsCredential='<SECURE VALUE>'
• adminPasswd='<SECURE VALUE>'
• weblogicPassword='<SECURE VALUE>'
Note: If JMS connection is not secured, then replace with empty value, e.g. jmsCredential =
Note: Installer does not set the secure value credentials for security reasons, so they have to be manually entered and secured by the resource deploying the web app.
All secure values replaced should be removed from any deployment properties file or the file should be deleted from all locations after web apps are successfully deployed and tested.
There are two pre-configured, convenience methods for deploying the ODEE resources (DataSources, JMS Servers and JMS Modules, Persistent Stores) and Deployments.
• Method #1 will deploy resources and deployments to target WebLogic Clusters in a pre-configure and prepared domain.
This method requires user to have already created a Domain with Managed Servers, Clusters, Coherence Clusters and Machines (Nodes), allowing for WebLogic Clustering.
This method uses the wls_extend_clustered_server(.cmd|.sh)
• Method #2 will deploy the resources and deployments to a new domain created in processing the script targeting the resources and deployments to Managed Servers instead of Clusters.
This Method uses the wls_create_domain(.cmd|.sh) script.
For Method #1
Pre-requisite to have FMW RCU run and a WebLogic Server Domain created before running ODEE Installer with data collected for the WebLogic configuration screen in installer or use values entered in ODEE Installer to create the domain before you process with the wls_extend_clustered_server script.
Notes on WebLogic Server Domain:
• Domain Name and directory noted,
e.g. dmkr_domain
/app/oracle/middleware/wls_home/user_projects/domains/dmkr_domain
• Oracle JRF added for ADF support
• WebLogic Server admin user and password noted,
e.g. weblogic, @Oracle#1234
• Admin Server deployed with name and ports noted,
e.g. dmkr_adminserver, port=7001, sslport=7002
• A Managed Server for Web Applications with name and ports noted.
e.g. dmkr_app_mserver_1 port=8101, sslport=8102
• A Managed Server for JMS resources
e.g. dmkr_jms_mserver_1 port=9101, sslport=9102
• A Cluster for Web Applications with name noted,
e.g. dmkr_app_cluster_1
• A Cluster for JMS resources with name noted,
e.g. dmkr_jms_cluster_1
• Managed Servers associated Clusters app to app and jms to jms
• (Optional) Coherence Cluster with name noted,
e.g. DataGridConfig
• Machine (Node) configured:
e.g. dmkr_node_1
Run the script to deploy the ODEE resources and applications:
wls_extended_clustered_server(.cmd|.sh)
If adding Optional Documaker Interactive: Correspondence run the script:
wls_extend_clustered_server_interactive(.cmd|.sh)
Go to Creating WebLogic User Accounts section.
For Method #2
Run the script: wls_create_domain(.cmd|.sh)
Note: If you already have a domain on the server and you want to create a new domain, you can still use this script, just update the WebLogic domain name at the bottom of the file.
weblogicDomain=The program will ask to run the Repository Creation Utility (RCU) to create the Database schema for Middleware. Answer "y" if RCU has not been run or the new schema is required.
Please refer to Appendix A for "Navigating RCU Screens to Create Schemas" details.
Answer “n” after the RCU has been run. The program will continue to run the Fusion Middleware (FMW) Configuration wizard.
Please refer to Appendix B for "Navigating Configuration Wizard Screens to Configure the Domain" details.
-
Run the following script if using Documaker Interactive Correspondence web application;
wls_add_correspondence(.cmd|.sh) -
Start “Fusion Middleware Configuration Wizard” by running this command from the [middleware home]\/oracle_common\/common\/bin directory:Config.cmd
-
Select “Update an existing domain”
-
On Templates page, add template "Oracle WSM Policy Manager - [oracle_common]”.
-
On Advanced Configuration page, select “Topology”.
-
On Managed Servers page, under the managed server name for the deployed apps.
e.g. dmkr_idm_mserver_1”, add WSMPM-MAN-SVR to server groups.
-
Update changes.
-
-
5. Start the WebLogic AdminServer by running this command from the [middleware home]\/user_projects\/domains\/your_domain_name\/bin directory:
startWebLogic.cmd -
Set the following option in the JVM start up process (in WLS console server startup arguments) :
-Djbo.pers.max.active.nodes=-1Note: This will increase JVM heap usage, so monitor the heap usage as you may need to increase this accordingly.
-
7. If using MS SQL Server, add EXTRA_JAVA_PROPERTIES as'- Djbo.SQLBuilder=SQLServer' in SetDomainEnv(.cmd|.sh) file under \/domains\/your_domain_name\/bin.
-
8. If using IBM DB2, add EXTRA_JAVA_PROPERTIES as'- Djbo.SQLBuilder=DB2' in SetDomainEnv(.cmd|.sh) file under \/domains\/your_domain_name\/bin.
-
Continue with the steps outlined in Creating WebLogic User Accounts.
Adding MS SQL JDBC jar file to the WebLogic classpath
-
Open a browser to obtain the MS-SQL JDBC Type 4 driver from Microsoft. Click the Download button and select sqljdb_6.2.1.0_enu.exe, then click Next. After the file downloads, run the EXE to extract the files into a directory of your choice. Locate the enu\mssql-jdbc-6.2.1.jre8.jar file, and copy this file into the following directories:
-
<ODEE_HOME>\documaker\bin\lib
-
<ODEE_HOME>\documaker\docfactory\lib
-
<ODEE_HOME>\documaker\docupresentment\lib
-
<WLS_HOME>\wlserver\server\lib
-
-
Edit the <WLS_HOME>\oracle_common\common\bin\commExtEnv.cmd file and locate this line:
set
WEBLOGIC_CLASSPATH=%JAVA_HOME%\lib\tools.jar;%PROFILE_CLASSPATH%;%ANT_CONTRIB% \ant-contrib-1.0b3.jar;%CAM_NODEMANAGER_JAR_PATH%;Similar on Linux/UNIX.
-
Edit the line by adding the following to the end of it:
%WL_HOME%\server\lib\mssql-jdbc-6.2.1.jre8.jar;Similar on Linux/UNIX.
-
Save the file.
Creating WebLogic User Accounts
When the AdminServer is able to accept connections, the WebLogic server administrator needs to complete these steps:
Note: To change the web application user passwords from the WebLogic password, update the py files called by each script before running the script.
-
To install the standard user accounts, run this command under the j2ee weblogic dbtype scripts directory location:
create_users_groups(.cmd|.sh)This script creates the Documaker user account and the Documaker Administrators group. It adds this user to this group in WebLogic’s default authenticator.
-
To install a set of users and groups to be used with the example RI-MRL resources for Documaker Interactive: Correspondence, run this command under the j2ee weblogic dbtype scripts directory location:
create_users_groups_correspondence_example(.cmd|.sh) -
Link the new users and groups to the pre-configured entities in the Document Factory Administration registry database by going to the WebLogic server, opening a browser and going the WebLogic Admin Server host and port number and context-root of jpsquery. Example URL:
http://servername:7001/jpsquery
Note: You may need to change localhost to the name of your WebLogic server.
Step C: Starting Services
If the weblogic managed server named 'jms_server' is not started, start it before starting ODEE Factory services.
-
Go to the bin directory and run this command:
startManagedWebLogic(.cmd|.sh) dmkr_jms_mserver_1To start Windows services, perform these steps on your application (business) tier:
-
Choose the Start, Administrative Tools, Services option.
-
Start these Windows services:
Service Description ODDF Supervisor (AssemblyLine_Schema_Name:System_ID:AssemblyLine_ID) Example: ODFF (dmkr_asline2:1:2) The Document Factory Windows service. Docupresentment (AssemblyLine_Schema_Name:System_ID:AssemblyLine_ID) Example: ODDP (dmkr_asline:1:2) The Docupresentment Windows service. Note: Where dmkr_asline is the schema or user name for the assembly line. Note:If the Supervisor fails to start one of the Workers, it renames that Worker’s JAR file in the docfactory\deploy directory with the suffix “_bad”. For example, if the Supervisor is unable to start the Assembler worker, it renames the “assembler.jar” file to “assembler.jar_bad”. This kind of failure can occur in the following scenarios:
a. The Worker’s JAR file is opened, but a valid configuration is not found.
b. The Worker process fails to locate the executable, or the executable fails to start (missing exe, dll, etc.).
c. A monitor is started on the Worker process, but the monitor fails to detect that the process is running, or the process is unresponsive.
d. The set of information about the Worker process is invalid.
In such scenarios, examine the “startup.log” file located in the docfactory\logs folder, for additional information or to know the cause of the problem.
Step D: Starting Documaker Administrator and Dashboard
The steps you take to start the web applications vary, depending on the configuration of the deployment.
Note: A WebLogic administrator should complete this step.
Starting with WebLogic
Start the Documaker Administrator and Documaker Document Factory Dashboard web applications by starting the WebLogic Managed Server
Step E: Starting Documaker Interactive (Optional)
If used Method #1 the steps you take to start the web applications vary, depending on the type of web application server you are using.
Note: A WebLogic administrator should complete this step only if deploying Documaker Interactive.
Starting with WebLogic
A WebLogic administrator should complete this step only if deploying Documaker Interactive.
-
1. Go to the dirWeblogicHome\/user_projects/\domains\/your_domain_name directory and run this command:
Windows:
start .\bin\startManagedWeblogic.cmdmanaged_server_with_DILinux/UNIX:
./bin/startManagedWeblogic.shmanaged_server_with_DI -
When prompted, enter the WebLogic user name and password.
In order to prevent generation of files of type BC** include the properties in server start tab as mentioned for each server and then configure WLS to start with nodemanager:
Server Name Oracle Database DB2 idm_server -Djbo.passivationstore=database
-Djbo.pcoll.mgr=oracle.jbo.pcoll.pmgr.SQLServerPersistManager-Djbo.passivationstore=database
-Djbo.pcoll.mgr= oracle.documaker.shared.model.DB2PersistManagerCustomdmkr_server -Djbo.passivationstore=database
-Djbo.pcoll.mgr=oracle.jbo.pcoll.pmgr.SQLServerPersistManager-Djbo.passivationstore=database
-Djbo.pcoll.mgr= oracle.documaker.shared.model.DB2PersistManagerCustomsoa_server -Djbo.passivationstore=database
-Djbo.pcoll.mgr=oracle.jbo.pcoll.pmgr.SQLServerPersistManager-Djbo.passivationstore=database
-Djbo.pcoll.mgr= oracle.documaker.shared.model.DB2PersistManagerCustomNote: Non-soa users can skip the soa_server row. Note: When the WebLogic managed server with JMS resource and server deployed is stopped, the queues are no longer available for Document Factory to access and Document Factory will generate errors that it could not connect to the needed queues..
-
Add SOA to the WebLogic domain:
-
From the MW_HOME \wlserver\common\bin\ directory, run this command:
config.cmd -
Choose Extend an existing WebLogic domain, then click Next.
-
Select idocumaker_domain from the WebLogic Domain Directory window, then click Next.
-
On the Select Extension Source window, choose Oracle SOA Suite then click Next.
Note: SOA may add the Oracle WSM Policy Manager Extension. If so, this is not an error.
-
View the Configure JDBC Data Sources options (do not change these values), then click Next.
The connection to the database is tested. When the test finishes, view the results, then click Next.
-
Copy the sqljdbc4.jar file under wl_server\/server\/lib, your_domain_name\/lib if JDBC Component Schema fails to make connection. This is applicable only for MS SQL Server.
-
Update the Configure JDBC Component Schema window. This will configure the connections your SOA repository. Click Next.
-
The connection to the database is tested. When the test finishes, view the results, then click Next.

Figure 2.3.3 - Data Sources Dialog Message -
On the Select Optional Configuration window, click Next.
-
On the Configuration Summary window, click Extend and then Done.
-
k. To deploy the Oracle Business Rules into the SOA extension, run this command:
documaker\/j2ee\/weblogic\/db-type\/bpel\/antbuild(.cmd|.sh)
-
-
Start these WebLogic servers (using the same commands as in the previous steps):
-
Oracle Admin Server
-
Managed Servers with ODEE web apps deployed (e.g. dmkr_app_mserver_1)
-
Managed Server with JMS Server and resources deployed (e.g. dmkr_jms_mserver_1)
Note: Restart Oracle Documaker Document Factory Service if you had previously stopped it.
-
-
5. From the dirWeblogicHome\/user_projects\/domains\/your_domain_name directory, run this command:
Windows:
start .\bin\startManagedWeblogic.cmdsoa_server1Linux/UNIX:
./bin/startManagedWeblogic.shsoa_server1 -
Add soa_server1 as a target for the dmkr_admin data source as follows:
-
Make sure the AdminServer is ready to accept connections. Using a browser, log into the WebLogic console:
http://servername:adminserverport/consolewhere servername is name of the WebLogic server.
-
In the Domain Structure panel, expand Services and select Data Sources.
-
In the Summary section of JDBC Data Sources panel, click the dmkr_admin link. This is the name of the administrator schema.
-
Select the Targets tab then check the soa_server1 check box and click Save.
-
-
Once soa_server1 is ready to accept connections, deploy the Oracle Business Rule Composites by running this command:
documaker\/j2ee\/weblogic\/db-type\/scripts\/deploy_soa(.cmd|.sh)
Step F: Final Configuration and Validation
Each of the configuration context (SYSCONFIGCONTEXT, ALCONFIGCONTEXT, APPCONFIGCONTEXT) tables has MODIFYTIME, USERTAG1, NOTES, and USER_NAME columns that can be used to determine what has changed following installation or following another collection of changes. This is helpful to follow-up on when a particular item has changed and why. Additionally, this information can be used to track configuration updates that should be carried forward from one tier environment to another. Therefore, when making changes to the configuration during installation processes or subsequent updates for system maintenance always utilize the USERTAG1 column and/or NOTES columns to group these changes in an identifiable manner. For instance, utilize, initial in the USERTAG1 column for any initial configuration changes following the base installation. Once confirmed and tested, any changes can be updated as ‚passed or ready for promotion. Likewise use specific as a USERTAG1 value for any settings that include environment specific data like server names and IP addresses that you may not want to promote to a new environment directly.
-
Make sure you have a network accessible printer available for Document Factory publishing that supports the Multipurpose Internet Mail Extensions (MIME) types the system outputs when you are ready to generate printed output. For more information, see the Documaker Enterprise Administration Guide.
-
Validate the installation of Documaker Administrator by accessing Documaker Administrator from the following link:
https://servername:managedserverport/DocumakerAdministratorwhere servername is the name of the presentation tier.
Use these credentials to log in:
For Enter User name documaker Password The value entered in JMS Credentials during the installation process, unless it has been changed. -
Download and configure the WIP Edit plug-in (if using Documaker Interactive).
To edit documents within Documaker Interactive, you need the WIP Edit plug-in. You can download the plug-in from the Oracle Software Delivery Cloud web site and provide it to users by:
-
Pushing the installation to your end users.
-
Hosting the installation and allow the web application to provide a download link when requested. Make sure the installation is available on a static content server.
If you are hosting the WIP Edit plug-in installation, use Documaker Administrator to enter the location for the installation:
-
In the left panel, click the Systems link. In the right panel, expand the System node, if it is not already expanded. Expand the Assembly Line node, if it is not already expanded.
-
Select the row containing the newly-installed assembly line. Select the Correspondence application. Click Configure.
-
On the Correspondence tab, select the ENTRY_ACTION_PLUGIN_INIT category within the ENTRY context and then select the group name, ENTRY_ACTION_PLUG_INIT.
-
In the Properties panel, double-click the row containing the property named installer. Change the installer value to be the hosted location for the plug-in installation.
-
In the Properties panel, double-click the row that contains the putURL property. Then change the putURL value to reflect the ipaddress:port of the server for the idm_server web application and click Save. This must be the secure port for Documaker Interactive. The default port is 12002.
-
-
Validate your Document Factory installation by the preforming these tasks:
-
Create a copy of the extrfile.xml file with the name extrfile.tmp. This file is located in the \documaker\mstrres\dmres\input folder.
-
Move the extrfile.tmp file into the hotfolder directory on the Document Factory server.
-
Rename the extrfile.tmp file to extrfile.xml in the hotfolder directory.
Note: This step pushes documents through the system. Moving the file with a tmp extension makes sure the file is not processed by the Receiver before the file is copied to the hotfolder directory.
-
-
Validate the web applications using these credentials:
For Use Documaker Document Factory Dashboard URL https://Servername:managedserverport/DocumakerDashboard User name documaker Password The value entered in JMS Credentials during the installation process unless it has been changed. Documaker Interactive (if installed) URL http://Servername:managedserverport/DocumakerCorrespondence When you access this link, you are redirected to the HTTPS port for a more secure connection. User name documaker Password The value entered in JMS Credentials during the installation process, unless it has been changed. You have completed the installation and initial configuration of Oracle Documaker Enterprise Edition.
Note: For information on customizing the location of Help files, downloading patches, and downloading documentation updates, see Maintaining Your System.