 from
the Users tile, to add the Application Users.
from
the Users tile, to add the Application Users.After you sign in to your IDCS console, your first task is to create additional user accounts. You should assign specific user groups to the user accounts that you are creating. There are seeded user groups available with the respective services, users must be mapped to one or more of the user groups, depending on the role that they perform.
For example, you can create a user for each member of your team. Each team member can then sign in to the account with their credentials. You can also assign each user to specific user groups, and apply specific security policies or roles to each group.
You can create the users and map the users to groups for your service. After creating the users, the users will receive a Welcome email. The users must activate their accounts and enter a new password to access the services.
To create users in IDCS Console, perform the following steps:
1. In the IDCS Console, click  from
the Users tile, to add the Application Users.
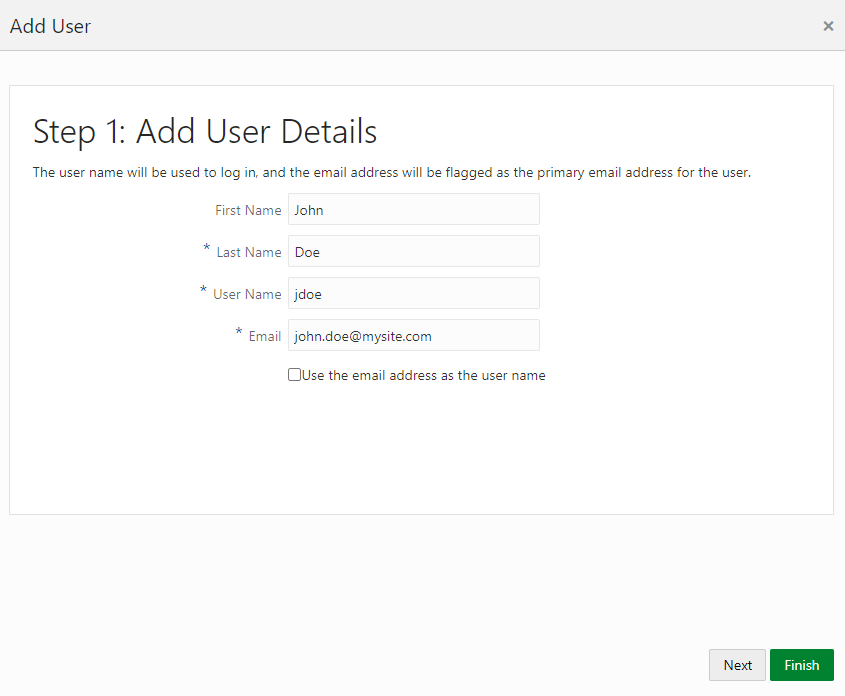
2. In the Add User page, enter the following information:
§ The First Name and Last Name of the user.
§ The user's Email Address and the User Name.

NOTE:
Ensure that you restrict the User Name to the following:
· Do not enter your Email Address as the User Name and do not select the Use the email address as the user name check box.
· Enter a maximum of 20 characters.
· Enter alphanumeric characters.
· Enter only Hyphen (-) and Underscore (_) Special Characters.
3. Click Next.
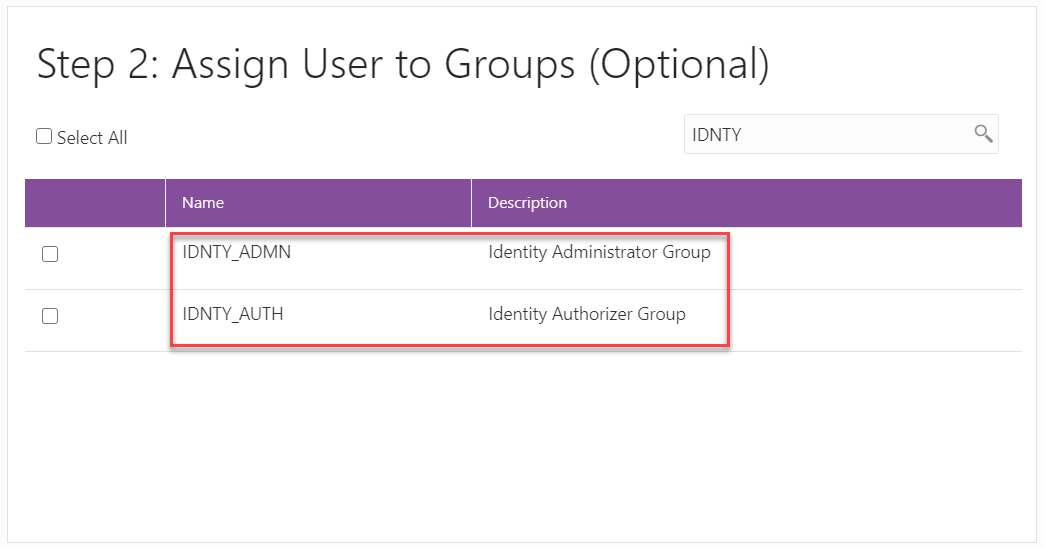
4. In the Assign User to Groups (Optional) window, select the user groups according to your user-specific groups or access.
ATTENTION:
After a User signs in to AFCS, the User to User-Group Mapping created in the IDCS Console will onboard into the Master and Mapping Tables. Later, if you deselect (remove) a User from a Group in the Assign User to Groups Window after provisioning, ensure that you also unmap the User from the corresponding User- Group in the Admin Console. This is a mandatory step to complete the unmapping process.
For more information on how to Unmap a User from a Group in the Admin Console, see the Users Summary Page Section in the Using the Admin Console Guide.
5. To create an Identity Administrator or Authorizer user, assign the users to the following:
§ IDNTY_ADMIN: You can use this option to create an Administrator User.
§ IDNTY_AUTH: You can use this option to create an Authorizer User.

6. Click Finish. After the successful creation of the user, the added users receive an Email to activate their account. The user must activate the account to use the service.
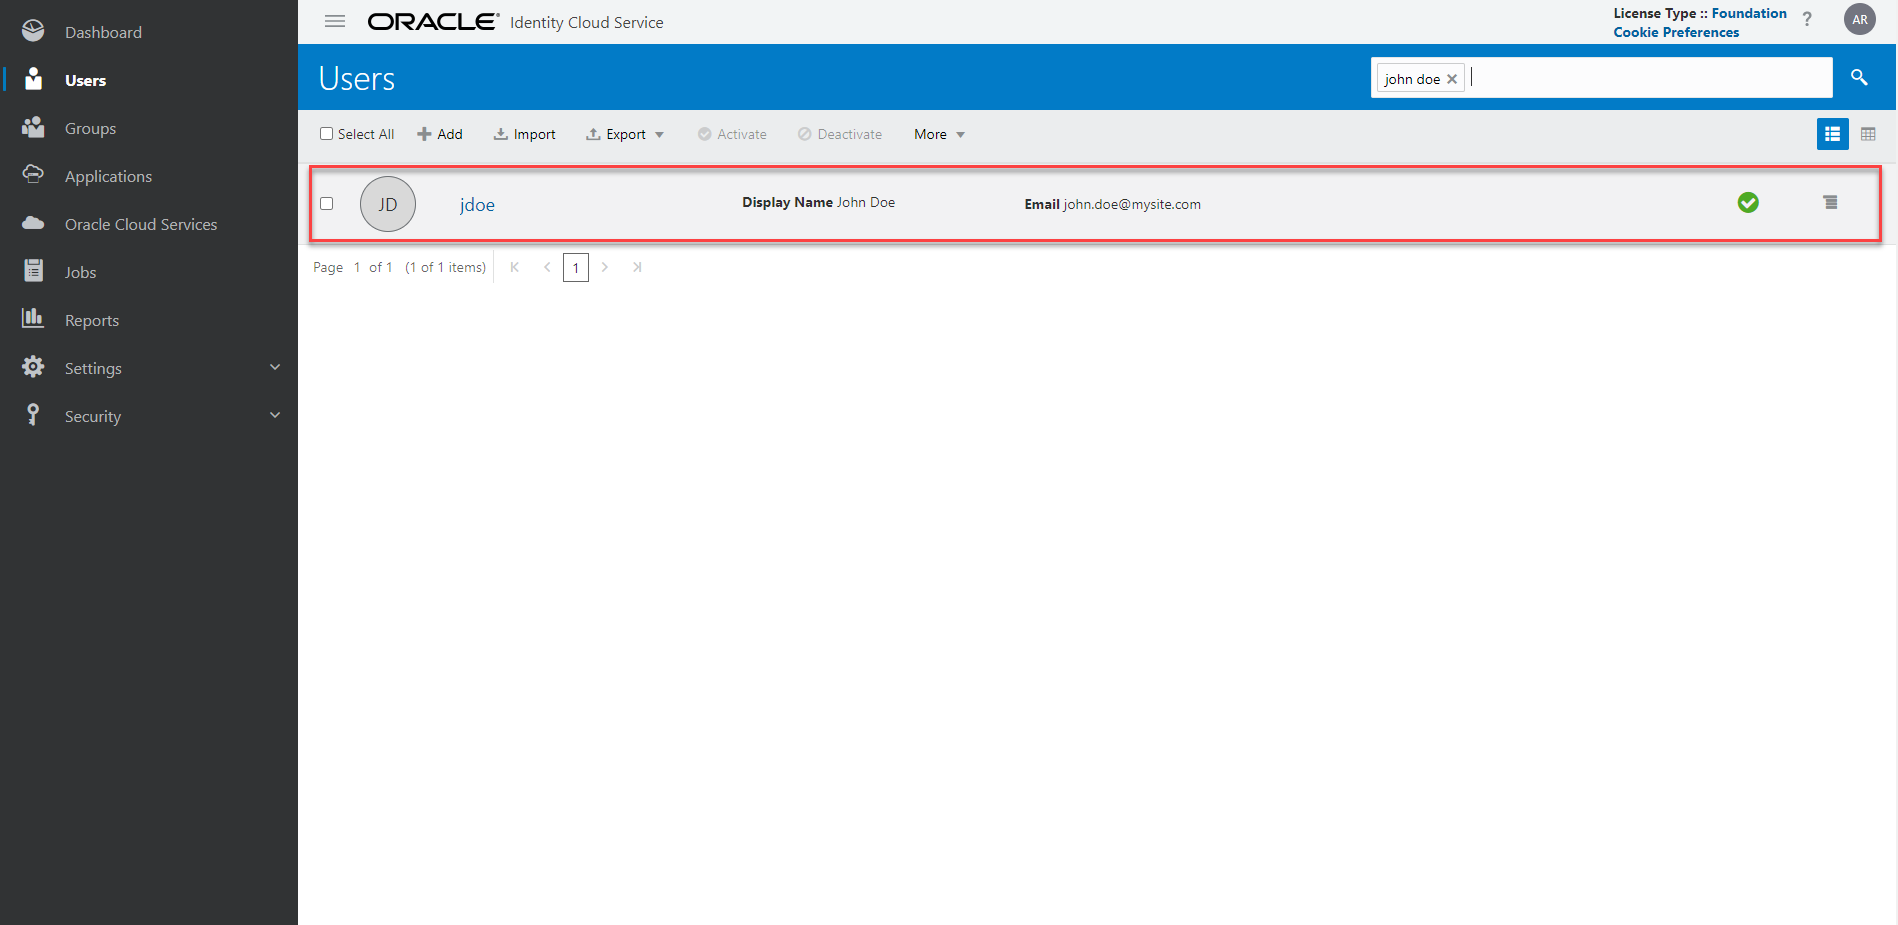
7. From the Users Window, you can access the newly created user and edit the user details.

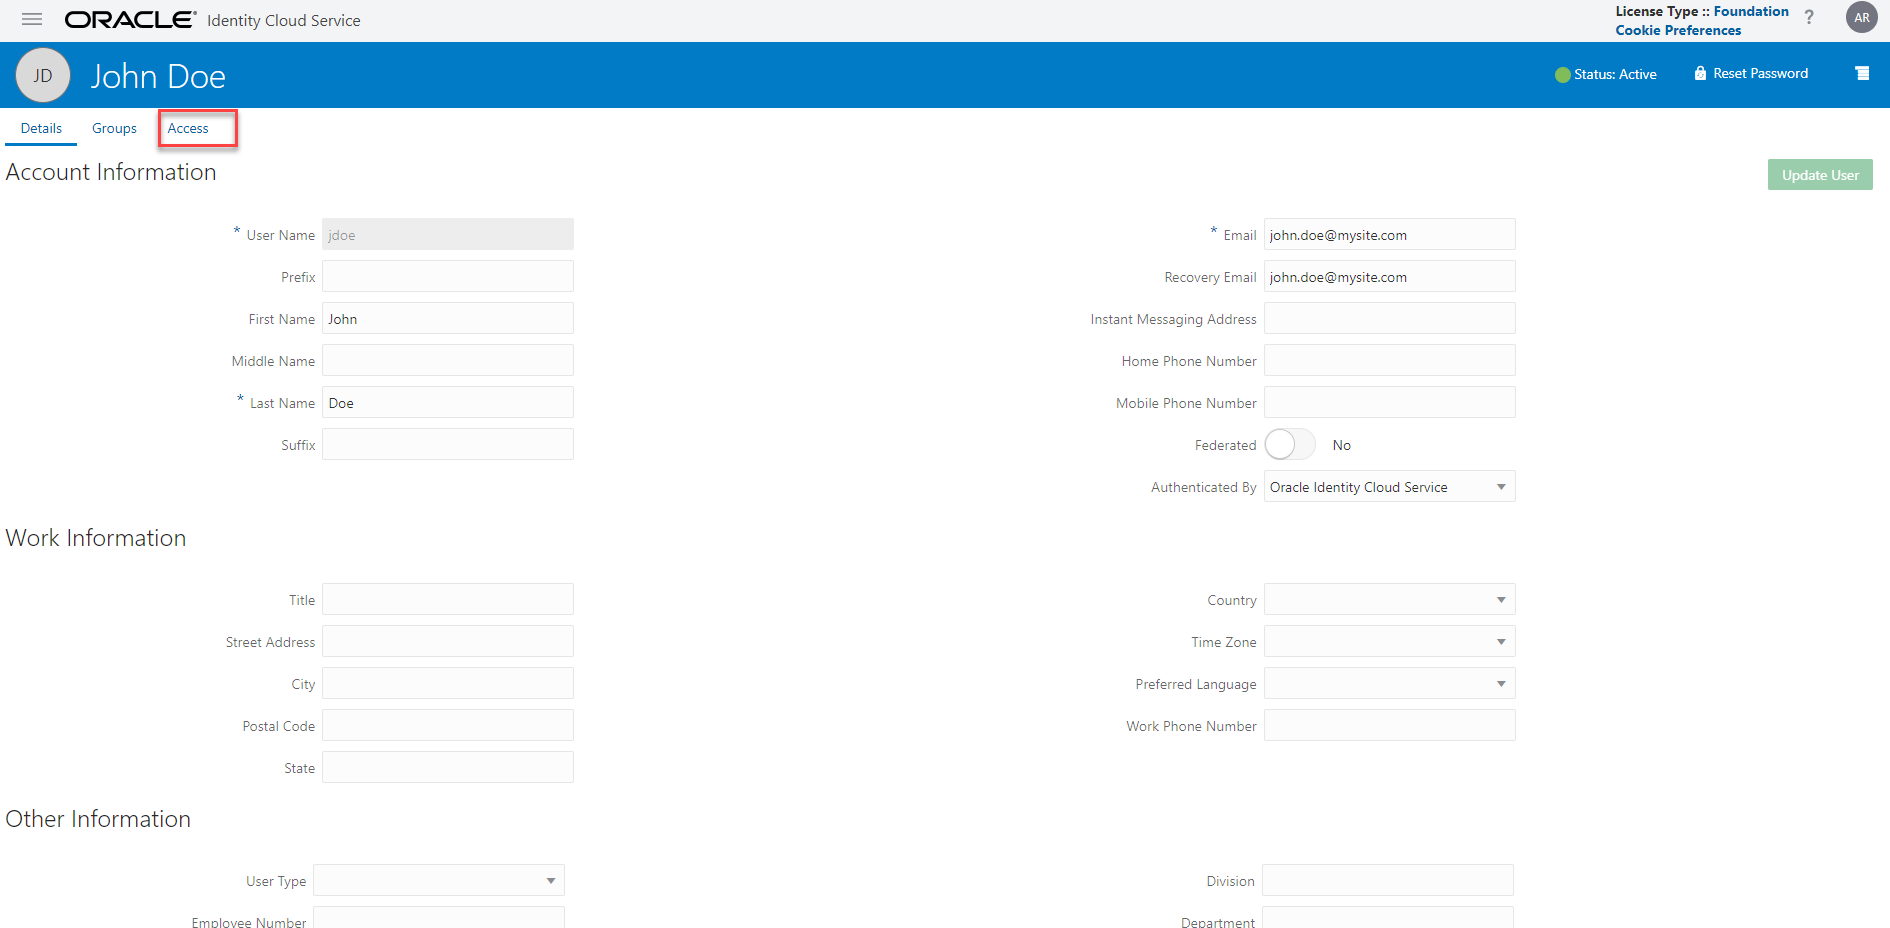
8. Select the User that you want to edit the details. In the User Details Window, select the Access tab.

9. Click Assign.
10. In the Assign Application Window, select the appropriate Application Instance to grant access to your user as mentioned below.
For example:
§ AFCS etjygp-prd (For production)
§ AFCS etjygp-nprd (For non-production)
NOTE:
Based on this mapping the users will be able to access the appropriate instance.
11. Click OK. The users are assigned based on the mapping.
For Bulk User Creation, you can batch import User Accounts using a comma-separated values (.CSV) file.
For more information about how to import application users, see Import Application Users.
ATTENTION:
· In the Session Duration field in the Oracle Identity Cloud Service console, enter a duration in minutes. The Session Duration is the duration in minutes for which the user’s session is valid. The user's session will time out after the Session Duration has been reached regardless of actual user activity or inactivity.
· It is recommended to have the Session Duration adequately long so that it does not impact user activity.