JMS Queues Setup for the IBSS deployed in Tomee 8.0.6
Download Apache ActiveMQ (ActiveMQ Artemis 2.17.0)
Installing Apache Active MQ
- Extract the Apache Active MQ Zip file to a specific folder.
Configure Apache Active MQ
- Navigate to bin folder (Ex: D:\Installations\apache-artemis-2.17.0\bin ) and execute the command in command prompt to create a Broker artemis create broker2.
- In the same command prompt window, enter the username and password. (Ex: admin).
- Similarly Enter Y for universal access.
- The below image is displayed:
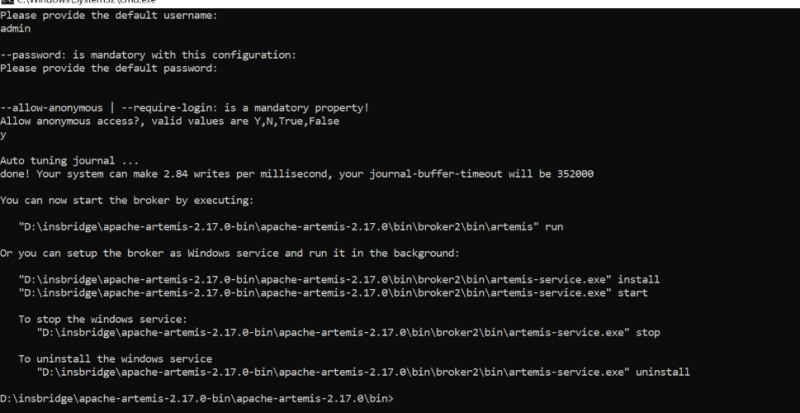
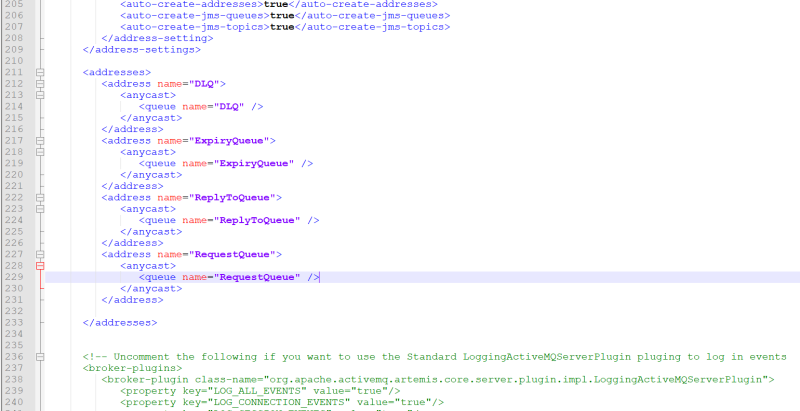
- A broker2 folder is created. Open broker.xml inside the broker2 folder under the broker2/etc folder.
- Enter the below details inside the address tag:
<address name="ReplyToQueue">
<anycast>
<queue name="ReplyToQueue" />
</anycast>
</address>
<address name="RequestQueue">
<anycast>
<queue name="RequestQueue" />
</anycast>
</address>
- Start the broker created using the following command in command prompt under broker2/bin folder as below:
Example: D:\Installations\apache-artemis-2.17.0\bin\broker2\bin>artemis.cmd run
artemis.cmd run
- In case of no errors, the Home page activity can be viewed for Activemq by clicking the below URL:
Note: 8161 related port can be seen in same command prompt window where you have run the above command
- Login using the credentials used while creating the broker (Ex: username/Password: admin/admin)
- Now go to the IBSS Home page which is deployed on TomEE server by accessing the URL ( http://HostName:port/IBSS).
- In the Home page from left side menu, expand IBSS/Nodes and click on Services node in the tree . On the right side , see 'Insbridge Connector Service' section wherein on click of Properties button, a pop-up window will be opened. In that window please enter the below details:
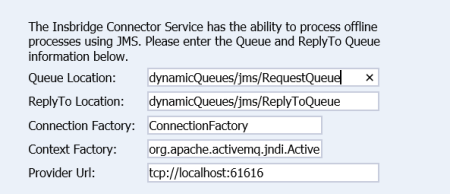
- dynamicQueues/jms/RequestQueue
- dynamicQueues/jms/ReplyToQueue
- ConnectionFactory
- org.apache.activemq.jndi.ActiveMQInitialContextFactory
- tcp://localhost:61616
First save the properties and then click Test Connector Properties button. A prompt with a success message will be displayed if above configuration is properly done, if not, need to redo or crosscheck with respect to above steps.