4. Setup - Administration System
In Administration > System, you can record setup data related to the application’s overall functionality and performance. This data affects;
- The mechanics of the system
- The processes of the system
- The search for Location of files to complete the tasks.
This section consists of the following topics:
- Lookups
- User Defined Tables
- Dedupe
- Securitization
- Producer Cycles
- Collection Cycles
- Reports
- Data Masking
Please note that, at any given point you can click “Refresh’ button to fetch the latest records data. Also the pagination option on all the screens display 5 records by default and helps to navigate to subsequent records. However, you can jump to the required page by entering the number in the ‘Page’ field.
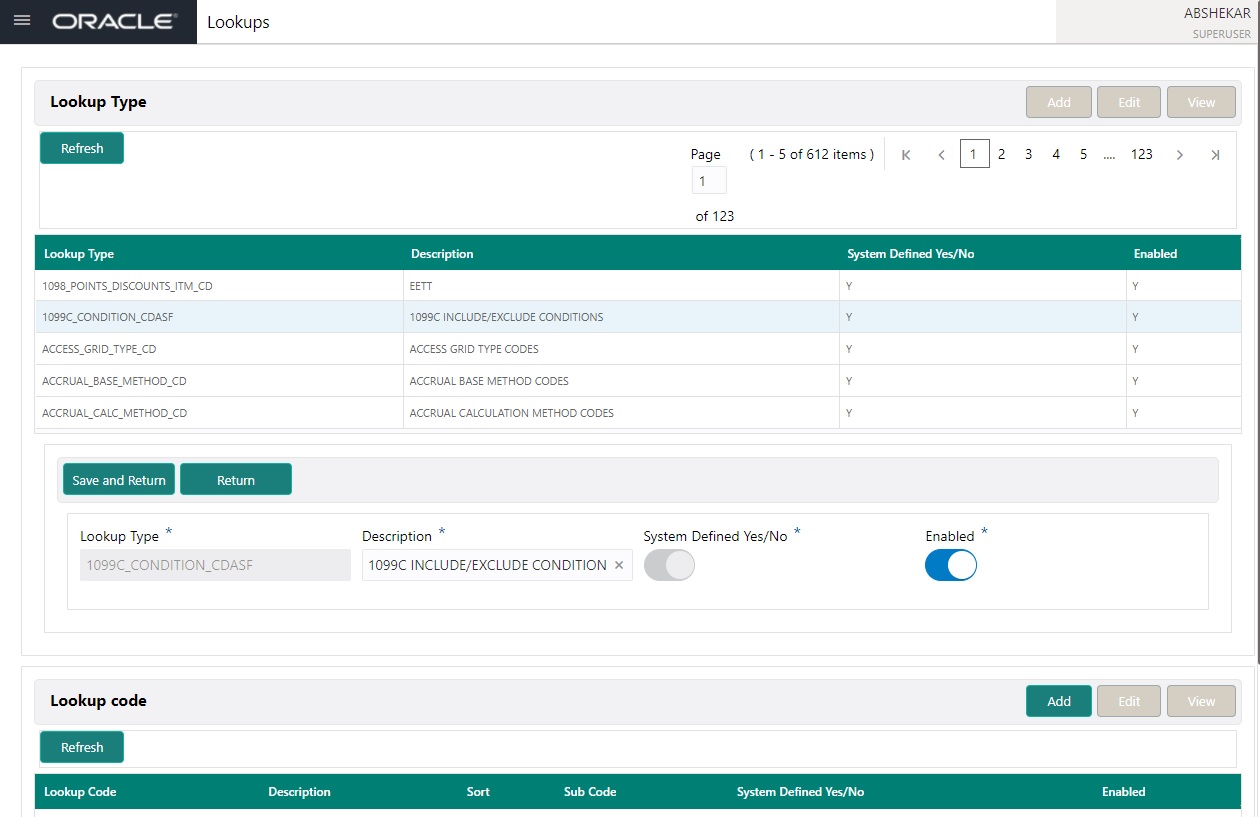
4.1 Lookups
The Lookups setup screen defines the contents in many drop-down fields used throughout the system. Fields that make use of drop-down field will accept only entries that are stored on this screen.
The Lookups screen contains two sections: Lookup Type and Lookup Code. Lookup types and codes can be system-defined or user-defined. The lookup types describe the function of the related lookup codes.
For system-defined lookup types, only the Description field may be changed.
A system-defined lookup type (Lookup Types block, System Defined is selected) is one that is critical to the system and cannot be changed. However, you can still modify the lookup type description and Record indicator (Enabled/Disabled).
A user-defined lookup type (Lookup Types block, System Defined is not selected) is one that can be modified, depending on a user's business needs. You can modify the description, system indicator and record indicator. If a lookup type is user-defined, the lookup code belonging to that lookup type can either be system-defined or user-defined.
A system-defined lookup code (Lookups screen, System Defined is selected) is one on which the system processing is dependent. Without this lookup code, the process produces incorrect results or fails.
A user-defined lookup code (Lookups screen, System Defined is not selected) is one that can be defined or altered by a user.
WARNING: System-defined lookup types are those that are required by the system. Their related lookup codes will also be system defined. If you update and save a user-defined lookup type as a system-defined-lookup type (that is, change the System Defined button from No to Yes in the Lookup Type sub screen), the system will not allow you to change the lookup type back to user-defined in the future.
Note
Lookup codes cannot be deleted, as they may have been used in the past, and the display and processing of that data is still dependent on the existing setup.
Typically, the system Administrator would modify the descriptions of lookup codes and add new lookup codes to the existing lookup types as needed.
To set up the Lookups
- In the LHS menu, click Setup > Administration > System > Lookups. The system displays the Lookups screen. The details are grouped into two:
- Lookup Type
- Lookup Code
- In the Lookup Types section, you can Add, Edit and View the lookups defined in the system.
A brief description of the fields is given below:
Field |
Do this: |
Lookup Type |
Specify the lookup type. |
Description |
Specify the description for the lookup type. |
System Defined Yes/No |
Select ‘Yes’, if you wish to maintain the lookup type as system defined and ‘No’, if you wish to maintain lookup type as User defined. |
Enabled |
Toggle the switch to enable the lookup type. |
- Click ‘Save and Return’ to update the record or click ‘Return’ to cancel the update.
- In the Lookup Codes section, you can setup individual codes that a field or process using the related lookup type can have. you can Add, Edit and View the lookup codes defined in the system.
A brief description of the fields is given below:
Field |
Do this: |
Lookup Code |
Specify the lookup code. These are solely dependent on the function of the Lookup Type. |
Description |
Specify the lookup code description. This may be changed as per your business requirement. |
Sort |
Specify the sort order for the lookup code. This determines the order these lookup codes are displayed or processed. |
Sub Code |
Specify the sub code for the lookup code. |
System Defined Yes/No |
Select ‘Yes’, if you wish to maintain the lookup code as system defined and ‘No’, if you do not want to maintain it as system defined. System defined lookup codes cannot be modified, except for changing the Description or Sorting fields. If the lookup type is not system defined, then the code can be modified. |
Enabled |
Toggle the switch to enable the lookup code. |
- Click ‘Save and Return’ to update the record or click ‘Return’ to cancel the update.
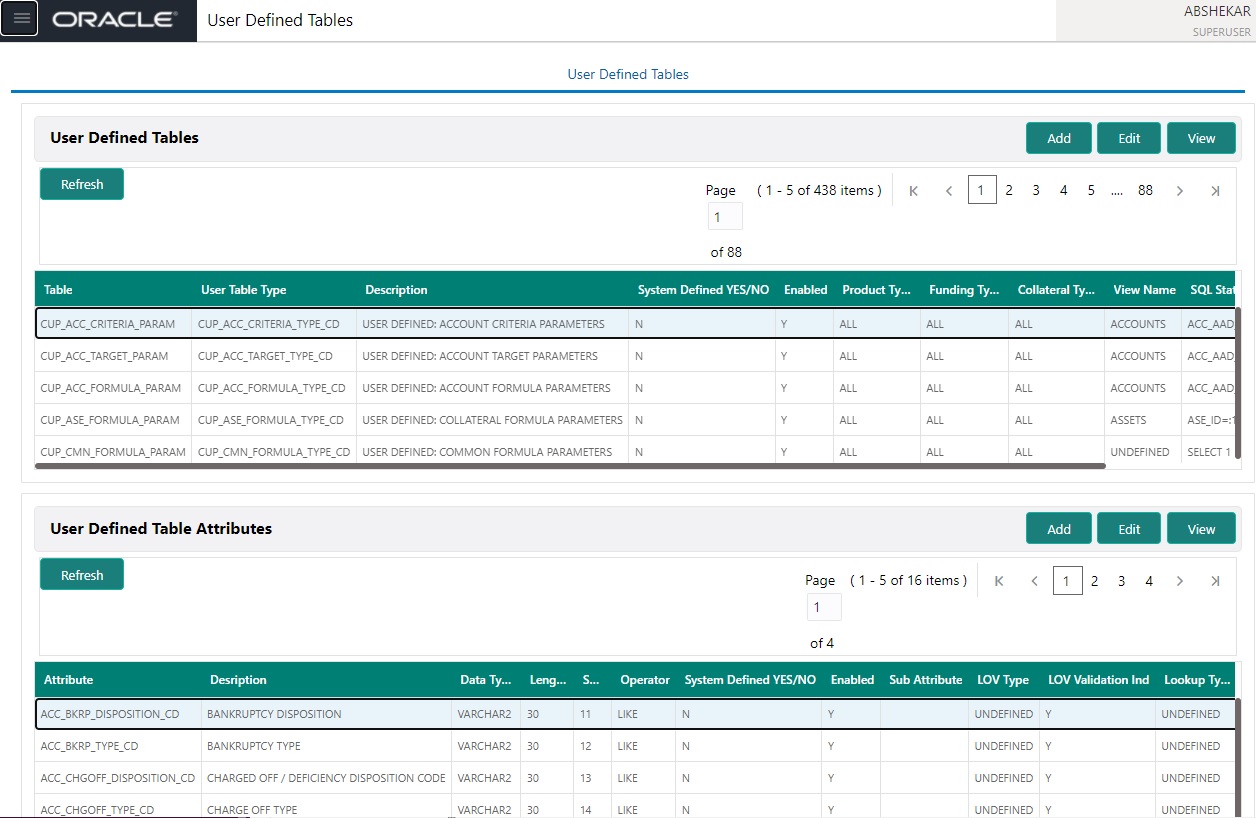
4.2 User Defined Tables
In User Defined Tables you can maintain user-defined tables, such as the data attributes the system uses on its Search screens.
In the following example, the list of attributes in the Criteria column are computed from the User Defined Tables screen.
To set up a user-defined table, you must:
- Define the fields on the table.
- Join the related tables.
- Assign the table a lookup type.
You can create tables for different products, funding, and collateral types.
After creating the user-defined tables, the system sorts the attributes to make the system usage more efficient. These details are used with different functions of the system, including:
- Searching applications and accounts
- Tracking follow-up items
- Creating details in bankruptcy, foreclosure/repossession, and deficiency
Note
Many of these tables, (Asset Tracking Attributes for example) may be configured during the initial setup of the application to provide for your specific business needs. Others, such as Application Search, may be changed whenever your business needs change. Still others should not be changed without consulting Oracle Financial Services Software, as changing them would require changes to existing code for the expected results to be implemented. As a thumb rule, it is better to add or disable information on the User Defined Tables screen than to edit existing entries.
To set up the User Defined Tables
- In the LHS menu, click Setup > Administration > System > User Defined Tables. The system displays the User Defined Tables screen. The details are grouped into two:
- User Defined Tables
- User Defined Table Attributes
- In the User Defined Tables section, you can Add, Edit and View the User Defined Table details defined in the system.
A brief description of the fields is given below:
Field |
Do this: |
Table |
Specify the user-defined table name. |
User Table Type |
Select the user-defined table type from the drop-down list. This determines where and how the related data is being used. |
Description |
Specify the description for user-defined table. |
System Defined Yes/NO |
Select ‘Yes’, if you wish to maintain the User table type as system defined and ‘No’, if you do not want to maintain it as system defined. System defined entries cannot be modified. If the entry is not system defined, then it can be modified. |
Enabled |
Toggle the switch to enable the user-defined table (optional). |
Product Type |
Select the product type from the drop-down list. |
Funding Type |
Select the funding type associated with the user-defined table from the drop-down list. |
Collateral Type |
Select the collateral type associated with the user-defined table from the drop-down list. |
View Name |
Specify the view name. |
SQL Statement |
Specify the SQL version of the statement. For Example: For SEARCH_ACC_ACCOUNTS table, the SQL is as follows: SELECT /*+ FIRST_ROWS */ ACC_AAD_ID FROM ACCOUNTS WHERE Note: For the above SQL, the where criteria is part of the User Defined Table Attributes |
Sort |
Specify the sort order for the user-defined table relative to other tables of the same type. |
Table |
This option is selected as ALL by default. |
- Click ‘Save and Return’ to update the record or click ‘Return’ to cancel the update.
- In the User Defined Table Attributes section, you can Add, Edit and View the User Defined Table details defined in the system.
A brief description of the fields is given below:
Field |
Do this: |
Attribute |
Specify the user-defined table attribute. |
Description |
Specify the description for the user-defined table attribute. |
Data Type |
Select the data type for the attribute (CHARACTER, NUMBER, or DATE) from drop-down list. |
Length |
Specify the maximum length of the user-defined table attribute. |
Sort |
Specify the sort order of the user-defined table attribute. If the sort order is changed it will only affect new instances of the User Defined Table, and will not affect existing data. |
Operator |
Select the operator for the user-defined table attribute from the drop-down list. |
System Defined Yes/No |
Select ‘Yes’, if you wish to maintain the User table attribute as system defined and ‘No’, if you do not want to maintain it as system defined. System defined entries cannot be modified. If the entry is not system defined, then it can be modified. |
Enabled |
Toggle the switch to enable the user-defined table attribute so that the attribute will be considered when creating new instances of the User Defined Table. |
Sub Attribute |
Specify the sub-attribute for the attribute (sub attributes are used to associate related attributes). |
LOV Type |
Select the list of value (LOV) type for the user-defined table attribute from the drop-down list. |
LOV Validation Ind |
Toggle the switch to enable LOV validation of the user-defined table attribute. This indicates whether the data must come from the LOV. |
Lookup Types |
Specify the lookup type of the LOV associated with the user-defined table attribute. |
Default Value |
Specify the default value for the user-defined table attribute. |
- Click ‘Save and Return’ to update the record or click ‘Return’ to cancel the update.
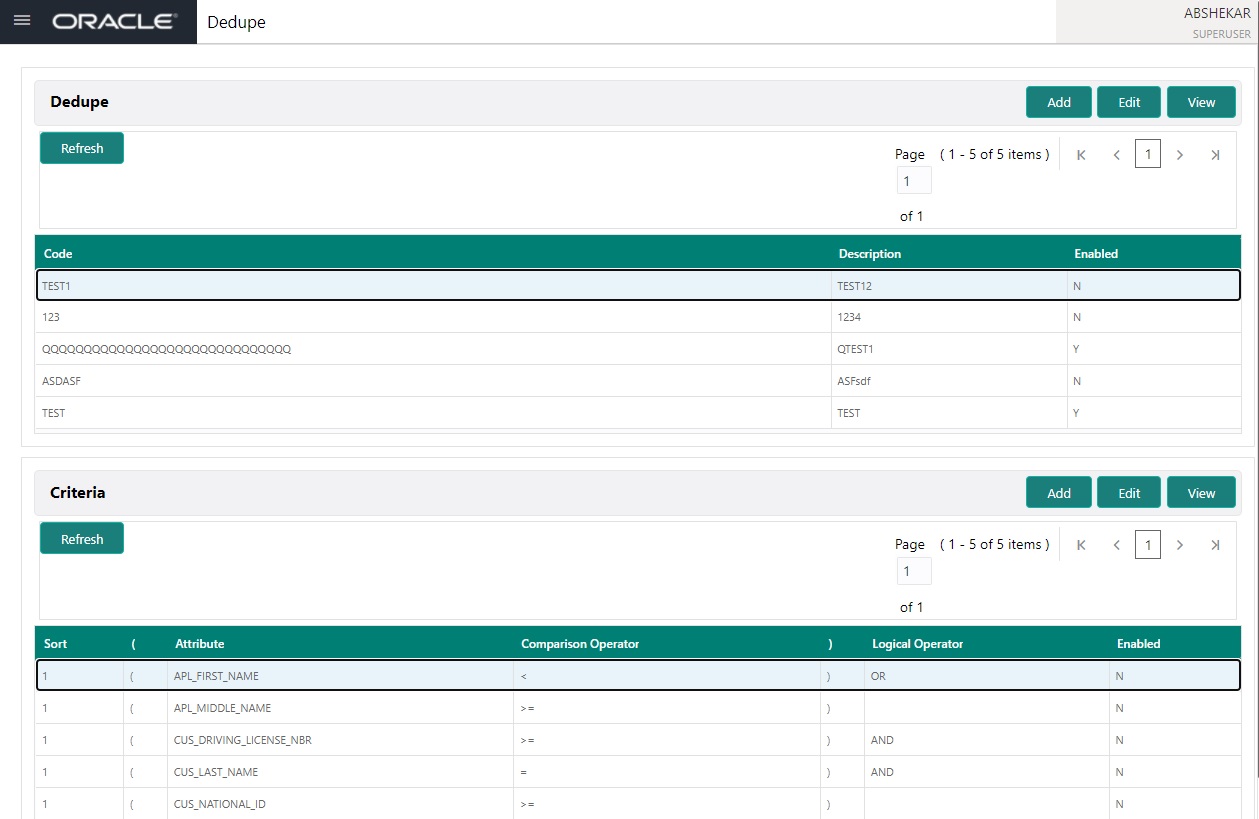
4.3 Dedupe
Oracle Financial Services Lending and Leasing’s dedupe feature can be configured to identify possible fraudulent information and misrepresentation of details on an application based on duplicate information between applications.
The system checks for duplicate information from existing applications, already rejected applications, and applications currently being processed.
The following application entry information is used as the dedupe criteria.
Label |
Description |
First Name |
First name of the applicant. |
Last Name |
Last name of the applicant. |
Date of Birth |
Date of Birth of the applicant. |
Mother’s Maiden Name |
Applicant’s mother name. |
National ID |
National ID of the applicant. |
SSN |
Applicant’s SSN number. |
Driving License |
Applicants driving license number. |
Passport Number |
Passport number of the applicant. |
Customer SSN |
Customer’s SSN number. |
Customer First Name |
First name of the customer. |
Customer Last Name |
Last name of the customer. |
Customer Date of Birth |
Date of Birth of the customer. |
Customer Mother’s Maiden Name |
Customer’s mother name. |
Customer National ID |
National ID of the customer. |
Customer Driving License |
Customer’s driving license number. |
Customer Passport Number |
Passport number of the customer. |
The Dedupe Setup screen enables you to define the dedupe criteria from the fields listed above. In the Criteria section of Dedupe screen, you can specify the logical operators And or or while defining the criterion.
If you choose AND as the logical operator between the criterion components, the system retrieves the records that are matching with the details in the criterion components.
For example, if you define the dedupe criteria as First Name and Passport Number, the system retrieves all records in which both the first name and passport number match the current application. On the contrary, if you choose OR as the logical operator, the system retrieves all the records in which either the First Name or Passport Number match the current application.
To set up the Dedupe screen
- In the LHS menu, click > Setup > Administration > System > Dedupe.
- The system displays the Dedupe screen. The details are grouped into two:
- Dedupe
- Criteria
- In the Dedupe section, you can Add, Edit and View the dedupe details maintained in the system.
A brief description of the fields is given below:
Field: |
Do this: |
Code |
Specify the code of the dedupe. |
Description |
Specify a description of the dedupe. |
Enabled |
Toggle the switch to enable the dedupe |
- Click ‘Save and Return’ to update the record or click ‘Return’ to cancel the update.
- In the Criteria section, you can Add, Edit and View the criteria details maintained in the system.
A brief description of the fields is given below:
Field: |
Do this: |
Sort |
Specify the sequence numbers. |
( |
Specify left bracket. |
Attribute |
Select the attribute from the drop-down list. |
Comparison Operator |
Select comparison operator from the drop-down list. |
) |
Specify right bracket. |
Logical Operator |
Select logical operator from the drop-down list. |
Enable |
Toggle the switch to enable the criteria. |
- Click ‘Save and Return’ to update the record or click ‘Return’ to cancel the update.
During the underwriting and funding processes, you can initiate the de-dupe check by clicking Dedupe Liabilities in Liabilities section of Applicant and Dedupe Applicant in the Duplicate Applicant section of Applicants Details respectively.
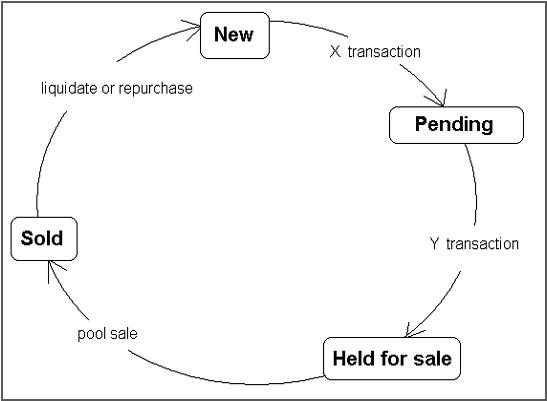
4.4 Securitization
With the Securitization Setup screen, the system provides a powerful tool that enables financial institutions to create account pools, to track and manage portfolios.
The Securitization Setup screen enables you to:
- Query account information
- Select accounts based on selection criteria
- Create a pool of selected accounts for sale
- Maintain the pools created and report transactions on these accounts
- Report on investors
- Repurchase pools or specific accounts from pools.
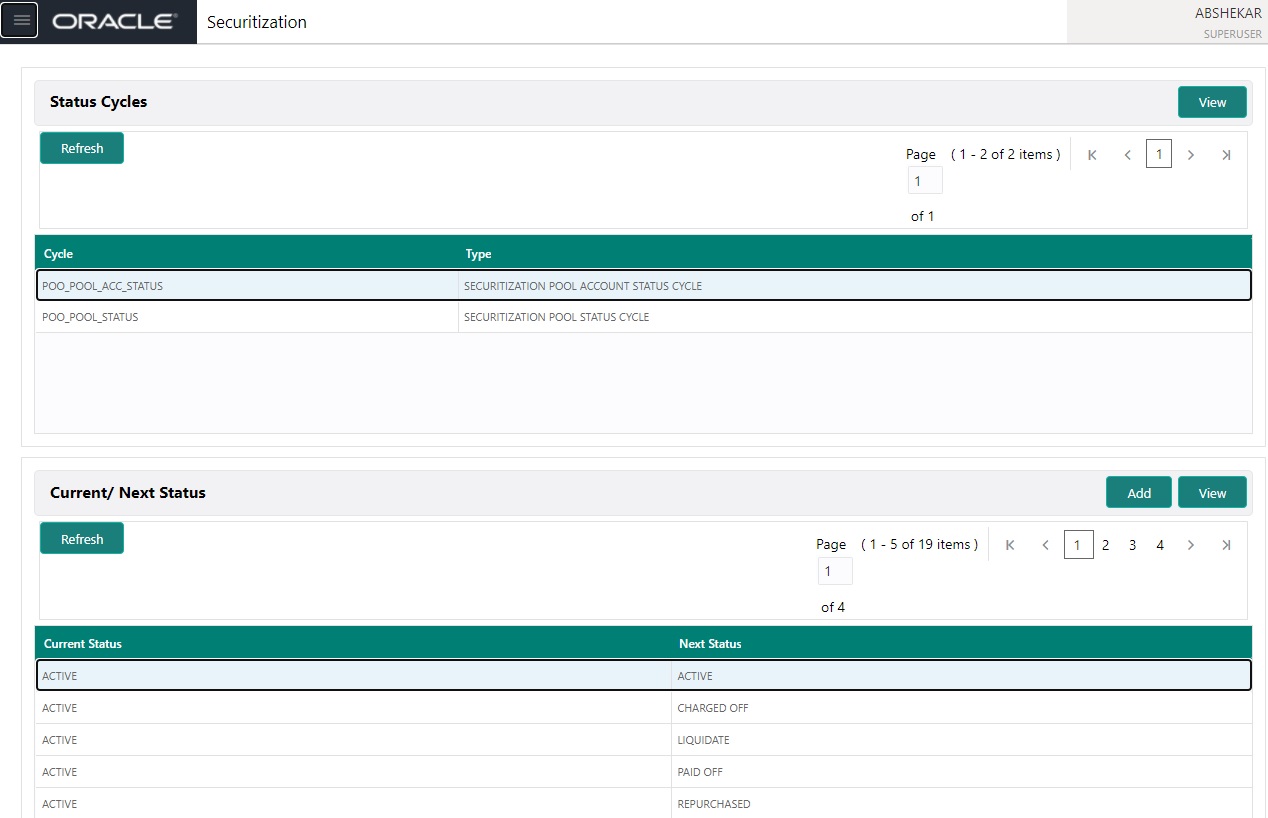
Securitization screen enables you to define the securitization cycles, as well as the responsibilities that can access the various statuses in each cycle. The following diagram demonstrates the status cycle:
To create a cycle
- In the LHS menu, click Setup > Administration > System > Securitization. The system displays the Status Cycle set up screen. The details are grouped into three:
- Status Cycle
- Current/Next Status
- Status Change Responsibilities
- In the Status Cycle section, you can view the following details.
A brief description of the fields is given below:
Field: |
Do this: |
Cycle |
View the cycle code. |
Type |
View the cycle type. |
- In the Current/Next Status section, you can Add and View the status maintained in the system.
A brief description of the fields is given below:
Field: |
Do this: |
Current Status |
Select the current status from the adjoining drop-down list. |
Next Status |
Select the next status from the adjoining drop-down list. |
- Click ‘Save and Return’ to update the record or click ‘Return’ to cancel the update.
- In the Status Change Responsibilities section, you can define the responsibilities that are authorized to change the code. You can Add, Edit and View the Status Change Responsibilities maintained in the system.
A brief description of the fields is given below:
Field: |
Do this: |
Responsibility |
Select the responsibility that will be capable of executing this transition, from the drop-down list. |
Allowed |
Select ‘Yes’ to allow change to the status responsibility and ‘No’ to disallow. |
- Click ‘Save and Return’ to update the record or click ‘Return’ to cancel the update.
4.5 Producer Cycles
The Producer setup screen enables you to define the dealer or producer status cycle. This tells the system which status a producer can cycle through. (This information is recorded in the Status field on the Producers section of the Producer setup screen.
For example,

The Producer Setup screen also defines the user responsibilities capable of changing the producer status.
Note
The system enables only producers/dealers with a status of ACTIVE to fund contracts.
To set up Producer Cycles
- In the LHS menu, click Setup > Administration > System > Producer Cycles.
- The system displays the Producer Cycles screen. The producer cycle screen contains three section:
- Cycle Definition
- Current/Next Status
- Status Change Responsibilities
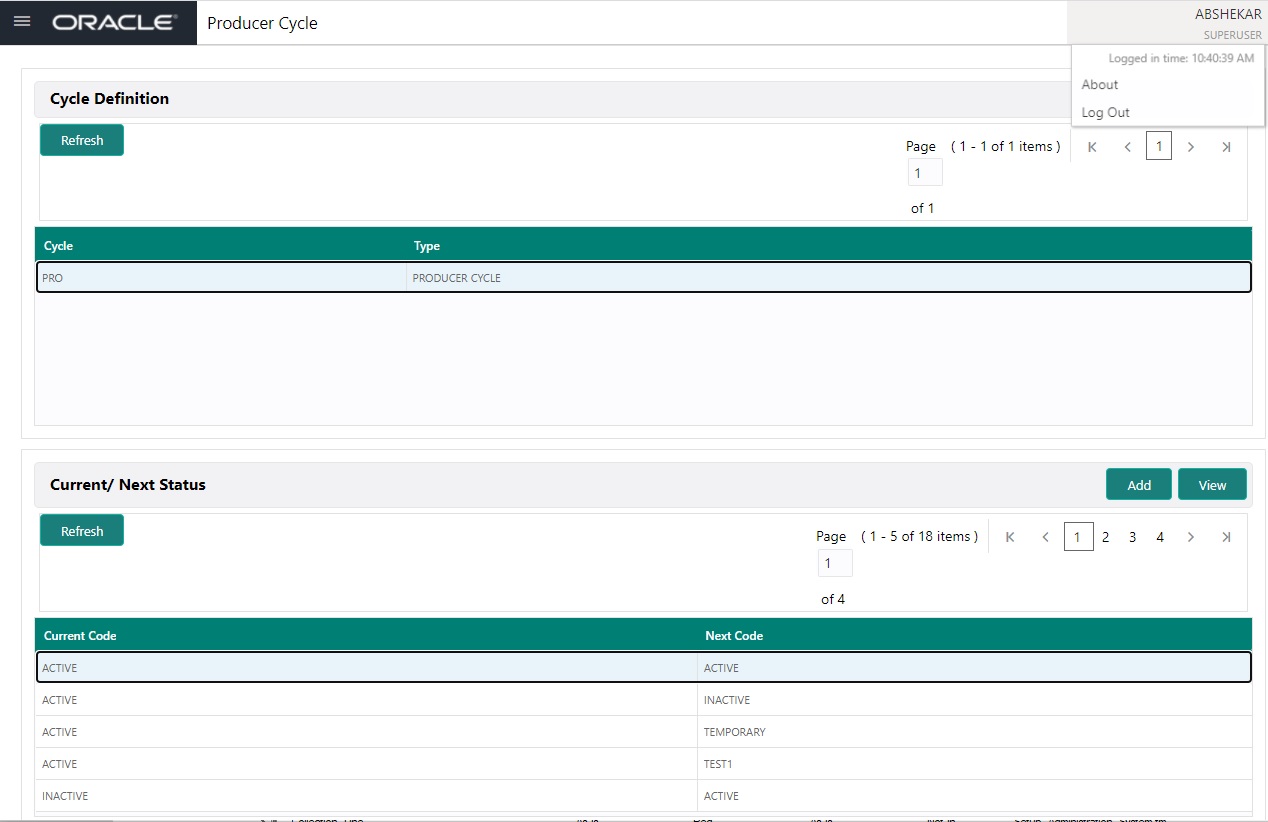
- In the Cycle Definitions section, you can view the following information.
Field:
View This:
Cycle
Displays the cycle name.
Type
Displays the cycle type.
- In the Cycle/Next Status section, you can Add and View the Cycle Status details maintained in the system.
A brief description of the fields is given below:
Field: |
Do this: |
Current Code |
Select the current code from which you need to perform transition, from the drop-down list. |
Next Code |
Select the code to which you need to perform transition, from the drop-down list. |
- Click ‘Save and Return’ to update the record or click ‘Return’ to cancel the update.
- In the Status Change Responsibilities section, you can Add, Edit and View the Status Change Responsibilities maintained in the system.
A brief description of the fields is given below:
Field: |
Do this: |
Responsibility Code |
Select the responsibility that will be capable of executing this transition, from the drop-down list. |
Allowed Indicator |
Toggle the switch to enable the responsibility to execute the transition. |
- Click ‘Save and Return’ to update the record or click ‘Return’ to cancel the update.
4.6 Collection Cycles
The Collection Cycles screen allows you to setup the collection workflow cycles.
To set up collection cycles
- In the LHS menu, click Setup > Administration > System > Collection Cycles. The system displays the Collection Cycles screen. The details are grouped into two:
- Status Cycle
- Current/Next Status
- Status Change Responsibilities
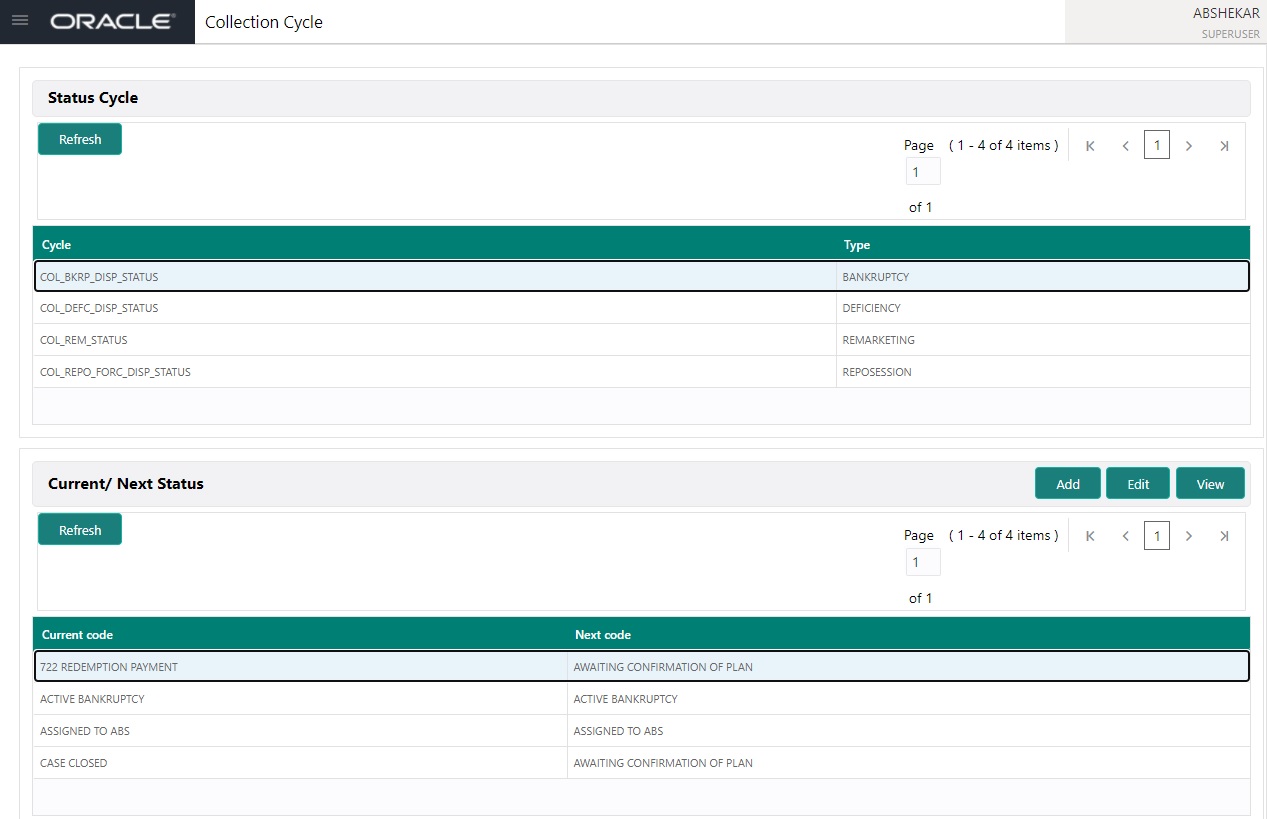
In the Collection Cycles section, you can view the following details:
Field |
Do this: |
Cycle |
The system displays the status cycle. |
Type |
The system displays the type of status cycle. |
- In the Current/Next Status section, you can Add, Edit and View Current/Next Status details maintained in the system.
A brief description of the fields is given below:
Field |
Do this: |
Current Code |
Select the current code from the drop-down list. |
Next Code |
Select the next code from the drop-down list. |
- Click ‘Save and Return’ to update the record or click ‘Return’ to cancel the update.
- In the Status Change Responsibilities section, you can Add, Edit, and View the Status Change Responsibilities maintained in the system.
A brief description of the fields is given below:
Field |
Do this: |
Responsibility |
Select the responsibility from the drop-down list. |
Allowed Ind |
Toggle the switch to allow a record. |
- Click ‘Save and Return’ to update the record or click ‘Return’ to cancel the update.
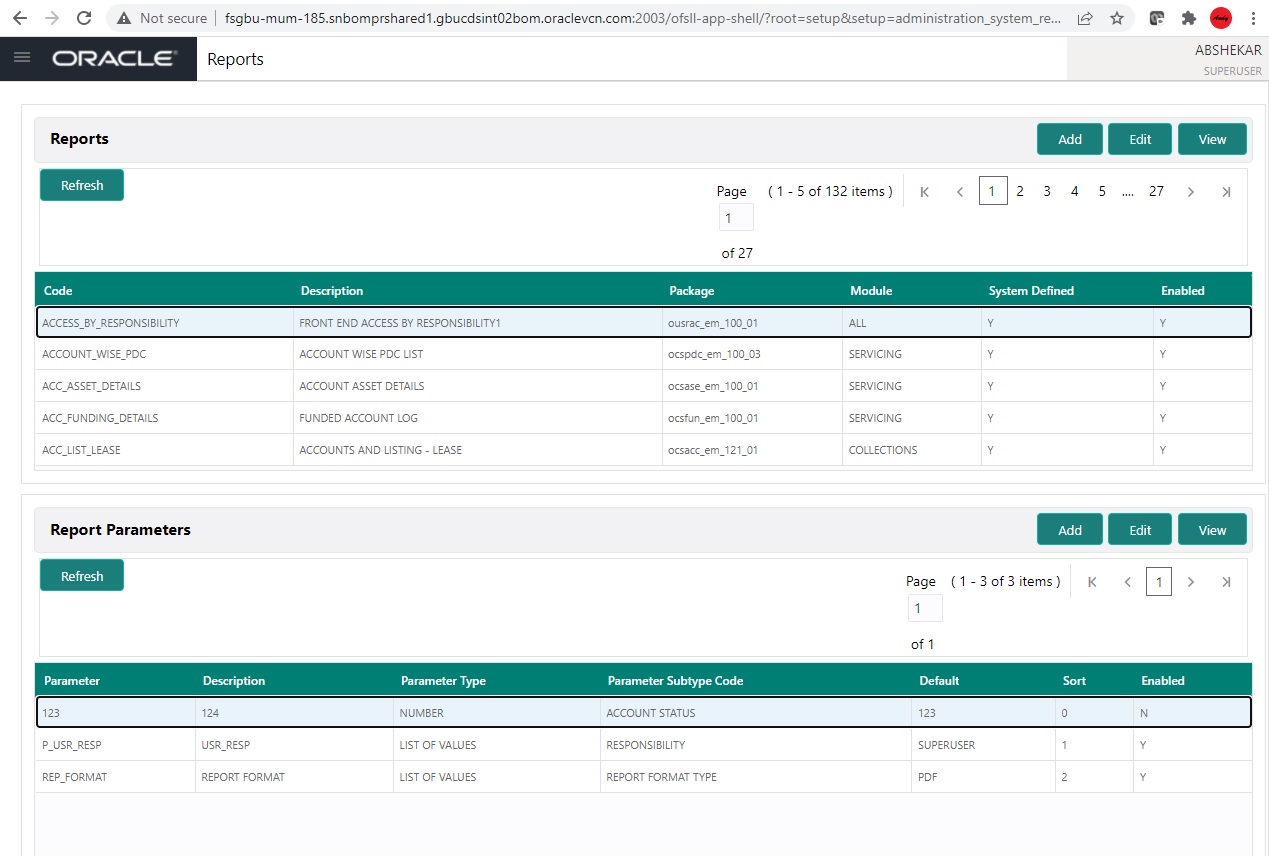
4.7 Reports
The Reports screen allows you to setup reports definition along with parameters to generate those reports in the system.
To set up the Reports
- In the LHS menu, click Setup > Administration > System > Reports link. The system displays the Report screen. The details are grouped into two:
- Reports
- Report Parameters
- In the Reports section, you can Add, Edit and View the Report definitions maintained in the system.
A brief description of the fields is given below:
Field |
Do this: |
Code |
Specify the code of the report. |
Description |
Specify the description of the report. |
Package |
Specify the package. |
Module |
Select the code of the report from the drop-down list. |
System Defined Yes/No |
Select ‘Yes’, if you wish to maintain the Report as system defined and ‘No’, if you do not want to maintain it as system defined. System defined entries cannot be modified. If the entry is not system defined, then it can be modified. |
Enabled |
Toggle the switch to enable the report definition. |
- Click ‘Save and Return’ to update the record or click ‘Return’ to cancel the update.
- In the Report Parameters section, you can Add, Edit and View the report parameters.
A brief description of the fields is given below:
Field |
Do this: |
Parameter |
Specify the parameter code of the report. |
Description |
Specify the description of the parameter. |
Parameter Type |
Select the parameter type of the report from the drop-down list. |
Parameter Sub Type |
Select the parameter sub type of the report from the drop-down list. |
Default |
Specify the default value for the report parameter (value to initially populate, or used if no value is supplied) (optional). |
Sort |
Specify the sort order for the lookup code. This determines the order these report parameters are displayed or processed. |
Enabled |
Toggle the switch to enable the report definition. |
- Click ‘Save and Return’ to update the record or click ‘Return’ to cancel the update.
4.8 Data Masking
Data masking screen in Oracle Financial Services Lending and Leasing facilitates to mask Personally Identifiable Information (PII) displayed in the application to safeguard the sensitive and confidential information while protecting them from offenders.
As part of the product installation, standard set of identified fields (seed data) which is likely to contain either organization / customer PI information are provided for data masking in disabled status. Based on need, the required fields can be enabled and masked for specific user responsibility in the Data Masking screen. Also if there are additional PII fields identified for masking, the same can be pooled into the system using input file processing method and masked using Data Masking screen.
The data masking process involves the following steps:
- Identify and enable field(s) (seed data) to be masked
- Select user responsibility for whom the data has to be masked
- Execute batch job to create data redaction policy
- Compile the data redaction policy
- (Optional) Process user identified PII data for masking
The following table indicates the standard pre-defined fields (seed data) identified in respective screens/tabs which can be readily masked using the Data Masking screen.
Tab Name |
Field Names |
Origination |
|
Applicant |
First Name, MI, Last Name, Family Name, Birth Dt, Nationality, National ID, Visa #, Passport #, License #, Marital status, Mother's maiden name, Passport number, Gender, Language, Dependants, Ethnicity, Disability, Email, Race, and Education. |
Applicant > FATCA |
Birth Place, Birth Country, and Permanent US Resident Status. |
Applicant > Power of Attorney |
Holder Name, Address, Country, Nationality, and Telephone Number. |
Applicant |
Active Military Duty, Military Effective Date, Duty Order Number, and Active Military duty Release date. |
Addresses |
Country, Postal Address Type, Address #, Street Pre, Street Name, Street Type, Street Post, Apt #, Address 1, Address 2, Address 3, Zip, Zip Extn, City, State, and Phone. |
Telecoms |
Phone and Extn |
Employments |
Employer, Country, Address #, Address 1, Address 2, Zip, Zip Extn, City, State, Phone, Extn, Income Amt - Stated, Income Amt - Actual, Salary - Stated, Salary - Actual, and Title. |
Applicant > Financials |
Type, Source, Account #, and Currency. |
Existing Accounts |
Account # and Title. |
Servicing |
|
Customer |
Name, Birth Dt, Nationality, National ID, Visa #, Passport #, License #, Marital status, Mother's maiden name, Passport #, Language, Disability, Email, and Education. |
Customer > FATCA |
Birth Place, Birth Country, and Permanent US Resident Status. |
Customer > Power of Attorney |
Holder Name, Address, Country, Nationality, and Telephone Number. |
Customer |
Active Military Duty, Military Effective Date, Duty Order Number, and Active Military duty Release date. |
Addresses |
Country, Postal Address Type, Address #, Street Pre, Street Name, Street Type, Street Post, Apt #, Address 1, Address 2, Address 3, Zip, Zip Extn, City, State, Phone, and Address. |
Employments |
Employer, Country, Address #, Address 1, Address 2, Zip, Zip Extn, City, State, Phone, Extn, and Title. |
Assets tab |
|
Assets |
Identification #, Lien Status, Lien Event Date, Second Lien Holder, Comments, Lien Release Entity, and Entity Name. |
Masking Format
Oracle Financial Services Lending and Leasing supports only complete masking (not partial) of both factory shipped and user identified PII data. On masking, the masked data is presented in same structural format to facilitate internal validations. The below table indicates the default values used for masking fields based on data type:
Data Type |
Masking Value |
NUMBER |
9 |
VARCHAR |
X |
DATE |
31/12/9999 |
Phone number |
For UI represented format - 000-000-0009 (Masked with 0’s and last digit as 9) and for generic, masked as 9999999999 |
xxxxx.xxx@<domain>.com |
Note
It is recommended to avoid modifying masked data for user(s) with masked responsibility. However, while editing masked data (if permitted) requires to input full data replacing the masked characters. For example, editing a masked SSN (xxx.xx.xxxx) requires to specify all nine digits of SSN and not just the last four digits.
4.8.1 Setup Data Masking
- In the LHS menu, click Setup > Administration > System > Data Masking.
- Define the parameters available in ‘Data Masking Details’ and ‘User Access Details’ tabs.
4.8.1.1 Data Masking Details
On clicking Data Masking link, the Data Masking Details tab is displayed by default and allows you to enable the required fields for masking.
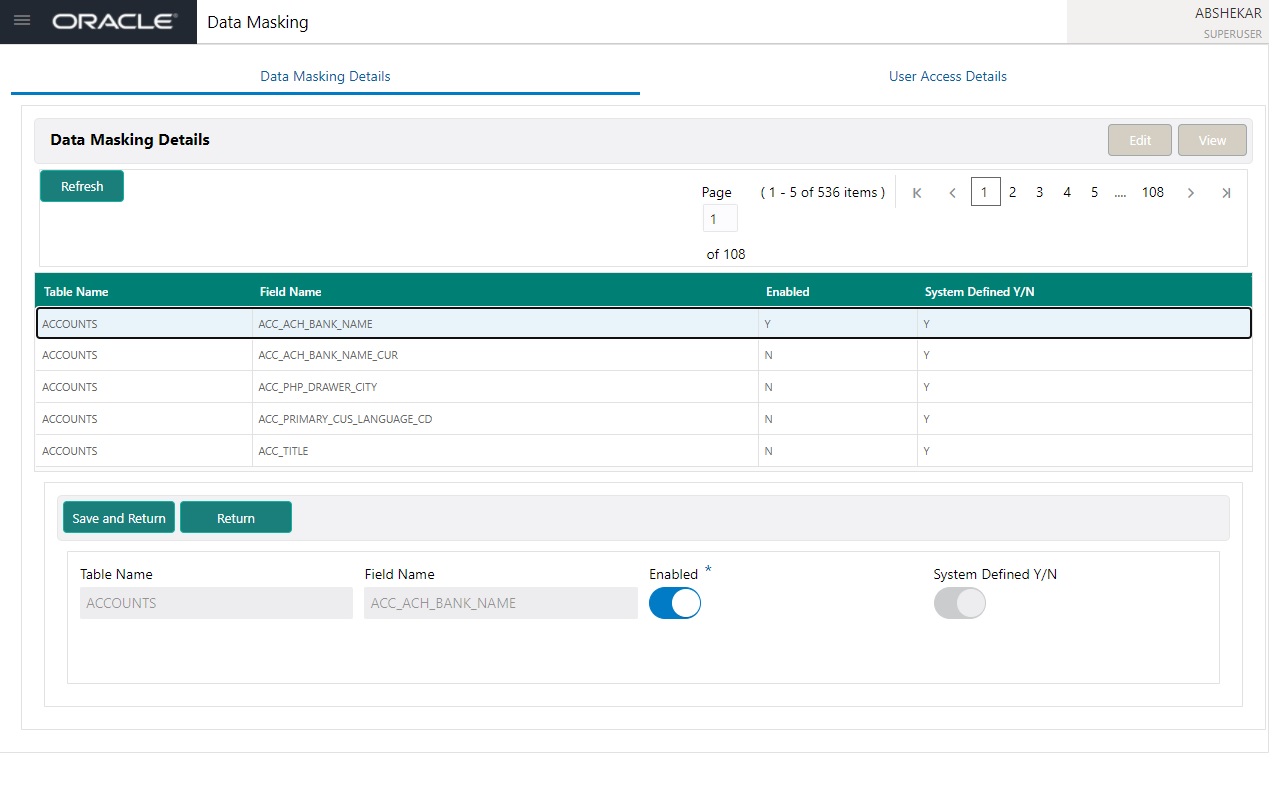
- In the Data Masking Details section, you can Edit or View the details.
A brief description of the fields are given below:
Field |
Do this: |
Table Name |
View the table name which contains the selected field details. |
Field Name |
View the selected field name. |
Enabled |
Toggle the switch to enable masking of the selected field. |
System Defined |
View the type of seed data maintained in the system. ‘Y’ indicates factory shipped seed data and ‘N’ indicates user defined seed data. |
- Click ‘Save and Return’ to update the record or click ‘Return’ to cancel the update.
4.8.1.2 User Access Details
The User Access Details tab facilitates to define the user responsibility to whom the PII data should be masked. By default, all the selected PII data in Data Masking Details tab appears as masked for one or more user(s) selected in this tab.
- In the LHS menu, click Setup > Administration > System > Data Masking > User Access Details.
- In the User Access Details section, you can Add, Edit and View the user access details.
A brief description of the fields are given below:
Field |
Do this: |
Responsibility |
Select the user responsibility from the drop-down list. |
Masked |
Toggle the switch to enable masking for the selected user. Note: Defining a user and not selecting the masked check box will only create the record and masking rules are not applied. |
- Click ‘Save and Return’ to update the record or click ‘Return’ to cancel the update.