49 Add New SOAM Profile on Existing VM

Note:

The procedures in this appendix can be run only after the SDS has been upgraded to release 8.0/8.1 and the upgrade has been accepted.

Note:

Updating the SOAM VM profile is an independent procedure from the SDS upgrade and should be scheduled in a separate maintenance window.

This appendix updates the SOAM VM profile to support 1 billion subscribers. This appendix applies only to systems that have been upgraded to release 8.0/8.1. The upgrade must be accepted before initiating these procedures. The SOAM VMs are updated with the new profile using the following sequence:

  1. Add the SDS 8.6 ISO to the PMAC repository
  2. Remove the SOAM from the SOAM server group
  3. Delete the existing SOAM VM and recreate the SOAM VM with the new profile
  4. Add the new SOAM VM to the SOAM server group

To access the 1 billion subscriber VM profile, the SDS 8.6 ISO must be available in the PMAC software repository. Following procedure copies the SDS 8.6 ISO from the SDS to the PMAC and adds the image to the repository.

Add SDS Software Images to PMAC Server

  1. Log in to the active SDS VIP (CLI). From the command prompt, log into the server as the admusr.
    login: admusr
             Using keyboard-interactive authentication.
             Password: <admusr_password>
  2. In the Active SDS VIP (CLI), change directories. Navigate to the /var/TKLC/upgrade/ directory.
    $ cd /var/TKLC/upgrade/
  3. In the Active SDS VIP (CLI), verify the ISO file. Verify if the SDS ISO file is present.
    $ ls
    SDS-8.6.0.0.0_90.11.0.iso
  4. In the Active SDS VIP (CLI), copy the file. Perform scp to the SDS ISO file to the PMAC server.
    $ scp –p  SDS-8.6.0.0.0_90.11.0.iso
            admusr@<PMAC_Mgmt_IP_address>:/var/TKLC/upgrade/
            Password: <admusr_password>
            SDS-8.6.0.0.0_90.11.0.iso      100% 853MB  53.3MB/s 
            00:16
  5. In the PMAC Server (GUI), log into the Platform Management and Configuration application. Open an approved Web browser (Internet Explorer 8.0, 9.0, or 10.0) and connect to the management IP address assigned to the PMAC server associated with the SDS SOAM NE. If a certificate error is received, click on the Continue to this website (not recommended) link.

    Figure 49-1 Website Security


    Website Security

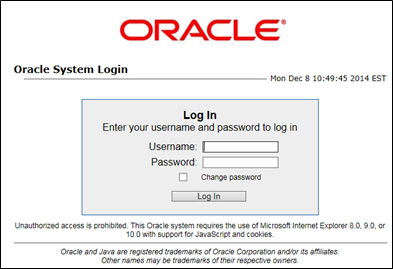
  6. Log in to the PMAC Server using the default user name and password.

    Figure 49-2 PMAC Server Login


    PMAC Server Login

  7. In the PMAC Server, add an image. Expand Software click Manage Software Images. Click Add Image.

    Figure 49-3 Add Image


    Add Image

  8. In the PMAC Server, add an image. Select a Path from the list. Add a Description. Click Add New Image.

    Figure 49-4 Add a new Image


    Add a new Image

  9. Click OK to confirm.

    Figure 49-5 OK


    OK

  10. The following Info message displays to show the task.

    Figure 49-6 Manage Software Images


    Manage Software Images

  11. In the PMAC Server, monitor the progress using Tasks tab in the banner.

    Figure 49-7 Tasks


    Tasks

  12. The new software image displays in the list when complete.

    Figure 49-8 Software Image


    Software Image

  13. To log out from the PMAC Server, click Logout.

    Figure 49-9 Log out


    Log out

  14. Execute SDS Health Check procedures as specified in Health Check Procedures