.
.Understand the following terms before you begin performing User Management.
· Users: Customers create users in IDCS and can do the following:
§ Map them to existing groups
§ Create new groups to map them
After users are created, they are synced from IDCS to PFTCS.
· Groups: Groups are seeded (available out-of-the-box) by PFTCS. Customers can also create new groups in IDCS. After groups are created, they are synced from IDCS to PFTCS. Groups are mapped to roles using PFTCS by the same user that was created using IDCS.
· Roles: Roles are seeded by PFTCS. Customers can also create new roles using PFTCS and assign existing functions to these new roles.
· Functions: Functions are seeded by PFTCS. Customers cannot create new functions; however, they can only use the existing functions.
The Users Summary Page shows the list of available users. You can view the details of a user and map the user to one or more User Groups.
Select the Username in the Users Summary Page and then select Details to view the User ID and Username of the selected User.
To search for a specific User, type the first few letters
of the Username that you want to search in the Search
box and click Search. .
The search result displays the names that consist of your search string in the list of available users.
At the bottom of the page, you can enter the number of entries that are available on a single page in the Records box. You can increase or decrease the number of entries that are displayed using the up and down arrows. To navigate between pages in the View bar, use the following buttons:
· Use the
First Page  Button to view the entries on
the first page.
Button to view the entries on
the first page.
· Use the
Previous Page  Button to view the entries
on the previous page.
Button to view the entries
on the previous page.
· Use the
Next Page Button to view the entries on
the next page.
Button to view the entries on
the next page.
· Use the
Last Page  Button to view the entries on
the last page.
Button to view the entries on
the last page.
You can also navigate to the desired page. To do this, enter the page number in the View Bar Control and press Enter.
After you sign in to your IDCS Console, your first task is to create additional user accounts. You should assign specific User Groups to the User Accounts that you are creating. There are seeded User Groups available with the respective services, the users must be mapped to one or more of the User Groups, depending on the role that they perform.
For example, you can create a user for each member of your team. Each team member can then sign into the account with their credentials. You can also assign each user to specific User Groups and apply specific Security Policies or Roles to each Group.
You can create the users and map the users to groups for your service. After creating the users, they will receive a Welcome email. The users must activate their accounts and enter a new Password to access the services.
To create users in IDCS Console, perform the following steps:
1. In the IDCS
Console, click  from
the Users tile, to add the Application Users.
from
the Users tile, to add the Application Users.
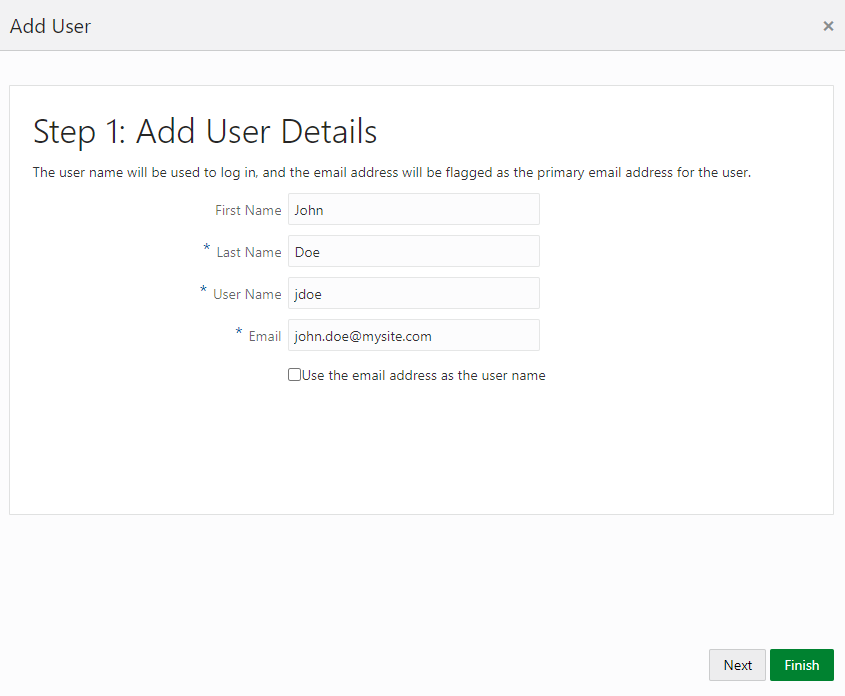
2. In the Add User page, enter the following information:
§ The First Name and Last Name of the user.
§ The user's Email Address and the User Name.
NOTE
1. Do not enter your email address as the Username and do not select the Use the email address as the username check box.
2. Enter a maximum of 20 characters.
3. Enter Alphanumeric Characters.
4. Enter only Hyphen (-) and Underscore (_) Special Characters.
3. Click Next.
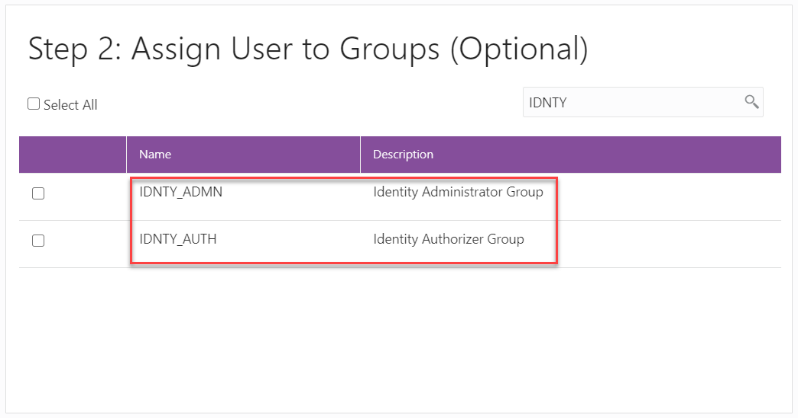
4. In the Assign User to Groups (Optional) window, select the User Groups according to your user-specific groups or access.
ATTENTION:
After a user signs into Profitability Management Cloud Service (PFTCS), the User to User-Group Mapping created in the IDCS Console will onboard into the Master and Mapping Tables. Later, if you deselect (remove) a User from a Group in the Assign User to Groups window after provisioning, ensure that you also unmap the User from the corresponding User- Group in the Admin Console. This is a mandatory step to complete the Unmapping Process.
For more information, see Unmap User from Groups.
5. To create an Identity Administrator or Authorizer User, assign the users to the following:
§ IDNTY_ADMIN: You can use this option to create an Administrator User.
§ IDNTY_AUTH: You can use this option to create an Authorizer User.
6. Click Finish.
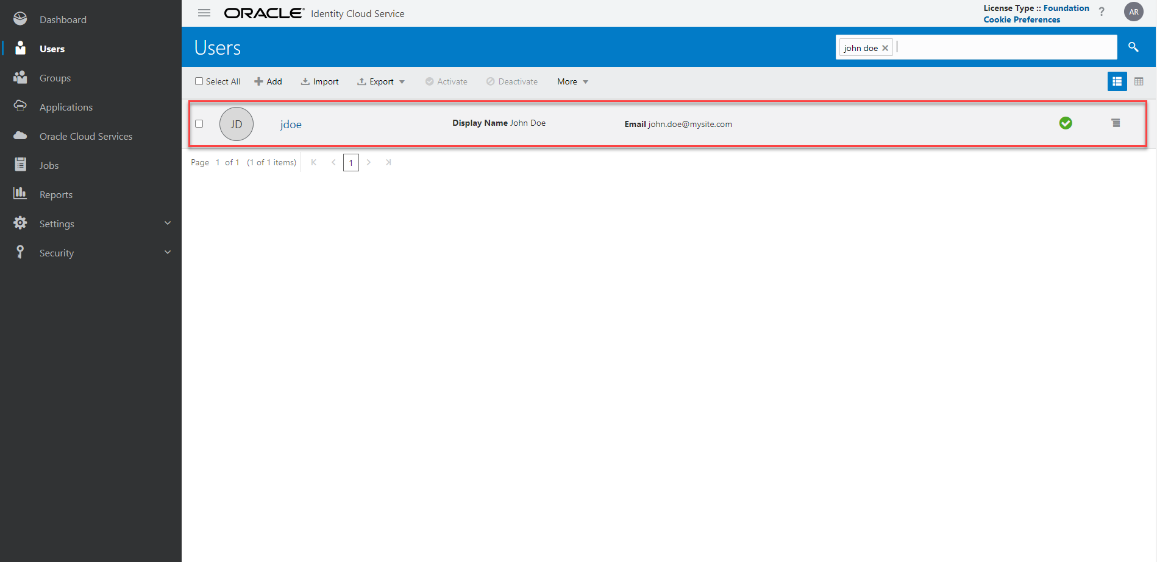
After the successful creation of the user, the added users receive an email to activate their account. The user must activate the account to use the service.
7. From the Users window, you can access the newly created user and edit the user details.
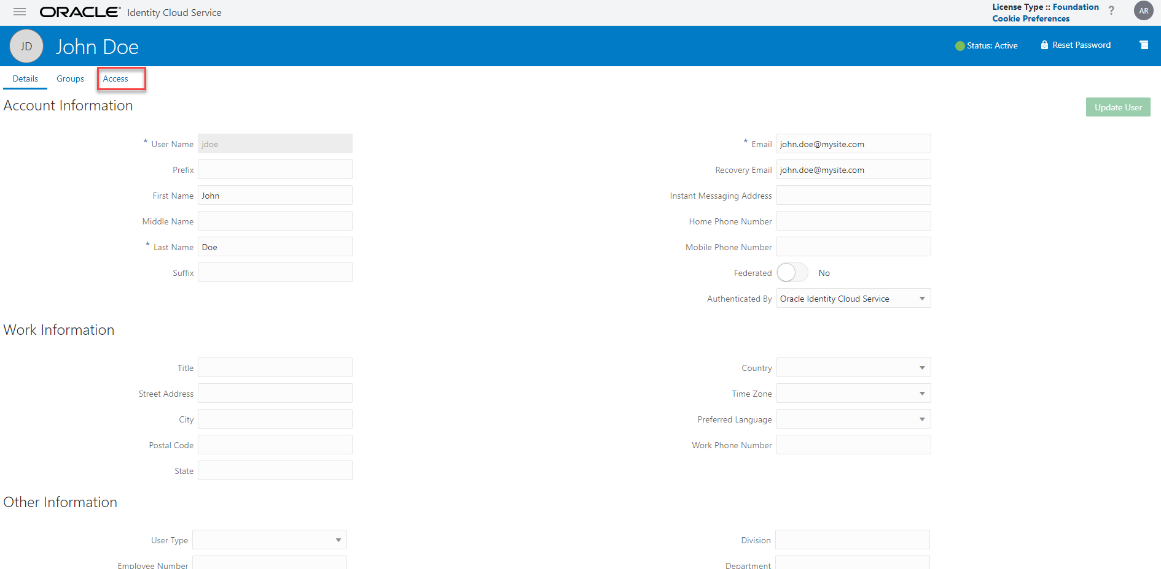
8. Select the User that you want to edit the details. In the User Details Window, select the Access tab.
9. Click Assign.
10. In the Assign Application Window, select the appropriate Application Instance to grant access to your user as mentioned below.
For example:
§ PFTCS etjygp-prd (For Production)
§ PFTCS etjygp-nprd (For Non-Production)
NOTE
Based on this mapping the users will be able to access the appropriate instance.
11. Click OK.
The users are assigned based on the mapping.
For Bulk User Creation, you can batch import User Accounts using a comma-separated values (.CSV) file.
For more information about how to import application users, see Import Application Users.
After creating users and assigning them to groups, the users that you have added will receive a Welcome email to activate their account.
ATTENTION:
It is important that you configure the session duration for users. The Session Duration is the duration in minutes for which the User’s Session is valid. The user's session will time out after the Session Duration has been reached regardless of actual user activity or inactivity.
In the Session Duration field in the Oracle Identity Cloud Service Console, enter a duration in minutes.
It is recommended to have the Session Duration adequately long so that it does not impact user activity.
For more information, see Configuring Session Timeout.
If you are an Administrator, you can batch import User Accounts using a Comma-separated Values (.CSV) file.
NOTE
Before you can import user accounts, you must create a CSV file that is properly formatted for the import process.
To import user accounts, perform the following steps:
1. In the IDCS Console, expand the Navigation Drawer, and then click Users.
2. Click Import.
3. In the Import Users dialog box, click Browse to locate and select the .CSV file that contains the user accounts to import.
NOTE
Click Download sample file in the dialog box to download a sample file and carry out your accounts upload.
4. Verify that the path and name of the .CSV file that you selected appear in the Select a file to import field.
5. Click Import.
NOTE
If a user account is missing a required value, such as the user's first name, last name, or username, then Oracle Identity Cloud Service cannot import it. If Oracle Identity Cloud Service cannot import a User Account, then it evaluates the next account in the CSV file.
After Oracle Identity Cloud Service evaluates all User Accounts, the Jobs page displays the accounts you have imported. You can also get information related to the successful imports and imports that did not happen due to system errors.