1 Maintenance Module
The Maintenance module allows you to record all maintenance work required on board the ship, in cabins or public locations, and schedule preventive maintenance. The function within the module includes creating a work order, report printing, and viewing past maintenance work.
Work Orders
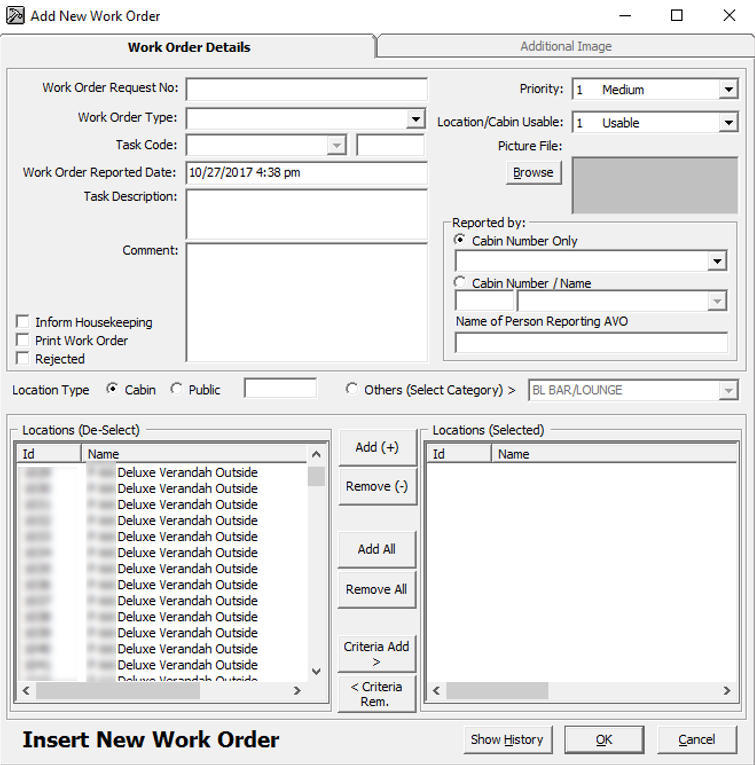
The Work Orders can be added as a single order or in a batch using the Criteria Add function. Entries of the work order are not limited to the Maintenance module. This function is also available in Management module, Front Desk, and in Add Work Order.
Figure 1-1 Add New Work Order Form
Adding a Single Work Order
- From the Work Orders menu, select Add Work Orders.
- In the Add New Work Order form, enter the external document number in the Work Order Request No. field, if any.
- Select the Work Order Type and Task Code from the drop-down list.
- Enter the Task Description and Comment in the respective fields.
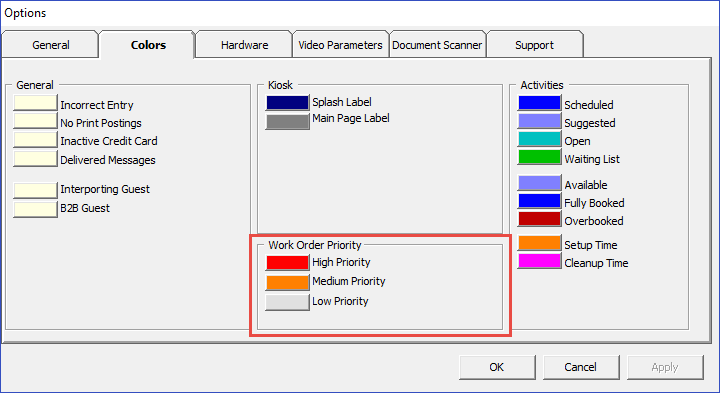
- Select the Priority and Location/Cabin Usable Status from the drop-down list and attach a picture file, if any. You can select a different Priority and Location Usable Status other than the predefined status when adding or editing a work order.
- In the Reported By section, select the Cabin number and enter the Name of Person Reporting AVO.
- For the Location Type, select Cabin, Public or Others (Select Category), and then navigate to the Location section and select the exact location(s) from the grid.
- Click Add to add the location to Location (Selected) section.
- To deselect the location from the Locations (Selected), select the item to remove and then click Remove(-) or Remove All.
- Click OK to save the work order.
Adding Work Orders by Batch
-
Repeat steps 1 to 6 from the steps above.
-
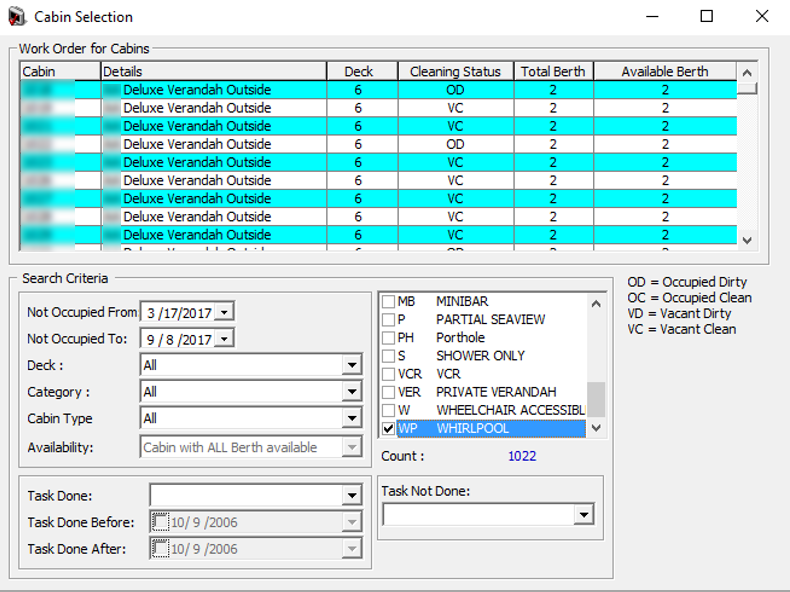
Click the Criteria Add> button located between Locations (De-Select) and Locations (Selected) to start the Cabin Selection window.
-
In the Cabin Selection window, navigate to the Search Criteria section, select the criteria from the drop-down list, select the required filter, and then click Refresh to update the information in the grid.
Figure 1-2 Cabin Selection Criteria
-
Click OK to add the selection to Locations (Selected).
-
To deselect the location from Locations (Selected), select the item to remove and then click Remove(-) or Remove All.
-
Click OK to complete the work order.
Work Order Overview
Figure 1-3 Work Order Overview
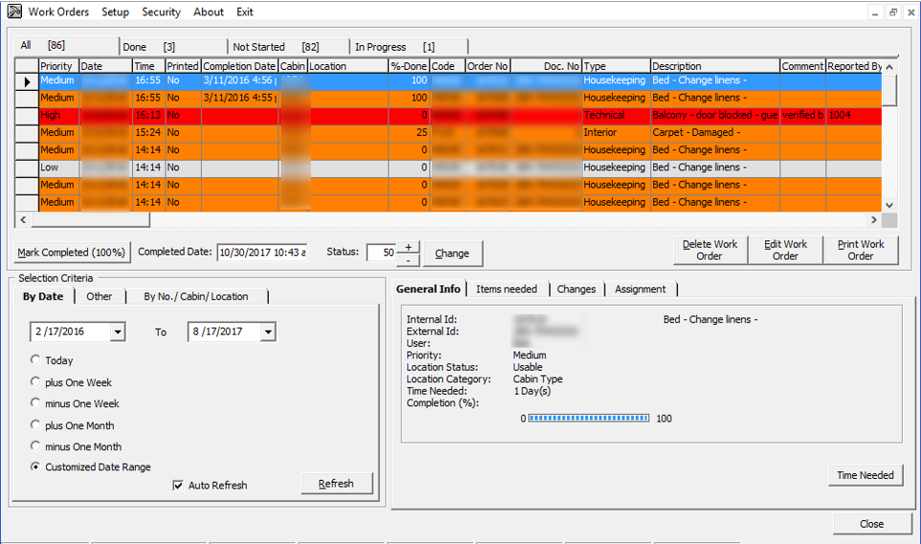
The Work Order Overview window is comprised of: the following:
-
A grid view of all work orders by status and its corresponding count.
-
Functions to Delete, Edit and Print Work Order.
-
A display view by date, others and by No/Cabin/Location.
-
Detailed information on the work order — General info, Items needed, Changes and Work Order Assignment.
Searching for Work Order
-
At the Work Order Overview window, Selection Criteria section, select the filter from the available tab.
-
Click Refresh to refresh the information on the grid.
-
You can sort the information shown on the Overview grid by clicking the column header and support columns, which are: Priority, Date, Time, Printed, Completion Date, Cabin Location, %-Done, Code, Order no, Doc. No, Type and Description.
-
Select the Work Order from the grid and click Edit Work Order
. -
In the Update Work Order form, edit the necessary information and click OK to save the changes.
Rejecting a Work Order
-
Select Work Order from the grid and click Edit Work Order.
-
Select the Rejected check box for the Comment field, and click OK to save. The system places a check mark in the Rejected column on the Overview window.
-
Select the Work Order from the grid and click Delete Work Order.
-
At the confirmation prompt, click Yes to confirm.
-
Enter the reason to delete the work order, and click OK to proceed.
-
Select the work order from the grid and click Print Work Order.
-
At the Print Job confirmation prompt, click OK to print.
Assigning/Editing/Deleting an Assignment
-
Select the Work Order from the grid and navigate to the Assignment tab window.
-
In the Assignment tab, click Assign Work Order.
-
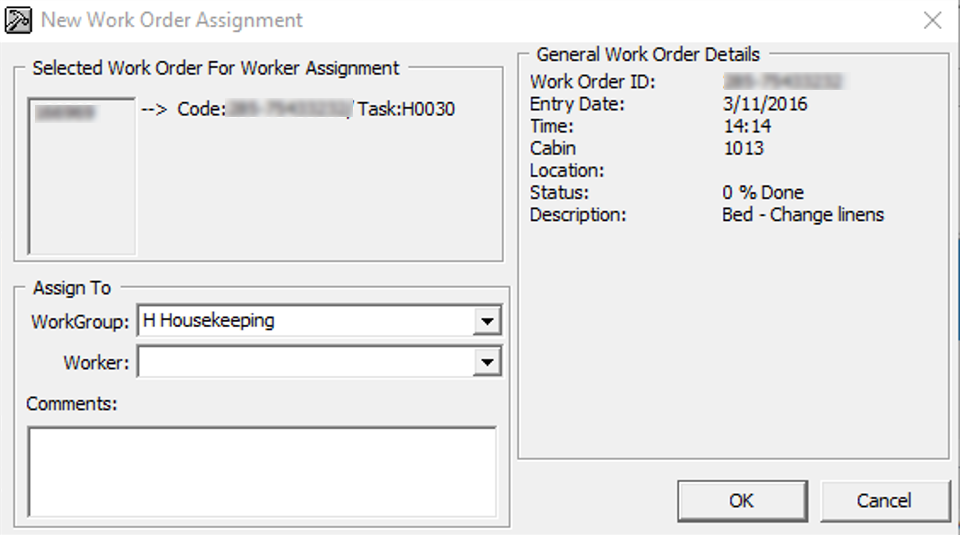
On the New Work Order Assignment form, Assign To section, select the Work Group and/or Worker, from the drop-down list and click OK to confirm.
Figure 1-4 New Work Order Assignment
-
The status of the assigned work order will change and appear under the In Progress tab. The Date, Time, Assigned By and Worker are visible in the Assignment tab of the work order.
-
To edit an assignment, select the work order from the Assignment tab, click Edit Assignment, and click OK to save the changes.
-
To delete an assignment, select the work order from the Assignment tab, and click Delete Assignment.
Adding/Editing/Deleting Items Needed In a Work Order
Figure 1-5 Items Needed

-
Select the work order from the Overview tab.
-
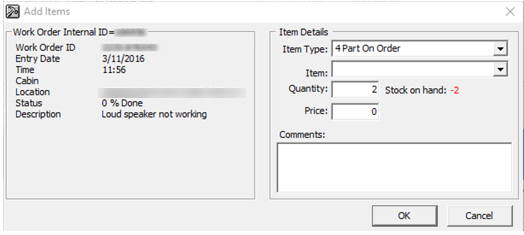
In the Items needed tab, click Add items.
-
Select the Item Type and Item from the drop-down list, and enter the required quantity and price, if any.
Figure 1-6 Add Items
-
Click OK to save.
-
To edit the items needed, select the item from the grid, click Edit Items, and click OK to save the changes.
-
To delete the items needed, select the item from the grid, and click Delete Items.
General Information of the Work Order
In the General Info tab of the selected work order displays information such as Internal ID, User, Priority Location, Time Needed and Completion %.
Figure 1-7 General Info Tab
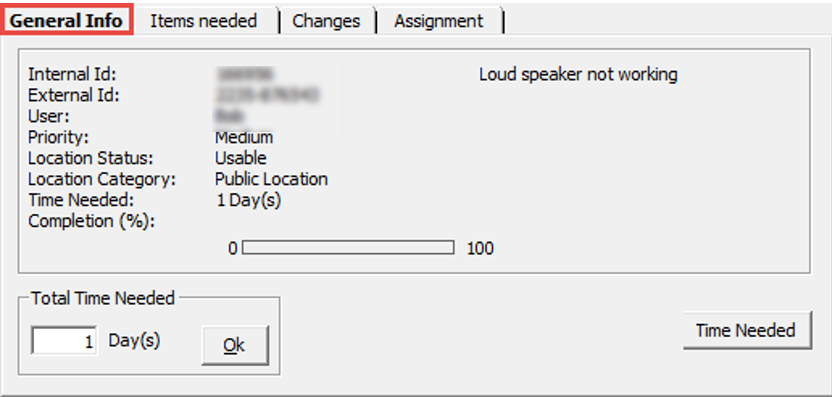
The total time needed is adjustable by clicking the Time Needed button. Update the day(s) field and click OK to save.
Updating Work Order Progress Status
Figure 1-8 Updating Progress / Completion Status
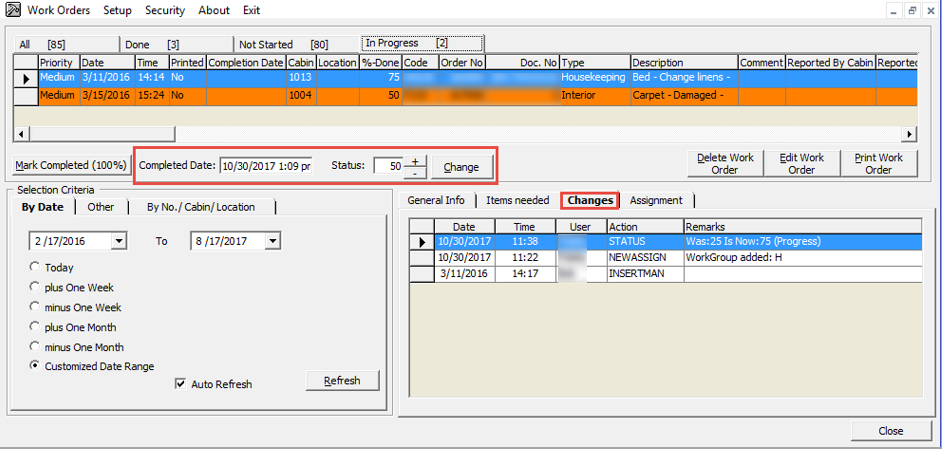
- From the Progress tab, select the work order to update.
- In the middle section of the Overview window, enter the completed date, then set the Status using the (+/-) symbols and click Change or click the Mark Completed (100%). A work order that is marked as complete is listed in the Done tab.
- The percentage of completion is logged in Changes tab.
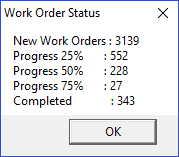
Work Order Status
Figure 1-9 Work Order Status Count
View Location History
Figure 1-10 View Location History Window
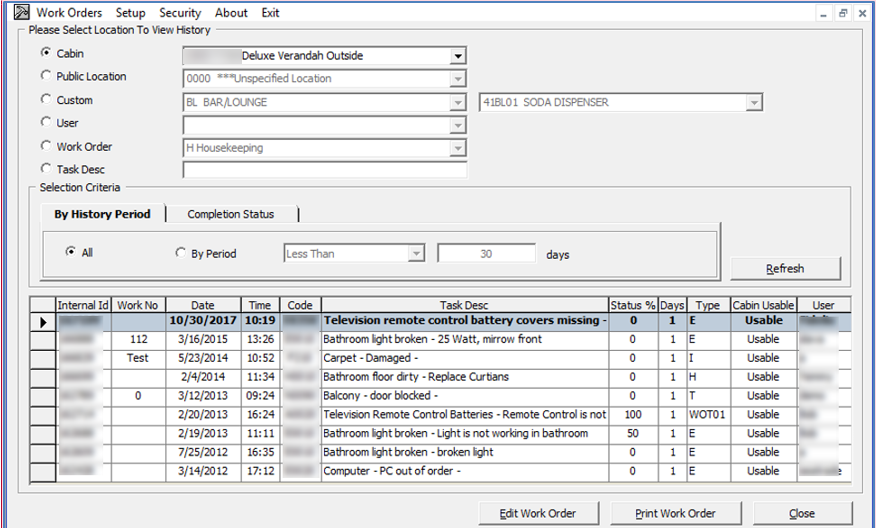
- In the View Location History window, select one of the options from the drop-down list.
- Make your selections from the Selection Criteria section and click Refresh to populate the information on the window.
- Select the work order and click Edit Work Order to open the Update Work Order window. This function does not work if the selected work order is marked as complete.
Reports
- To view the available reports, click Reports.
- To print a report, select the report and click Print.
- To view a report, select the report and click the Preview tab.
- To export a report, select the report and click the Export.
Task Printers
Figure 1-11 Task Printer Assignment
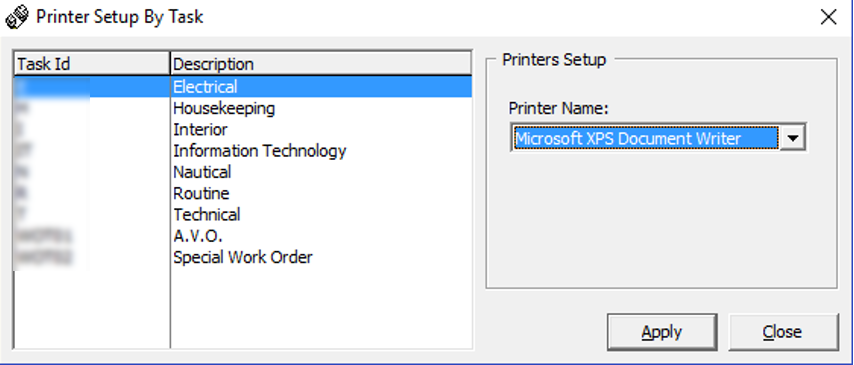
- From the Main window, select Setup and then select Task Printer.
- Select the Task ID and then select the printer name from the drop-down list.
- Click Apply to save.
