19 Check-In

The Check-In page is the last step in the check-in process if there are no traveling companions linked to the guest. The page displays the details of the guest you are checking in and provides an option to print or renew a board card before completing the check-in.

After successfully checking- in the guest, and if the parameter is set to allow manual selection of the person’s onboard or shore status, a confirmation box prompt you to select the guest as either Onboard or Ashore.

Figure 19-1 Check In Confirmation Page
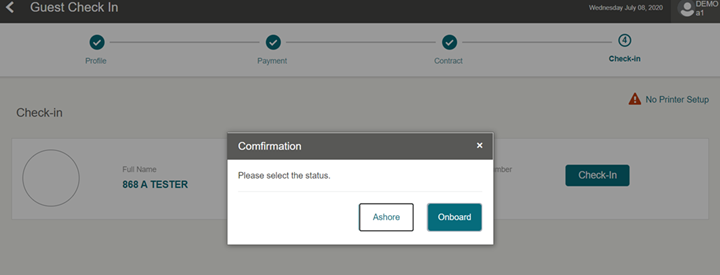

This figure shows the Mobile Check-In Confirmation page.

Printing Board Card

To print a board card and complete the check-in:
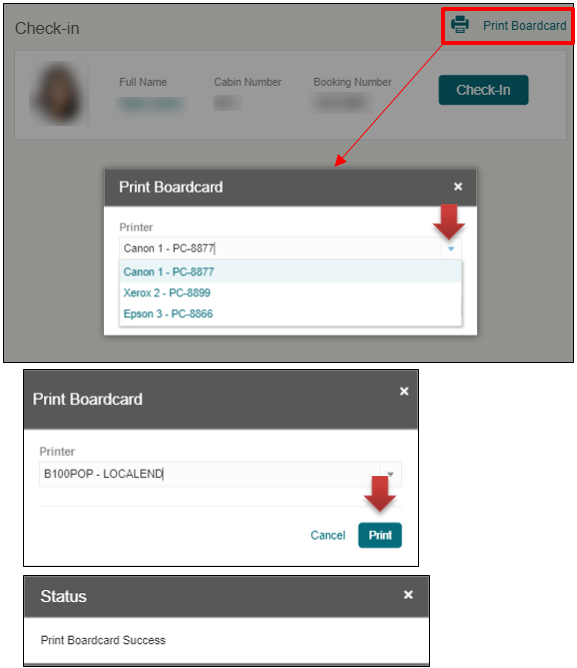
  1. Click the Print Board card button. The No Printer Setup is shown if you have not set up a printer.
  2. On the Print Board card page, select the printer from the list of values.
  3. Click the Print button.
  4. Once the print job is successful, click the X to close the alert message box.

    Figure 19-2 Print Board Card Function


    This figure shows the Print Board Card function.
  5. Click the Check-In button to complete the check-in and update the reservation status accordingly.
  6. When the status is changed to Checked-In, click the Complete button. Information on all pages will be re-validated. If the validation passes, the application returns you to the Search Guest page or Travel With page, allowing you to check-in the travel companion(s).

    Note:

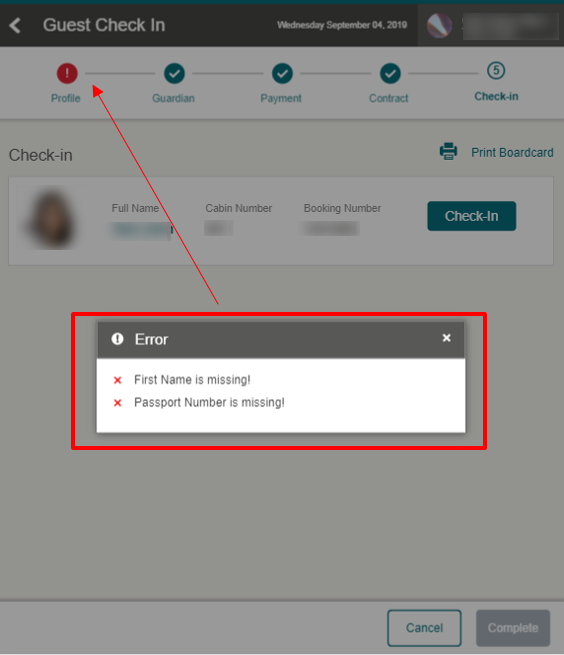
    If there is missing or incorrect information when you click the Check-In button, you receive an alert message listing the error.

    Figure 19-3 Check-In Validation


    This figure shows the Check-In Validation.
  7. The Train Navigation displays a red exclamation (!) sign if the field(s) has an error. Select the marked page to rectify the error before proceeding to the next page.