Importing Cash Flow Data
You can import cash flow data via CSV file. This includes curve setup data (From and To dates, Profile, and Total columns) and curve distribution data (distribution values of the Total amount entered in the date period columns). It is important to observe the order of curve operations: import the setup values first, then import the distribution values.
- Manual entry generally allows data import but depends upon the curve set up.
- Auto-distribution precludes data import.
- Fields that display data from other sources (schedule sheet, cost column, business process record) cannot be edited via CSV import.
You can change curve distribution settings; however, the system will replace your data with data collected by the new distribution method. For example, if you change a manual entry field to auto, all manually entered data will be lost and replaced with the auto-generated data.
To import curve setup data into the Cash Flow Worksheet by CSV import
- Go to the project/shell tab and switch to User mode.
- In the left Navigator, expand the Cost Manager node.
- Click the Cash Flow sub-node to open the Cash Flow log.
- Select a curve from the log and double-click the curve to open the Cash Flow worksheet window.
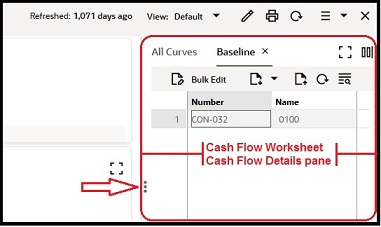
- Open the right pane by way of moving the split screen to display the Cash Flow Worksheet Cash Flow Details pane, as shown below, and click Baseline or Forecast.
If you are importing both setup and distribution data, then import the setup data first to establish the distribution time period.
- Click the Export icon (down arrow) in the tool bar to export the CSV template. The CSV opens in Microsoft Excel®. You can Save the CSV file to your desktop first or Open it directly.
Note: Cash flow data exports the currency and the values to the CSV template.
- Add the Curve Distribution data to the CSV file.
- From Date, To Date: use the date format.
- Profile: If using auto-profile, enter the name of the default profile you want to use. This is from the Distribution Profiles list maintained in Admin mode.
- Total: Enter a value to use as the cost total.
- Save the CSV file.
- Import the CSV file.
- In the Details sheet, click the Import icon (up arrow), then select Curve Setup from the drop-down menu. The File Upload window opens.
- Locate the CSV file and click Open. The data will populate edited fields on the Details sheet.
To import curve distribution data into the Cash Flow Worksheet by CSV import
- Go to the project/shell tab and switch to User mode.
- In the left Navigator, expand the Cost Manager node.
- Click the Cash Flow sub-node to open the Cash Flow log.
- Select a curve from the log and double-click the curve to open the Cash Flow worksheet window.
- Open the right pane by way of moving the split screen to display the Cash Flow Worksheet Cash Flow Details pane, as shown below, and click Baseline or Forecast.
- Click the Export icon (down arrow) to export the CSV template. You can Save the CSV file to your desktop first, or Open it directly.
- Add the Curve Distribution data to the CSV file.
- Enter values in the time period distribution fields. Do not exceed the amount for Unassigned.
- The Currency field must have the currency listed.
- Save the CSV file.
- Import the CSV file.
- In the Details sheet, click the Import icon (up arrow), then select Curve Distribution from the drop-down menu. The File Upload window opens.
- Locate the CSV file and click OK. The data will populate edited fields on the Details sheet.
- Save the Details window.
Note: You can import data into cash flow by commitment curves in either transaction or project currencies. If you try to import data in an incorrect currency, you will be notified. For example, if the transaction currency is in Yen and the project currency is in USD, and you try to import in Euro, you will get an error message in the CSV file. You will need to correct the errors in the CSV before re-importing.
Last Published Friday, May 1, 2026