Working with the EPS
Your P6 projects are arranged in a hierarchy called the enterprise project structure, or EPS. The EPS can be subdivided into as many levels or nodes as needed to parallel work at your organization. Nodes at the highest, or root, level might represent divisions within your company, project phases, site locations, or other major groupings that meet the needs of your organization. Projects always represent the lowest level of the hierarchy. Every project must be included in an EPS node.
Ideally, one person or group controls the EPS across the organization. The project control coordinator creates the hierarchical structure that identifies the company-wide projects. The coordinator works with the project manager in each area of the organization to define basic project information for each group and to develop standards before any projects are added.
After you set up an EPS, you can define additional data about each EPS division, such as anticipated dates, budgets, and spending plans. Use the detail windows on the EPS page to specify this information. Or, you can begin adding projects under the applicable levels in the structure if you have access rights to these functions. Access rights are set by your application administrator.
Throughout the application, when selecting projects to work with, you can open all projects that belong to an EPS node or sort them by EPS. When you create a project, you must specify a single parent EPS node. User access and privileges to nodes within the EPS hierarchy are implemented through a global OBS that represents the management responsible for each project. Each manager in the OBS is associated with an area of the EPS, either by node or by project, and the WBS of the particular level of the hierarchy.
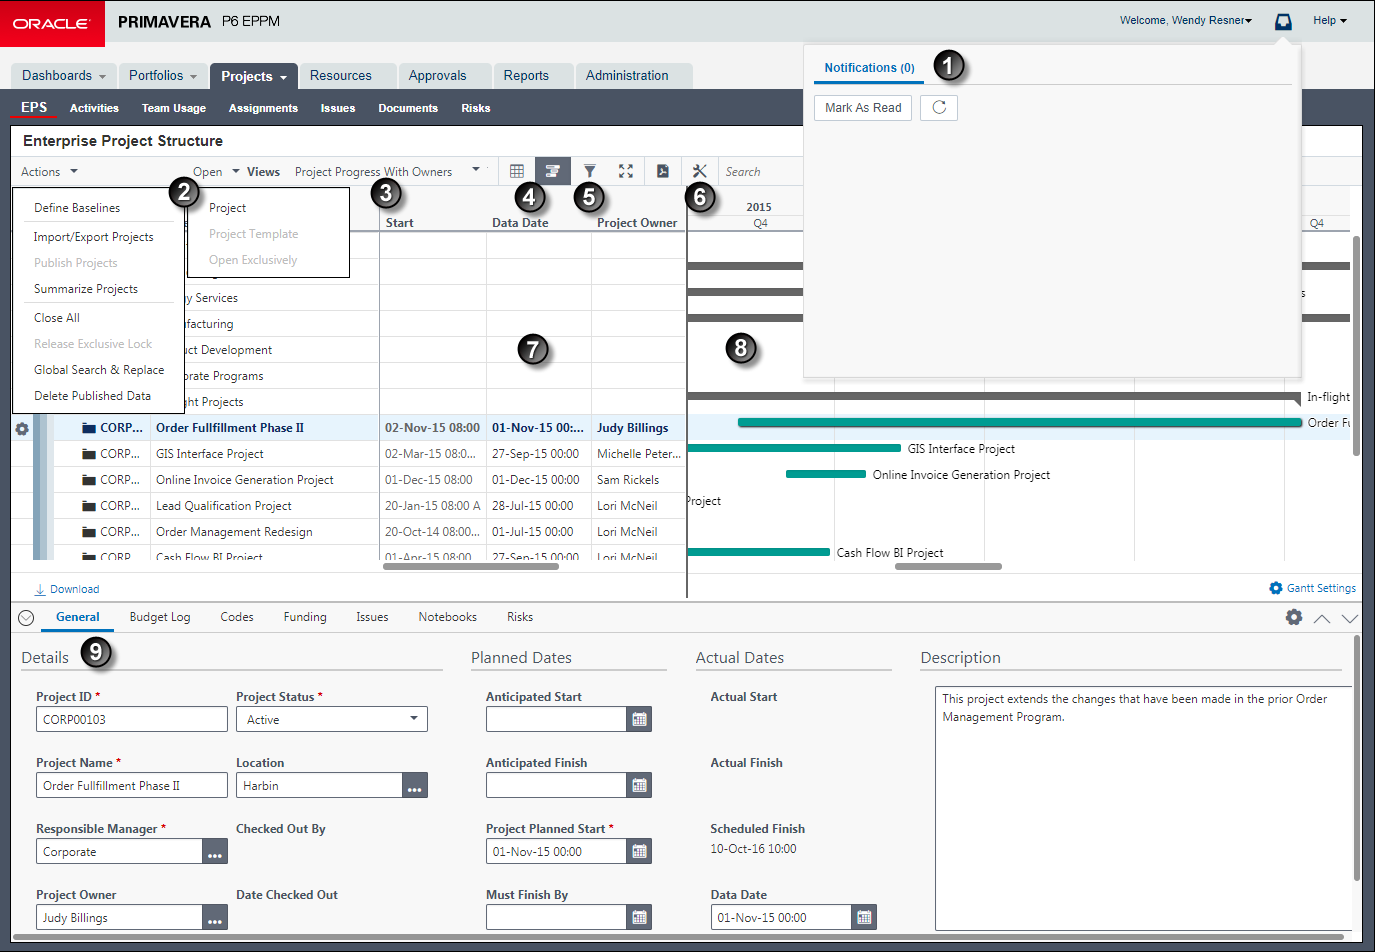
Table of Key EPS Page Elements
Item | Description |
|---|---|
| Notifications area: When background services, for example project summarization, finish running you will be notified here.
|
| Actions and Open menus: Use these menus to work with the EPS page. |
| EPS Views list: Determines how you see data on the EPS page. |
| Grid and Gantt view buttons: Determines whether you see a grid of EPS data, or a grid and a graphical representation of dates on a timeline. |
| Filter button: Enables you to customize the EPS page. |
| Customize View button: Enables you to customize the EPS page |
| EPS/Project Grid: Displays each project within the EPS. In this example, the data is grouped by EPS, then by Portfolio, and then by a project code called Financial Rating. |
| EPS Gantt : Displays project and EPS data in a Gantt format. |
| Detail Windows: The General detail window for the project selected in the table. You can customize which detail windows appear in the view. |
Related Topics
Last Published Thursday, February 1, 2024