5.1.1 Pre-Feature Activation Health Check

Perform Health Check (Pre Feature Activation)

This procedure is used to determine the health and status of the network and servers. This must be executed at the start of every maintenance window.

Note:

The Health Check procedure below is the same as the Health Check procedure described in Perform Health Check when preparing for feature activation, but it is repeated here to emphasize that it is being re-executed if Perform Health Check was performed outside the maintenance window.

Log in to the SOAM VIP GUI, establish a GUI session on the SOAM server by using the VIP address of the SOAM server.

  1. Open the web browser and enter the URL, http://<Primary_SOAM_VIP_IP_Address>
  2. Log in as the guiadmin user.

    Figure 5-1 Oracle System Login


    Oracle System Login

    .

Verify if the RABR folder is not present

  1. Under the Main Menu, verify if the RABR folder is not present.

    Figure 5-2 Main Menu


    Main Menu

Log in to the NOAM VIP GUI, establish a GUI session on the NOAM server by using the VIP address of the NOAM server.

  1. Open the web browser and enter the URL, http://<Primary_NOAM_VIP_IP_Address>
  2. Log in as the guiadmin user.

    Figure 5-3 Oracle System Login


    Oracle System Login

  3. Verify the server status, expand Status & Manage folder and click Server

    Figure 5-4 Status and Manage


    Status and Manage

  4. Verify if the Server Status is Normal (Norm) for: Alarm (Alm), Database (DB), Replication Status, and Processes (Proc).

    Figure 5-5 Server Status


    Server Status

    Do not proceed to feature activation if any of the above states are not Norm. If any of these are not Norm, corrective action should be taken to restore the non-Norm status to Norm before proceeding with the feature activation.

    If the Alarm (Alm) status is not Norm but only Minor alarms are present, it is acceptable to proceed with the feature activation. If there are Major or Critical alarms present, these alarms should be analyzed before proceeding with the feature activation. The activation can be able to proceed in the presence of certain Major or Critical alarms. Contact My Oracle Support for assistance as necessary.

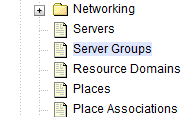
  5. Verify the Server Configuration, expand Configuration folder and click Server Groups

    Figure 5-6 Server Groups


    Server Groups

    Verify if the configuration data is correct for your network.

  6. Log current alarms, expand Alarms & Events folder and click View Active

    Figure 5-7 Alarms and Events


    Alarms and Events

  7. Click Report

    Figure 5-8 Report


    Report

  8. Save or Print this report to keep copies for future reference.

    Figure 5-9 Save or Print


    Save or Print

    If this procedure fails, contact My Oracle Support for assistance.