Applying Change Package
The Apply Change Package wizard will guide you through the configuration based on the Apply Type that is selected.
When the custom change package containing your selected updates is created not all files are included in the change package for 2 major reasons:
Reduces the time it takes to create the initial package.
Leverages Change Assistant job filtering to eliminate the creation of files not required by your target environment.
The update job is filtered based on the target environment and only the files required for the target environment are created from the PUM source. Depending on where the PeopleSoft Update Image (PUM Source) is installed the process may be very time-consuming, to alleviate this issue customers have the option to run the source and target steps in separate jobs.
The initial pass to apply updates has the following options:
Source Steps Only
The Source Steps Only option provides the ability to run the initial pass to create all files that are contained in the change package. This job can be run on the same machine where the PUM Source is installed. Once the initial pass has completed, a modified change package is created that contains all the files. The modified update change package can then be copied to the machine where you will run the Apply Update on your target database.
Target Steps Only
Using the new change package created from the Source Steps Only job, you can apply the change package to your target database without requiring a connection to the source database. When the job is created for the target environment, all unnecessary files are filtered out.
All Steps
All steps requires a connection to both the target database and the PUM source. When this option is selected, the source steps will create the necessary files needed for the target system.
To apply the change package:
Start EMF if it is not already started and you selected Configure EMHub For File Deploy on the EMHub Options page in Change Assistant.
Note: EMHub is only required for file deploy. If you plan to manually deploy file, skip this step. If EMHub is not running, the Change Package template will include a step to manually copy the files included in the Change Package to the various Application Server(s), Web Server(s) and File Server(s) associated with the current Target Database.
In Change Assistant, select Tools, Change Actions.
Select Update Manager and Click Next.
Note: If you are already in the Update Manager action, select Tools, Apply Change Package.
Select Apply Change Packages and click Finish.
Select the download directory where the change package was created.
Select the change package that was created for your custom change package definition.
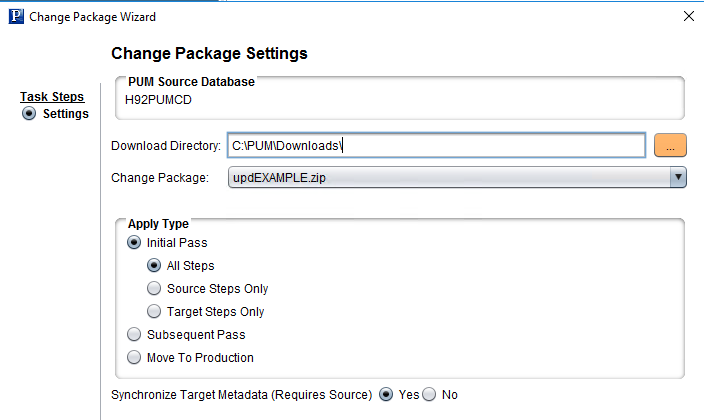
Select Initial Pass.
By default All Steps is selected. Change this value if you choose to decouple the source and target steps.
This example illustrates the fields and controls on the Change Package Settings page. You can find definitions for the fields and controls later on this page.
Field or Control
Description
Download Directory
When the change package definition is defined on the PUM Source, it will be downloaded to the directory indicated here. By default the download directory defined for Change Assistant is used.
Change Package
The change package name will include the change package definition. upd<your change package name>.zip.
Apply Type
Initial Pass
You will first apply the update to your development environment which is an Initial Pass.
In the Initial Pass you will perform compares to retrofit your customizations and repackage the update to include all your customizations.
Important! Development environment must have the same maintenance level as any additional targets where you intend to subsequently reuse this package (after incorporating customizations) and apply them using the Move to Production apply type.
In the initial pass, you can select which steps to perform.
Subsequent Pass
The final step in the initial pass creates a modified change package which includes all your customizations. This modified change package is then used to apply the updates to additional target databases the same maintenance level. If you select subsequent pass, the modified change package will contain Less manual stops than the initial pass, but will include a manual stop to review the change package and a step to update the change package. Typically you would run an initial pass, then a subsequent pass and then the final move to production.
Note: The subsequent pass template is similar to the Move to Production pass templates delivered in Images on PeopleTools releases prior to 8.57.
Move to Production
Use the Move to production pass to apply your updates to the Production database. This pass will execute the SQL's used in the initial pass or subsequent pass bypassing the build steps. There are less steps and manual stops reducing apply time.
See PUM Best Practices and Maintenance Strategy document post on the PUM Homepage.Update Manager Home Page
Synchronize Target Metadata (Requires Source)
Select Yes to upload the target database information to the PUM Source when the update is applied.
The default is Yes, however if you are applying the update to a database that is not used for defining and creating change packages in PUM, there is no need to upload the database information to the PUM Source and you would select No.
Note: If the PUM source is not defined, this option will not be enabled.
Click Next.
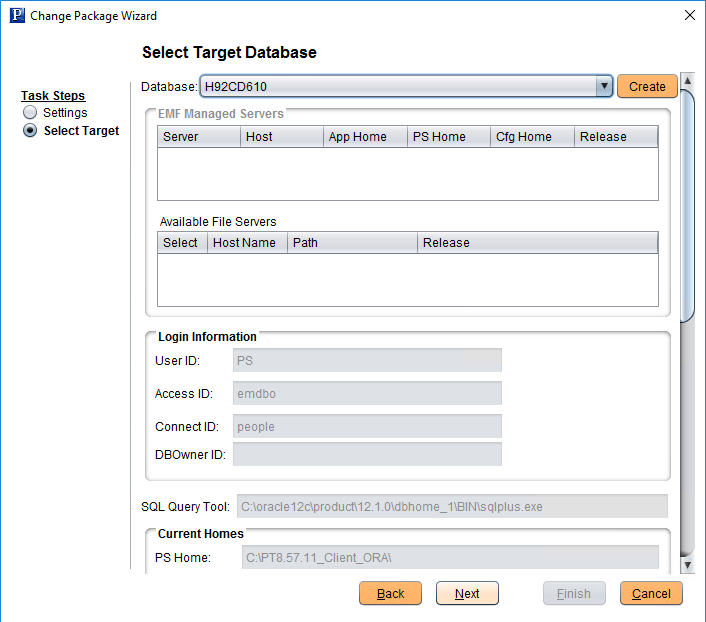
Select the target database.
Note: Use the Create button to create the target database if it has not been previously created. See Defining Databases and Defining Target Database
If you are using EMHub, select the file server.
This example illustrates the fields and controls on the Select Target Database page. You can find definitions for the fields and controls later on this page.
Click Next.
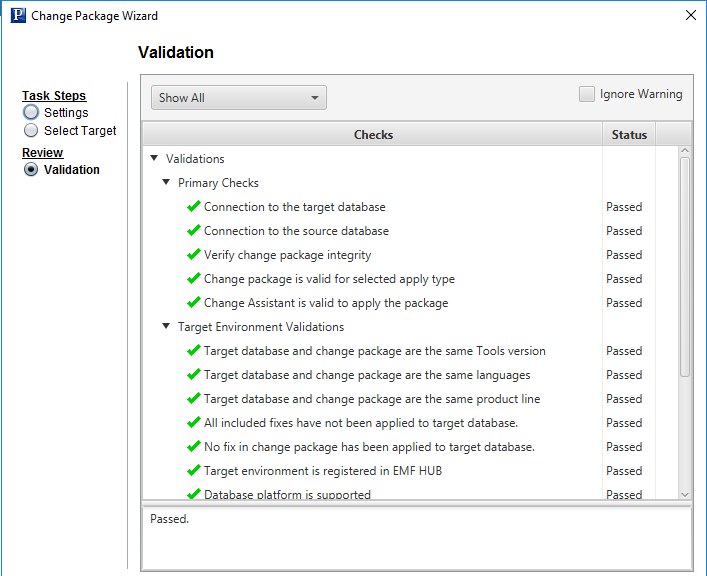
Change Assistant will perform primary checks, validate the target environment and validate the source environment. The Validation page displays the status for the specific validations.
This example illustrates the fields and controls on the Validation page.
Click Next.
The Apply Summary is displayed, click Finish.
Change Assistant will begin building the Change Assistant job.
The Update job will be created and open in Change Assistant.