Modifying the Rich Text Editor User Interface
The rich text editor extends the capabilities of a long edit box to display rich text or editable rich text at runtime. PeopleTools 8.59.16 and later versions support CKEditor v5.
The CKEditor topics are separated based on the PeopleTools release and the supported CKEditor version:
Users on PeopleTools 8.59.16 or later should refer to the CKEditor v5 for PeopleTools 8.59.16 and Later topic.
Users on PeopleTools 8.59.15 or earlier should refer to the CKEditor v4 for PeopleTools 8.59.15 and Earlier topic.
The following topics describe the user interface of CKEditor v5 and its use.
This example illustrates an editable rich text-enabled long edit box at runtime.
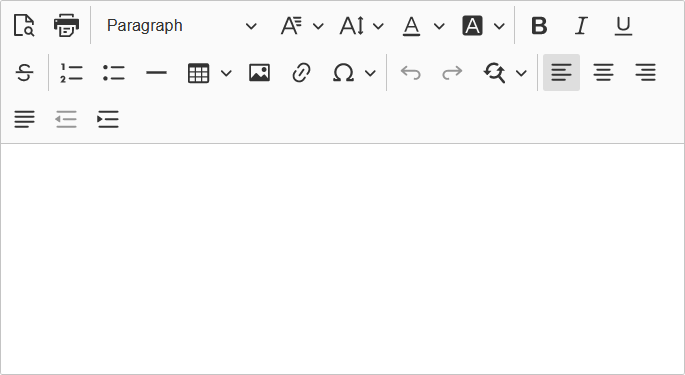
The rich text editor enables you to add rich formatting of text content, including common structural treatments such as lists; formatting treatments such as bold, underline, and italic text; drag-and-drop inclusion; paste-as-text; and sizing of images. The rich text editor toolbar is extensible through the use of HTML definitions that define your configuration, which enables you to design and implement an interface that is specific to the needs of your users.
Important! Use caution when modifying the rich text editor interface; it is recommended that you never include or enable the Source button in the toolbar.
Securing CKEditor Files
By default, CKEditor files can be accessed without authentication on the web server. Oracle recommends that after your PeopleSoft Internet Architecture installation, you make sure to secure any files or folders at the web server level as needed. To secure CKEditor files, security has to be setup at web server level. How you configure this security varies according to your web server product.
For information on implementing security on Oracle WebLogic see Securing Servlets on WebLogic.
Creating Custom Configurations
CKEditor v5 does not provide a default configuration file. If you want to create a custom configuration file, you may copy the PeopleTools delivered configuration file for CKEditor v5.
To create a custom configuration:
In Application Designer, search for the PeopleTools delivered configuration file (PT_RTE_CFG), and copy the code in the configuration file.
Create a new HTML definition.
Paste the code into the HTML definition.
Save the HTML definition. Prefix the definition name with PT_RTE_CFG for example, PT_RTE_CFG_MYCONFIG.
Note: Only HTML definitions with the PT_RTE_CFG prefix appear in the Configuration Settings Id drop-down list box.
Modify the code in the HTML definition as necessary and save. The code might look like this example:
const cketoolbarconfig =  [
            'heading',
            'findAndReplace',
            'italic',
            '|',
            'link',
            'numberedList',
            '|',
            'indent',
            'outdent',
            'alignment:left',
            'alignment:right',
            'alignment:center',
            'alignment:justify',
            '|',
            'InsertImage',
            'blockQuote',
            'insertTable',
            'undo',
            'redo',
            'SpecialCharacters',
            'fontSize',
            'fontFamily',
            'fontColor',
            'fontBackgroundColor'
        ];
To use the new configuration, open the Long Edit Box Page Field Properties dialog box; select the Options tab; click the Configuration Settings Id drop-down list box; and then select the HTML definition name from the list of values that appear.
Creating Custom Plug-In Files
A plug-in enables you to create an application-specific toolbar button.
Modifying the Default Image Storage Location
By default, when you upload images the system stores them in the PTRTDB table. The default URL ID is PT_RTE_IMG_DB_LOC. To create a different storage location and URL ID, follow these steps:
Create a new record definition.
Insert the FILE_ATTDET_SBR subrecord.
Save and then build the record definition.
Clone these record definitions:
PTRTDB_BMP
PTRTDB_GIF
PTRTDB_JPG
Save the record definitions, name them like this: <myrecord>_BMP, <myrecord>_GIF, and <myrecord>_JPG.
For each record, open the SQL Editor and change the
FROMstatement in the SQL to this:FROM PS_<your record name from step 3>Save and build each view.
Note: FTP storage is not supported.
Note: It often will require end users to refresh a page or access it twice in order to display an image in a rich text editor field after the following events: browser cache has been cleared, web server cache has been cleared, the posting using the rich text editor field (such as a job posting) is new.
The following topics describe the user interface of CKEditor v4 and its use.
This example illustrates an editable rich text-enabled long edit box at runtime.
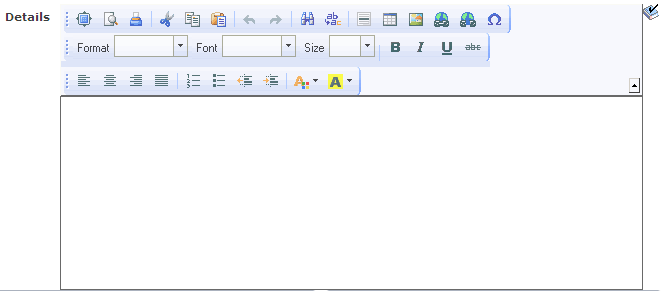
The rich text editor enables you to add rich formatting of text content, including common structural treatments such as lists; formatting treatments such as bold, underline, and italic text; drag-and-drop inclusion; paste-as-text; and sizing of images. The rich text editor toolbar is extensible through the use of HTML definitions that define your configuration, which enables you to design and implement an interface that is specific to the needs of your users.
Important! Use caution when modifying the rich text editor interface; it is recommended that you never include or enable the Source button in the toolbar.
Securing CKEditor Files
By default, CKEditor files can be accessed without authentication on the web server. Oracle recommends that after your PeopleSoft Internet Architecture installation, you make sure to secure any files or folders at the web server level as needed. To secure CKEditor files, security has to be setup at web server level. How you configure this security varies according to your web server product.
For information on implementing security on Oracle WebLogic see Securing Servlets on WebLogic
Creating Custom Configurations
The default configuration filename is config.js. You can locate this file in the PIA_HOME\webserv\domainname\applications\peoplesoft\PORTAL.war\sitename\ckeditor directory.
To create a custom configuration:
Copy the code in the config.js file.
Open Application Designer and create a new HTML definition.
Paste the code into the HTML definition.
Save the HTML definition. Prefix the definition name with PT_RTE_CFG for example, PT_RTE_CFG_MYCONFIG.
Note: Only HTML definitions with the PT_RTE_CFG prefix appear in the Configuration Settings Id drop-down list box.
Modify the code in the HTML definition as necessary and save. The code might look like this example:
CKEDITOR.editorConfig = function( config )
{
	config.toolbar =
[
	['Templates','Styles','Cut','Copy','Paste','Bold','Italic','Underline','Strike'],

];
};
To use the new configuration, open the Long Edit Box Page Field Properties dialog box; select the Options tab; click the Configuration Settings Id drop-down list box; and then select the HTML definition name from the list of values that appear.
Creating Custom Template Files
Important! The use of custom template files is deprecated with CKEditor v5 in PeopleTools 8.59.16 and 8.60.04 patches. Therefore, you are encouraged to discontinue your use of custom template files as soon as feasible.
The rich text editor delivers templates that help you format the text in predetermined ways. The default template file is default.js. You can locate this file in the PS_HOME\webserv\domainname\applications\peoplesoft\PORTAL.war\sitename\ckeditor\plug-ins\templates\templates folder.
To create a custom template file:
In Application Designer, create an HTML definition and save it as PT_RTE_TMPL_TEMPLATE. The definition name should always be prefixed with PT_RTE_TMPL,_ and the HTML must include 'pt_rte_template' as you see in this example:
CKEDITOR.addTemplates('pt_rte_template',{imagesPath:CKEDITOR.getUrl(CKEDITOR.plug-ins.getPath('templates')+'templates/images/'),templates:[{title:'Image and Title',image:'template1.gif',description:'One main image with a title and text, which surrounds the image.',html:'
<h3><img style="margin-right: 10px" height="100" alt="" width="100" align="left"/>Type the title here</h3>
<p>Type the text here</p>'}]});
Note: The name 'pt_rte_template' is the fixed name, which has to be set for any custom template that you create. The template name should be exactly the same as mentioned above.
Save the HTML definition.
Note: It is recommended that if you create a custom template file, that you create a custom configuration file for it to reference.
To use the new configuration, open the Long Edit Box Page Field Properties dialog box; select the Options tab; click the Template File Iddrop-down list box; and then select the HTML definition name from the list of values that appear.
Click the OK button.
Save the page definition.
Note: When associated to a long edit box, all templates in an HTML definition are available to all users. To limit the available templates for specific rich text enabled long edit boxes, create a new template HTML definition to contain only the templates that you would like for the application user to see and associate that definition to the field.
Creating Custom Style Files
Important! The use of custom style files is deprecated with CKEditor v5 in PeopleTools 8.59.16 and 8.60.04 patches. Therefore, you are encouraged to discontinue your use of custom style files as soon as feasible.
The rich text editor delivers styles to assist you in entering data using specific styles that combine color, font and format. The default configuration file is default.js and is in the PIA_HOME/webserv/.../styles folder.
To create a custom style file
In Application Designer, create an HTML definition and save it as PT_RTE_STYLE_MYSTYLE.
The HTML Object name used for defining styles should always be prefixed by PT_RTE_STYLE.
This is sample code for an HTML style definition:
CKEDITOR.stylesSet.add( 'pt_rte_style',[{name:'Blue
Title',element:'h3',styles:{color:'Blue'}}]);
Note: In this style example, the name 'pt_rte_style' is the fixed name, which has to be set for any custom style that you create. The style name should be exactly the same as mentioned above.
To use the new configuration, open the Long Edit Box Page Field Properties dialog box; select the Options tab; click the Style File Iddrop-down list box; and then select the HTML definition name from the list of values that appear.
Click the OK button.
Save the page definition.
Note: When associated to a long edit box, all styles in an HTML definition are available to all users. To limit the available styles for specific rich text enabled long edit boxes, create a new style HTML definition to contain only the styles that you would like for the application user to see and associate that definition to the field.
Creating Custom Plug-In Files
A plug-in enables you to create an application-specific toolbar button.
Modifying the Default Image Storage Location
By default, when you upload images the system stores them in the PTRTDB table. The default URL ID is PT_RTE_IMG_DB_LOC. To create a different storage location and URL ID, follow these steps:
Create a new record definition.
Insert the FILE_ATTDET_SBR subrecord.
Save and then build the record definition.
Clone these record definitions:
PTRTDB_BMP
PTRTDB_GIF
PTRTDB_JPG
Save the record definitions, name them like this: <myrecord>_BMP, <myrecord>_GIF, and <myrecord>_JPG.
For each record, open the SQL Editor and change the
FROMstatement in the SQL to this:FROM PS_<your record name from step 3>Save and build each view.
Note: FTP storage is not supported.
Note: It often will require end users to refresh a page or access it twice in order to display an image in a rich text editor field after the following events: browser cache has been cleared, web server cache has been cleared, the posting using the rich text editor field (such as a job posting) is new.
PeopleTools 8.59.16 currently supports CKEditor v5, which does not support certain features available in CKEditor v4. You can no longer use the CKEditor v4 features listed in the following table.
Important! To stay current with the latest information on deprecated features, subscribe to the following technical bulletin on My Oracle Support: Data Compatibility with Updated Rich Text Editor Technology in PeopleTools (Doc ID 2945233.1)
The following CKEditor v4 features are deprecated. Features identified as plug-ins are rendered as button in the rich text editor toolbar.
|
Feature |
Description |
|---|---|
|
Anchor plug-in |
This plug-in provides the capability to insert anchors with some properties; this is part of the Links plug-in. |
|
Button (form control) plug-in |
This plug-in adds a button form control element in the editor content. |
|
Check box (form control) plug-in |
This plug-in adds a check box form control element in the editor content. |
|
Custom style files |
The use of custom style files with Application Designer is deprecated with CKEditor v5. |
|
Custom template files |
The use of custom template files with Application Designer is deprecated with CKEditor v5. |
|
Elements Path plug-in |
This plug-in displays a list of HTML element names in the current cursor position. By default, the list appears at the bottom of the editor interface and can give you contextual information about the content that you are creating. |
|
Insert Smiley plug-in |
This plug-in provides a set of emoticons to insert into the editor via a dialog window. |
|
Maximize plug-in |
This plug-in adds a toolbar button maximizing the editor inside a browser window. |
|
New Page plug-in |
This plug-in adds a toolbar button that clears the editing area and creates a new page. |
|
Radio button (form control) plug-in |
This plug-in adds a radio button form control element in the editor content. |
|
Selection field (form control)plug-in |
This plug-in adds a selection field (a drop-down) form control element in the editor content. |
|
Show Blocks plug-in |
This plug-in adds the command to visualize all block-level elements by surrounding them with an outline and displaying their element name at the top left. |
|
Text area (form control) plug-in |
This plug-in adds a text area (a long edit box) form control element in the editor content. |
|
Text field (form control) plug-in |
This plug-in adds a text field (an edit box) form control element in the editor content. |