Working with Push Notifications
The Push Notification Framework helps in disseminating and consolidating notifications from events in the PeopleSoft system in real time. When you login to the PeopleSoft system, you can see your notifications in the Notifications panel. On desktop browsers and device widths greater than 1280 pixels, the Notifications panel is open by default on your fluid homepages. On device widths of 1280 pixels or less, such as on a smartphone, and on all transaction pages, the Notifications panel is available by clicking the Notifications button in the header. The system continues to update notifications as they occur in real time while you are working on your tasks and even as you’re working on notifications themselves.
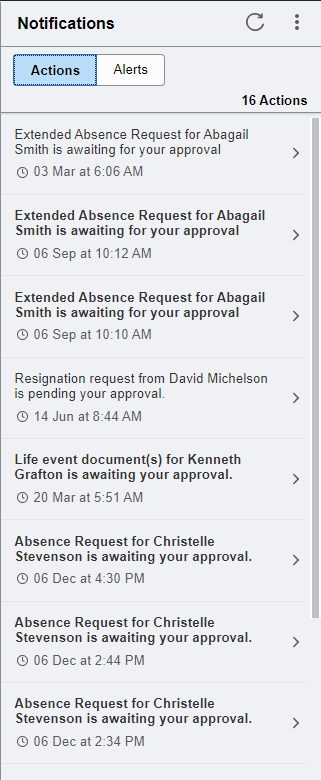
This example illustrates the fields and controls on the Notifications panel - Actions section. You can find definitions for the fields and controls later on this page.
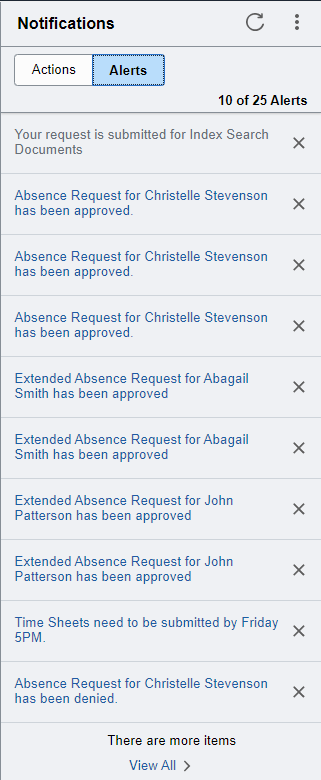
This example illustrates the fields and controls on the Notifications panel - Alerts section. You can find definitions for the fields and controls later on this page.
Field or Control |
Description |
|---|---|
|
Refreshes the Notification window to add all new notifications. The Refresh button displays a blue dot when a new notification arrives. |
|
The Notification menu includes these links:
|
Actions |
Select this section to see a list of all of your actionable items. |
Alerts |
Select this section to see all of your informational alerts (non-actionable items). |
|
Click a link to open the transaction for that notification. |
Alert link title |
For certain alerts, you can click the alert link to view more information. |
|
Dismisses an alert. This button is displayed only for alerts in the Alert section. |
|
View All |
Click this link to go to View All Notifications page. See Viewing All Notifications. |


Note: Notifications are generated in the language of the notification approver, which is specified on the General tab of the User Profiles page (PeopleTools, Security, User Profiles, User Profiles). For example, if the notification approver's language is set to English, the notifications will be displayed in English. When a notification is generated, the notification remains in that language and does not change to reflect the user's language preferences or current session language.
Use the two-panel action view to view and act on all of your actionable notifications.
Navigation:
From the Notifications panel,
This example illustrates the fields and controls on the two-panel action view.
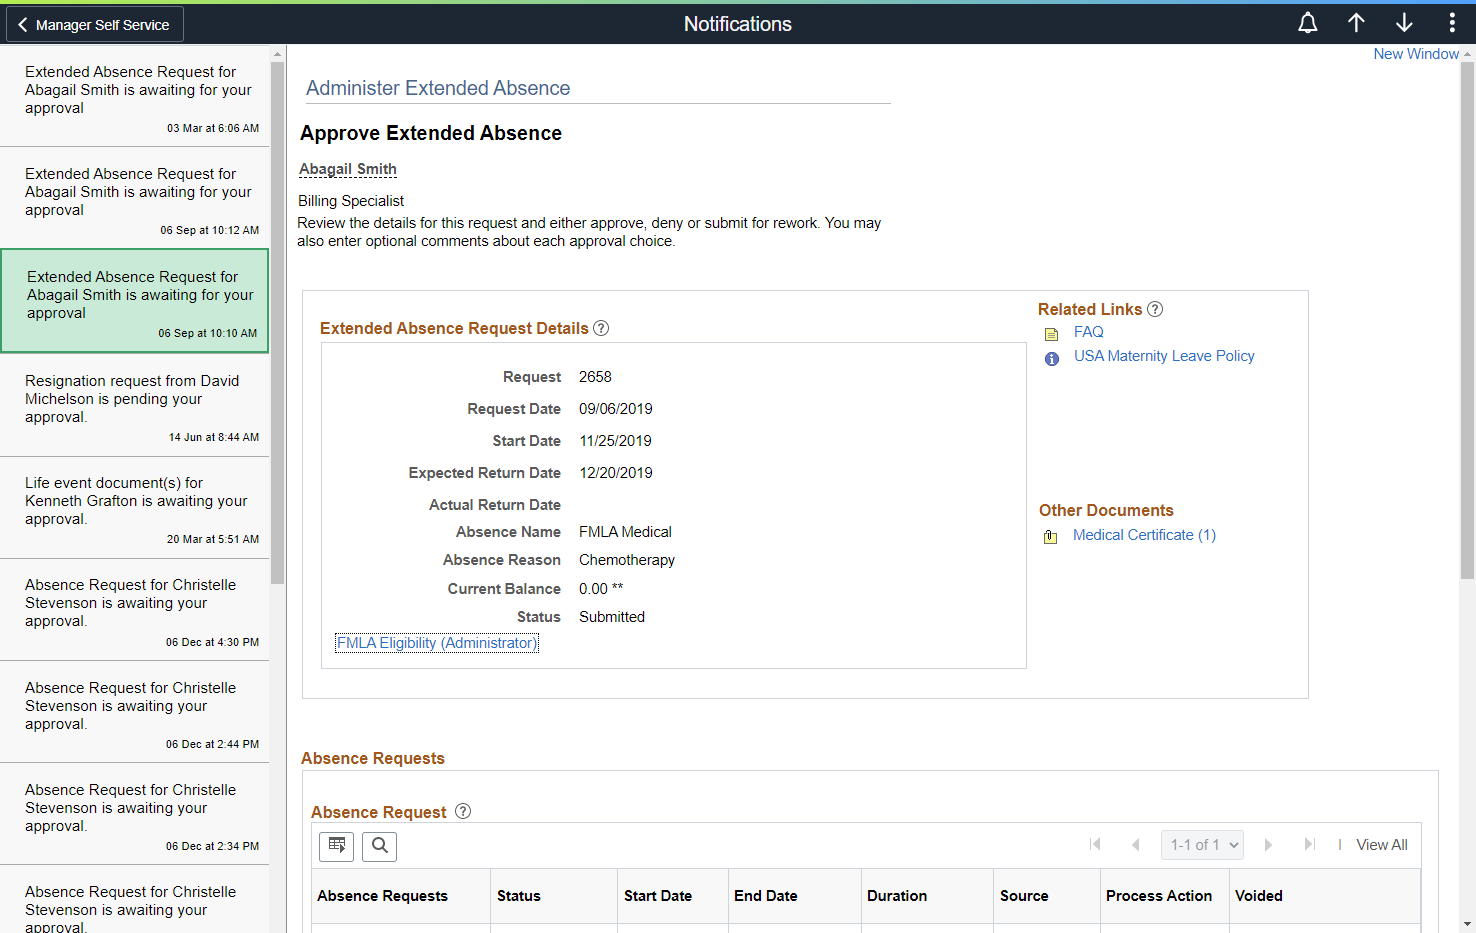
The action view uses the master/detail architecture to display a master list of your actionable items in the left panel while displaying the notification target content on the right. You can act directly on this target content—for example, to approve, deny, or take any other action appropriate to the transaction. To navigate in the action view, click a notification listed in the left panel to display it on the right. Alternatively, use the Previous in List and Next in List navigation buttons in the fluid banner to navigate sequentially through your list of actionable items.
Because the action view is a master/detail component, some transactions are presented to you different from the preceding example:
If the transaction cannot be displayed directly within the action view, then you will be presented with the following message:
The notification source can’t be directly displayed within this area. Click on the link below to navigate to target notification:
Notification Target
Click the Notification Target link to open the notification in a new browser window.
If the transaction includes its own inner left panel, the list of notifications is initially collapsed so that the inner left panel of the target transaction is displayed. To redisplay your list of notifications, click the Notifications tab to slide out the outer left panel. See Working with the Slide-out Left Panel for more information.
Use the View All Notifications page to review all of your actions and alerts together.
Navigation:
From the Notifications panel,
This example illustrates the fields and controls on the View All Notifications page. You can find definitions for the fields and controls later on this page.
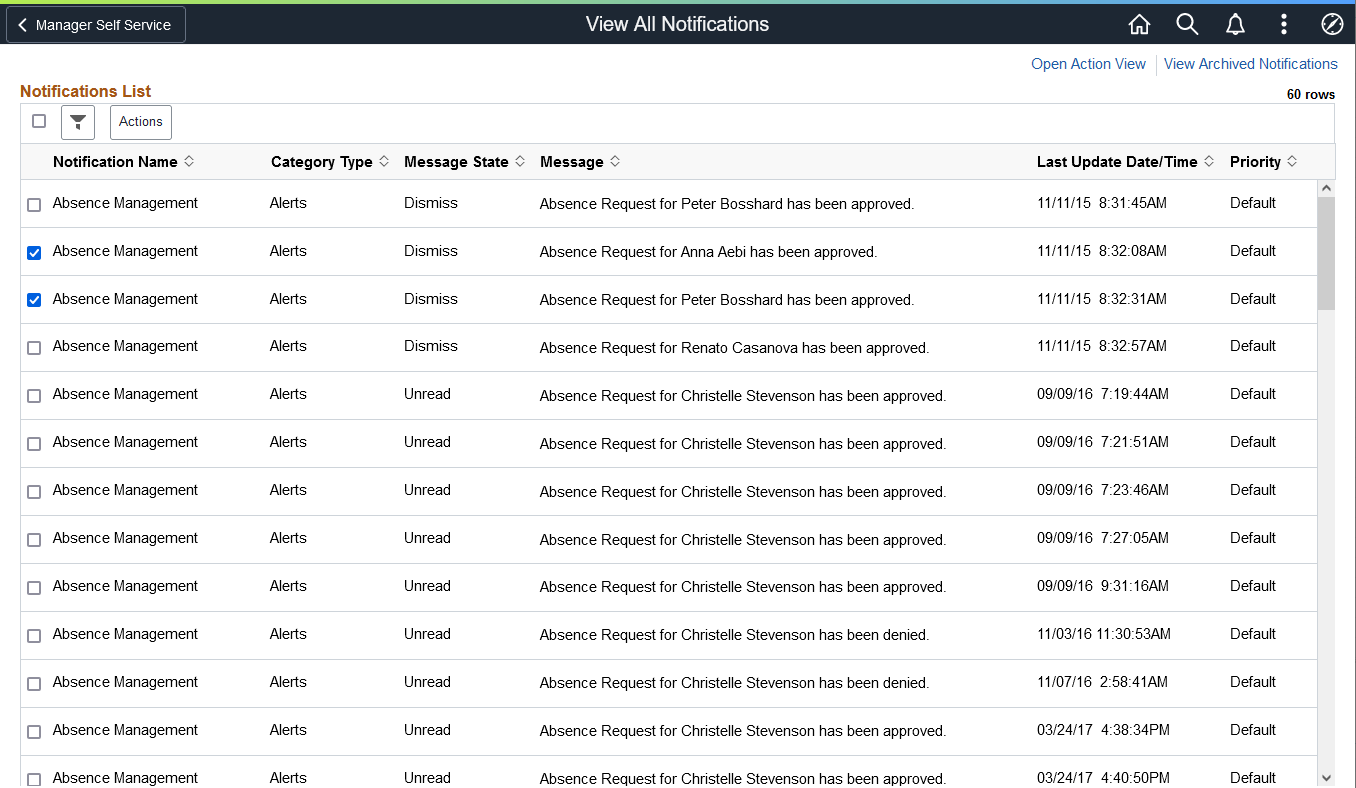
In the left panel, you can filter the list of notifications by:
Notification name
Category type
Message state
Priority
Select one or more notifications, and then select an item from the Actions menu:
Mark the notifications as read.
Mark the notifications as unread.
Mark the notifications as dismissed (available for alerts only).
Click the Open Action View link to open the two-panel action view. See Using the Two-Panel Action View for information. Click the View Archived Notifications link to view your archived notifications. See the following section.
Archived Notifications
Use the View Archived Notifications page to view notifications that have been archived by your system administrator.
Navigation:
On the View All Notifications page, click the View Archived Notifications link.
This example illustrates the fields and controls on the View Archived Notifications page.

Use the Notifications Settings page to personalize the Notifications panel.
Navigation:
In the Notifications panel, click the
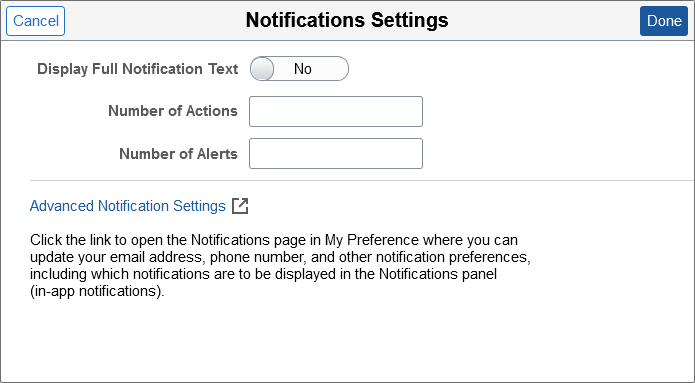
This example illustrates the fields and controls on the Notifications Settings page. You can find definitions for the fields and controls later on this page.
Field or Control |
Description |
|---|---|
Display Full Notification Text |
Select this option if certain notifications are truncated when displayed in the Notifications panel. |
Number of Actions |
Enter the maximum number of actions to be displayed in the Notifications panel. Note: If the number of actions exceeds this value, a View All link is displayed to allow you to view all of your notifications on the View All Notifications page. |
Number of Alerts |
Enter the maximum number of alerts to be displayed in the Notifications panel. Note: If the number of alerts exceeds this value, a View All link is displayed to allow you to view all of your notifications on the View All Notifications page. |
Advanced Notification Settings |
Click to open the Notifications page in My Preferences, where you can personalize how you wish to receive your notifications. |
When you personalize your notifications, you can select among the notification options that have been configured for each notification type. When the options are available, you can select to receive notifications in the Notification panel (in-app), in email, or by text message. You can also personalize which pop-up notifications you wish to receive. The following table provides links to additional topics for personalizing the Notifications panel and your notifications.
|
Topic |
See |
|---|---|
|
Personalizing the Notifications panel. |
See the preceding information in this topic for more information. |
|
Personalizing whether the Notifications panel is displayed on your homepages by default. |
|
|
|
|
Specifying an email address for receiving notifications. |
Setting Up Your System Profile Note: The location to define your email address can differ by PeopleSoft application pillar. See the documentation for your PeopleSoft application for more information. |
|
Specifying a phone number for receiving text messages. |
“Notifications” section in Specifying General Settings in My Preferences Note: The location to define your phone number can differ by PeopleSoft application pillar. See the documentation for your PeopleSoft application for more information. |
|
Personalizing pop-up notifications. |
“Pop-up Notification” section in Specifying General Settings in My Preferences |