Using the PeopleSoft Fluid User Interface to View My Applicants
This topic discusses how Recruiters, Recruiting Managers and Recruiting Administrators use the fluid My Applicants page to view information about applicants who are associated with their job openings. It also provides access to recruiting pivot grids that provide actionable operational analytics.
For general information about fluid pages in PeopleSoft HCM, see Understanding PeopleSoft Fluid User Interface Homepages.
|
Page Name |
Definition Name |
Usage |
|---|---|---|
|
HC_HRS_PE_MY_APPS_FL (cref for the tile) HRS_MYAPP_TILE_FLU (page for dynamic data) |
View the number of applicants for the recruiting user. Click this tile to access the My Applicants page. |
|
|
HRS_PE_MY_APPS_FL |
View applicants associated with the recruiting user’s job openings and to review key information about each applicant. |
Use the My Applicants tile (cref for the tile: HC_HRS_PE_MY_APPS_FL) to view the number of applicants for the recruiting user.
Navigation:
The My Applicants tile is on the delivered Fluid Recruiting Homepage.
This example illustrates the My Applicants tile.
The count on the tile indicates the number of applicants for the recruiting user.
Click the tile to access a list of the applicants.
Use the My Applicants page (HRS_PE_MY_APPS_FL) to view applicants associated with the recruiting user’s job openings and to review key information about each applicant.
It enables the recruiting user to search, view applications and resumes, and email applicants from a single page. This page also allows the recruiting users to access applicant analytics.
Navigation:
Click the My Applicants tile on the delivered Fluid Recruiting Homepage.
This example illustrates the My Applicants page.
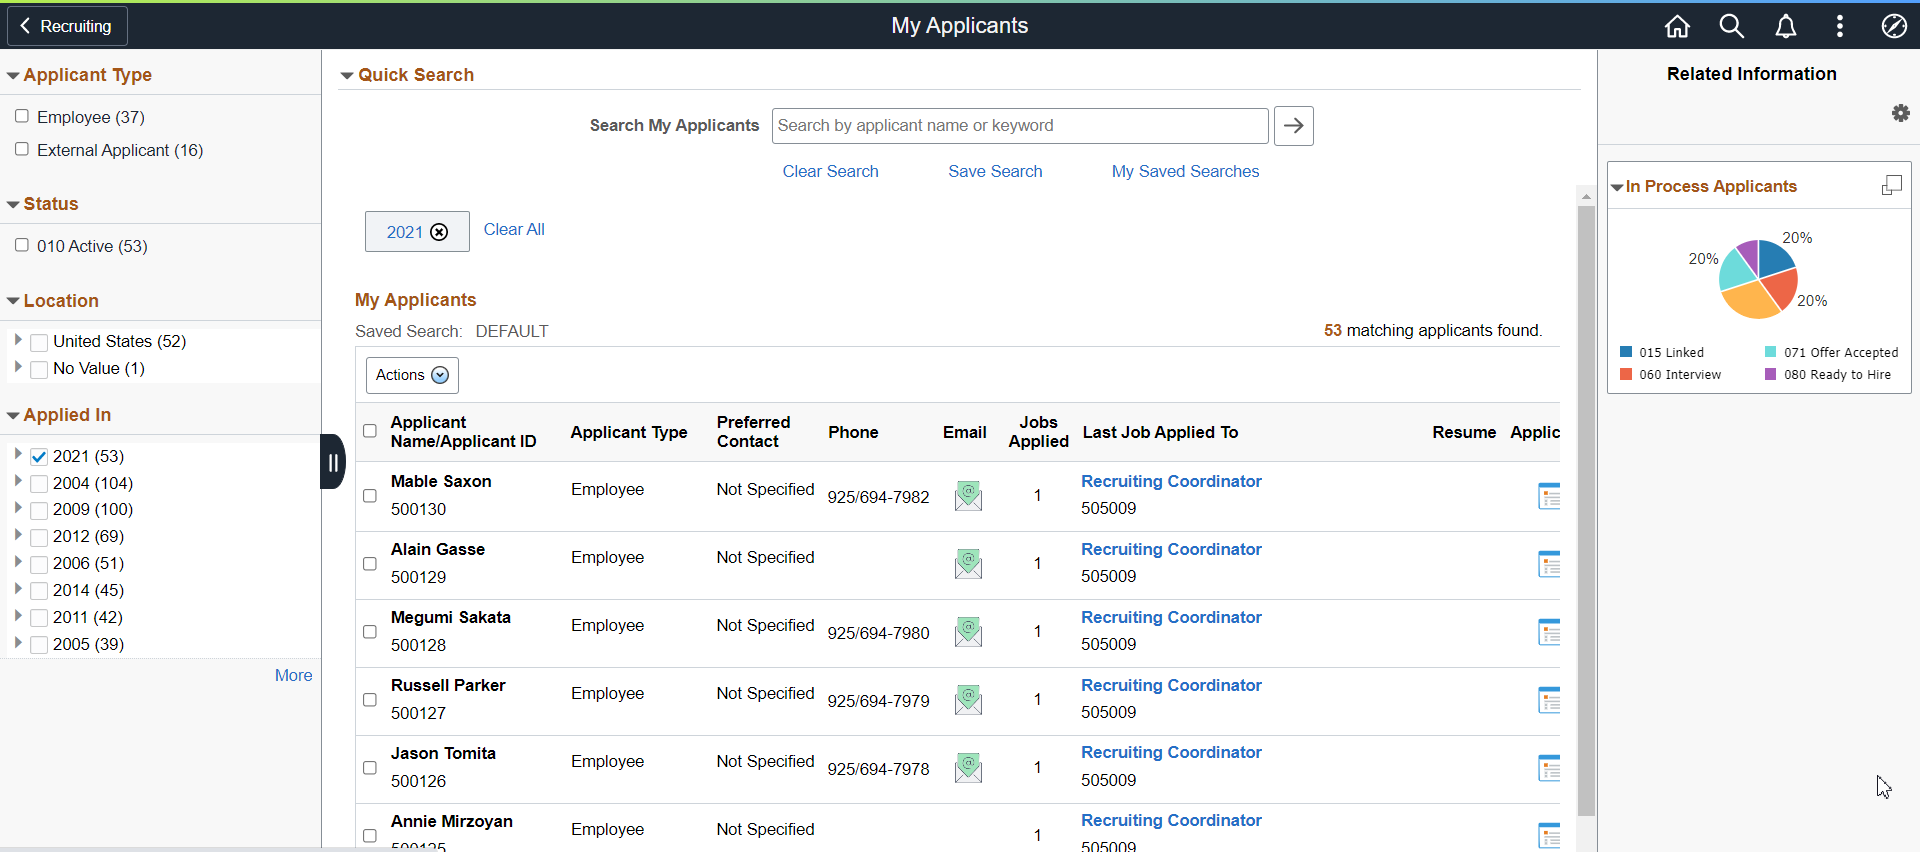
Left Panel
The left panel lists different facet filters to refine the applicants associated with the Recruitment/Hiring team. Available filters are:
Applicant Type: Use this facet to filter based on the applicant type: External Applicant, Employee, or Non-Employee.
Status: Use this facet to filter based on the applicant status.
Location: This facet offers hierarchical filtering based first on the applicant’s country, then state or province, then city.
Applied in: This facet offers hierarchical filtering based first on the year that the application was created and then, after you select a year, based on the month that the application was created.
Select the required filter criteria and search for the applicant.
Quick Search
Field or Control |
Description |
|---|---|
Search My Applicants |
Use this field to search for applicants using name or other keywords, such as phone number, email id. |
Clear Search |
Click this link to clear the search criteria and associated search results. |
|
Save Search |
Click this button to save the search criteria. |
|
My Saved Searches |
Click this button to view, delete, or run saved searches. |
My Saved Searches Modal
Use the My Saved Searches modal window to view, delete or run the saved searches.
My Saved Searches modal
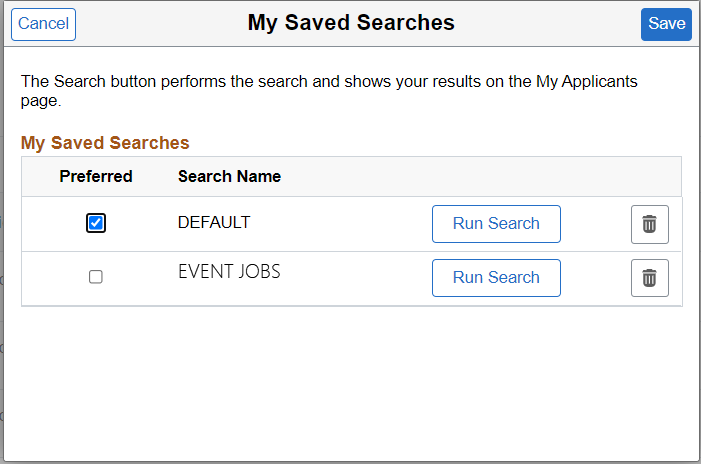
Default search is the personalized search criteria definition carried forward from the previous versions of My Applicants page saved by the user. By default, the system displays the list of applicants based on this default search definition for customers migrating to the latest release from a previous version.
|
Field or Control |
Description |
|---|---|
|
Preferred |
Select this checkbox for most frequently used search. If this checkbox is selected, the system executes the preferred saved search every time a user logs in. This overrides the default search definition carried forward from previous version. |
|
Search Name |
Displays the unique search name entered by the applicant. |
|
Run Search |
Click this button to run the search index and view results on the My Applicants page. |
Actions
The Actions button displays a set of related actions that the user can choose to perform on all the applicants that are selected using the check box under Applicant Name/Applicant ID. These are the available options:
Field or Control |
Description |
|---|---|
Add Applicant to List |
Access the Add to Applicant List page where user can choose the List Name to add the applicants to. |
Change Applicant Status |
Change the overall status of the selected applicants. |
Forward Applicant |
Forward the information of the selected applicants to another person. |
Link Applicant to Job |
Link the selected applicants to one or more job openings. |
Send Correspondence |
E-mail letters related to job application status to the selected applicants. |
My Applicants
This grid displays all the applicants associated with the recruiting user’s job openings, with the most recent applicants at the top of the list.
Field or Control |
Description |
|---|---|
|
Use this button to sort the applicants based on Applicant Name, Applicant ID (the default value), Phone, Job Applied and Last Job Applied To. |
Applicant Name/Applicant ID |
Theis field displays identifying information about the applicant. |
|
Applicant Type |
This field displays the type of applicant. |
|
Preferred Contact |
Displays the contact preference to receive communication whether it is through email or phone. |
Phone |
Displays the applicant’s primary phone number, if one exists. |
|
The Email icon appears if the applicant record includes a primary email address. The system displays the actual email address as mouseover text for the icon. Click the icon to access the Send Correspondence Page to send email (or a letter) to the applicant. If a user does not have authorization for the Send Correspondence component, the user’s default email client is opened instead. |
|
Jobs Applied |
Displays the number of jobs for which the applicant has applications. All job openings are included, even if they are closed or if the user does not have security access to the opening. If the applicant applied more than once to the same job opening, that opening is counted only once. Applications not linked to a job opening are not included in the count, nor are unsubmitted (draft) applications. |
Last Job Applied To |
Displays the job opening ID and title for the applicant’s most recent application. Click the link to access the Manage Job Opening page. |
Resume |
The Resume icon appears if the most recent application includes a resume. Click the icon to open the resume in a new window. If the resume is an attachment, the file opens in the new window. If the resume was entered as text in the application, the new window displays the Applicant Resume page in read-only mode. If none of the listed applicants have resumes, this column is hidden. |
Application |
Displays the Manage Application icon. Click the icon to access the Manage Application page, which provides a central location for performing all recruiting activities for a single job application. |
|
Click to access the Application Report Options Page, where you can choose report parameters and then generate an application details report. |

Included Applicants
The My Applicants page lists applicants who:
Are associated with the user’s job openings (openings to which the user has security access).
Are not in a Draft disposition (the disposition marked as Draft in your status configuration).
Are not in a Reject disposition (any disposition associated with the Reject phase).
Related Content and Decision Support
If you use PeopleTools 8.55 or later, the My Applicants page includes a supplementary panel that provides access to related information, Simplified Analytics and Insights visualizations.
For more information about Simplified Analytics, refer to the Simplified Analytics topics in the PeopleTools: Pivot Grid documentation.
Field or Control |
Description |
|---|---|
Related Information |
The Related Information tab displays the In Process Applicants analytics. |
|
This icon appears at the top of the Related Information tab. Click to open the Personalize Related Content page. This page lists the available related content so you can choose whether the Related Information tab shows or hides each item. |
|
This icon appears at the top of each individual item in the Related Information tab. Click to expand the item to open a modal dialog with a larger interactive version of the chart. |
 (Personalize Related Content icon)