Setting Up Preferences Using Fluid
This section provides an overview of using My Preferences (TL_TR_PREF_FLU) and discusses how to set the Time Reporting and Preferences.
|
Page Name |
Definition Name |
Usage |
|---|---|---|
|
TL_TR_PREF_FLU TL_TR_PREF_DTL_FL |
Enables employees to view and update their time reporting preferences. |
|
|
SCH_EE_USERPREF_FL |
Enables employees to view and update their schedule related preferences. |
The Time and Labor My Preferences page is used by employees to set up their schedule and time reporting preferences, such as preferred start day of the week, and time related defaults to display on the Time reporting pages.
When a Time Reporter is viewing or reporting time using the Timesheet page, certain time reporting preferences setup appear on the Timesheet page, such as Start Day of Week and Task Values.
Note: The Time Reporters can specify whether they want to be contacted through email or phone, when there is a change in schedule.
By default, the My Preferences page opens the Time Reporting Preferences tab.
Use the Time Reporting Preferences page (TL_TR_PREF_FLU and TL_TR_PREF_DTL_FL) to enable employees to view and update their time reporting preferences.
Navigation:
Select the Actions button from the page banner. From the Actions menu, select
This example illustrates the fields and controls on the My Preferences - Time Reporting Preferences page. You can find definitions for the fields and controls later on this page.
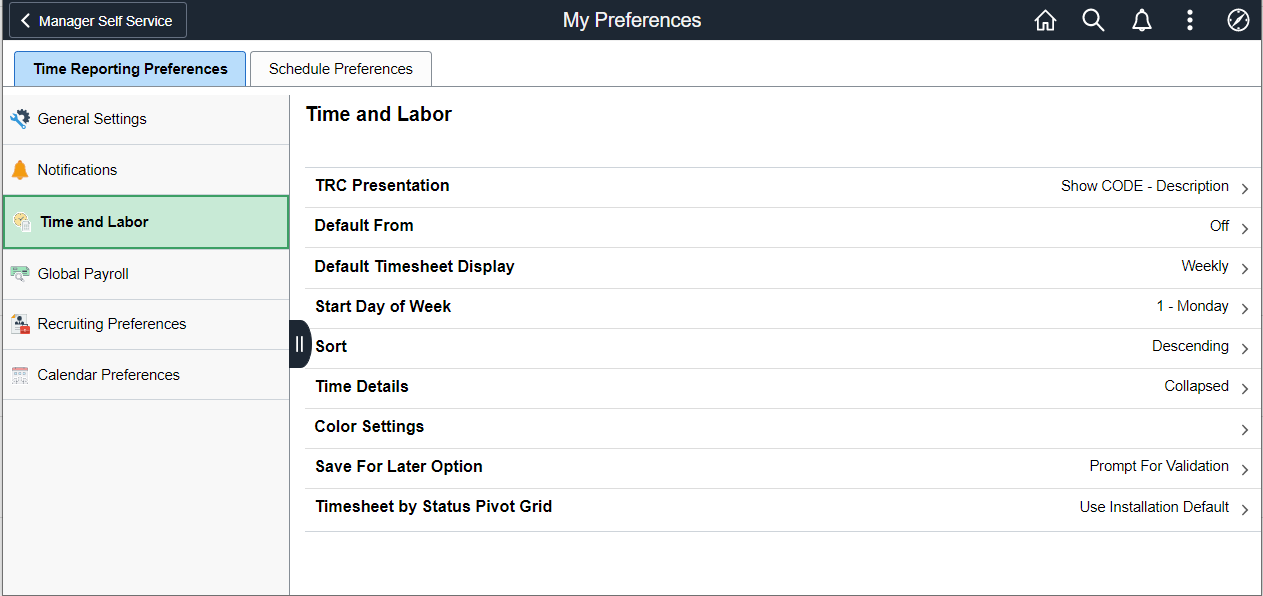
Employees use this page to set up and maintain their specific time reporting preferences and configuration options. The preferences that employees specify on this page will be reflected on various time reporting pages such as the Timesheet, Mass Time, Web Clock, and the Adjust Paid Time pages.
|
Field or Control |
Description |
|---|---|
|
TRC Presentation |
Select to view or update the section for TRC Presentation. |
|
Default From |
Select to view or update the section for Default From. |
|
Default Timesheet Display |
Select to view or update the section for Default Timesheet Display. |
|
Start Day of Week |
Select to view or update the section for Start Day of Week. |
|
Sort |
Select to view or update the section for Sort. |
|
Time Details |
Select to view or update the section for Time Details. |
|
Color Settings |
Select to view or update the section for Color Settings. |
|
Save for Later Option |
Select to view or update the section for Save for Later Option. |
|
Timesheet By Status Pivot Grid |
Select to view or update the section for Timesheet By Status Pivot Grid. |
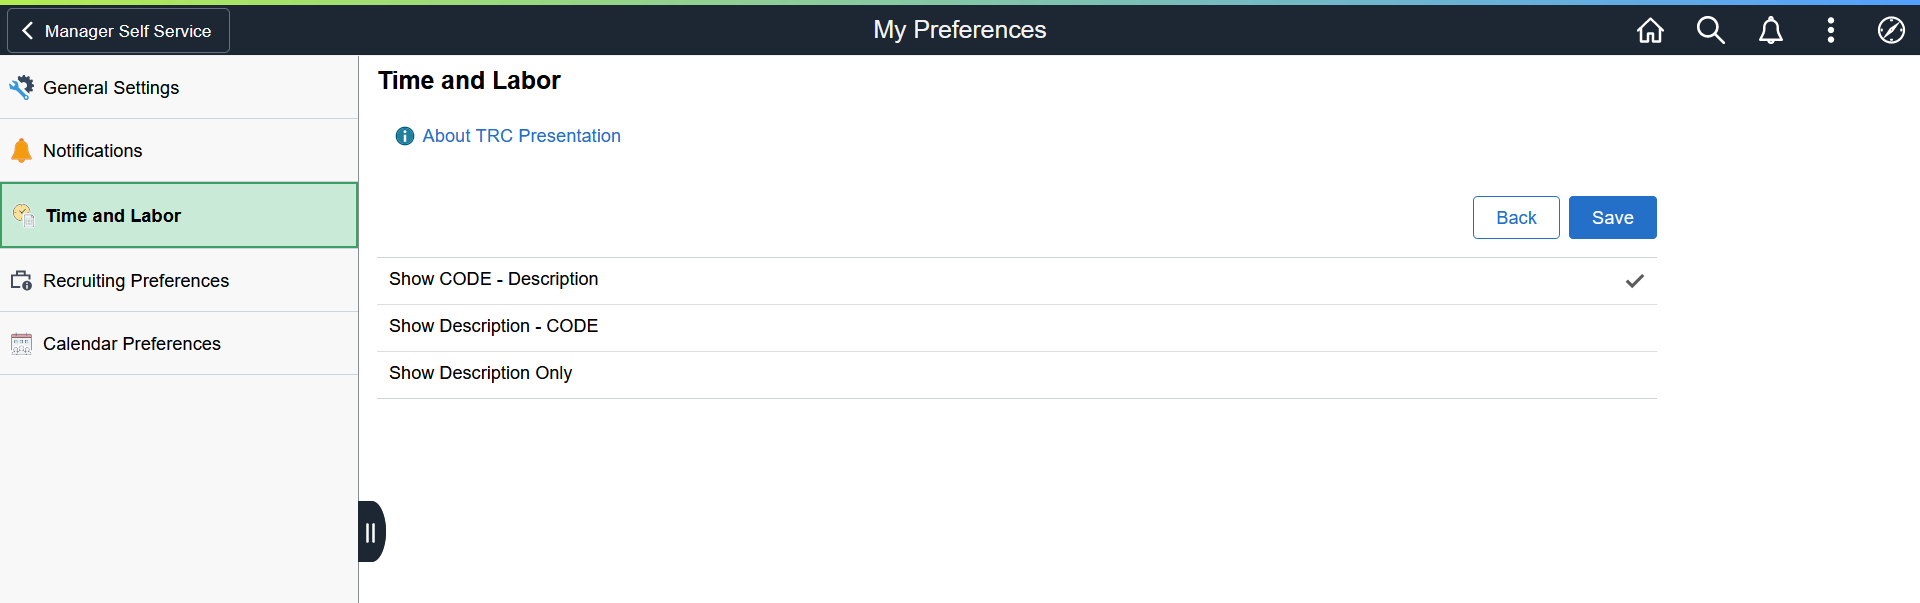
TRC Presentation
This configuration option determines in what order the Time Reporting Code is displayed and sorted when viewing the Time Reporting Code field on the Enter Time, Report Time, Weekly Time and Time Summary pages.
This example illustrates the fields and controls on the TRC Presentation section of theTime Reporting Preferences page. You can find definitions for the fields and controls later on this page.
|
Field or Control |
Description |
|---|---|
|
Show CODE - Description |
This configuration option shows the code first and then its description. |
|
Show Description - CODE |
This configuration option shows the description first followed by the code. |
|
Show Description Only |
This shows only the description. Note: The system warns time reporters if there is another TRC program with the same description. The system does not prevent from saving this TRC Presentation option. |
|
Back |
Go back to the Time Reporting Preferences page. |
|
Save |
Save the selected preferences Note: The Save button will only be enabled if any change is made to the page. |
Default From
Based on the preferences that are selected here in Default From, the Enter Time, Report Time and Weekly Time pages will default the values.
Note: If an employee is a task profile reporter, the Timesheet will just use what is defined as the default task profile either from Maintain Time Reporter Data or from the taskgroup displayed on the Timesheet, and not look at the User Preferences.
This example illustrates the fields and controls on the Default From section of the Time Reporting Preferences page. You can find definitions for the fields and controls later on this page.

|
Field or Control |
Description |
|---|---|
|
Off |
Default option to specify no default value. |
|
Prior Period |
Defaults information from the last period. This pre-population method works for employee access, not for manager access of an employee timesheet. |
|
Schedule |
Defaults information from the time reporter's current schedule. |
|
Task Values |
Task element values are automatically populated from the taskgroup and tasks listed in the Task Value Defaults section of Time Reporting Preferences. Note: If default task values are setup and values are not selected as an option, then the user receives a warning each time while leaving the page. |
|
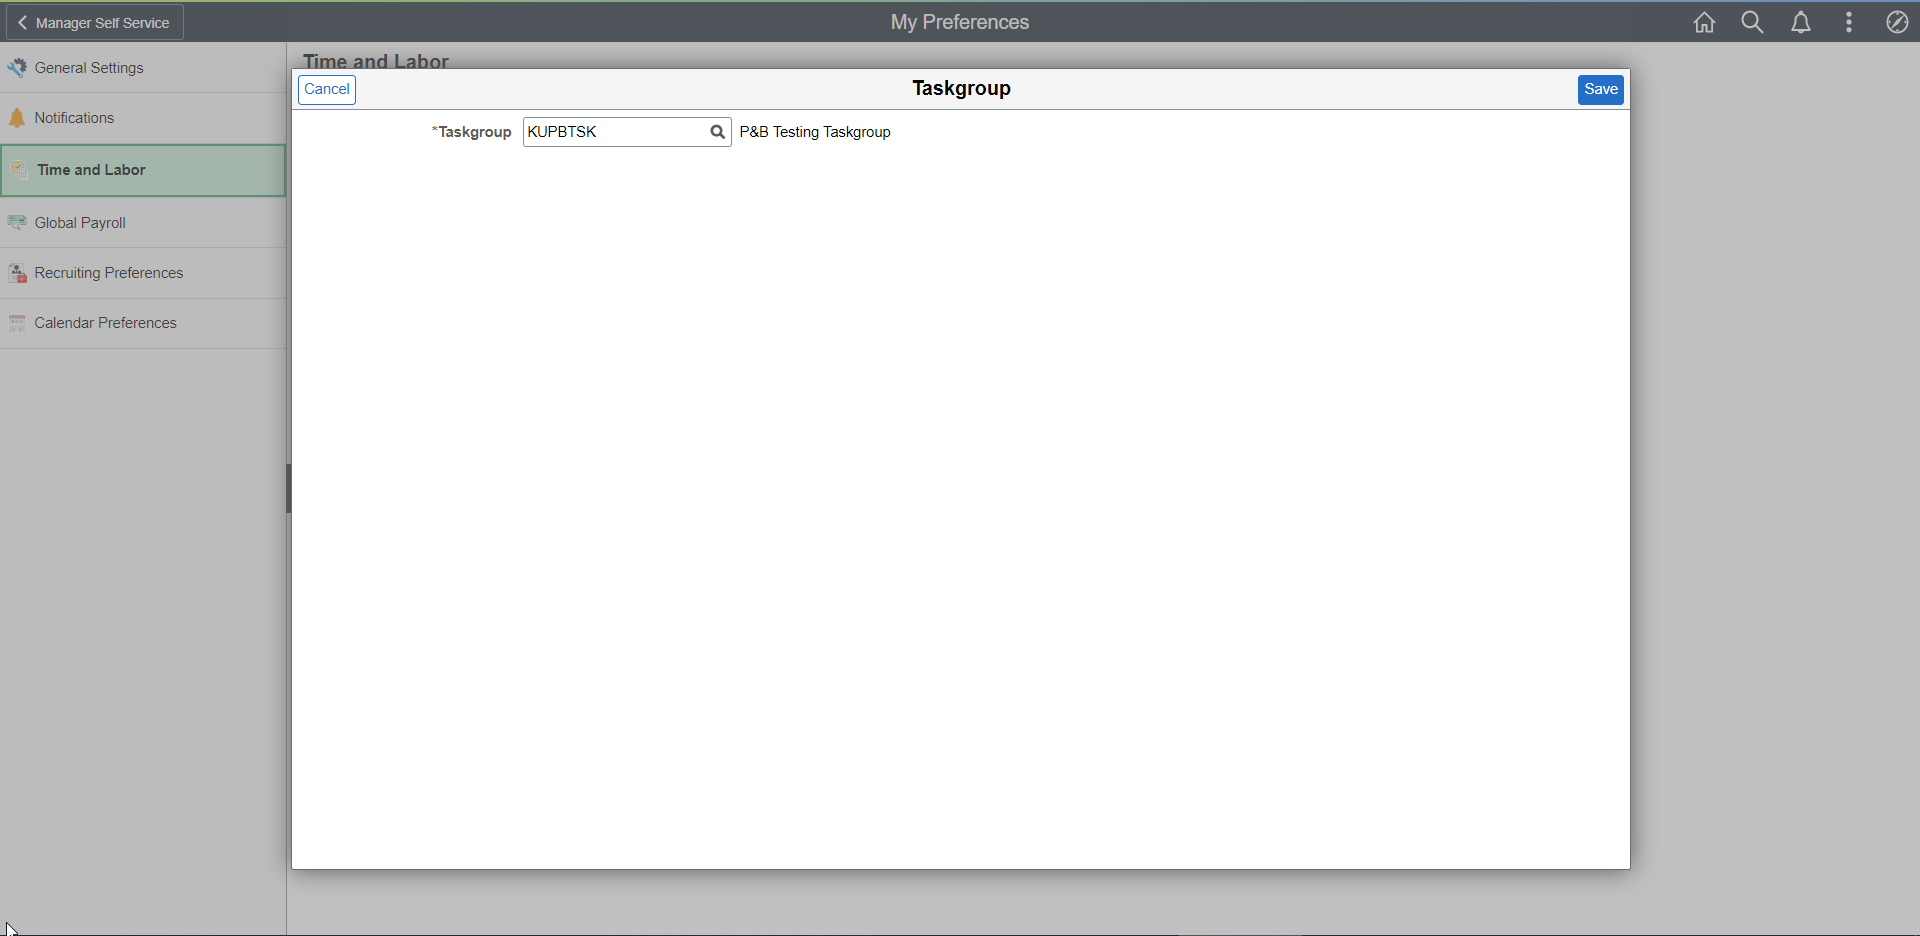
Add Taskgroup |
Select to open a modal window to add a taskgroup on the Taskgroup page (TL_USRPREF_TSK_SCF). |
|
Back |
Go back to the Time Reporting Preferences page. |
|
Save |
Save the selected preferences Note: The Save button will only be enabled if any change is made to the page. |
This example illustrates the fields and controls on the Taskgroup page. You can find definitions for the fields and controls later on this page.
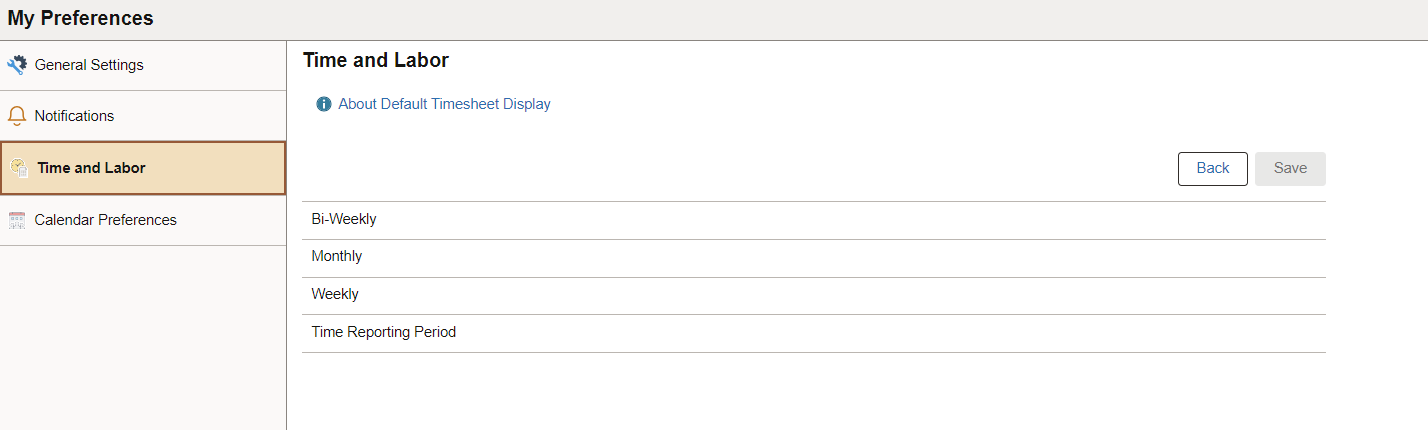
Default Timesheet Display
The Default Timesheet Display page determines if time displays on the Enter Time page in a weekly, bi-weekly, monthly or time period format.
This example illustrates the fields and controls on the Default Timesheet Display section of the Time Reporting Preferences page. You can find definitions for the fields and controls later on this page.
|
Field or Control |
Description |
|---|---|
|
Bi-Weekly |
Select to display the time on the Enter Time page in bi-weekly format. |
|
Monthly |
Select to display the time on the Enter Time page in monthly format. |
|
Weekly |
Select to display the time on the Enter Time page in weekly format. |
|
Time Reporting Period |
Select to display the time on the Enter Time page in a time period format defined on the Workgroup. |
|
Back |
Go back to the Time Reporting Preferences page. |
|
Save |
Save the selected preferences Note: The Save button will only be enabled if any change is made to the page. |
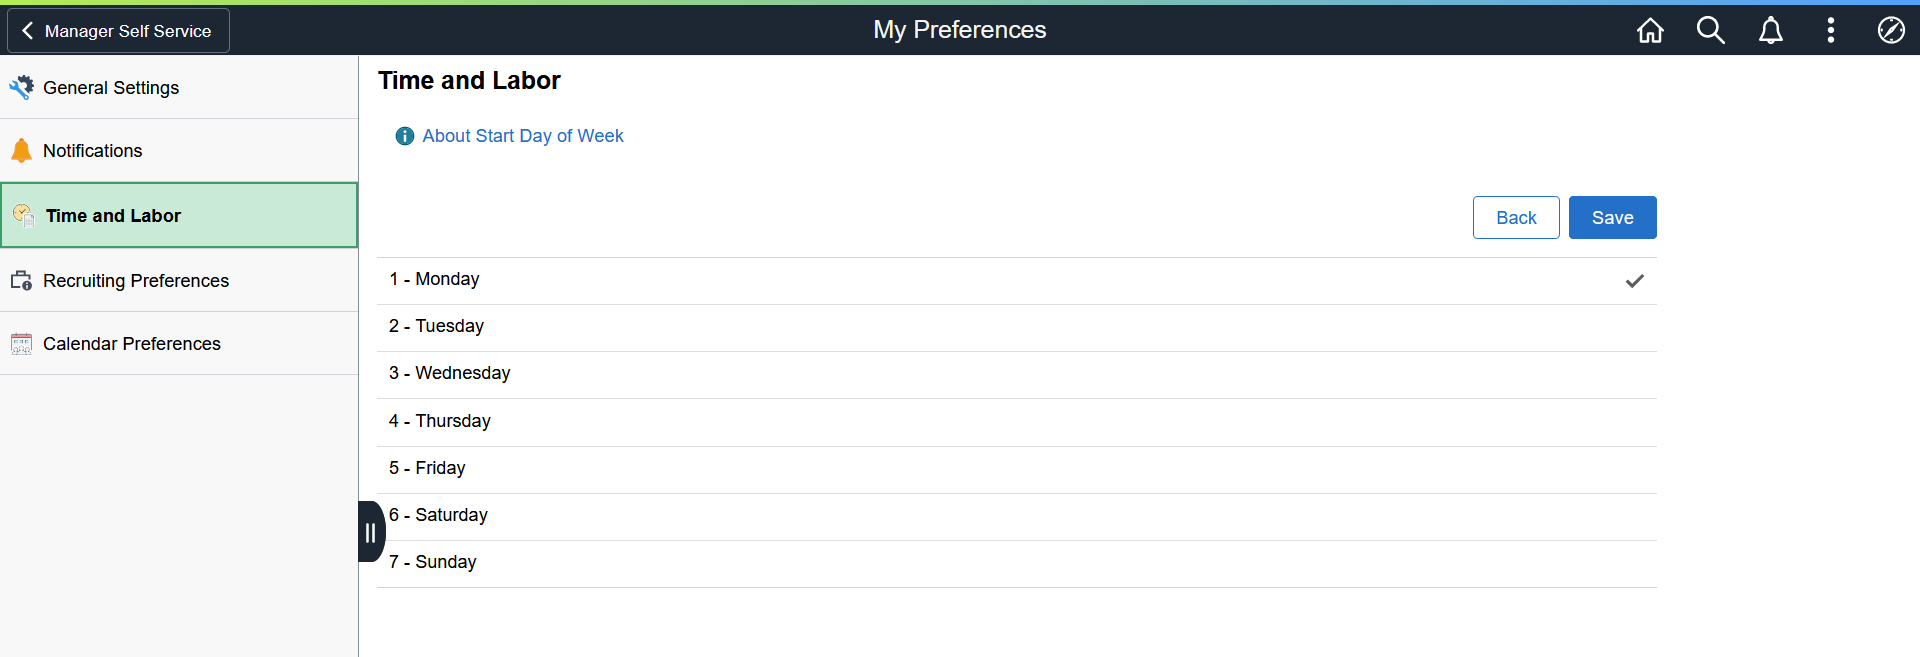
Start Day of Week
Use Start Day of Week to specify the first day of the week on the Enter Time page.
Select the default day for the week to start when using the Timesheet page. This field is applicable only when the time reporters select Weekly in the Default Timesheet Display field.
Save the selection after choosing the start day of the week using the Save button.
Note: The Save button will only be enabled if any change is made to the page.
This example illustrates the fields and controls on the Start Day of Week section of the Time Reporting Preferences page. You can find definitions for the fields and controls later on this page.
Sort
Use sort to select the display of reported time in ascending or descending order.
This example illustrates the fields and controls on the Sort section of the Time Reporting Preferences page.
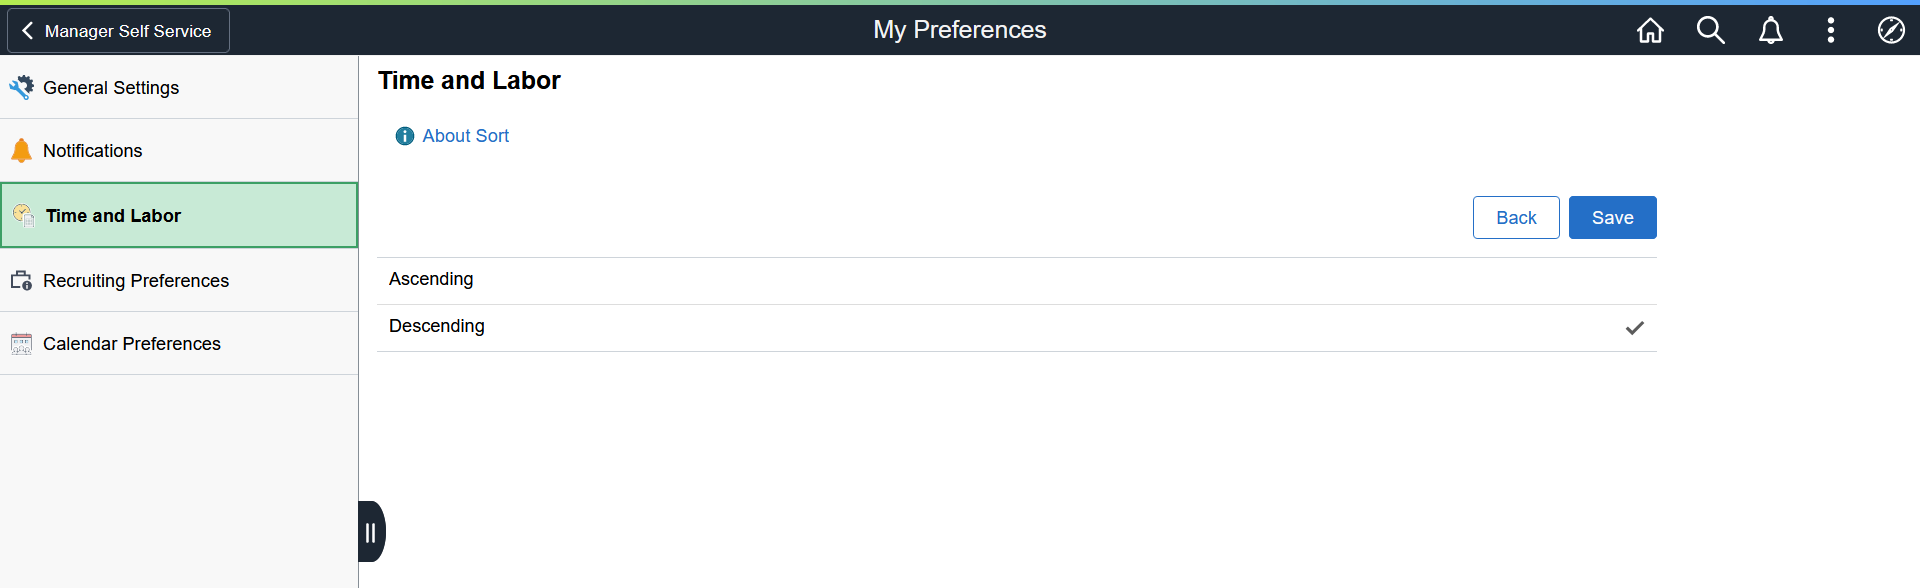
Save the selection to update the sorting preference.
Note: The Save button will only be enabled if any change is made to the page.
Time Details
Use to expand or collapse the Time Details fields for Report Time and Weekly Time entry pages.
This example illustrates the fields and controls on the Time Details section of the Time Reporting Preferences page.
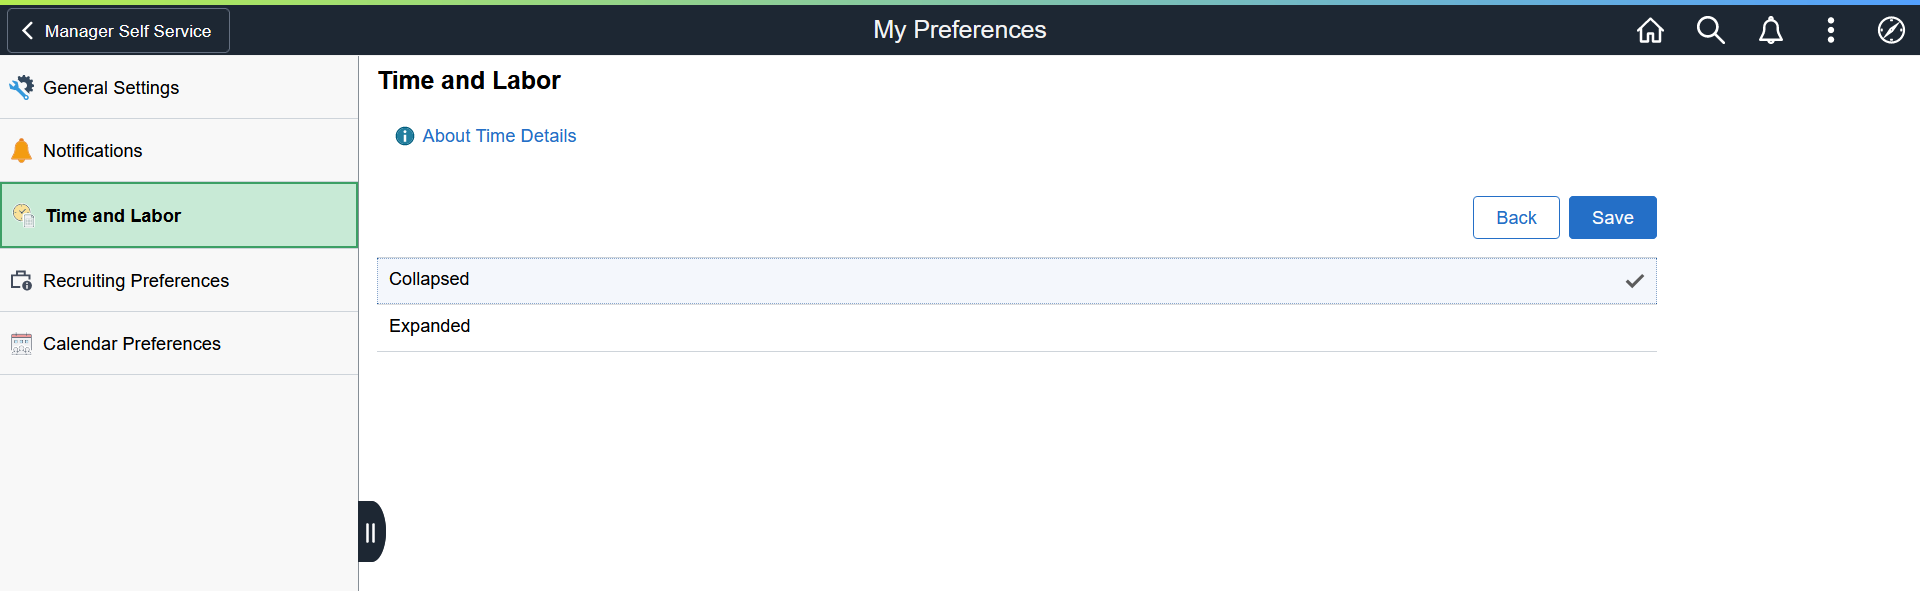
Note: This is applicable to Daily Time and Weekly Time Entry pages and not to the Enter Time page.
Save the selection to update the time details preference.
Note: The Save button will only be enabled if any change is made to the page.
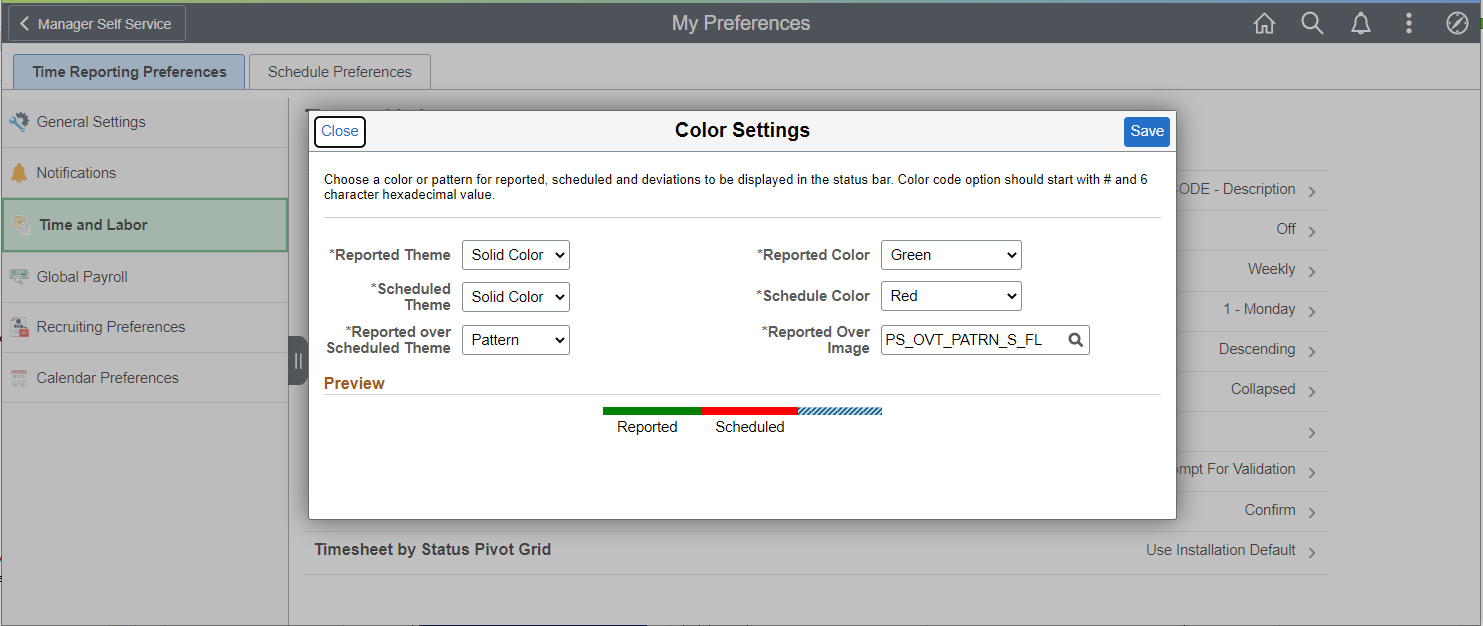
Color Settings
Choose a color or pattern for reported time, scheduled time and deviations to their schedule to be displayed in the status bar of the Color Settings page (TL_USER_COLOR_SCF).
This example illustrates the fields and controls on the Color Settings page displayed from the Time Reporting Preferences page.
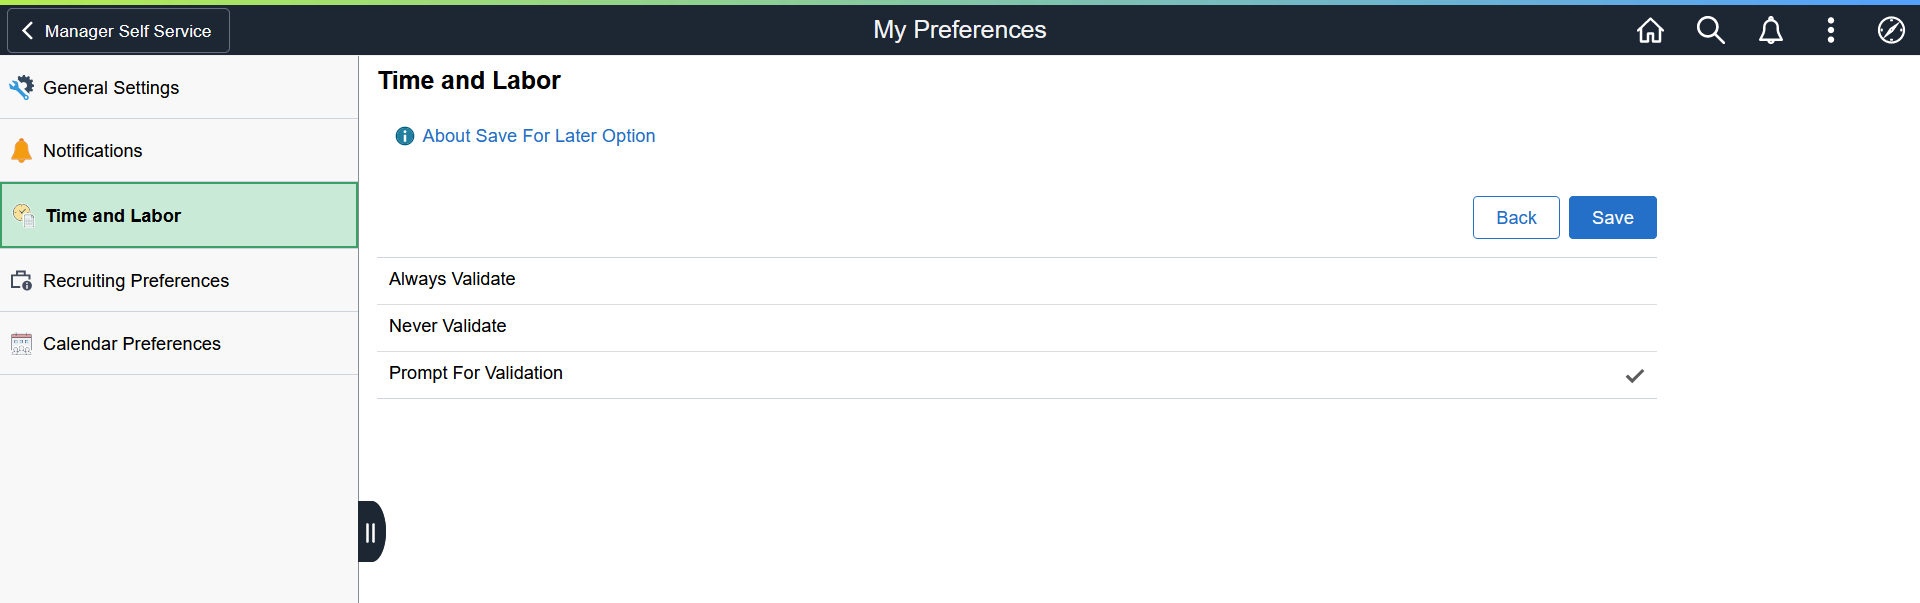
Save For Later Option
Specify whether timesheets are validated when a user selects the Save for Later button on a timesheet.
This example illustrates the fields and controls on the Save For Later section of the Time Reporting Preferences page. You can find definitions for the fields and controls later on this page.
|
Field or Control |
Description |
|---|---|
|
Always Validate |
Select to always validate when saving. |
|
Never Validate |
Save the time without validation. |
|
Prompt for Validation |
Ask whether the entered time should be validated. |
|
Back |
Go back to the Time Reporting Preferences page. |
|
Save |
Save the selected preferences Note: The Save button will only be enabled if any change is made to the page. |
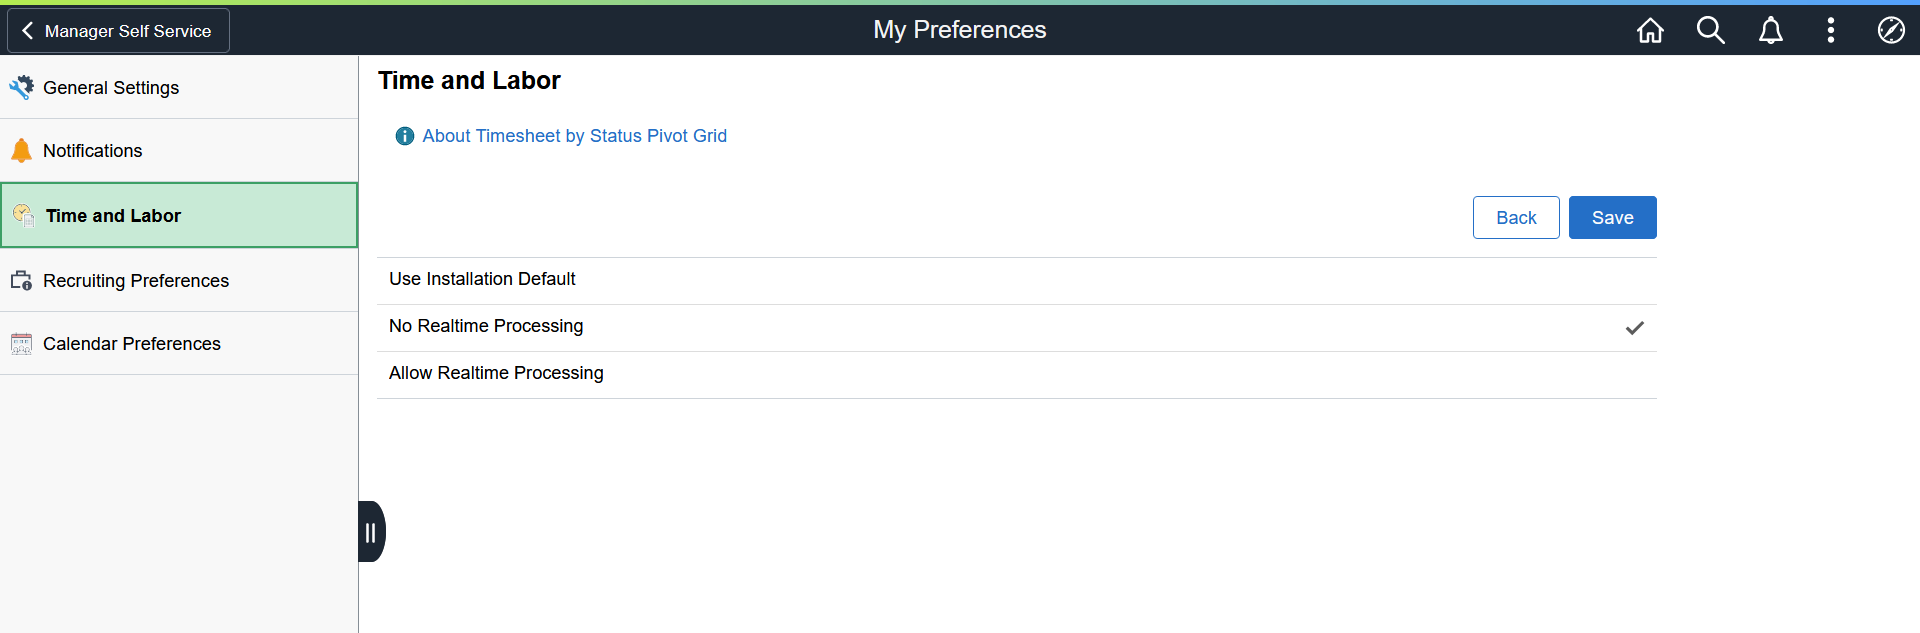
Timesheet By Status Pivot Grid
Use this section to enable real-time processing for the Timesheet by Status pivot grid.
This example illustrates the fields and controls on the Timesheet By Status Pivot Grid section of the Time Reporting Preferences page. You can find definitions for the fields and controls later on this page.
|
Field or Control |
Description |
|---|---|
|
Use Installation Default |
Select to load the data according to the time and labor installation set by the administrator. |
|
No Realtime Processing |
Select to load the data according to the last staging run on the pivot grids. |
|
Allow Realtime Processing |
Select to have the system load the most recent reported time on the pivot grids. |
|
Back |
Go back to the Time Reporting Preferences page. |
|
Save |
Save the selected preferences Note: The Save button will only be enabled if any change is made to the page. |
Use the Schedule Preferences page (SCH_EE_USERPREF_FL) to enable employees to view and update their schedule related preferences.
Navigation:
Select the Actions button from the page banner. From the Actions menu, select . Select the Schedule Preferences tab.
This example illustrates the fields and controls on the Schedule Preferences page. You can find definitions for the fields and controls later on this page.
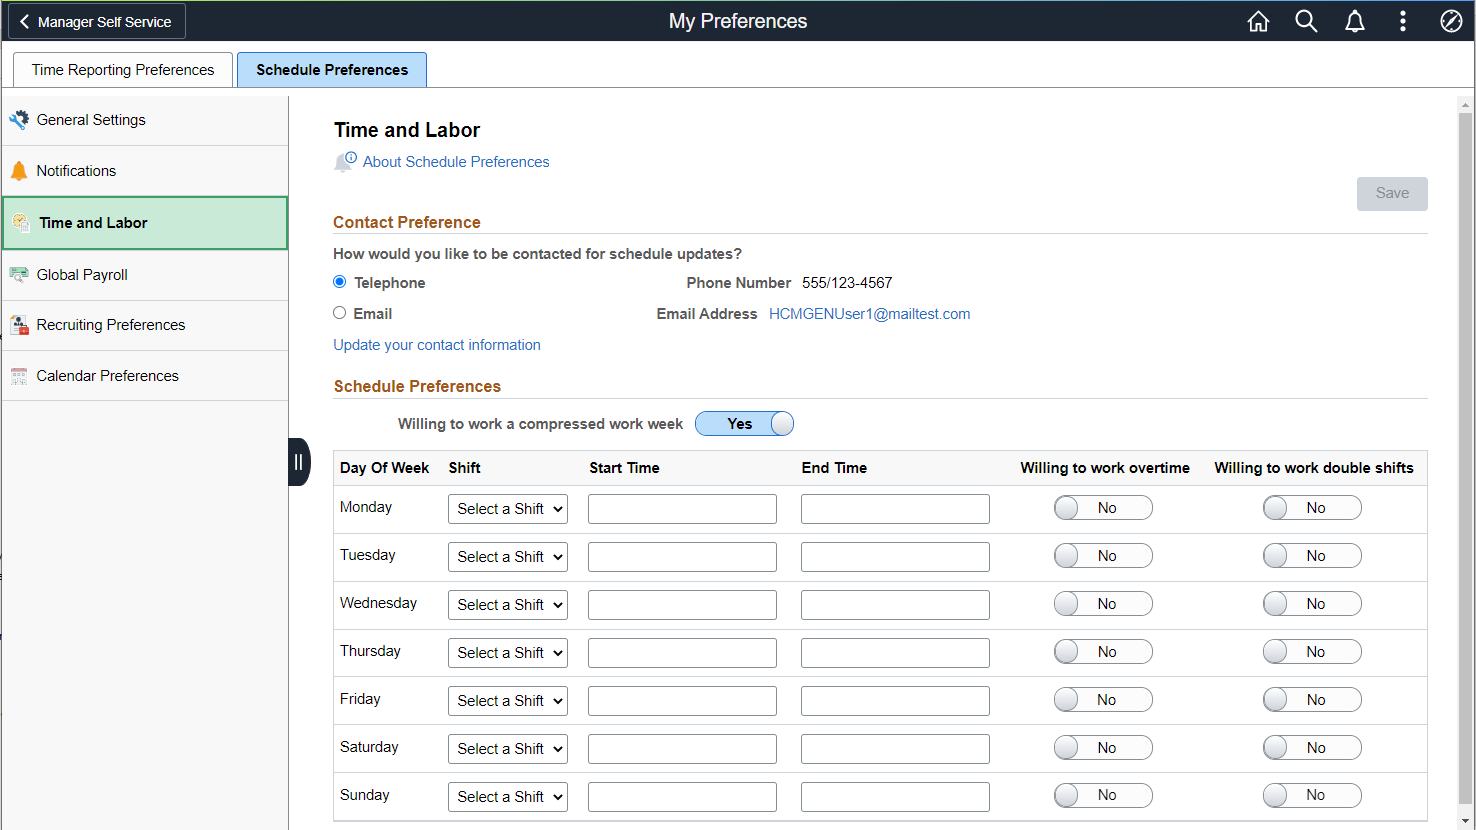
All fields on this page are optional, with the exception of the Telephone/Email option and the Willing to work fields. The Willing to work fields have a default value of No.
Contact Preference
The employee's preferred phone number and email address appear. To change them, access the Update your contact information link, which takes the user to the Contact Details page. Phone, email, and other contact information can be viewed and modified. The link to employee's contact information is only available for editing if eProfile is installed on the General Installation page.
Schedule Preferences
For each day of the week, enter the shift or start and end times the time reporters prefer to work.
|
Field or Control |
Description |
|---|---|
|
Willing to work a compressed work week |
Allows the time reporter to specify whether they are willing to work on a compressed work week. |
|
Shift |
Enter the shift preference. This field is populated based on the particular EmplID. If the current user has a schedule assigned, the only shifts available in the drop-down list box are those shifts that correspond to the user's schedule ID and the SetID determined by the user's schedule group. If the user has no schedule assigned, the Shift ID field is hidden. Note: There is no validation between start and end times and shifts. No logic exists to verify that the times entered fall within the shift, if one is entered. |
|
Start Time, End Time |
Enter the start and end times the time reporter prefers to work. |
|
Willing to work overtime |
Enter whether you would be willing to work overtime. |
|
Willing to work double shifts |
Enter whether you would be willing to work a double shift. |
Note: The Save button will only be enabled if any change is made to the page.