Columns Tab
The Columns tab allows you to define the structure of the report based on the different report types.
In the Available Columns section:
- From the Select a Data Source list, select a data source, such as query-based tabs. Query-based tabs of a BP display as a data source for UDRs at the following levels:
- Company Templates
- Shell Templates
- Company Workspace
- Shell level
Query-based tabs display as a data source in the format: <BP Name> / <QBT Name>
- In the Data Element column, select the check box for each data element.
- Drag and drop the selected data elements to the left pane to add columns to the report.
- Perform any of the following actions:
- Click Add Formula to add a custom column that is not listed in the Available Columns section, and then create a formula using the other existing data elements.
For example, a formula to display the remaining number of days before the due date is reached. Create this formula by subtracting a due date data element from a current date data element.
- Click Refresh, to refresh the list of selected columns in the left pane.
- Click
 Delete to delete a selected column from the left pane.
 - Click
 Reorder to modify the display order of the selected columns in the left pane.
- Click Add Formula to add a custom column that is not listed in the Available Columns section, and then create a formula using the other existing data elements.
Tabular Report - Columns Tab
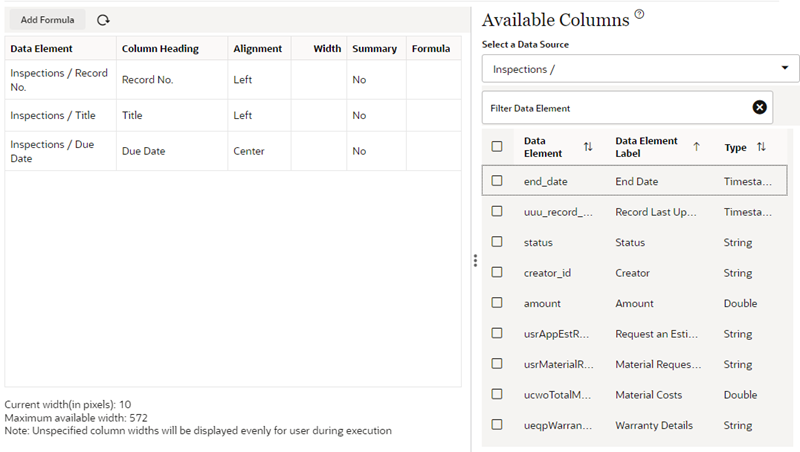
The left pane header contains the following elements and columns:
- Data Element
- Column Heading
- Alignment
- Width
- Summary
- Formula
- Hide
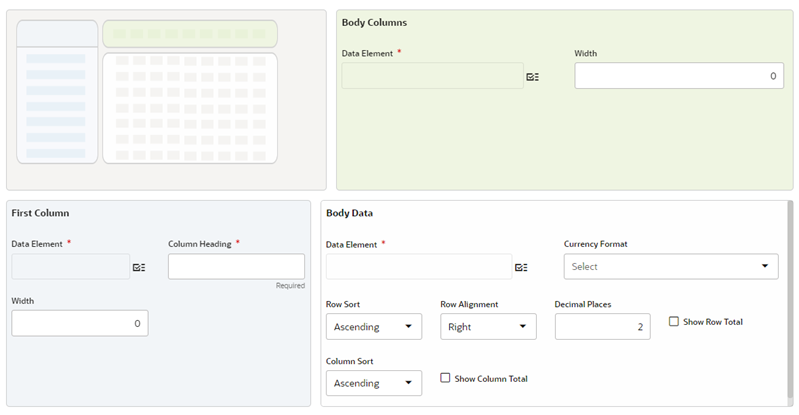
Crosstab Report - Columns Tab
The color of each block corresponds to the picture in the top left block, to display how data is arranged. Select at least one Data Element for the Body Columns, First Column, and Body Data blocks.
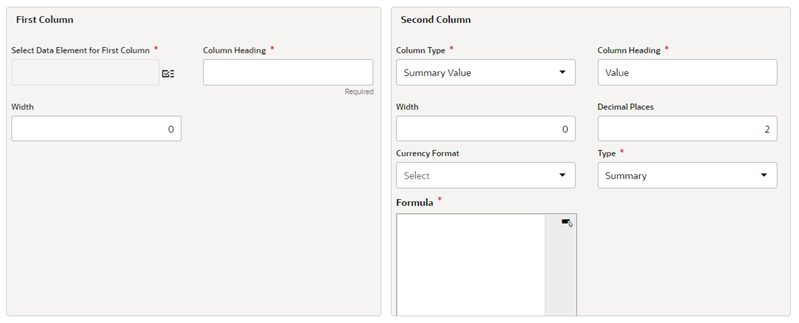
Summary Report - Columns Tab
This is the Columns tab for a Summary report. The following fields are required:
- First Column
- Select Data Element for First Column
- Column Heading
- Second Column
- Column Type
- Column Heading
- Type
- Formula
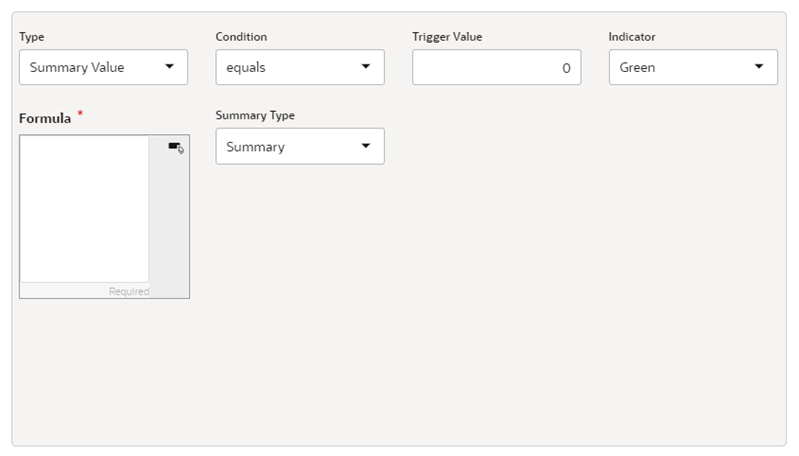
Alert Report - Columns Tab
This is the Columns tab for an Alert report. Enter a formula for the report column.
See Also
Last Published Thursday, February 19, 2026