Design Approach for a Workflow Business Process
Many forms use workflows; a good design approach is to outline the workflow first to understand what kind of forms you will need at each step. After you have a good understanding of the workflow and what forms will be necessary, you can create the forms and then assign them to the appropriate steps as you create the workflow.
View vs. Action Forms in a Workflow
Part of understanding the workflow is considering each phase of a step. For most steps, there will be a "viewing" phase and an "action" phase. As a business process arrives at each step in a workflow, Unifier notifies the appropriate users if they are involved in the step. When they open the notification, the application displays a view-only form of the step's task. Each user can choose to accept or decline the task implicit in this form. If the user declines the task, the step ignores the user. If the user accepts the task, the form becomes an action form where the user can enter or edit information and attach comments, line items, or documents, and forward the form on to the next step in the workflow.
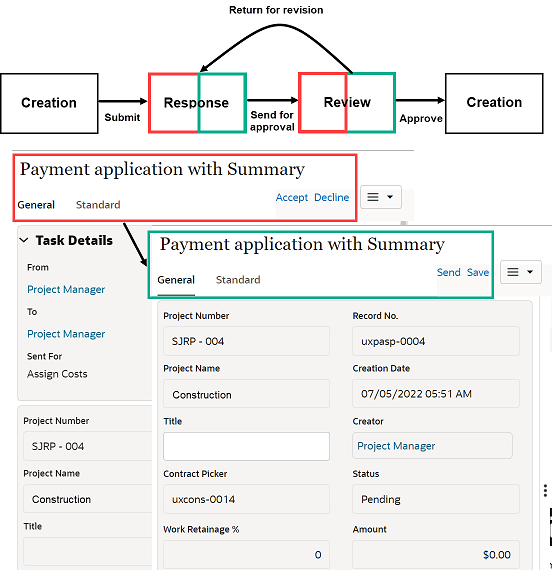
You will be designing the "view" and "action" forms for each step in a workflow. In the example below, the view phase is the first half of the step, marked in red, and the action phase is the second half of the step, marked in green. The toolbar options change from Accept and Decline to Send and Save. Clicking Send on the action form will route the record to the recipient in the view phase once more, for acceptance or rejection.
What Users Can Do
On a view form | On an action form |
|---|---|
|
|
Last Published Saturday, June 6, 2026