Starting a Workflow
To create a new workflow, you begin by naming the workflow. Then you can open the workflow "canvas" to design the workflow.
To begin a workflow:
- Go to the Company Workspace tab and switch to Admin mode.
- In the left Navigator, select uDesigner, and then select Business Processes.
- Open the BP for which you want to design a workflow.
- In the left Navigator, select Workflows.
- From the toolbar, click New, and then select Manual. The Workflow Properties window opens.
- Enter a Name for the workflow and (optional) a Description.
- Click OK. The new workflow appears in the Workflows pane.
- Select the workflow in the Workflows pane and click Open.
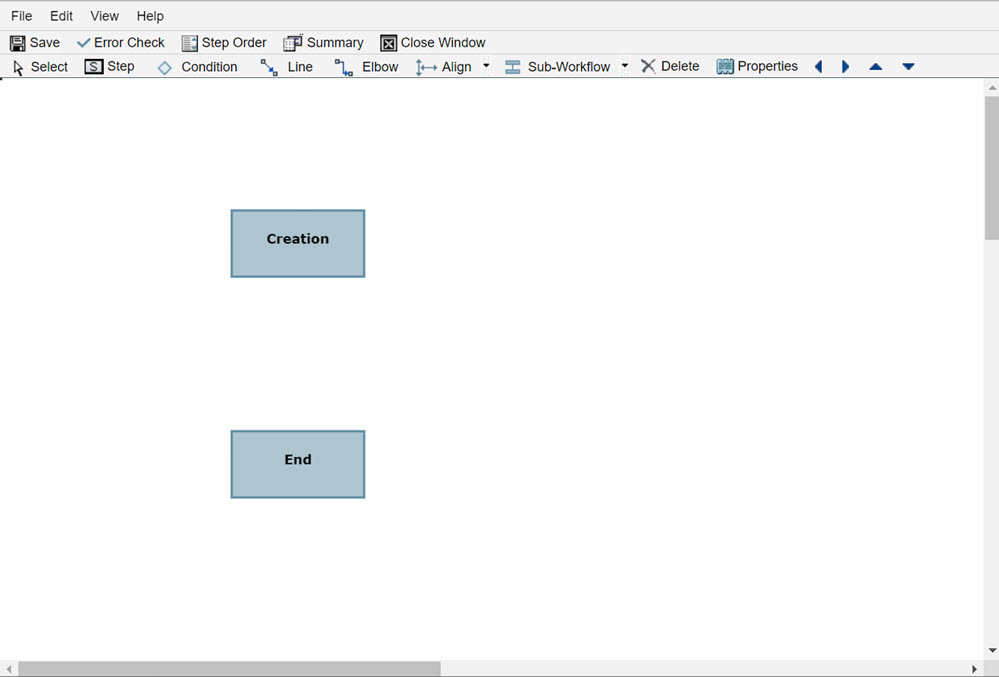
uDesigner opens a canvas where you can build the workflow. By default, the workflow has a Create and End step. This is your starting point for designing a workflow.
Workflows can often be very large. If you are designing a large workflow, you can enlarge the canvas screen to make it easier to add steps to the workflow progression.
To enlarge the canvas, you can drag the window sides until the workflow fits in the window, or you can quickly maximize the canvas. To maximize the canvas, click the icon in the upper-right corner of the window. To restore the canvas window to its normal size, click the Restore icon.
About Create and End Steps
The Create and End steps in a workflow have unique characteristics you should be aware of during the design and setup of the workflow.
For the Create step in uDesigner:
- You can rename the Create step to something else if you want.
- You can place only outgoing links on the Create step.
- You can attach only action forms to the Create step.
- You cannot send a link back to the Create step. If the workflow requires that a form be sent back to the creator (Create step), add a separate "back step" or "revision step" that will send the form back to the creator.
For the End step in uDesigner:
- You cannot rename the End step.
- You can place only incoming links on the End step
- You can attach either an action form or a view form to the End step.
For the Create Step in Unifier:
- You cannot "Cc" users on the Create step.
- A workflow cannot send a link back to the Create step. If the workflow requires that a form be sent back to the creator (Create step), the workflow design should include a separate "back step" or "revision step" that will send the form back to the creator. If your workflow includes such a "back step," specify match step <Creation> for the Assignees on that step.
For the End Step in Unifier:
- You can "Cc" users on the End step.
- You can send the form to the editors who have been assigned to the form.
- You can add comments to a business process at the End step, and also at any status in a workflow, including "terminated."
Last Published Saturday, June 6, 2026