Before you Begin
In this business scenario, we create a group customer in the Prototype company. For this group customer, a client is made a member of a child-class based on the membership rules. Then, the client is enrolled in a policy, and the bill amount, is reconciled.
Note:
This use case may differ from your actual requirements. This is written to help understand the steps to implement a group customer in OIPA. To follow steps in this use case, it is recommended that the default Prototype company is available in your environment.Scenario
In this business scenario, we are using the Prototype company and we are using the Prototype company default configuration.
Prerequisites
Prototype company default configuration in your environment.
Step 1: Create a Group Customer
To create a Group Customer, follow these steps:
- From the Central Add drop-down, select Customer, and click the Create icon. The Customer screen appears with Customer detail fields and History tab.
- On the Customer tab, from the Type drop-down, select Group Customer.
- Enter the applicable customer information in the appropriate fields. If required information is left blank, then an error message will appear.
In this use case:
- Enrollment Relationship: Employment
- Enrollment Class: Eligibility
- Hierarchy Relationship: Employment
- Click Save.
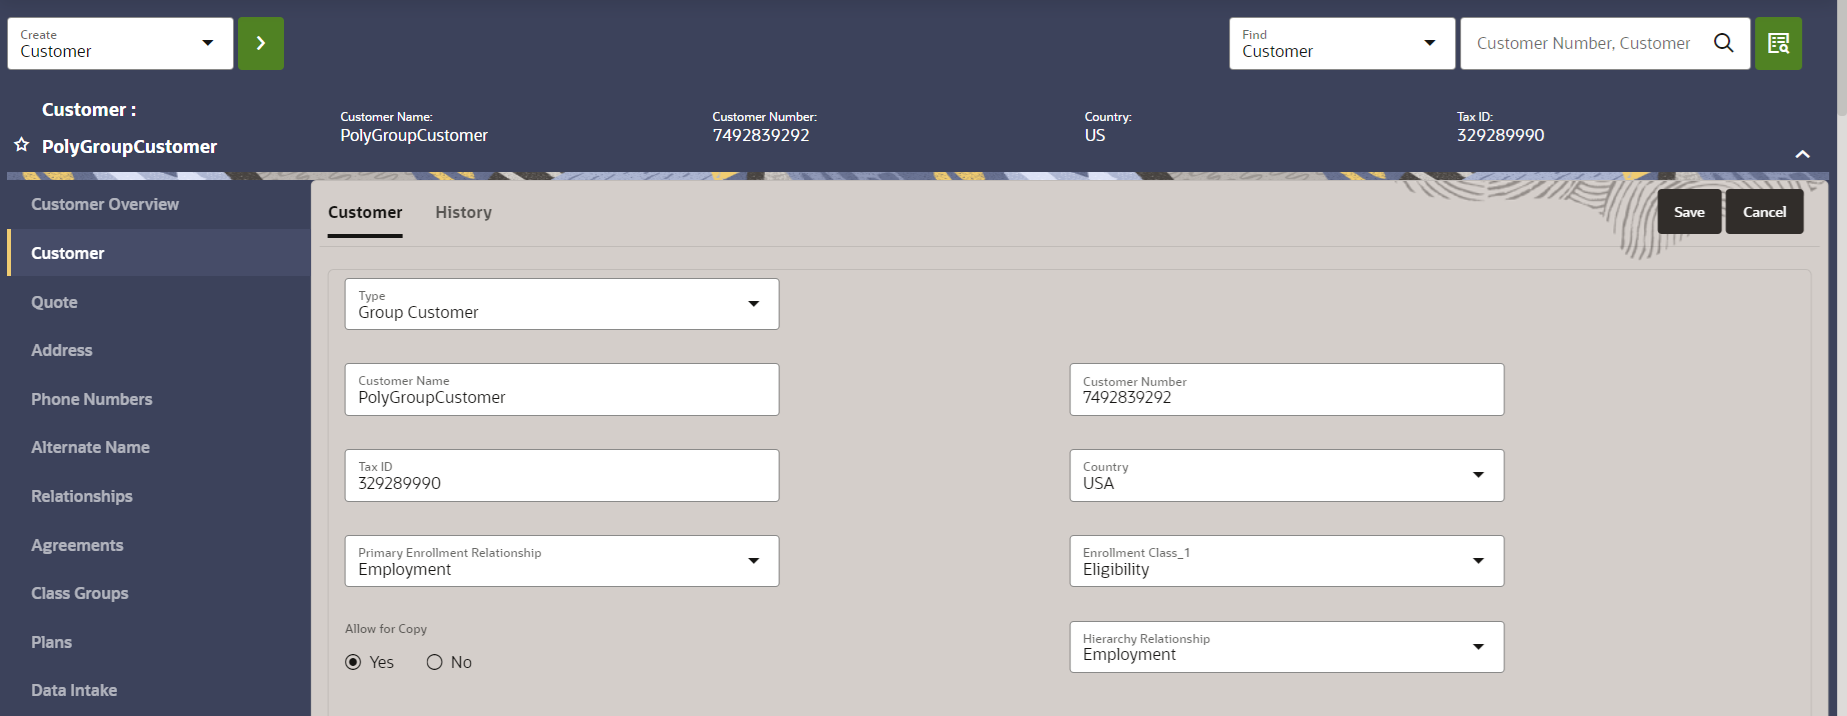
Group Customer
Step 2: Add an Agreement to the Group Customer
In this use case we are adding a Contract agreement to the above group customer.
To add a contract agreement, follow these steps:
- On the Group Customer screen, in the Left Navigation list, click Agreements. The Agreements tab appears.
- Hover over the Contract node, the + New icon appears.
- Click the + New icon, the Details tab appears.
- Enter the fields and update the Status to Active. In this use case:
- Type: Master Agreement – Insured
- Agreement Name: Master Agreement – Insured
- Click Save.
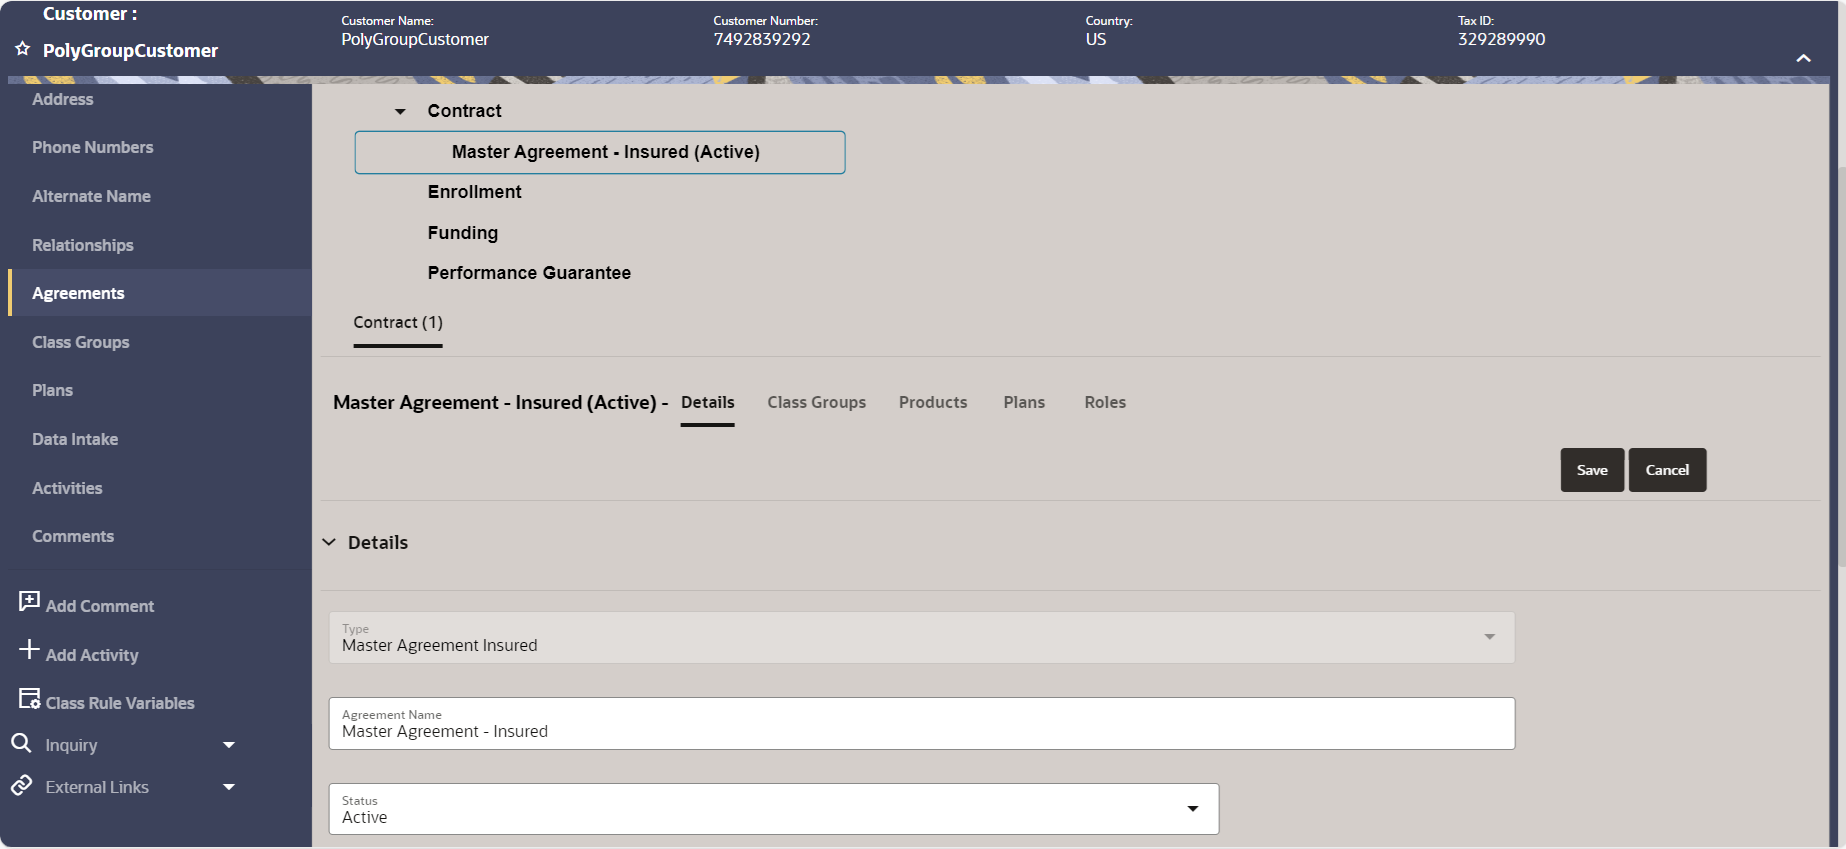
Agreement
Step 3: Add a Product
Before adding a plan, you must add a product to the group customer.
To add a product, follow these steps:
- On the Agreement screen, expand Contract, click the required agreement, and then click the Products tab.
- Click the Add Product button. The (Agreement Name) page appears.
- From the Company drop-down, select the required company. In this use case, we select Prototype Group Child Company.
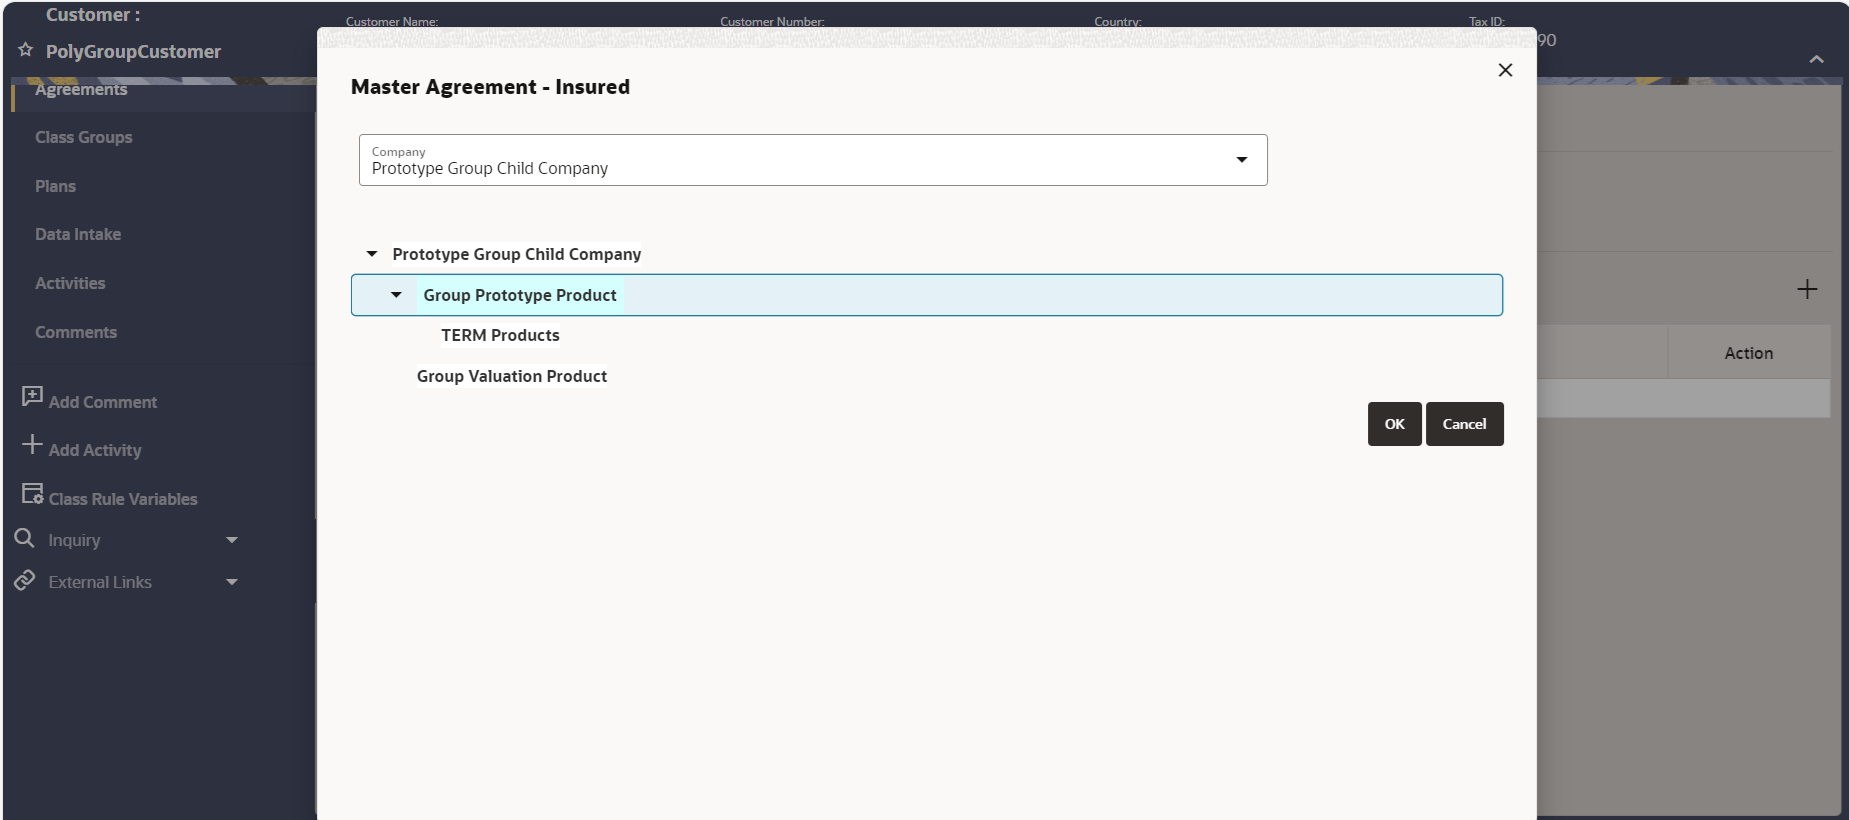
Select the Product - Select the required product and click OK. The Details page appears. (In this use case, we select Group Prototype Product.)
- On the Details page, enter the Effective Date and update Status to Active.
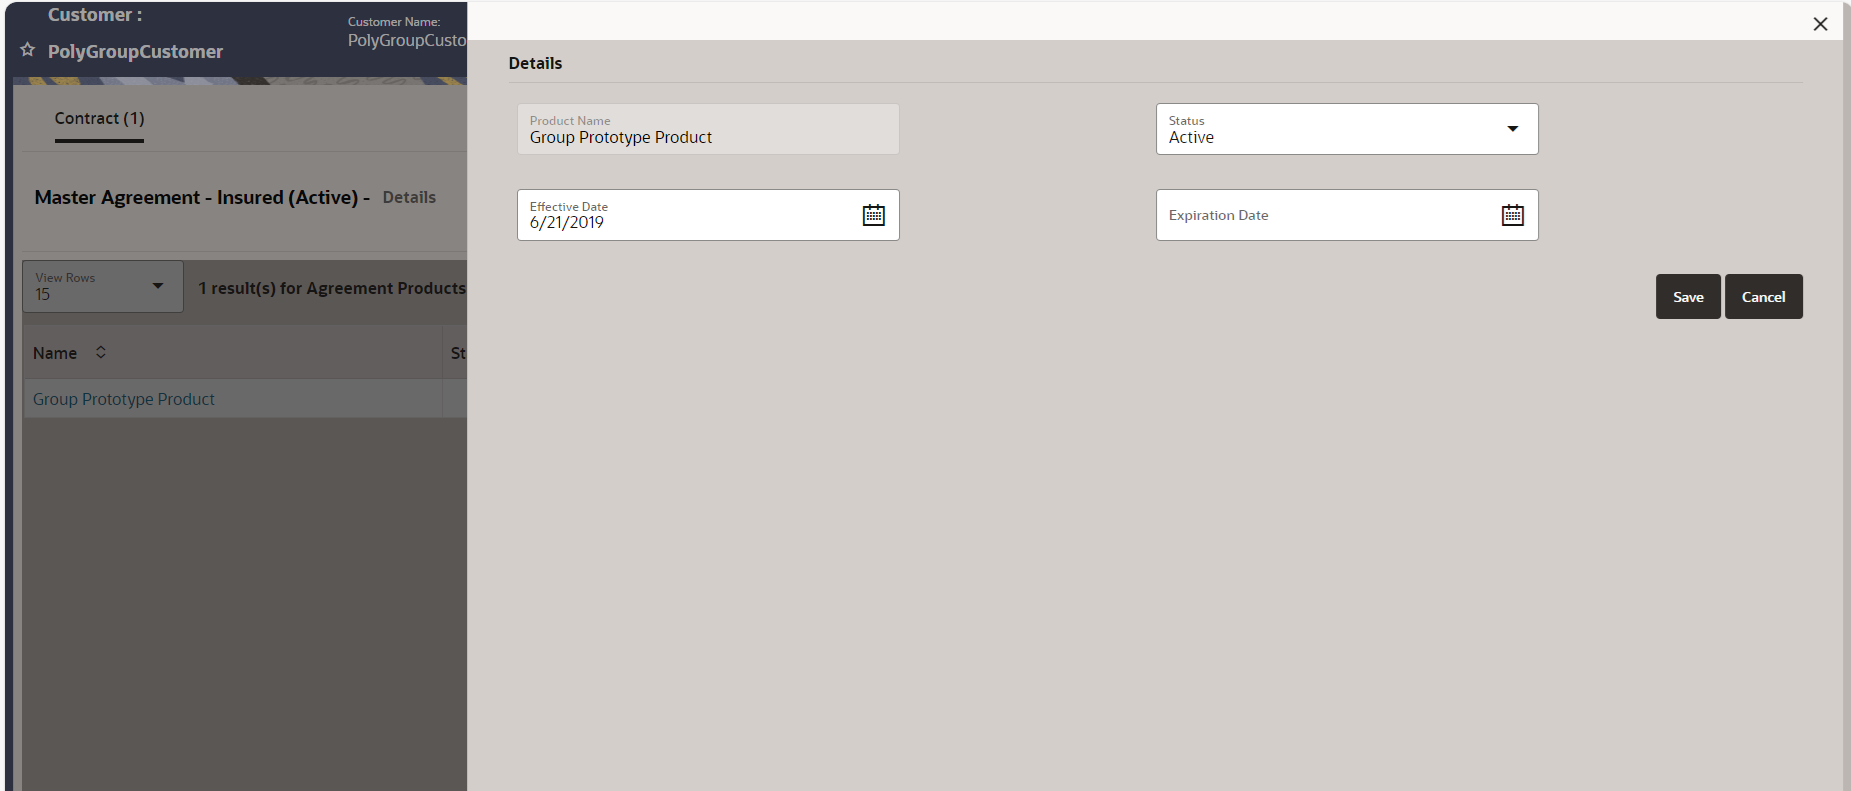
Product - Click Save. The product is added under the Products tab in a tabular format.
Step 4: Add a Plan
Once, you have added a product, you can add a plan and plan segments.
To add a plan, follow these steps:
- On the Agreement screen, expand Contract, click the required agreement, and then click the Plans tab.
- In the Add option, select newplan from the drop-down list, and then click the Create icon. The (Agreement Name)- New Plan window appears.
- Enter the applicable information for the new plan.
In this use case:
- Company: Prototype Group Child Company
- Product Name: Group Prototype Product
- Status: Approved
- Effective Date: 6/21/2020
- Currency: US Dollar
- Expiration Date: blank
- Allocation Method: Default
- PIT Valuation: Yes
- Mixed Valuation: No
- Market Maker: USA
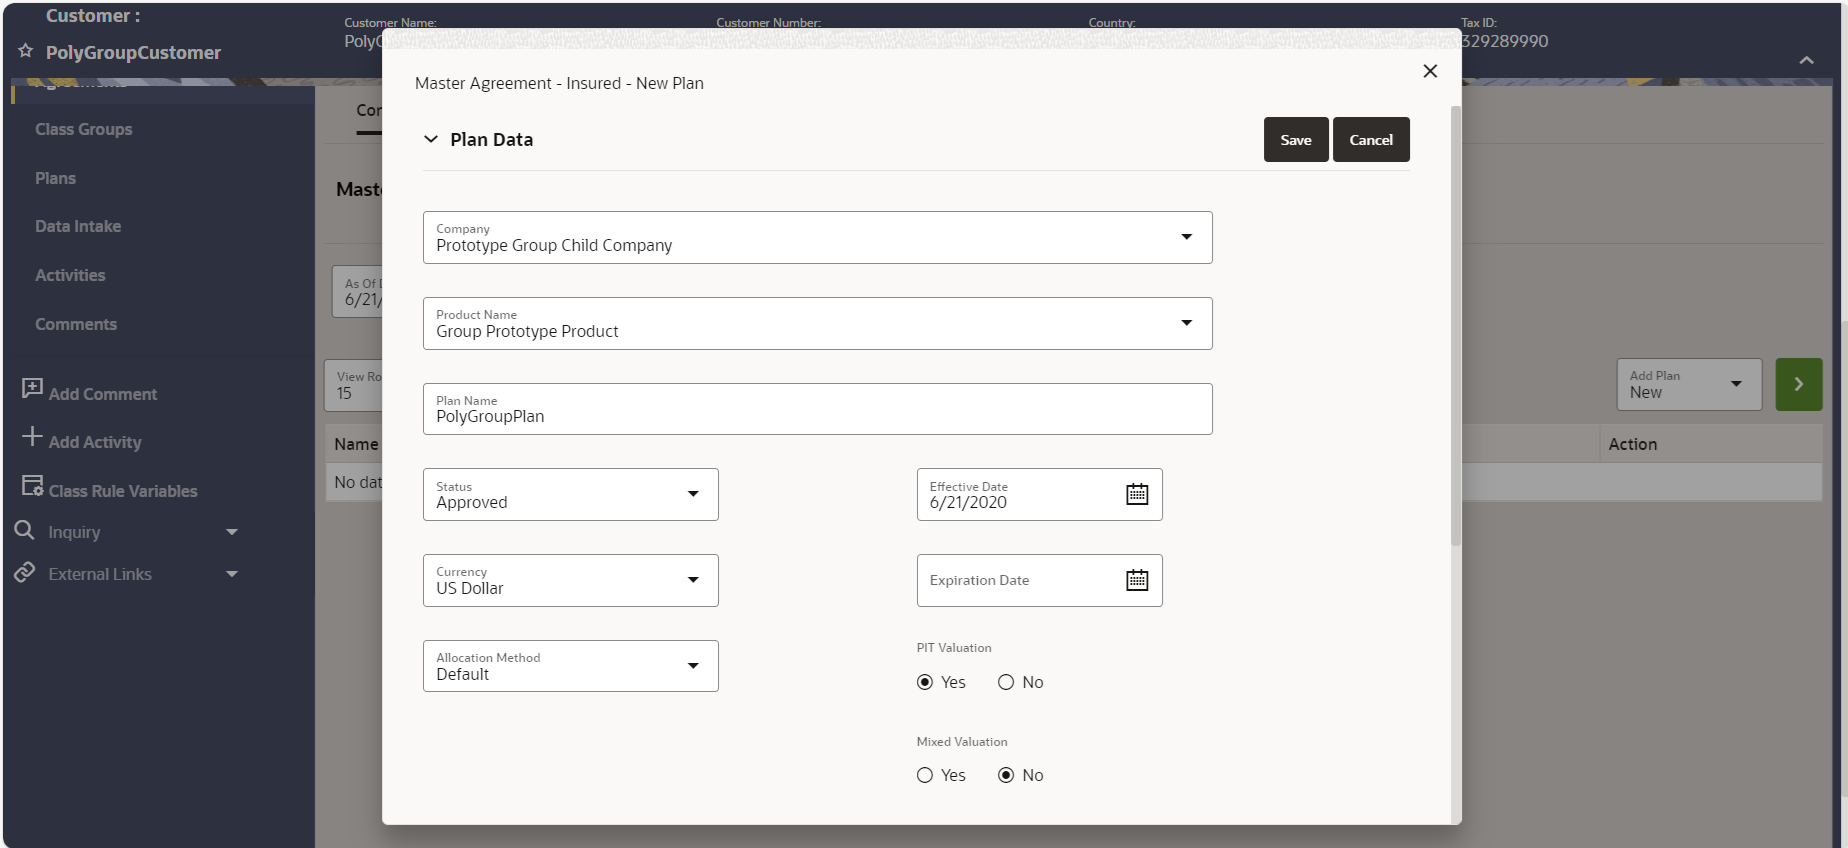
Plan - Click Add Plan Segment. The Add Plan Segment page appears.
- Enter the segment information. In this use case, Segment Name is BaseCoverageBasic and Plan Segment Type is Type1.
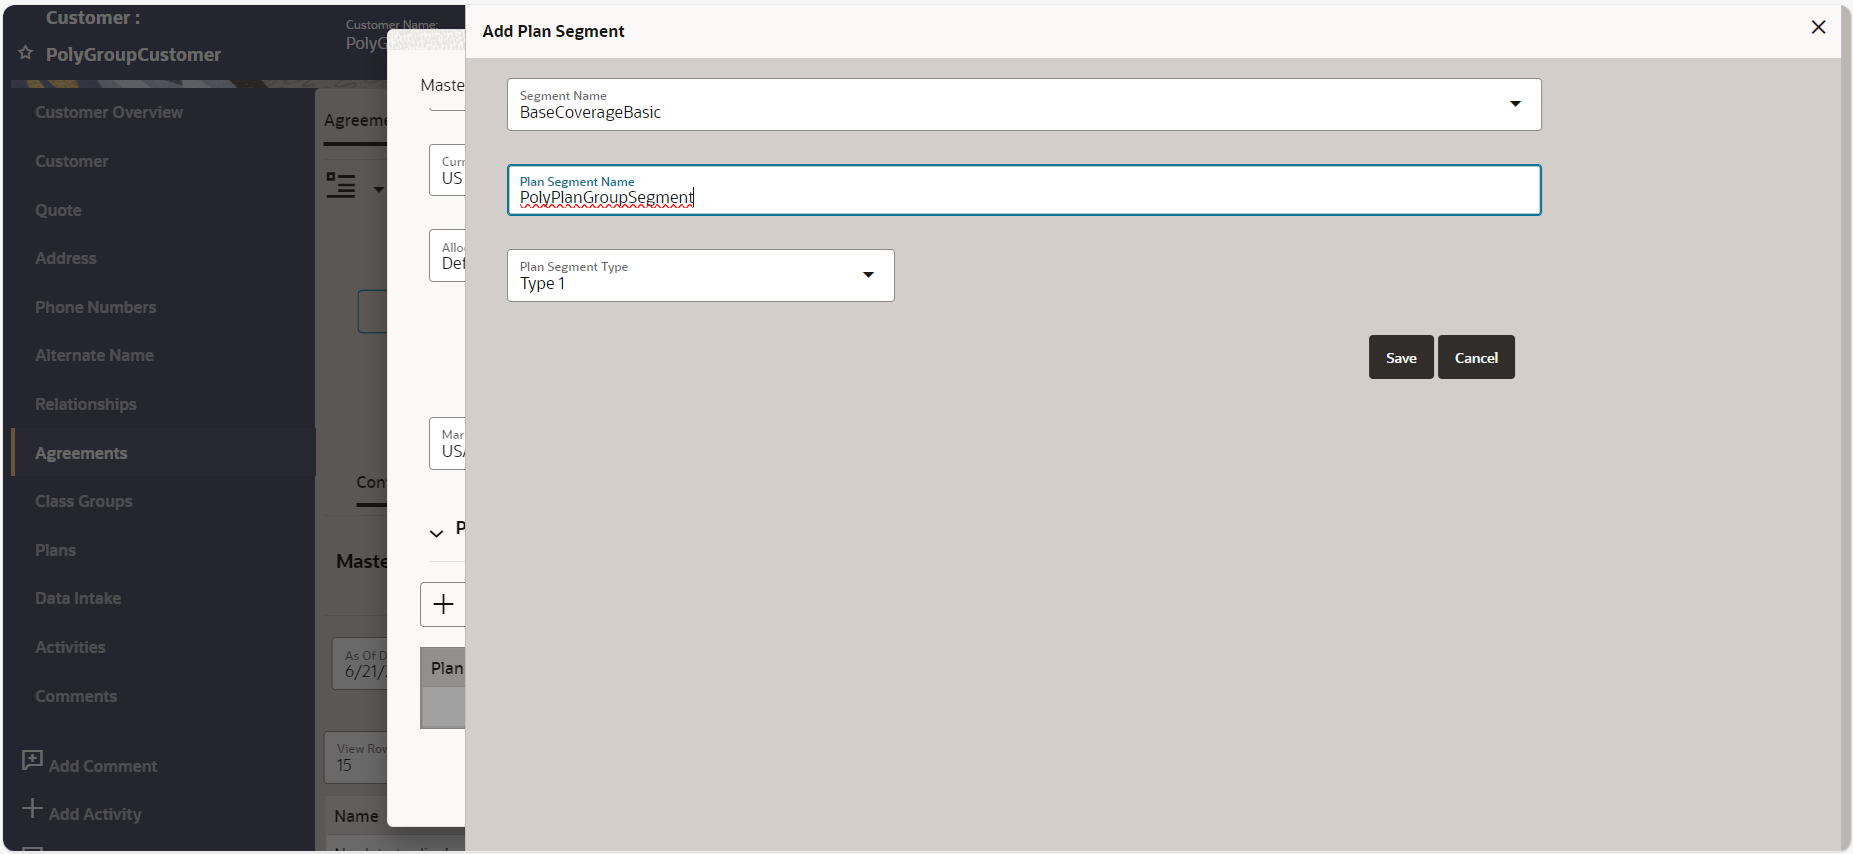
Plan Segment - Click Save. The (Agreement Name)-New Plan window appears.
- Click Save. The Details page appears.
- Update the Status to Active and click Save. A new plan is added and displayed in the tabular view under the Plans tab.
Step 5: Activate the Plan
To activate the plan, follow these steps:
- On the Group Customer screen, in the Left Navigation list, click Plans. The Plans screen appears.
- Use > to expand the required plan.
- Under the Action column, click the
 Submit icon.
 - Under the Action column, click the
 Process icon. The plan Record Status is updated to Active.
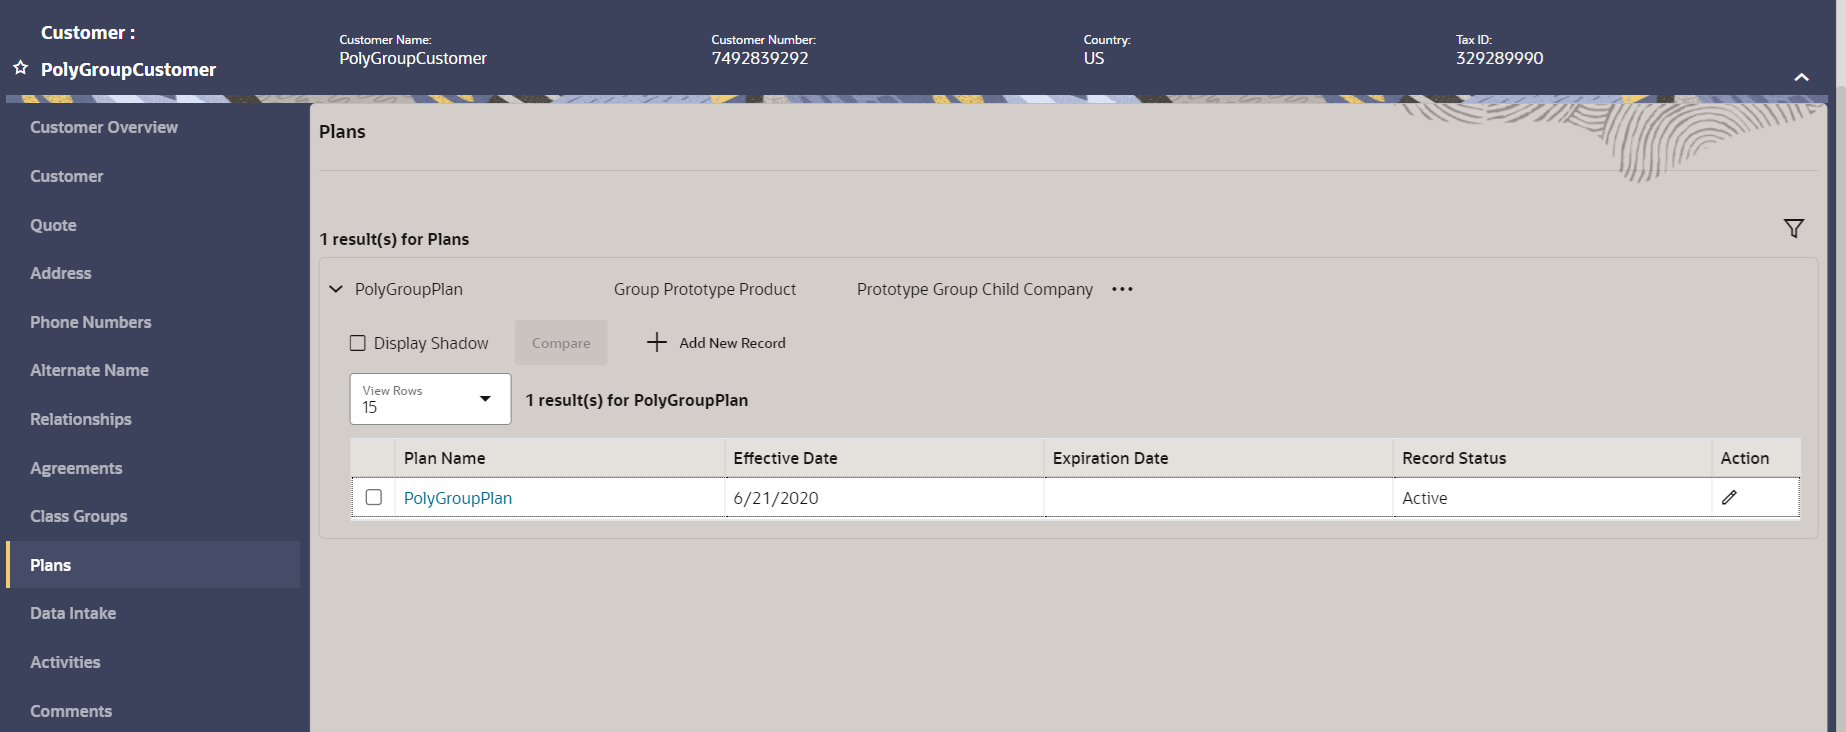
Active Plan
Step 6: Add a Class Group
The class group represents the entire tree node structure for a collection or arrangement of classes in the Class Group screen. The Group client must arrange classes into a class group. The arrangement may be constructed for any number of reasons, based on the client's business needs, including billing, reporting, and eligibility.
To add a Class Group, follow these steps:
- On the Agreement screen, expand Contract, click the required agreement, and then click the Class Groups tab.
- In the Add option, select New from the drop-down list, and then click the Create icon, the Add Class Group page appears.
- Enter the applicable class group Information on the Details tab.
In this use case:
- Type: Eligibility
- Status: Approved
- Effective Date: 6/15/2020
- Expiration Date: blank
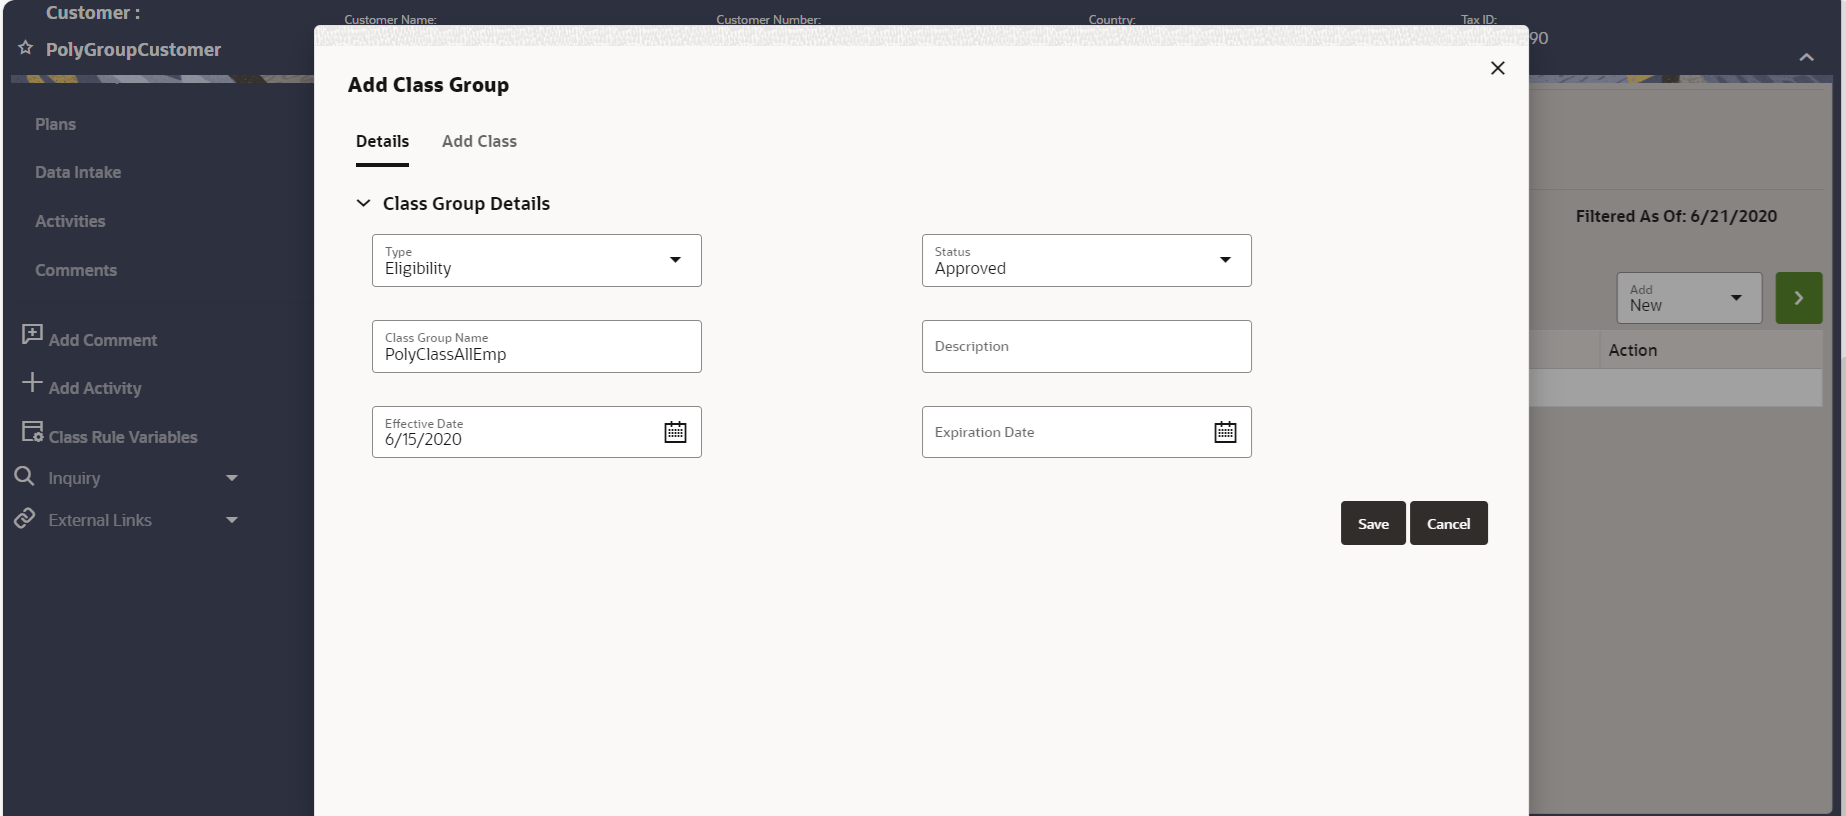
Class Group - Click Add Class tab to add a class within the newly created class group.
- Select the Class Type to match the class group type and enter the applicable class information in the fields provided according to the class type. In this use case, Class Type is Eligibility.
- Click Save. The Add Class Group window appears.
- Update the Status to Active and then, click Save. The class group is added under the Class Groups tab in a tabular format.
Step 7: Add Child Classes
Group policy members are added to a child class depending on the membership rules.
To add child classes, follow these steps:
- On the Left Entity Navigation list, click Class Groups. The Class Groups screen appears.
- On the Class Groups screen, expand a (Class Group Name).
- Click the (hyperlink). The Class Group window appears.
- Click the Classes tab. It displays the classes that are added to a class group in a tree-like structure. In each structure, there is one root node (which has no parent node) and one default orphan class node.
- Hover over a class. The New icon appears.
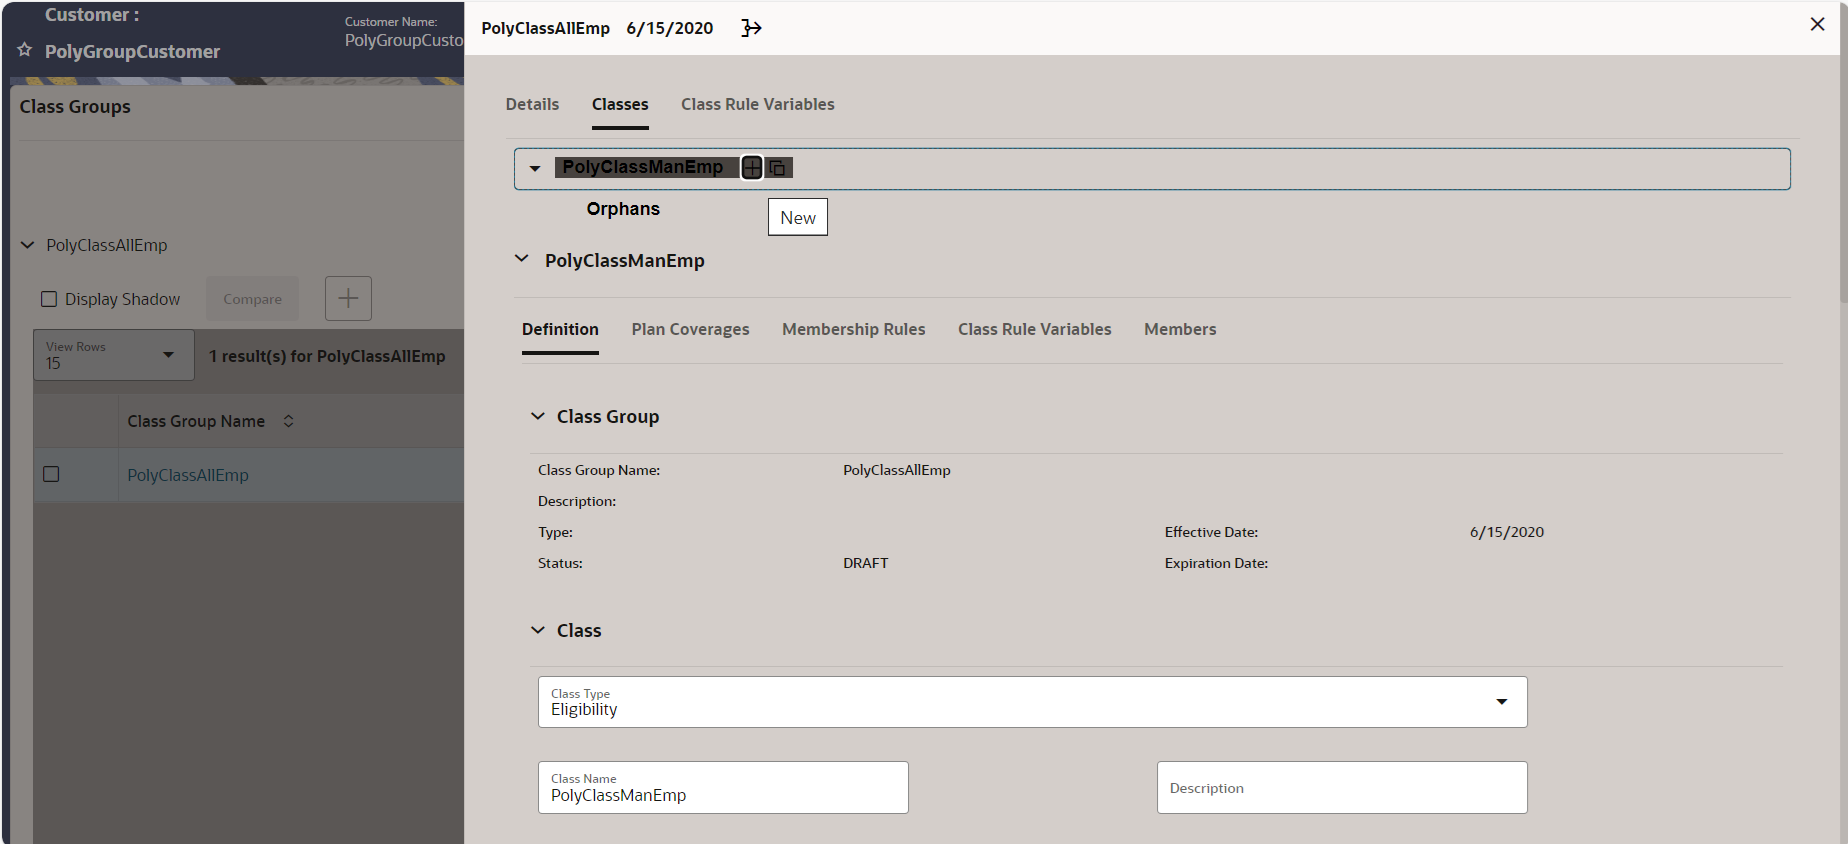
New Icon - Click the New icon. The Definition page appears.
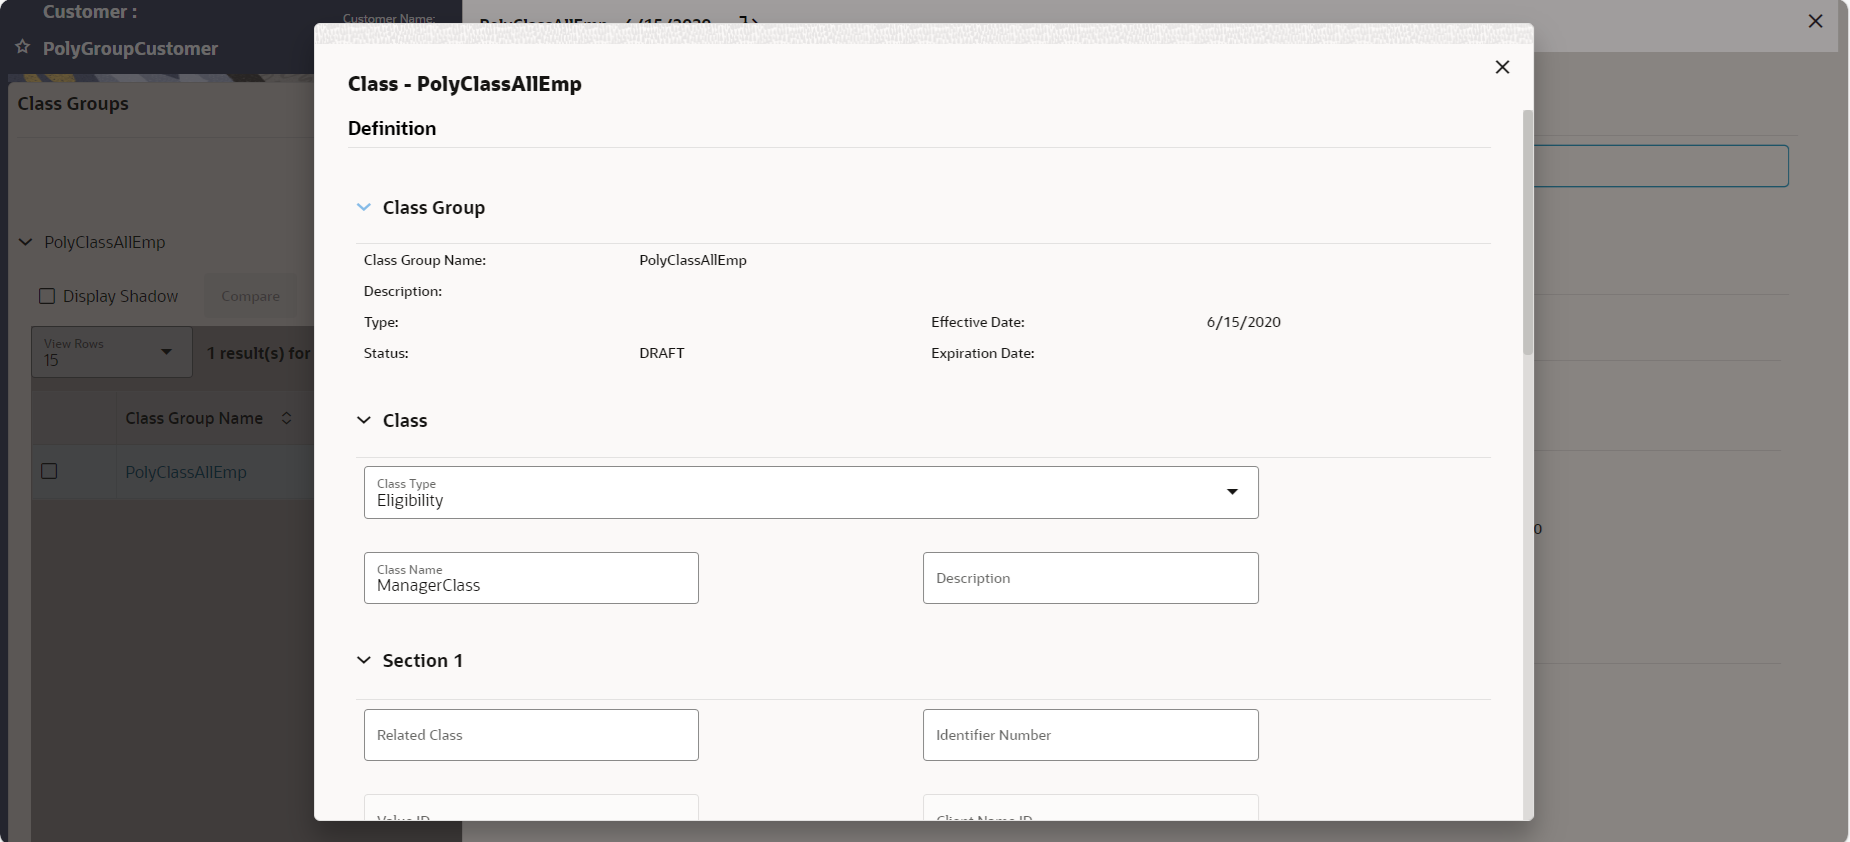
Child Class - Select the Class Type to match the class group type and enter the applicable class information in the fields provided according to the class type.
- Click OK to add the class.
Step 8: Create Class Rule Variables
You can use Class Rule Variables as membership rules for a class.
To add a class rule variable, follow these steps:
- On the Classes tab, select the required class.
- Click the Class Rule Variables tab.
- Click the Add Variable button. A row is added with fields. Enter the fields with appropriate data. In this use case:
- Type: Expression
- Data Type: Boolean
- Text: 1==1
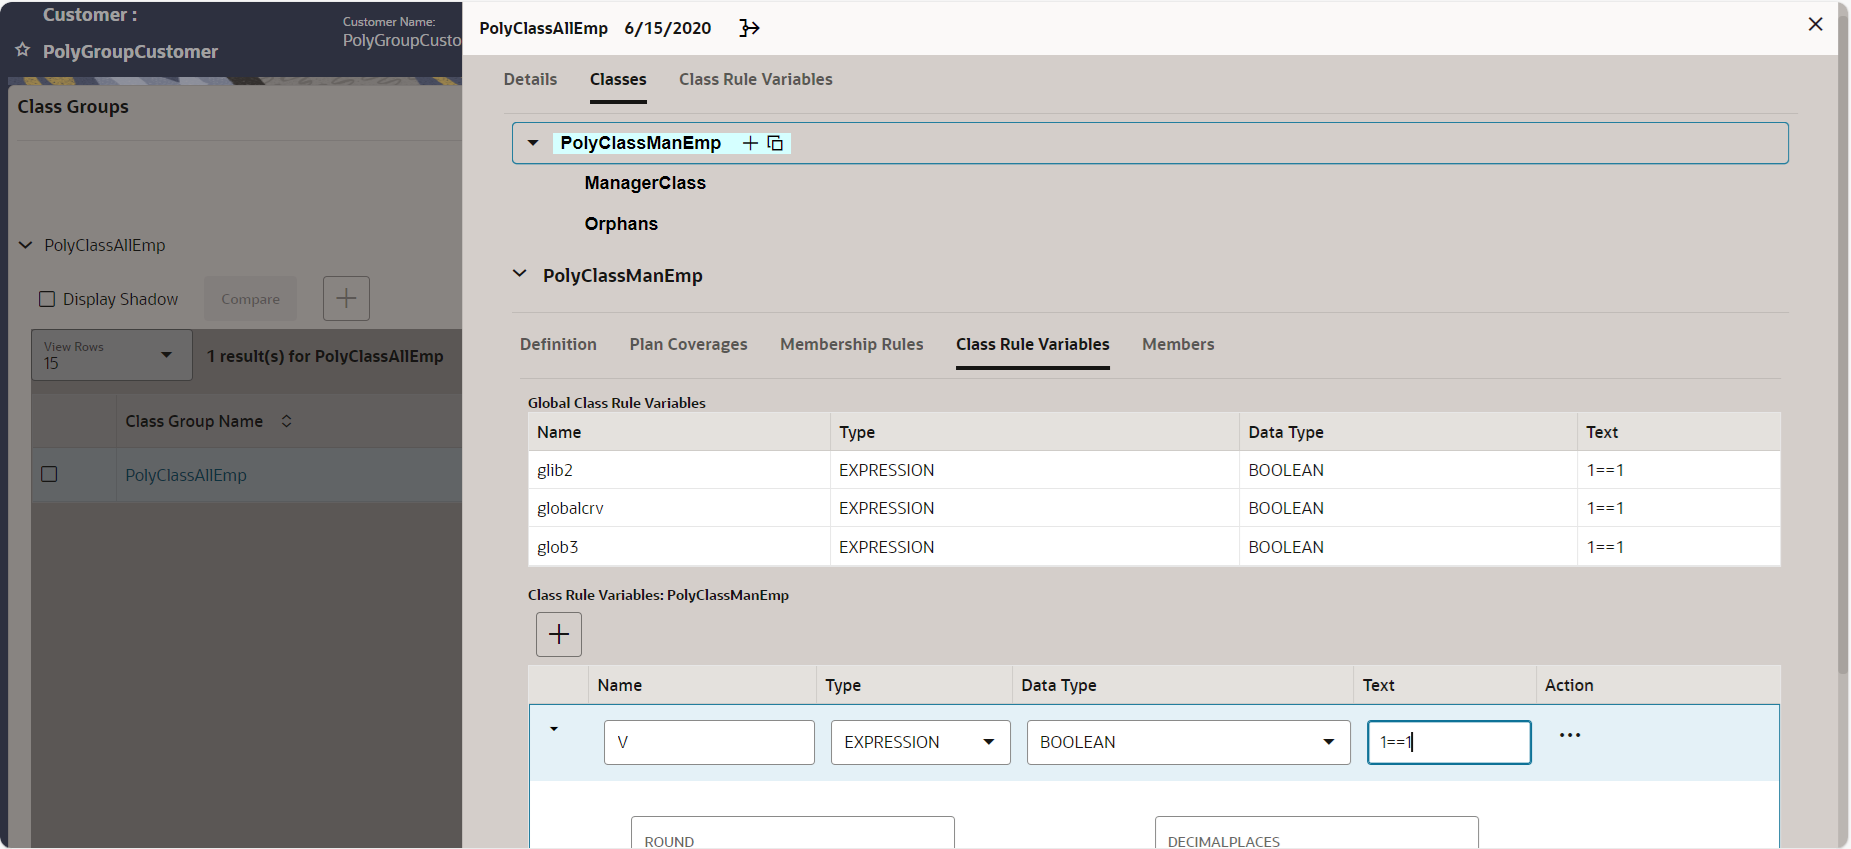
Class Rule Variables - Click Save. The class rule variable is added for the class.
Note:
Ensure that you add class rule variables for both parent and child classes.
Step 9: Use Class Rule Variables as Membership Rules
You need to assign class rule variables as membership rules to parent and child classes.
To assign membership rules, follow these steps:
- On the Classes tab, select the required class.
- Click the Membership Rules tab.
- Move the required Class Rule Variables from the Variables box to the Conditions box.
- Click Save.
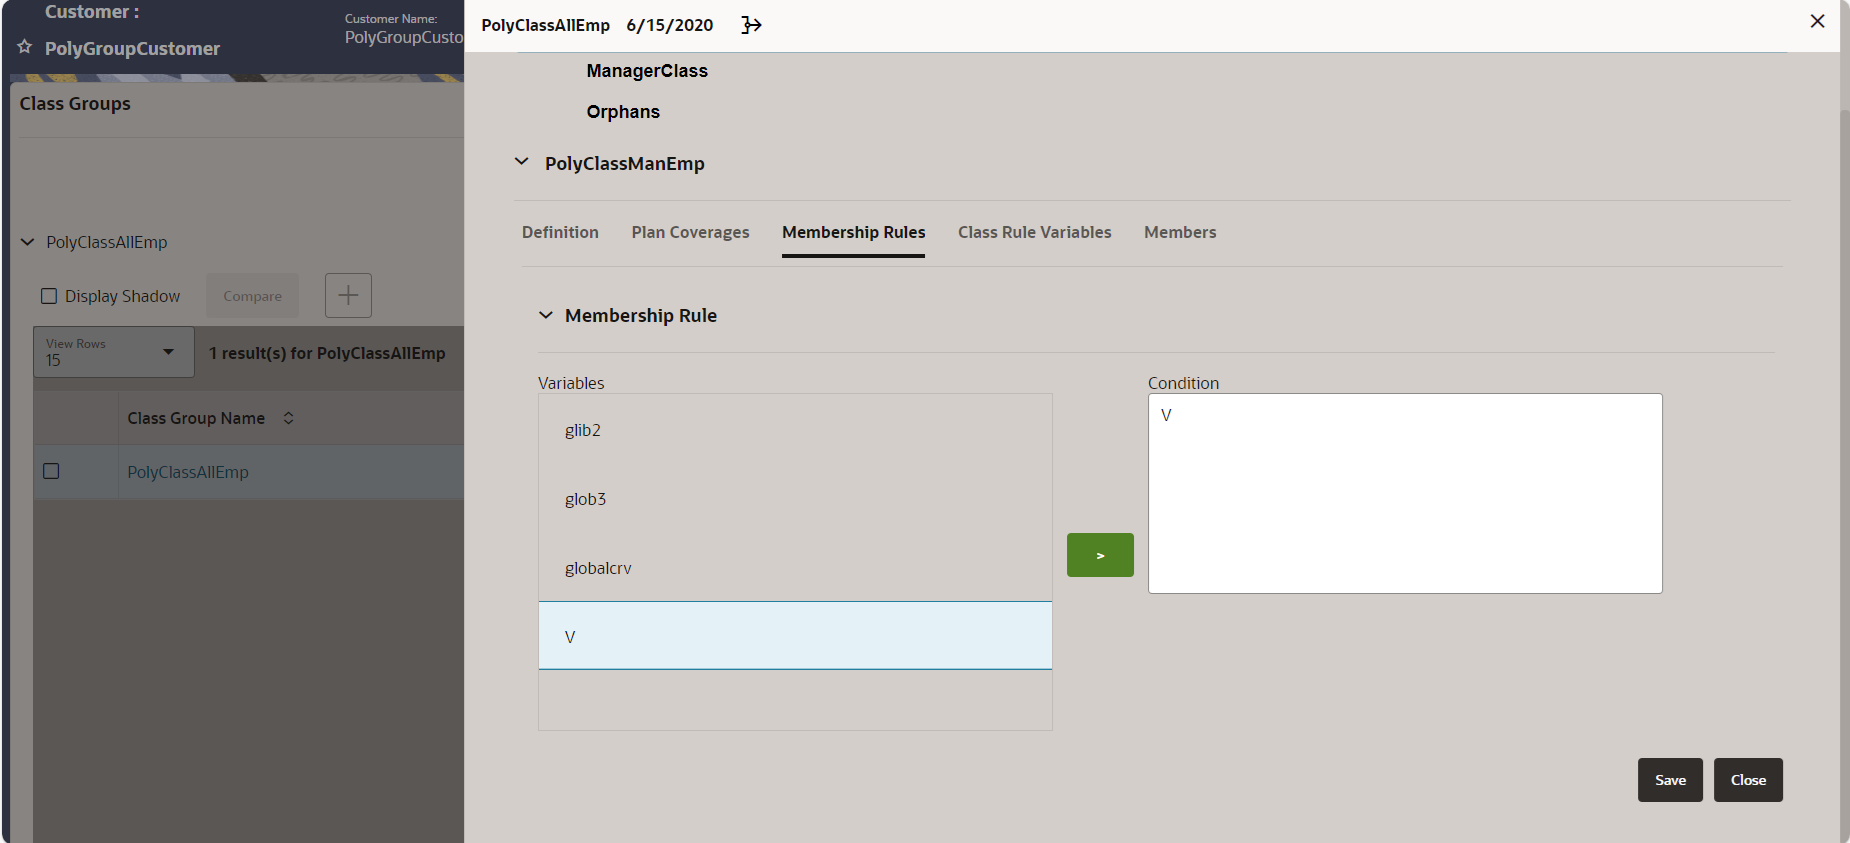
Membership Rule
Step 10: Associate Plan Coverages with Classes
Ensure that plan containing the required segments or coverages are in Active Status.
To associate plan coverages, follow these steps:
- On the Classes tab, select the required class.
- Navigate to Plan Coverages > Associate.
- Move the required segments from Plan Coverages box to Associate box.
- Enter the Effective Date and click OK.
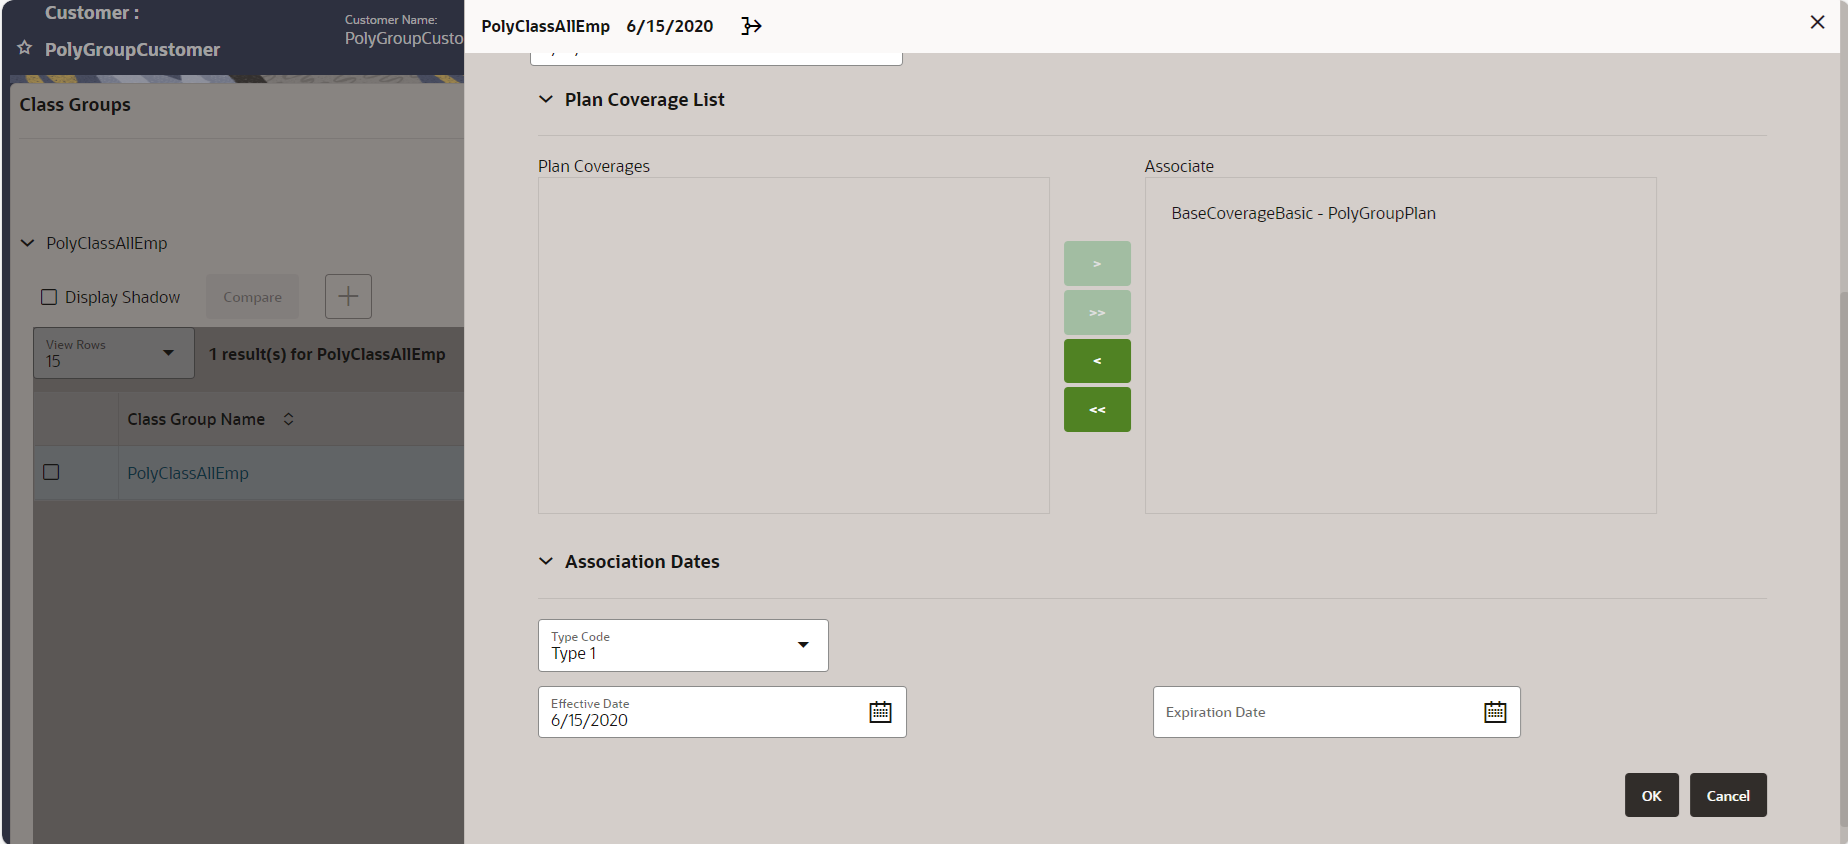
Associate Plan Coverages Note:
Ensure that you associate required plan coverages with parent and child classes.
When you have completed all the class details, click the ![]() Submit icon to update the Record Status of the Class Group to Active.
Submit icon to update the Record Status of the Class Group to Active.

Step 11: Add a Relationship
To add a relationship for a group customer, follow these steps:
- On the Left Entity Navigation list, click Relationships. The Downstream Relationships tab opens.
- Select the Employment from the Add Relationship Type drop-down.
- Click Add New Relationship.
- Select Relationship Sub Type as Full Time.
- Click
 . The Client page appears with Find Client and Add Client tabs.
- Use Find Client to search an existing client or use Add Client to create a new client.
- Enter Effective Date and then, click Save.
- Use > to expand the required relationship.
- Under the Action column, click the Submit icon. The relationship is now Active.
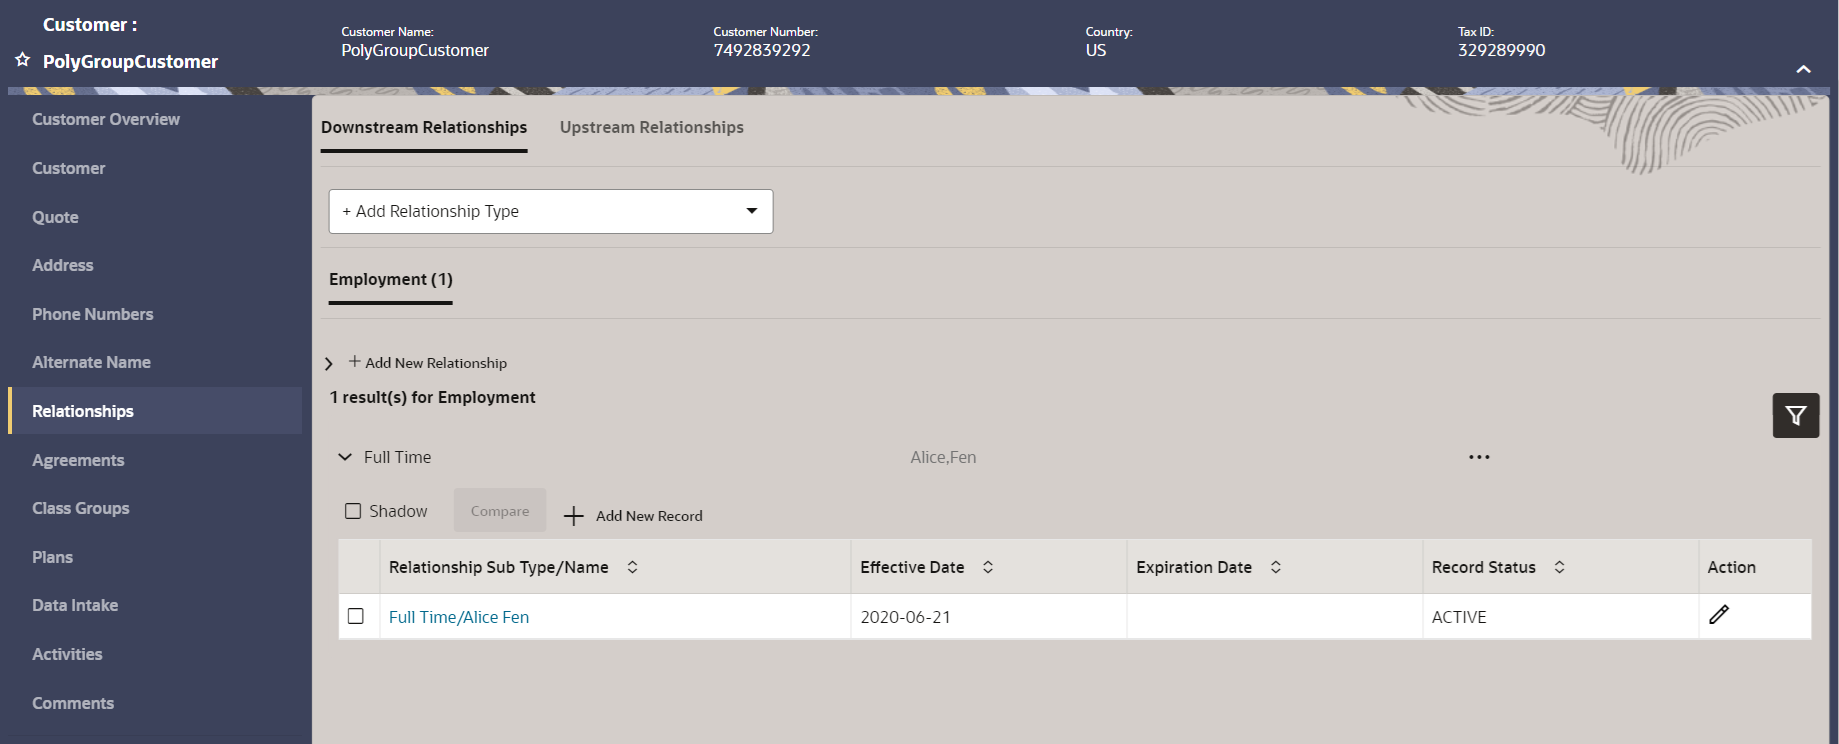
Active Relationship
Step 12: Process EvaluateMembership Activity
To process EvaluateMembership activity at client level, follow these steps:
- For the newly added relationship, hover over the Ellipsis icon, and then click Go To Client. The Client screen appears.
- On the Client screen, in the Left Navigation list, click Activities. The Activity page appears.
- Click + Add Activity icon. The Add Activity page appears.
- In the Select Activity drop-down, select EvaluateMembership activity.
- Enter Effective Date and Effective Until and then, click OK.
- In the Action column, click the Process icon. The activity is processed successfully.
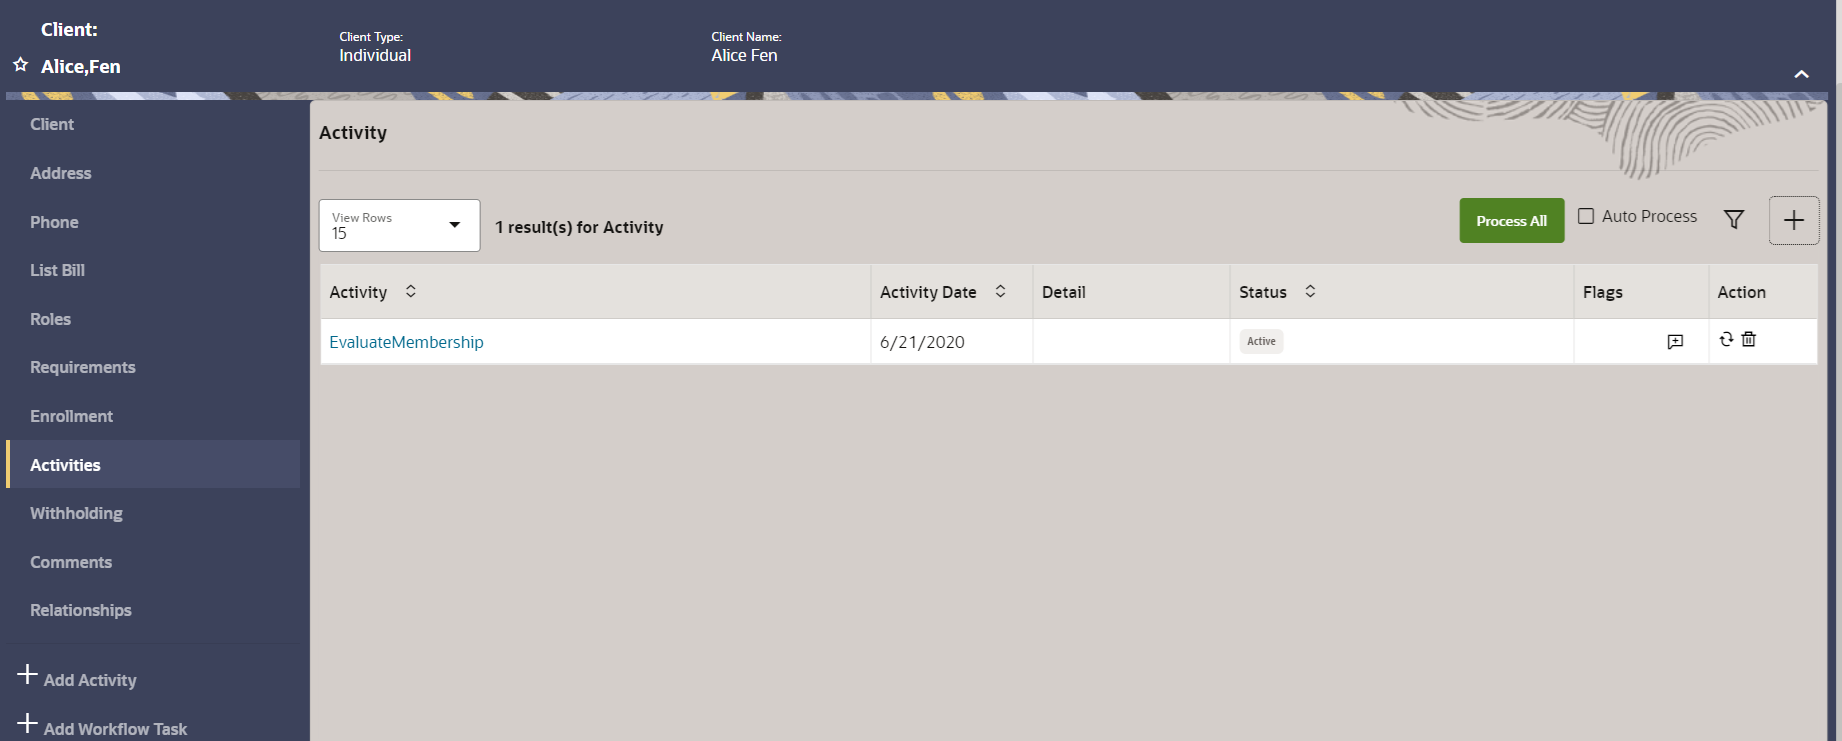
Evaluate Membership Activity
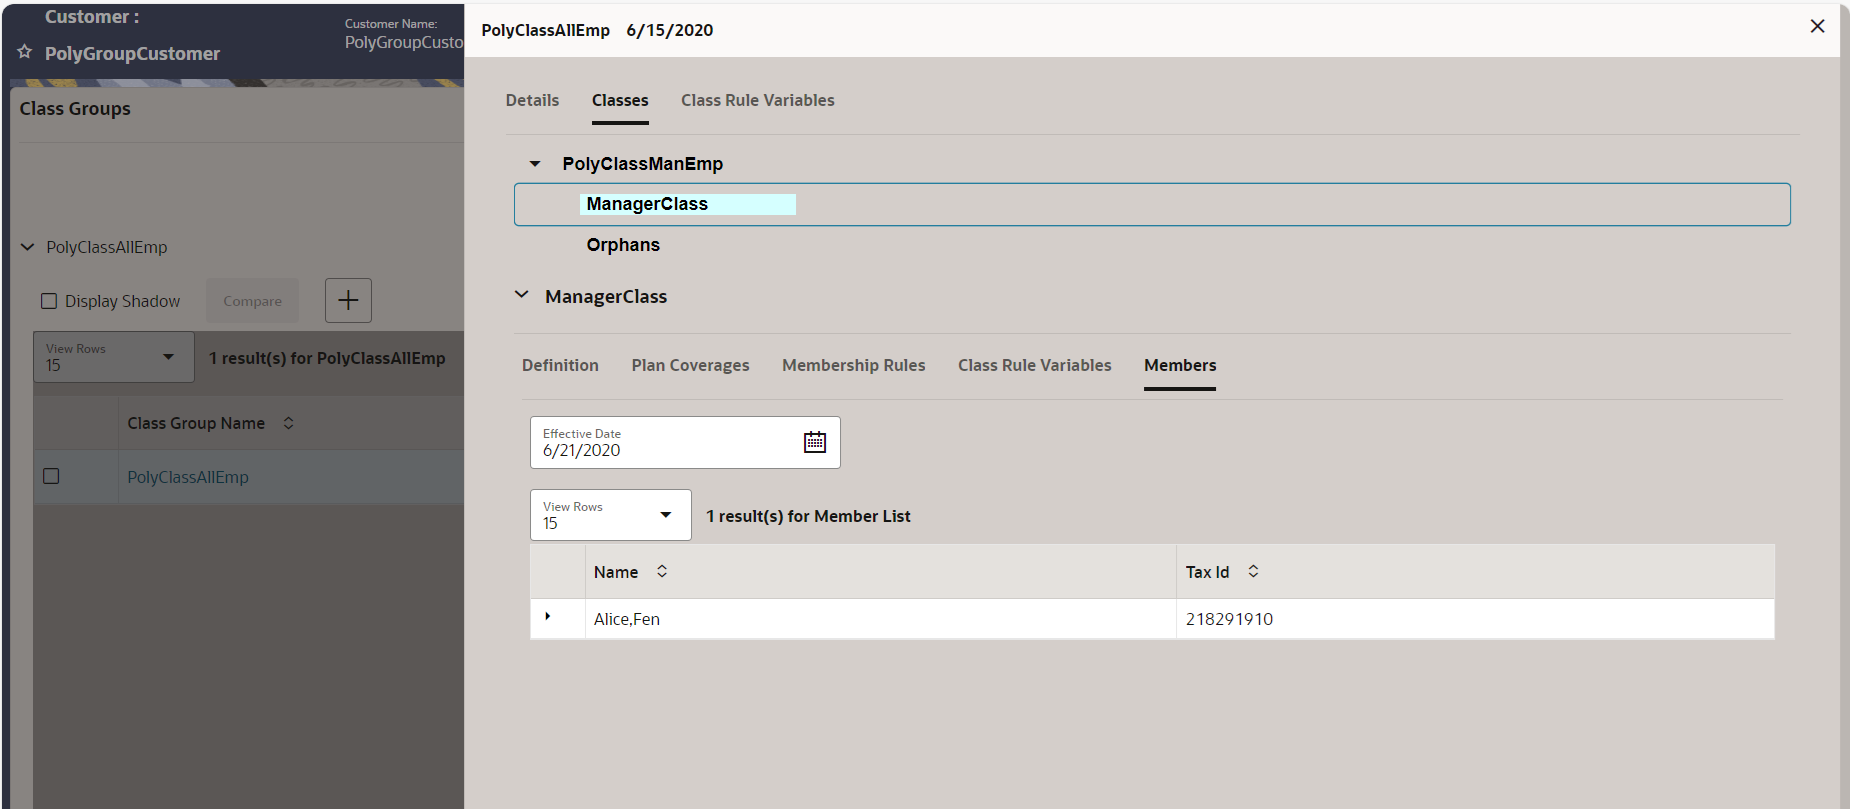
On successful processing, the client becomes the member of the required child class. This can be observed on the Class Membership tab of the activity.
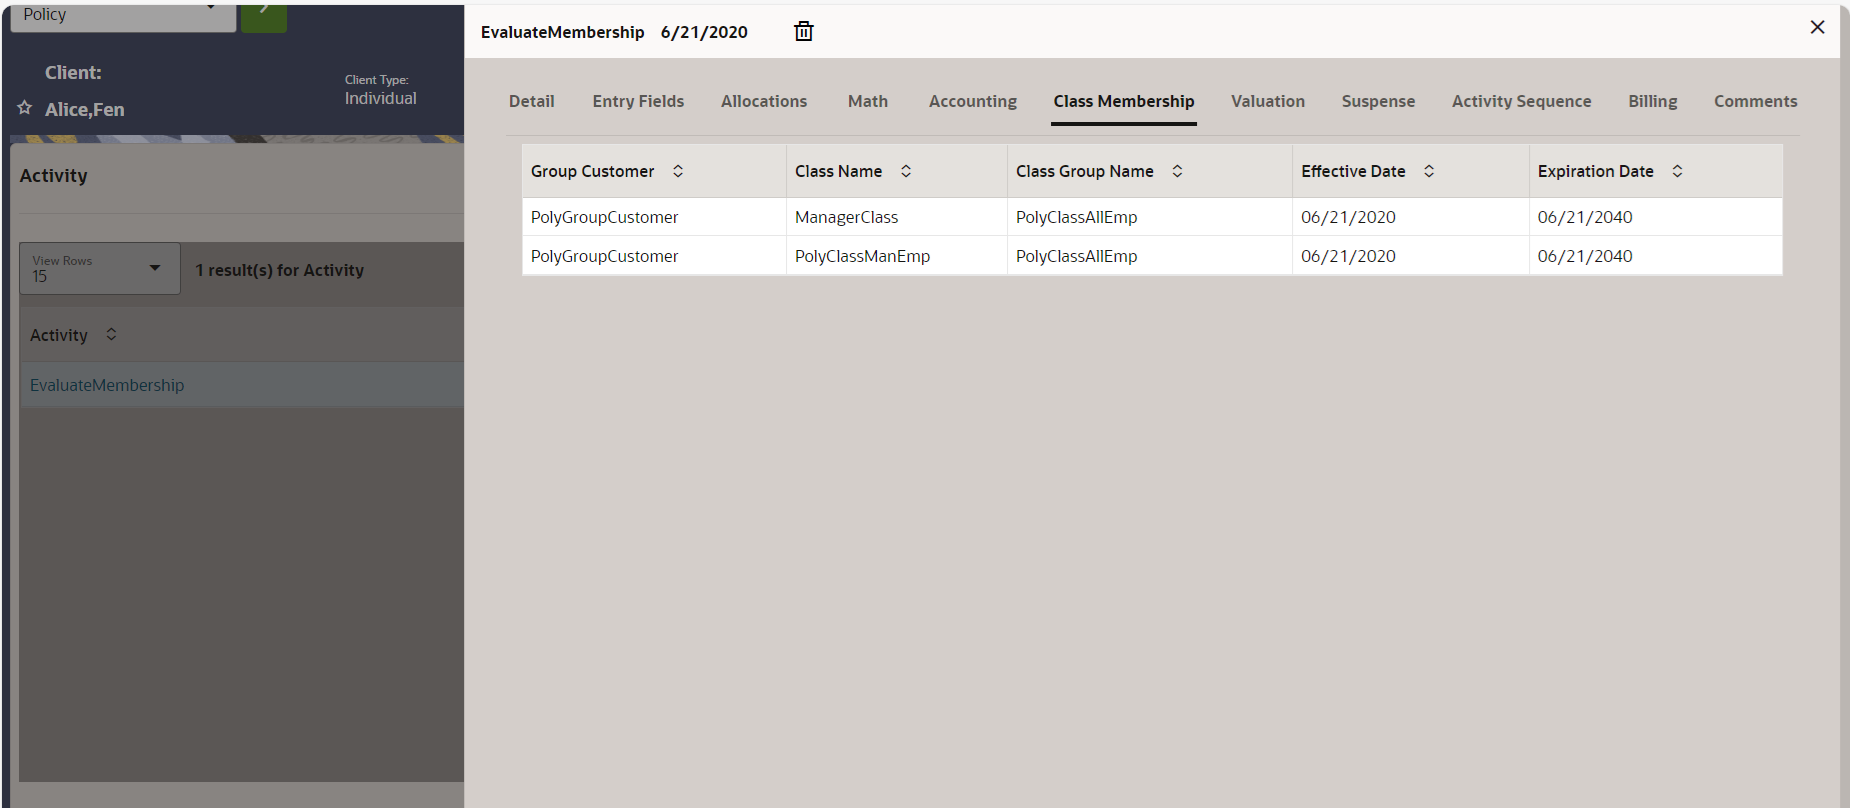
You can also observe that client is added as a member under the Members tab of a child class.
Step 13: Process EnrollmentPrototype Activity
To process EnrollmentPrototype activity at client level, follow these steps:
- On the Client screen, in the Left Navigation list, click Activities. The Activity page appears.
- Click + Add Activity icon. The Add Activity page appears.
- In the Select Activity drop-down, select EnrollementPrototype activity.
- Enter Effective Date, New Policy Name, Issue State, and Coverage etc. and then, click OK.
- In the Action column, click the Process icon. The activity is processed successfully.
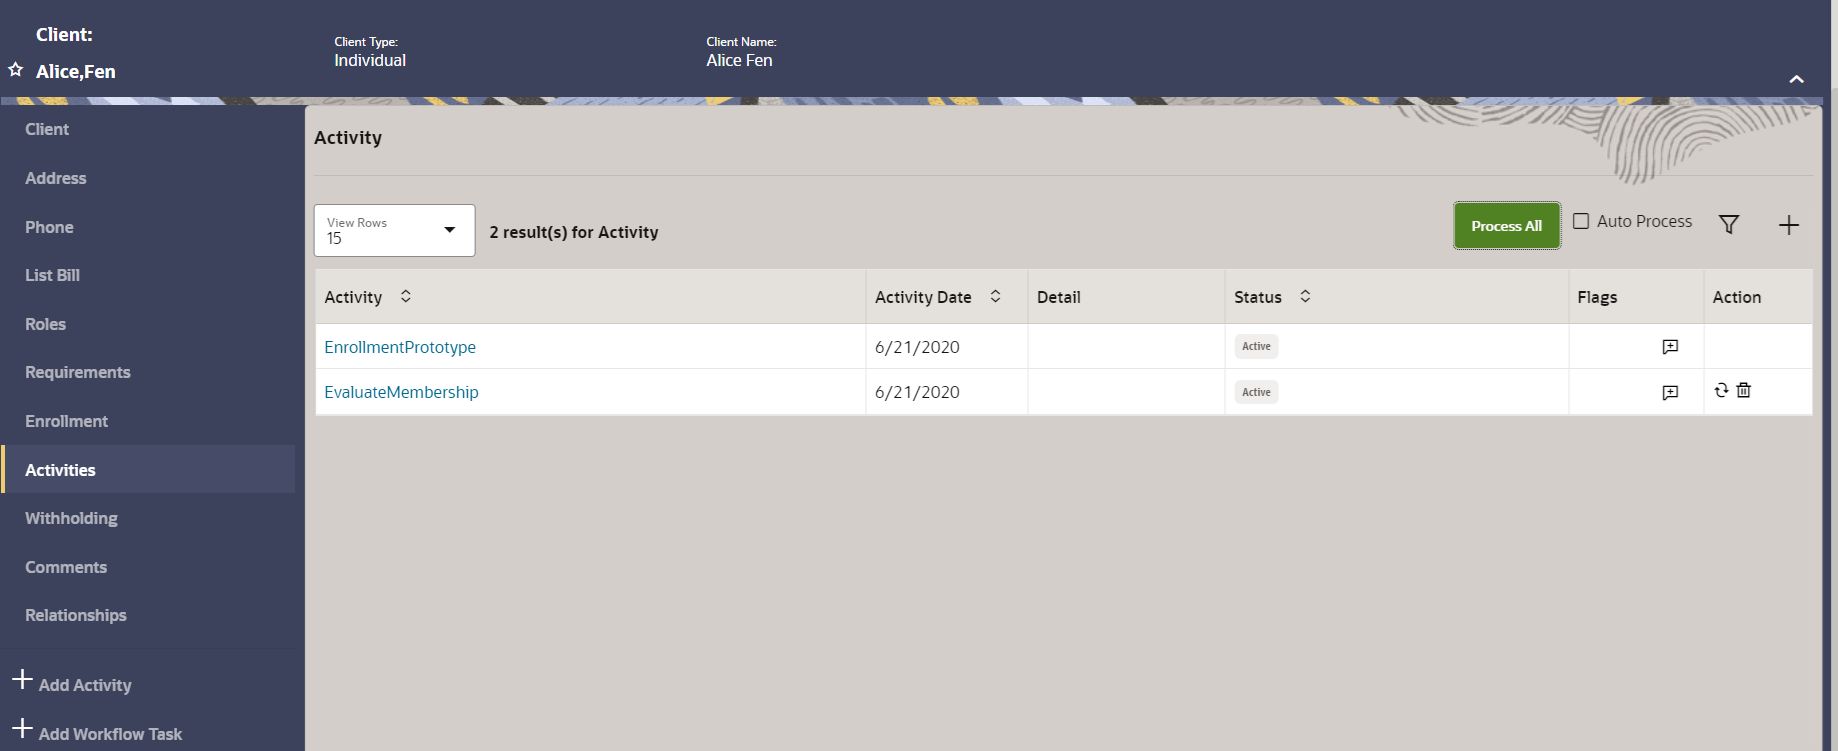
Active Enrollment Activity
On successful processing, a new policy is created in Pending state. This policy is for the Group Plan that we created for the Group Customer.
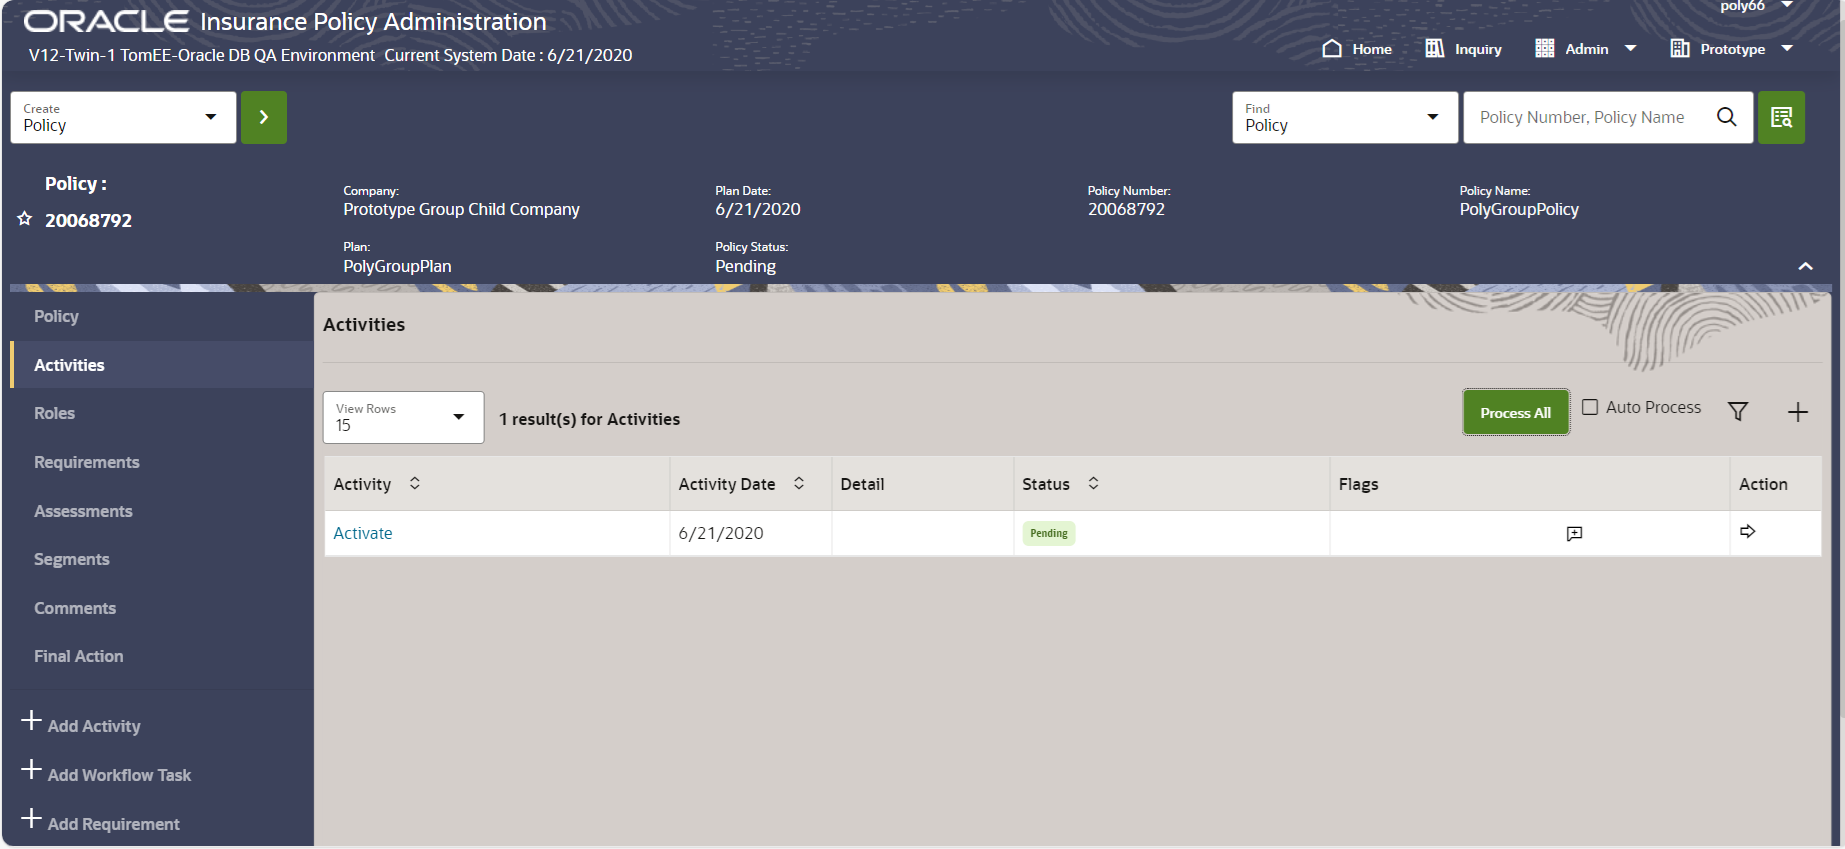
Activate activity is added in Pending state for the newly created policy. To make the policy Active, in the Action column, click the ![]() Process icon. The policy becomes Active.
Process icon. The policy becomes Active.
Step 14: Process GenerateBillDetail
To Process GenerateBillDetail, follow these steps:
- On the Policy screen, in the Left Navigation list, click Activities. The Activity page appears.
- Click + Add Activity icon. The Add Activity page appears.
- In the Select Activity drop-down, select GenerateBillDetail activity.
- Enter Effective Date, Bill Due Date, Bill Due Amount, Bill Group Type, Bill Entity Type, and Policy.
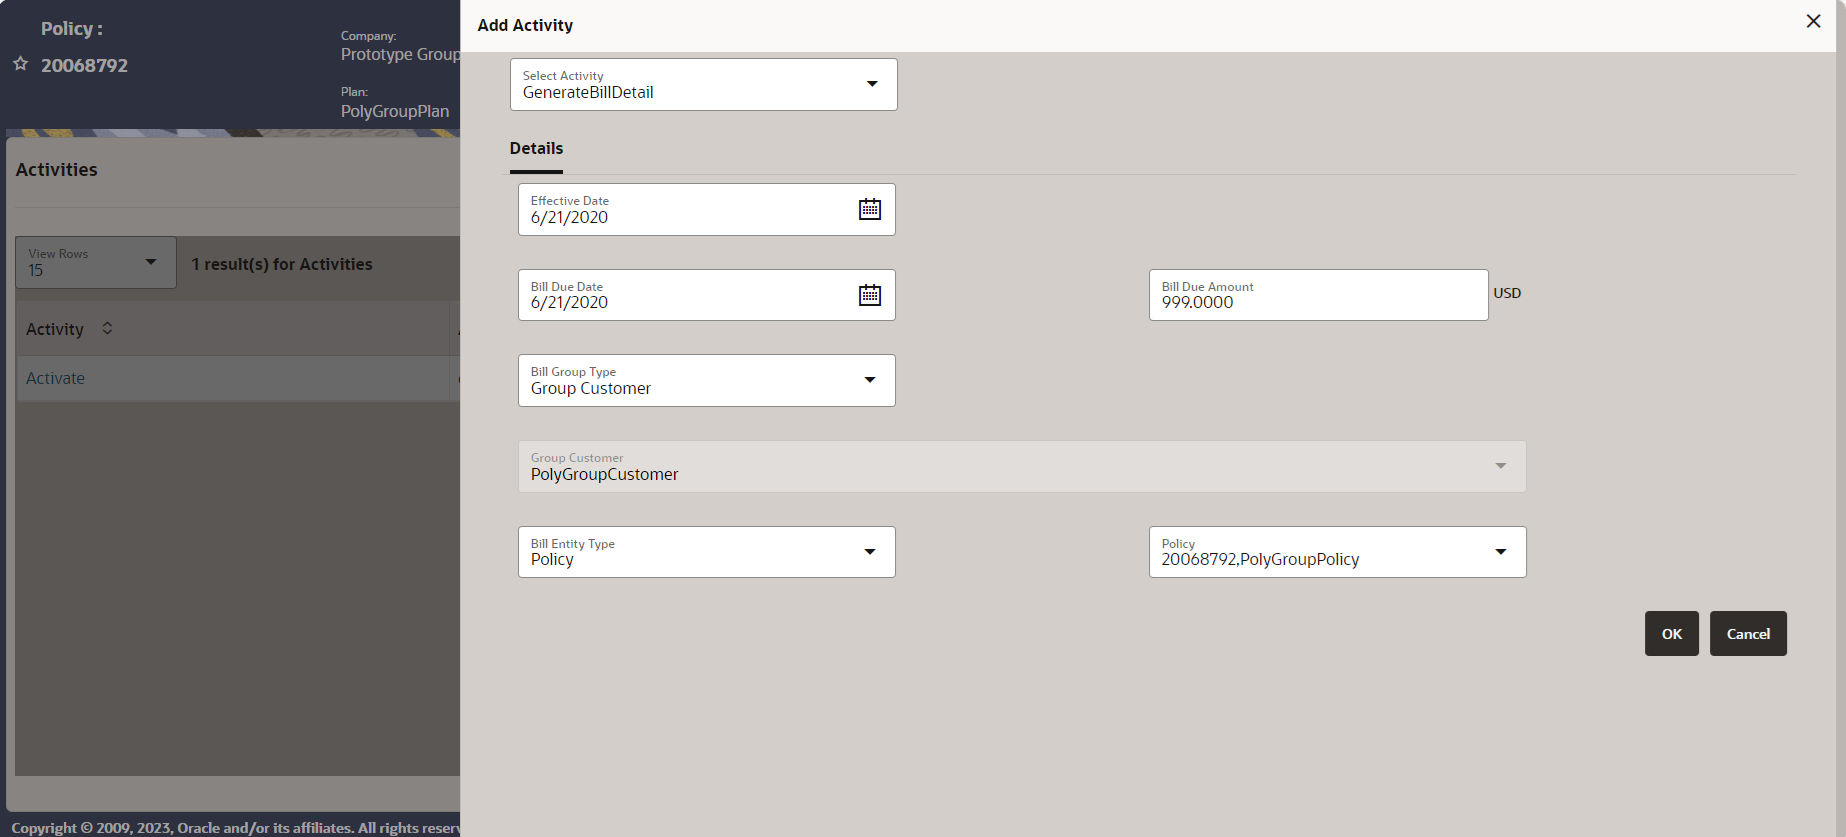
GenerateBillDetail Activity Details - Click OK.
- In the Action column, click the Process icon. The activity is processed successfully.
Step 15: Process GenerateBill
To Process GenerateBill, follow these steps:
- On the Group Customer screen, in the Left Navigation list, click Activities. The Activity page appears.
- Click + Add Activity icon. The Add Activity page appears.
- In the Select Activity drop-down, select GenerateBill activity.
- Enter Effective Date, Billing Detail Start Date, Billing Detail End Date, Bill Owner Type, Bill Detail Minimum Threshold Amount and Bill Detail Maximum Threshold Amount.
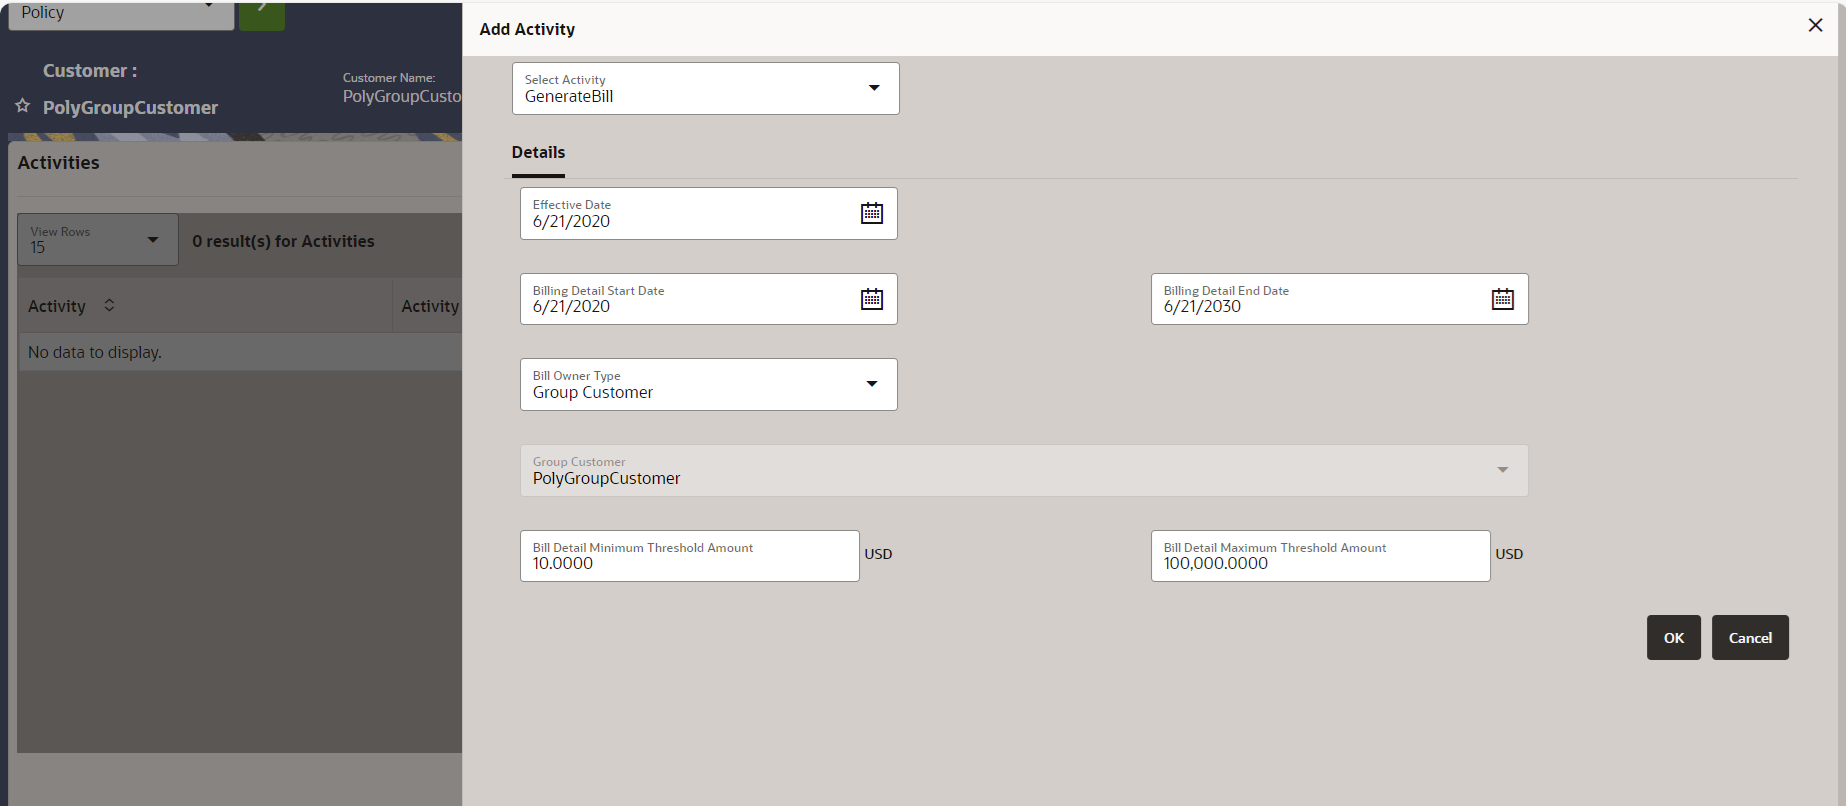
GenerateBill Activity Details - Click OK.
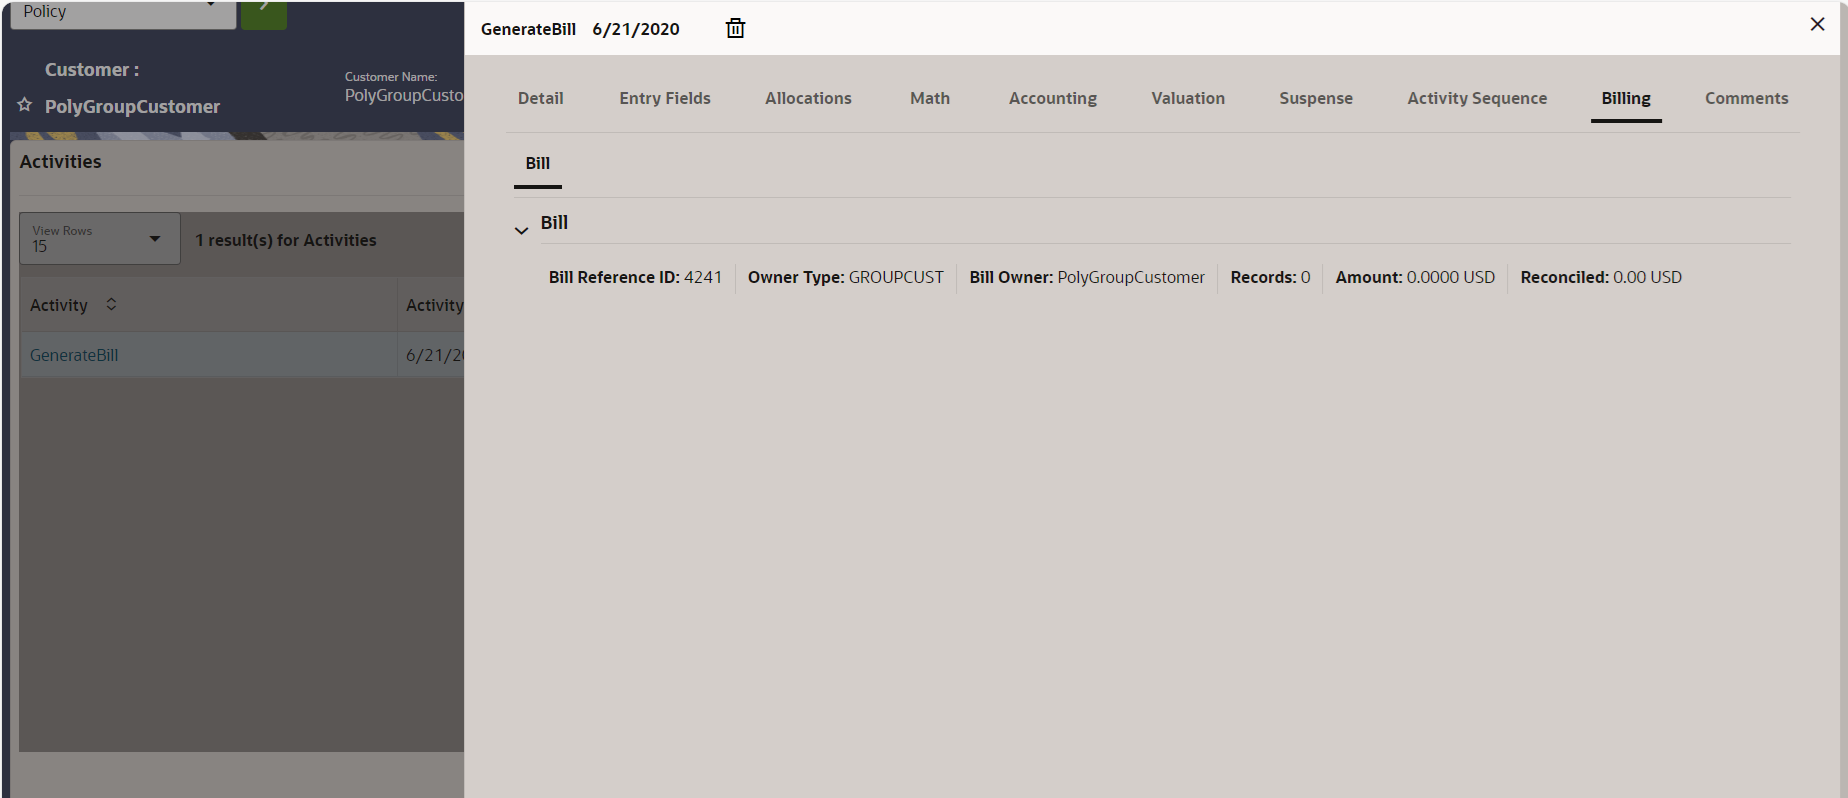
- In the Action column, click the Process icon. The activity is processed successfully.
Note the Bill Reference ID appearing under the Billing tab of the Activity Results.
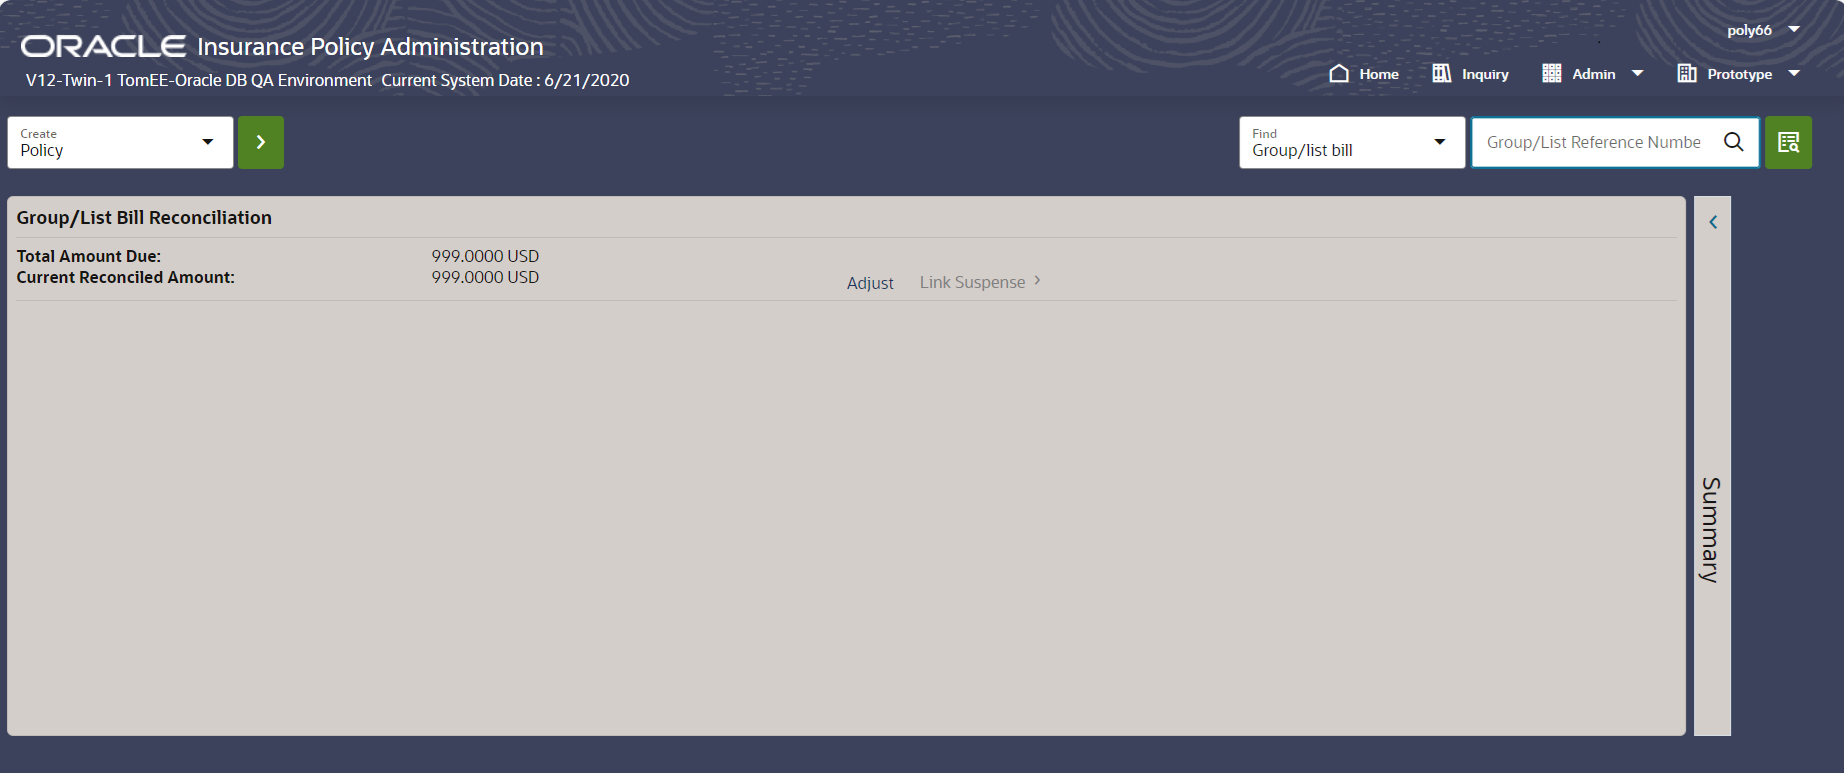
Step 16: Reconcile the bill
To reconcile bill amount, follow these steps:
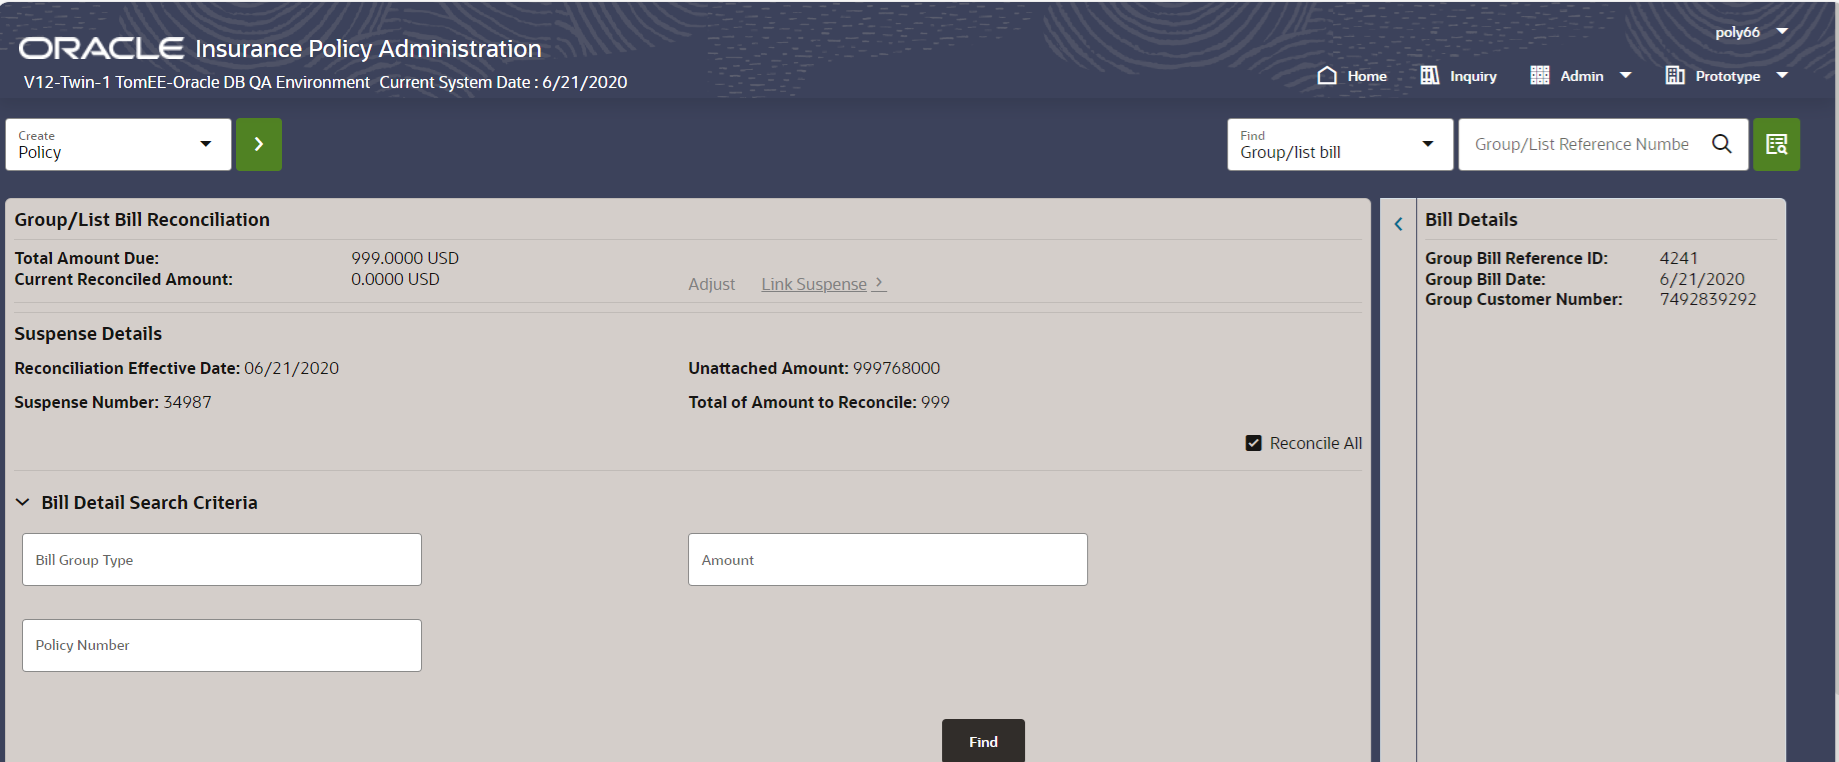
- On the Unified Search, select Group/list bill in the Find drop-down and then enter the Bill Reference ID.The Group/List Bill Reconciliation page appears.
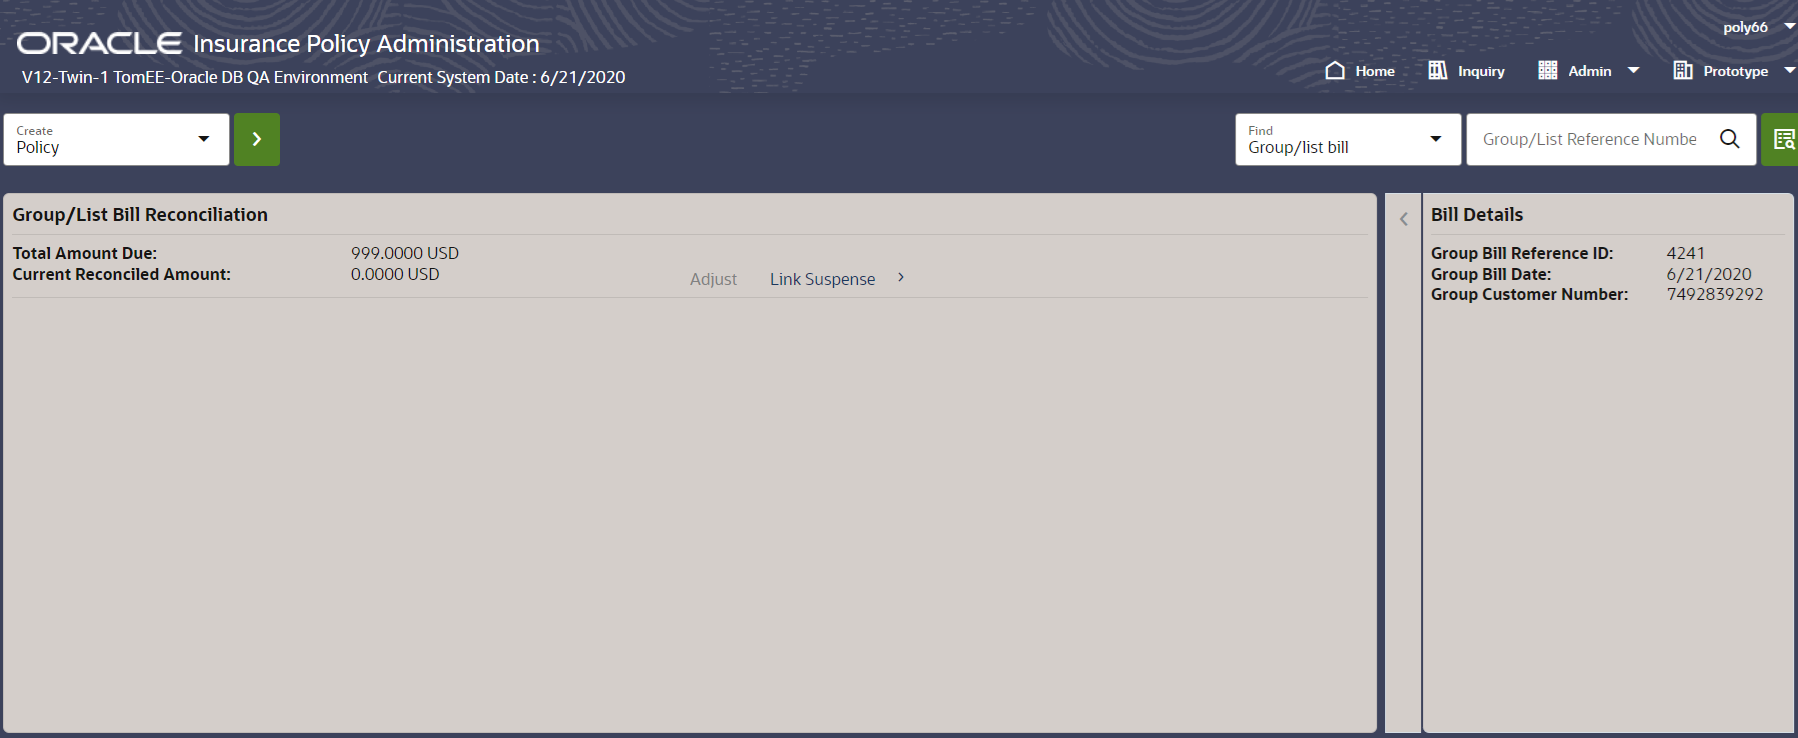
Group List Bill - Click Link Suspense. The Link Suspense page appears.
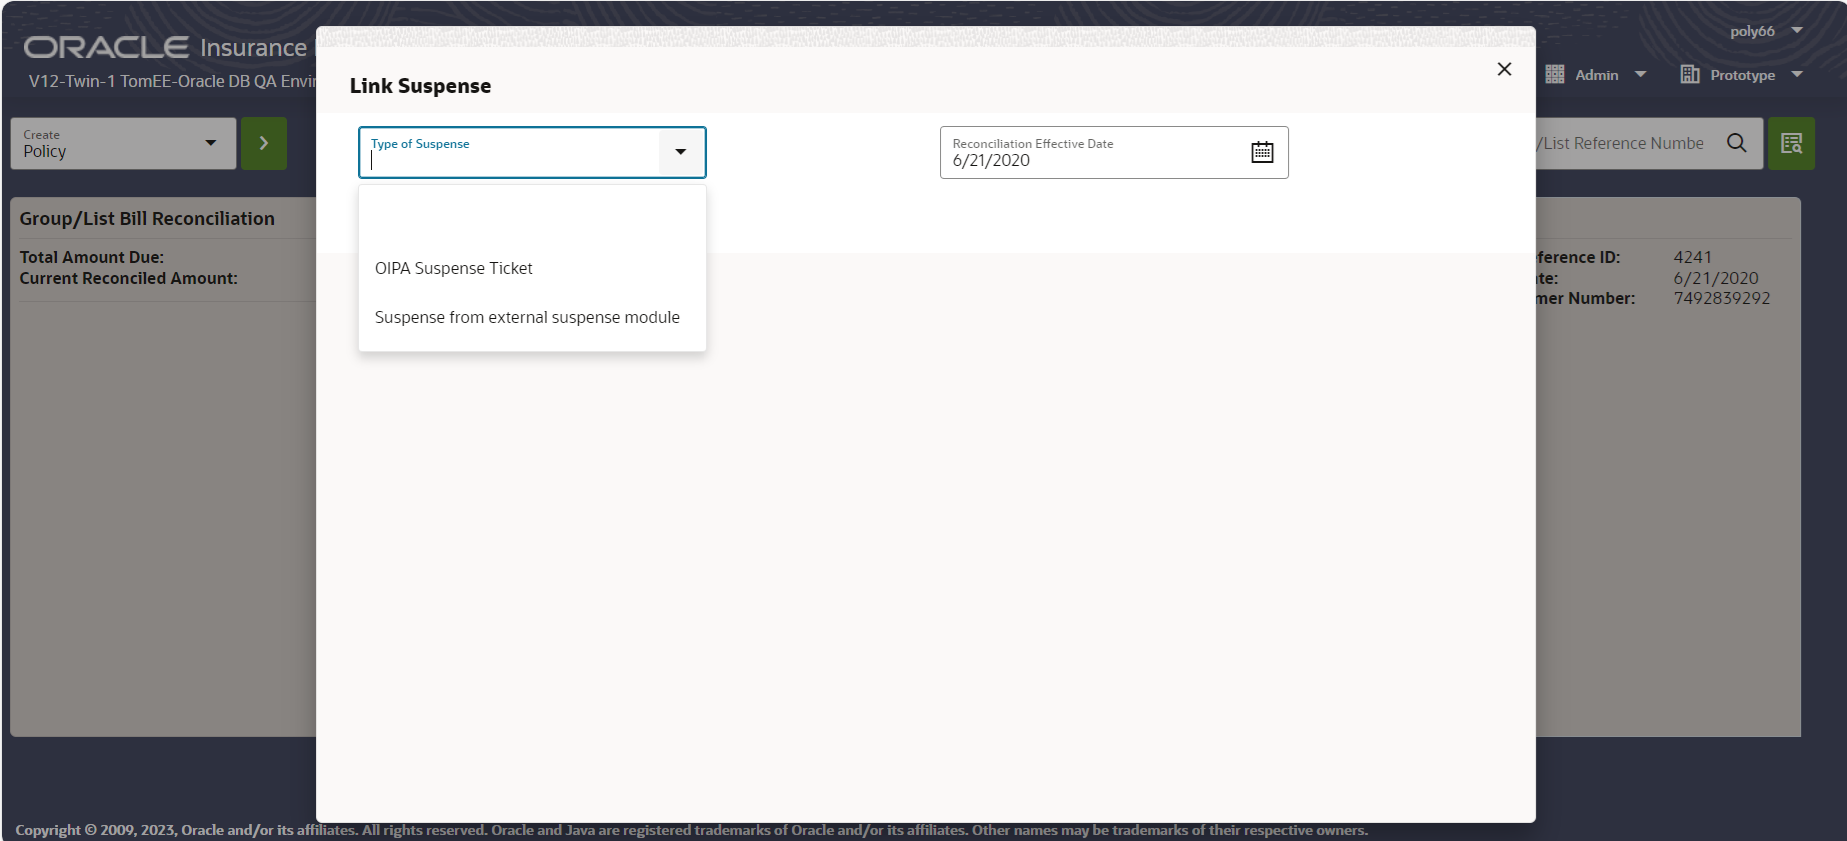
Link Suspense with the Bill - Select OIPA Suspense Ticket in the Type of Suspense drop-down.
- Use Suspense Search Criteria to link the required Suspense. The suspense is linked and it appears as shown below.
Suspense Linked with the Bill - Use
 to edit the Amount For Reconciliation and then click
  to save the bill reconciliation details. The warning message appears, click OK.
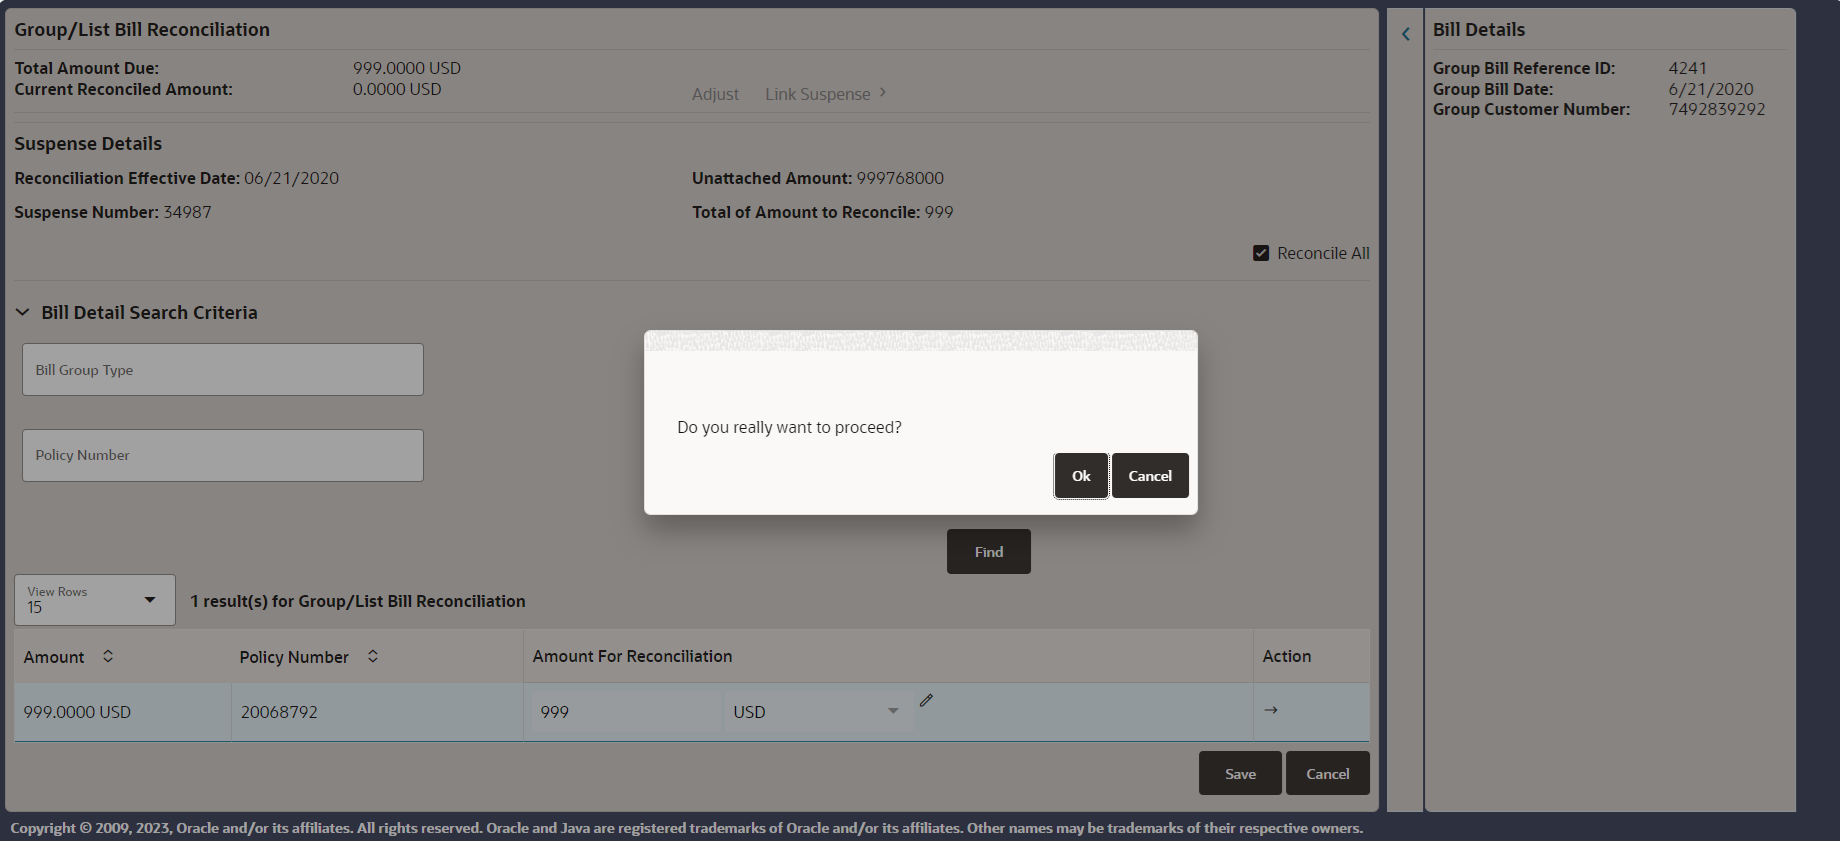
Warning Message Another message appears, This may take few minutes. Click OK to continue. Click OK. The Bill Details are saved.
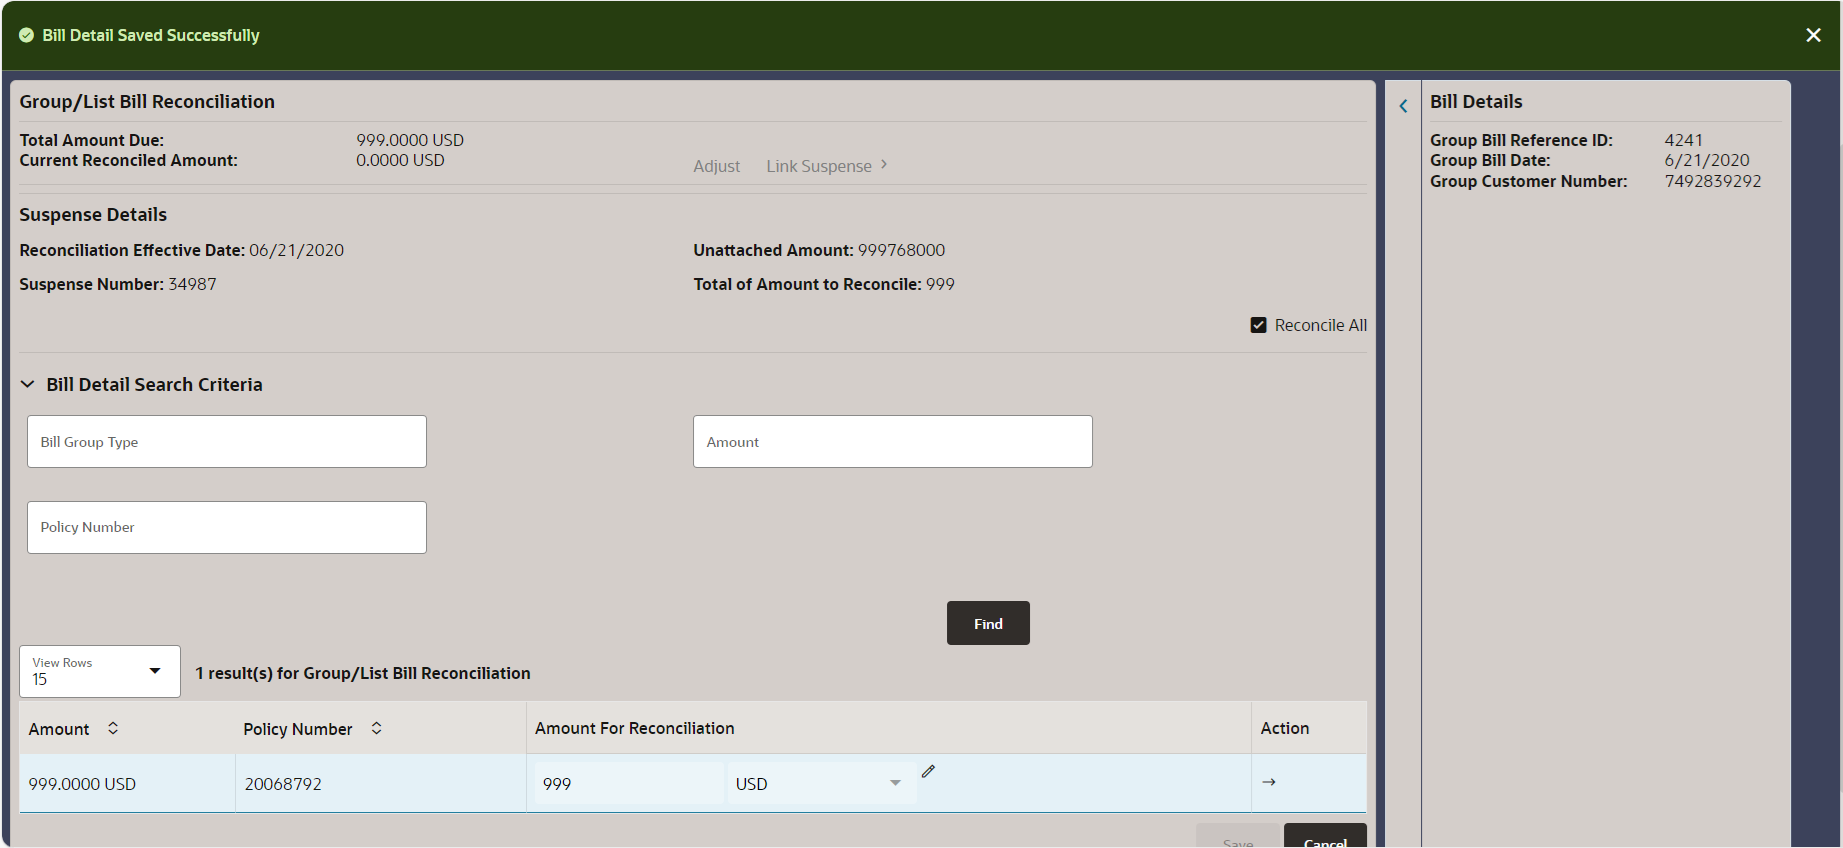
Bill Details Saved The Reconciliation activity is added in the Pending state for the policy.
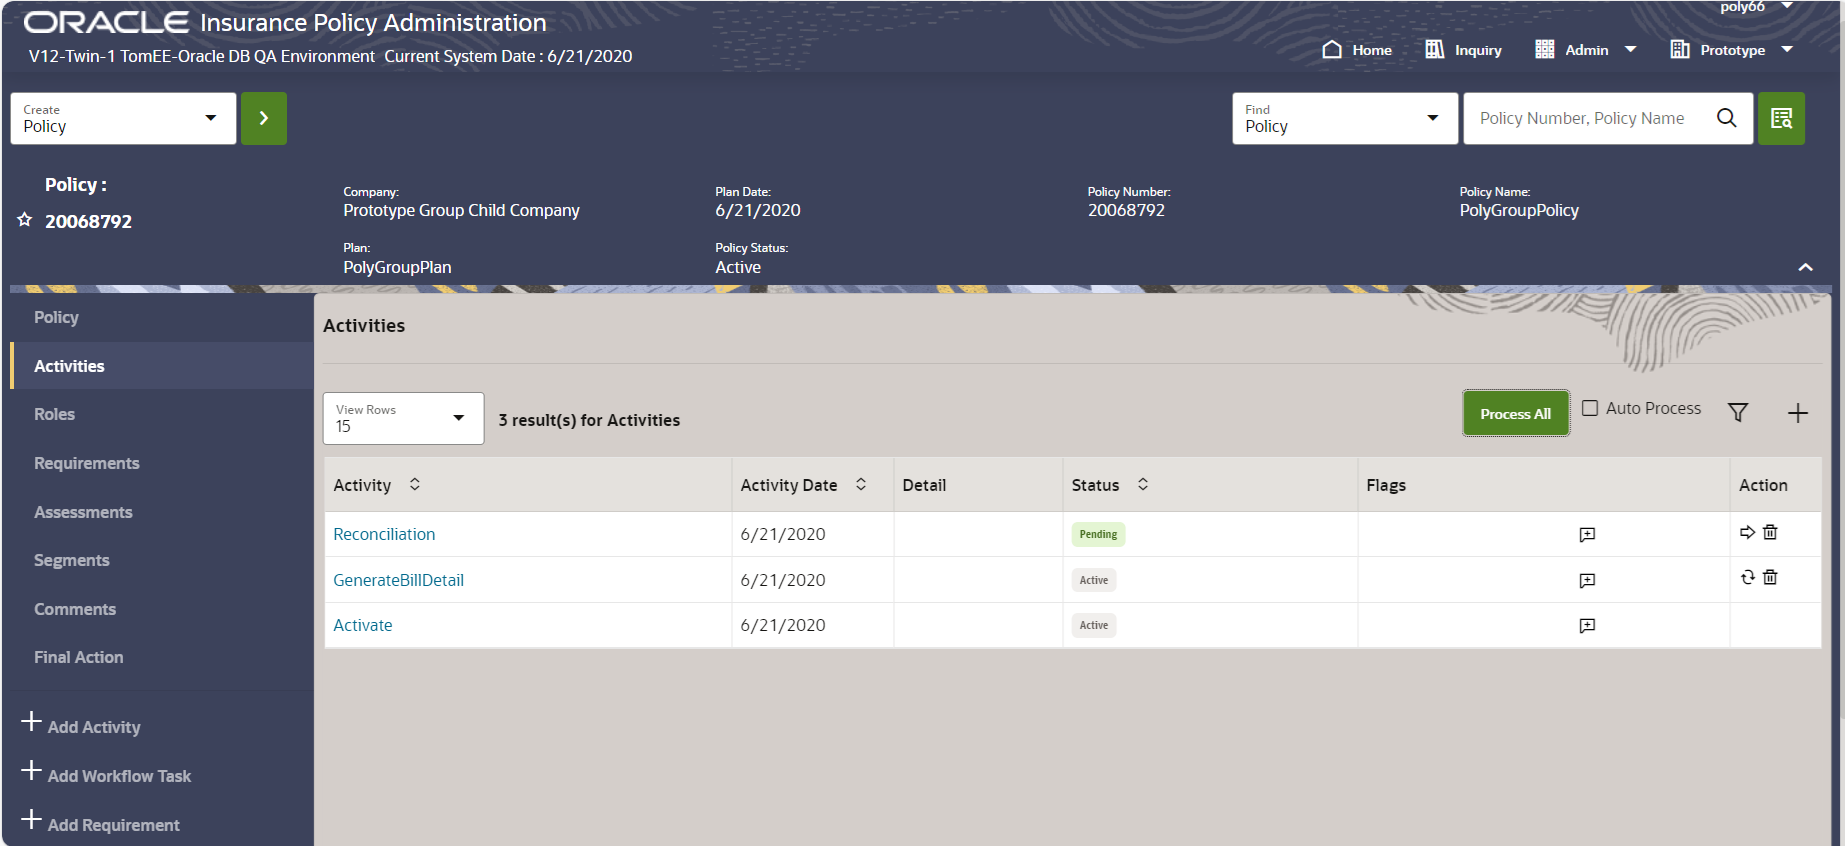
Reconciliation Activity Added - In the Action column, click the Process icon. The activity is processed successfully. On successful processing, the amount is reconciled.
Bill Amount is Reconciled
Group Customer - Manual
F89508-01
November 2023
Copyright © 2021, 2023, Oracle and/or its affiliates.
How to enroll members and reconcile bills for a Group Customer without Data Intake
This software and related documentation are provided under a license agreement containing restrictions on use and disclosure and are protected by intellectual property laws. Except as expressly permitted in your license agreement or allowed by law, you may not use, copy, reproduce, translate, broadcast, modify, license, transmit, distribute, exhibit, perform, publish, or display any part, in any form, or by any means. Reverse engineering, disassembly, or decompilation of this software, unless required by law for interoperability, is prohibited.
If this is software or related documentation that is delivered to the U.S. Government or anyone licensing it on behalf of the U.S. Government, then the following notice is applicable:
U.S. GOVERNMENT END USERS: Oracle programs (including any operating system, integrated software, any programs embedded, installed or activated on delivered hardware, and modifications of such programs) and Oracle computer documentation or other Oracle data delivered to or accessed by U.S. Government end users are "commercial computer software" or "commercial computer software documentation" pursuant to the applicable Federal Acquisition Regulation and agency-specific supplemental regulations. As such, the use, reproduction, duplication, release, display, disclosure, modification, preparation of derivative works, and/or adaptation of i) Oracle programs (including any operating system, integrated software, any programs embedded, installed or activated on delivered hardware, and modifications of such programs), ii) Oracle computer documentation and/or iii) other Oracle data, is subject to the rights and limitations specified in the license contained in the applicable contract. The terms governing the U.S. Government's use of Oracle cloud services are defined by the applicable contract for such services. No other rights are granted to the U.S. Government.
This software or hardware is developed for general use in a variety of information management applications. It is not developed or intended for use in any inherently dangerous applications, including applications that may create a risk of personal injury. If you use this software or hardware in dangerous applications, then you shall be responsible to take all appropriate fail-safe, backup, redundancy, and other measures to ensure its safe use. Oracle Corporation and its affiliates disclaim any liability for any damages caused by use of this software or hardware in dangerous applications.
Oracle and Java are registered trademarks of Oracle and/or its affiliates. Other names may be trademarks of their respective owners.
Intel and Intel Inside are trademarks or registered trademarks of Intel Corporation. All SPARC trademarks are used under license and are trademarks or registered trademarks of SPARC International, Inc. AMD, Epyc, and the AMD logo are trademarks or registered trademarks of Advanced Micro Devices. UNIX is a registered trademark of The Open Group.
This software or hardware and documentation may provide access to or information about content, products, and services from third parties. Oracle Corporation and its affiliates are not responsible for and expressly disclaim all warranties of any kind with respect to third-party content, products, and services unless otherwise set forth in an applicable agreement between you and Oracle. Oracle Corporation and its affiliates will not be responsible for any loss, costs, or damages incurred due to your access to or use of third-party content, products, or services, except as set forth in an applicable agreement between you and Oracle.