2. Getting Started with Oracle FLEXCUBE
This chapter explains the features of Oracle FLEXCUBE login window and the methods to change the user password. You will also find the features of Oracle FLEXCUBE Application Browser.
This chapter contains the following sections
l Section 2.1, "Logging into Oracle FLEXCUBE"
l Section 2.2, "Changing User Password"
l Section 2.3, "The Application Browser"
l Section 2.4, "Application Toolbar"
l Section 2.9, "Toolbar in Oracle FLEXCUBE Screens"
l Section 2.10, "Some Common Icons and their Usage"
l Section 2.11, "Supported Date Formats"
l Section 2.12, "Supported Amount Formats"
l Section 2.13, "Minimizing Main Screens"
2.1 Logging into Oracle FLEXCUBE
You will see the Login window on accessing Oracle FLEXCUBE. To get started, you need to login, using the appropriate User ID and password. The User ID is defined in the user profile created for you by your system administrator.
When you access the system, you will see the ‘Login’ screen.
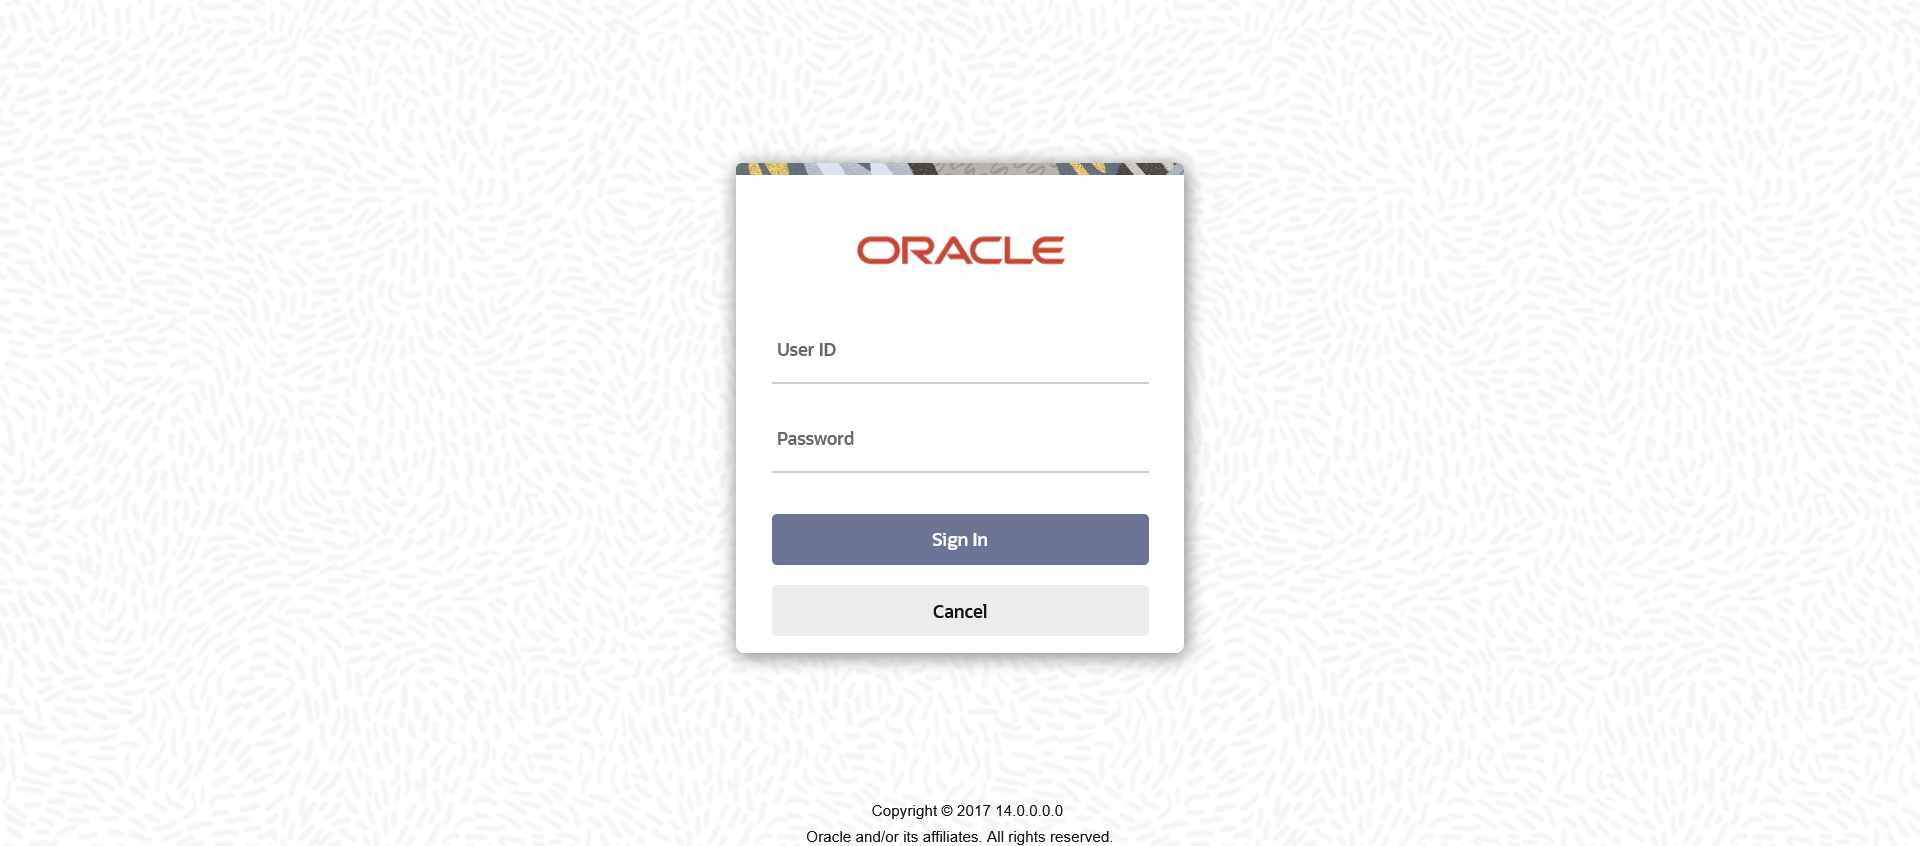
To login to Oracle FLEXCUBE, you need to specify the following details:
User ID
Specify the user ID. You can log into Oracle FLEXCUBE using the user ID provided by your system administrator. This field is not case-sensitive.
Password
Enter the password for the user ID specified in the above field. This field is case sensitive.
Once you have specified the above details, click ‘Sign In’ button.
If you have entered the correct user ID and password, the system will log you in and display the ‘Home’ tab of the ‘Application Browser’ screen. If the user ID or password is incorrect, the system will display the appropriate error message.
While creating the user profile, if the option ‘Force Password Change’ is checked, then the system forces you to change your password on first login. However, if the option is not checked, you may continue to use the same password.
The system disables the user profile under the following circumstances:
l The number of successive invalid login attempts reaches the maximum defined for your user ID
l The cumulative number of invalid login attempts reaches the maximum defined for your user ID
In case the user ID is disabled on any of the above grounds, the system displays a message that your user profile has been disabled. The users designated as Control Clerks can enable your user profile for you to use again. If you want to exit the system, click exit icon.
2.1.1 Multi Entity Enabled Oracle FLEXCUBE
Oracle FLEXCUBE allows you to enable multi entity to login to the respective entity application. Entity is a particular instance of FCUBS and each entity will pertain to its own database. The multiple entities will share a single application and single gateway.
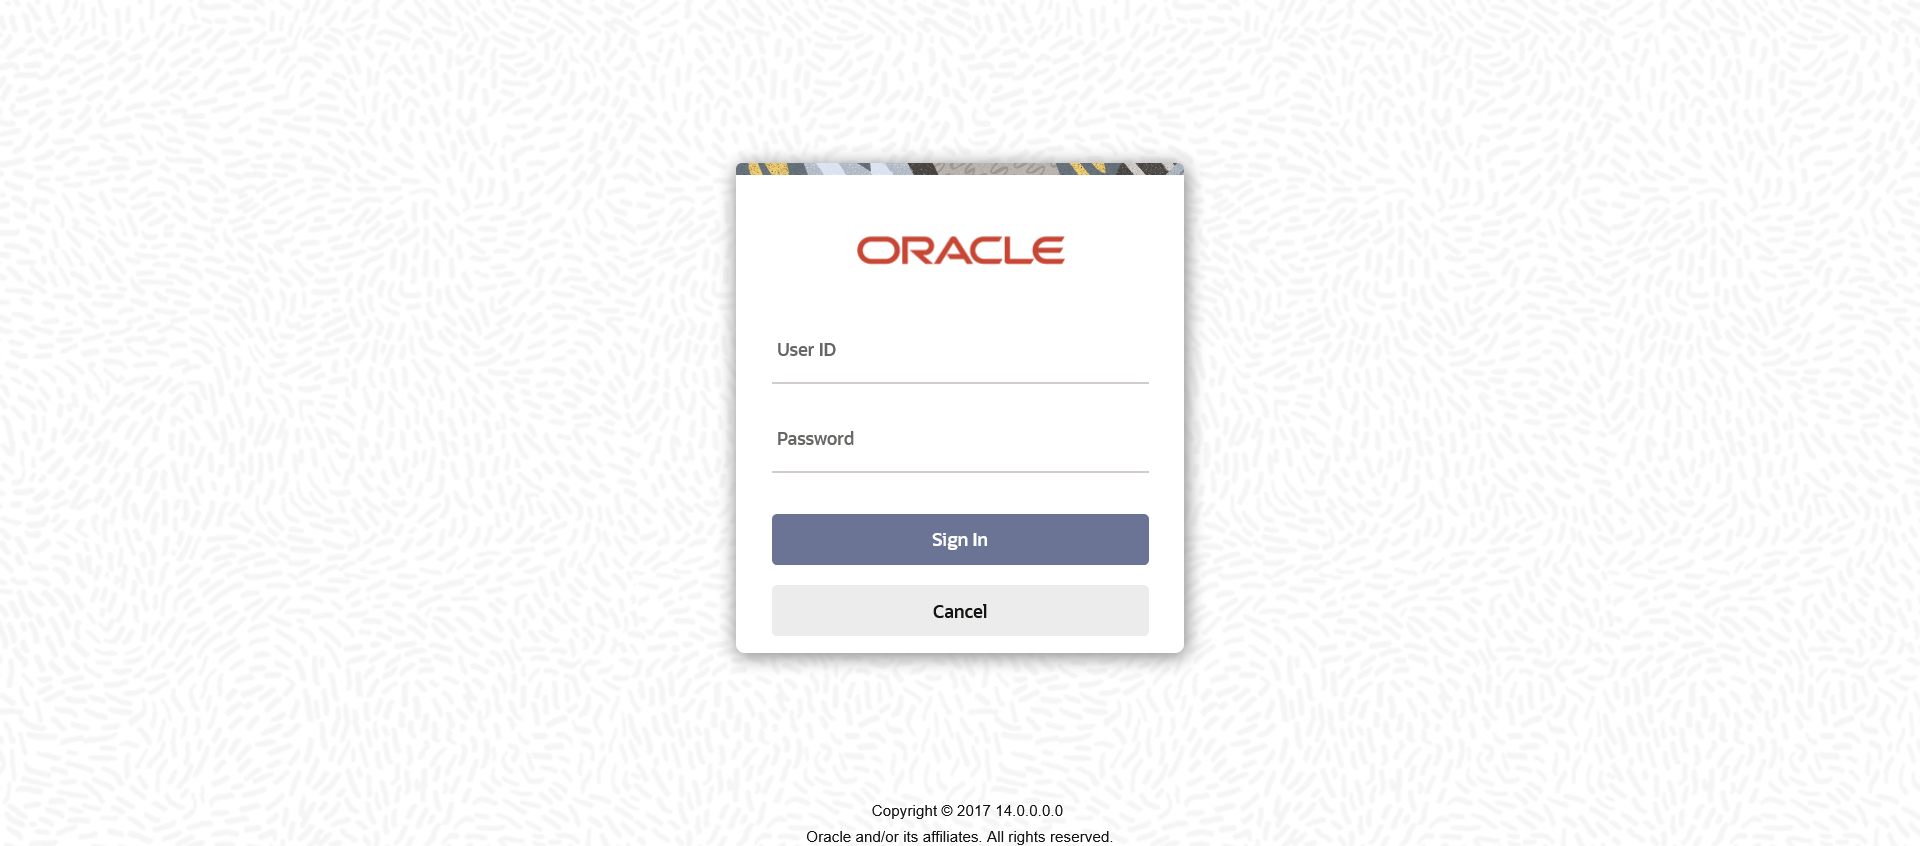
You can login to the multi entity enabled application using your User ID and Password. The user ID and password for entity enabled application will be same as in the application without Entity.
Entity
Select the entity to connect the application to the respective entity from the drop-down list. The list displays all the valid entities maintained in the system.
Note
Each entity will have its own data store schema. All the entities should be in the same code-base.
Oracle FLEXCUBE users can change their user passwords whenever required. The Control Clerks may also enable force password change and set a reminder to be displayed for the users whose password change is due.
User passwords in Oracle FLEXCUBE can be changed in two ways:
Periodic Password Change
A specific interval can be defined in Oracle FLEXCUBE for the user password change. Once the password change is due, on the immediate login attempt by the user, the system will display the ‘Password Change for User’ screen.
Manual Password Change
The user may also change the passwords at will. When you mouse over the logged user name, you will find the ‘User Action’ menu. Click the link ‘Change Password’. The system will display the ‘Change Password’ screen.
In the bank level parameters table, (accessible to users designated as Control Clerks), it can be indicated that a reminder or message should be displayed a fixed number of days before a password change is due.
For example, you may set at the bank level parameters that a password change reminder be displayed three days before the change is due. In that case, three days before the password change due date, you will see a reminder when you log into the system. The system will display this message at every login until the user changes the password.
2.2.1 Procedure to Change Password
Oracle FLEXCUBE allows you to change the user password at will. On the application toolbar, mouse over the logged user name. You will find the ‘User Action’ menu. Click the link ‘Change Password’.
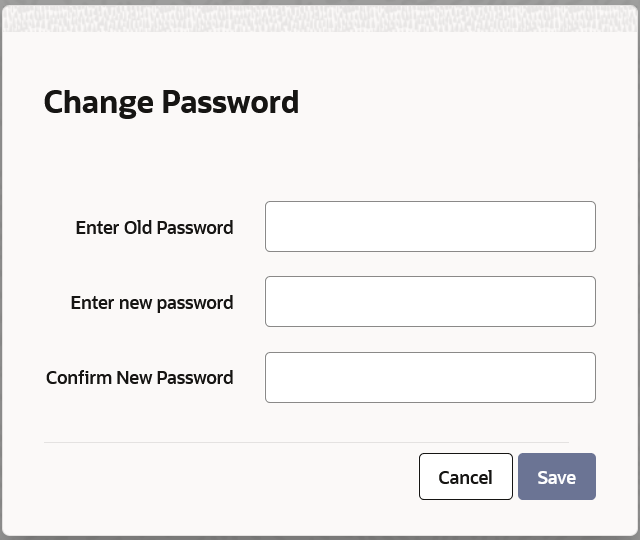
Specify the following details:
Enter Old Password
Specify the current user password.
Enter New Password
Specify the new user password.
Confirm New Password
Specify the new user password again. The system will match it with the new password entered in the above field.
If the password does not match with the password entered in the above field, the password change will not be successful. The system will display an error message. You will be prompted to repeat the password change process.
Once you have entered the above details, click ‘Save’ button. On a successful password change, the system logs you out. You need to log in to the system again using the new password.
You may click ‘Cancel’ button to cancel the password change process anytime before saving it.
The system validates the new password based on the following criteria:
l New password should be different from old password
l Password should not have any blanks before it or after it
l Password should not have any spaces between the characters
l Password should contain a minimum of 1 upper case character
l The only characters allowed for a password are:
– A to Z (in upper or lower case)
– 0 to 9 numbers, and_ (Underscore)
l Password should not be the same as ‘n’ number of previous passwords defined in the Password Repetition field of the Bank Level Parameters screen (here, ‘n’ stands for the number of previous passwords that cannot be used).
For example, at the Bank level the password repetition has been set to three. This means that your new password cannot be any of the last three passwords used by you.
l It should not be one of the passwords in the Restrictive Password list defined for your user profile, the role profile you are attached to (if there is any), or the Bank.
After you login to the application, the system displays the browser, also referred to as ‘Landing Page’ of the application browser.
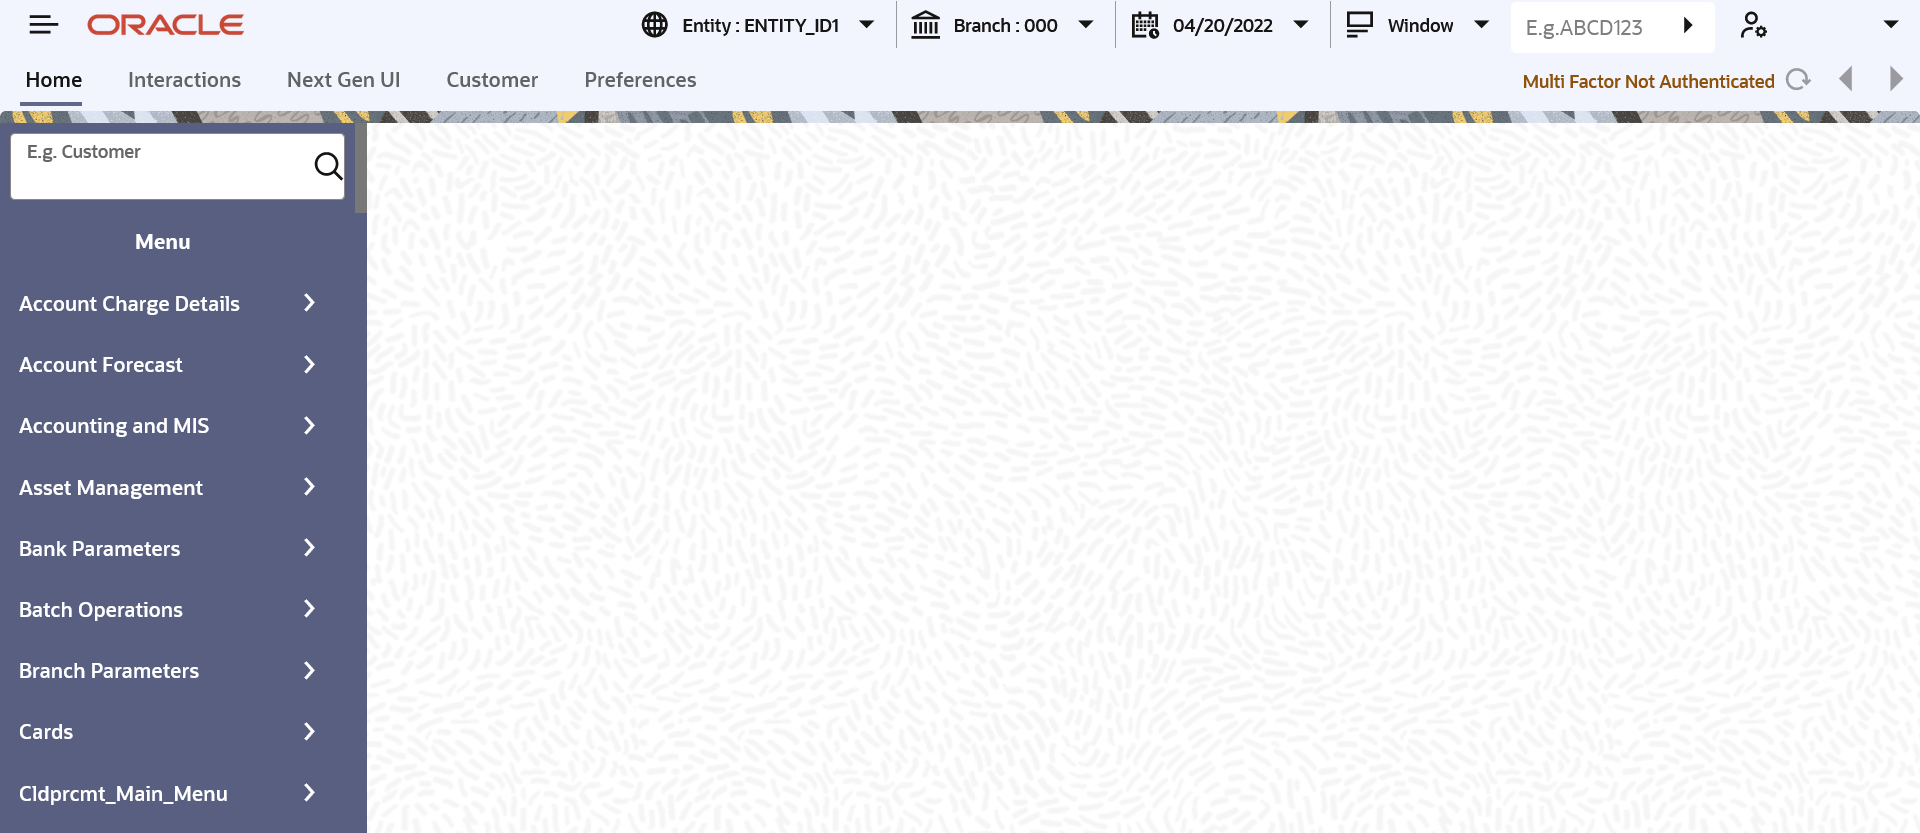
The Landing page is divided into 3 sections:
l Application Toolbar – Tabs and Menu actions
l Left hand side pane – Menu and search criteria based on the tabs selected in toolbar. You can minimize or maximize this pane by clicking and , respectively.
l Right hand side pane – Records matching the search criteria specified in the left hand side pane
The following tabs are available for selection in the ‘Toolbar’ of the landing page:
l Home – Select to view ‘Menu’ on the left hand side window and ‘Dashboard’ on the right hand side. When you login to the system, the ‘Home’ tab is displayed by default.
l Interactions – Select to view alerts, reminders and conversations that require your attention.
l Customer – Select to initiate customer session. This tab is enabled only if branch is plugged in the application.
l Workflow – Select to view the number of records available in each of the workflow stages. This tab is enabled only if branch is plugged in the application.
l Preferences – Select to view the user details and dashboards.
l Menu Options
The application toolbar is placed at the top frame of the application browser.

The application toolbar has the following details:
l Brand name/logo
l Current branch code
l Current system date
l Current user session duration
l Window button to go to the open window
l Help
l Logged user name
l Signoff button
l Function ID input box
The brand name/logo is displayed on the top left corner. You can set the required brand/logo in the properties file.
This section contains the following topics
l Section 2.4.1, "Changing Branch"
l Section 2.4.2, "Current User Session"
l Section 2.4.4, "Default User"
l Section 2.4.5, "Executing User Actions"
Keep the mouse over the branch code on the Application toolbar.
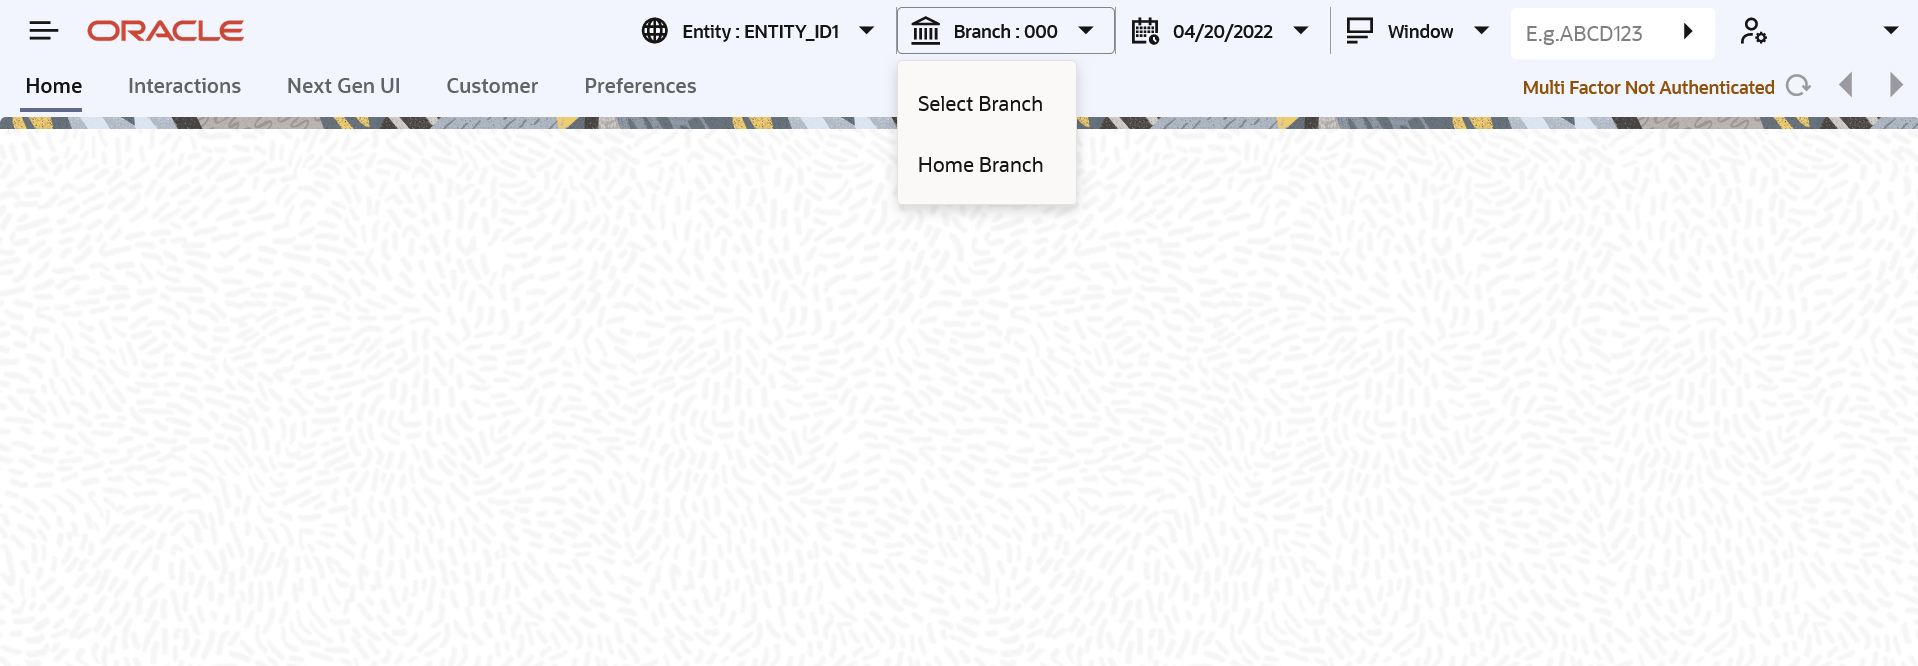
Under ‘Branch’ the following options are available:
l Select Branch - Select the branch that you need to access
l Home Branch - Go to the home branch
The system displays the duration of the current user session.
The session continues as long as the user is active. However, if the user is inactive, the session will automatically end after a certain period of time, based on the settings in the properties file.
One minute before the session time out, you will get the following prompt:
“Your Oracle FLEXCUBE Universal Banking session will expire in 1 minute. Please initiate a transaction or close this screen to reactivate.”
If you do not close the prompt screen within the next one minute, the session will expire. However, if you close the prompt, the session is considered to be active and will continue until you become inactive for the duration required for session time out.
When you launch a screen from the application, the system enables the ‘Window’ tab. If you launch more than a single screen, you can navigate to the screen of your choice through this tab. Click the tab, a drop down list appears from which you can select the screen you need to navigate to.
In the Application toolbar, you can find the option Default User option. Under Default User, the following options are available:
l Accessibility
l About
On selecting ‘Accessibility’ the following screen is displayed where you can see the access keys and the hot keys for the application.
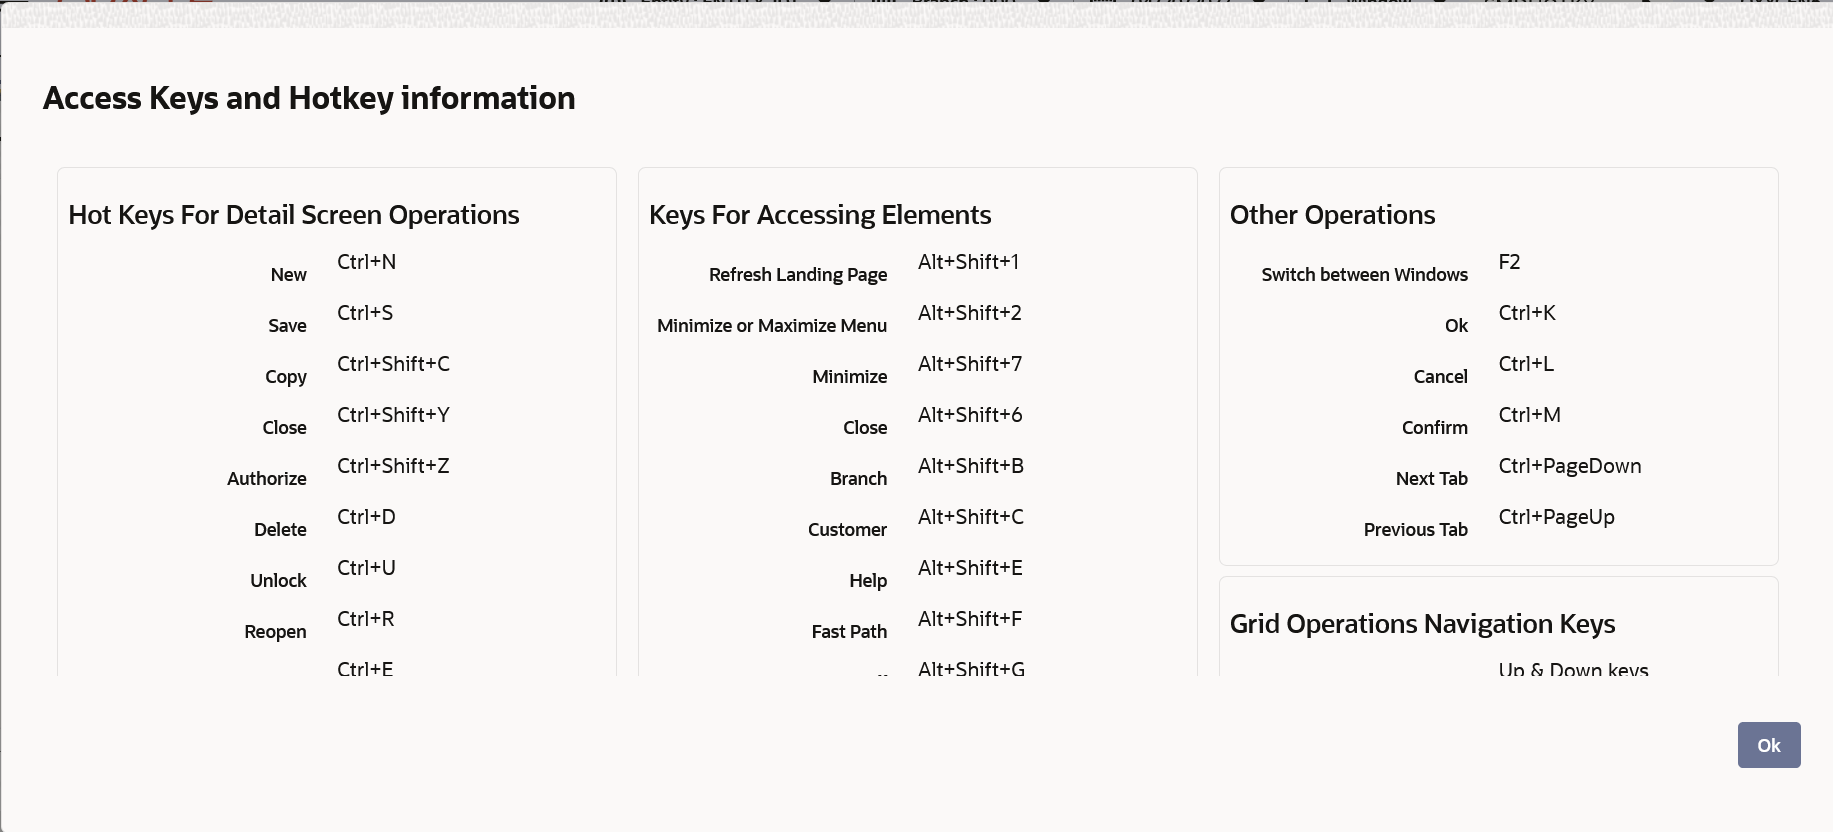
For further details on this screen and the accessibility options, refer to the ‘Accessibility’ user manual.
On selecting ‘About’ option the version and license details about the application (Oracle FLEXCUBE) are displayed.
Oracle FLEXCUBE allows you to execute certain user actions from the Application Browser. Mouse over the user name displayed on the Application toolbar. You can perform the following user actions:
l Set user hotkeys
l User Settings
l Change user password
l Performance statistics
l Debug Window
l Clear User
These user actions are discussed in detail under the following headings:
2.4.5.1 Setting User Hotkeys (Custom Shortcuts)
Oracle FLEXCUBE allows you to configure hotkeys or shortcut keys for specific function IDs that are frequently used. Once you configure such hotkeys, you can launch a specific screen using the hotkeys set for the corresponding function ID.
You need to map each required function ID to a hotkey using the ‘Hot Key Maintenance’ screen. To invoke this screen click ‘User Hotkey’ link under ‘User Action’. You can also invoke this screen by typing ‘SMDHOTKY’ in the field at the top right corner of the Application tool bar and clicking the adjoining arrow button.
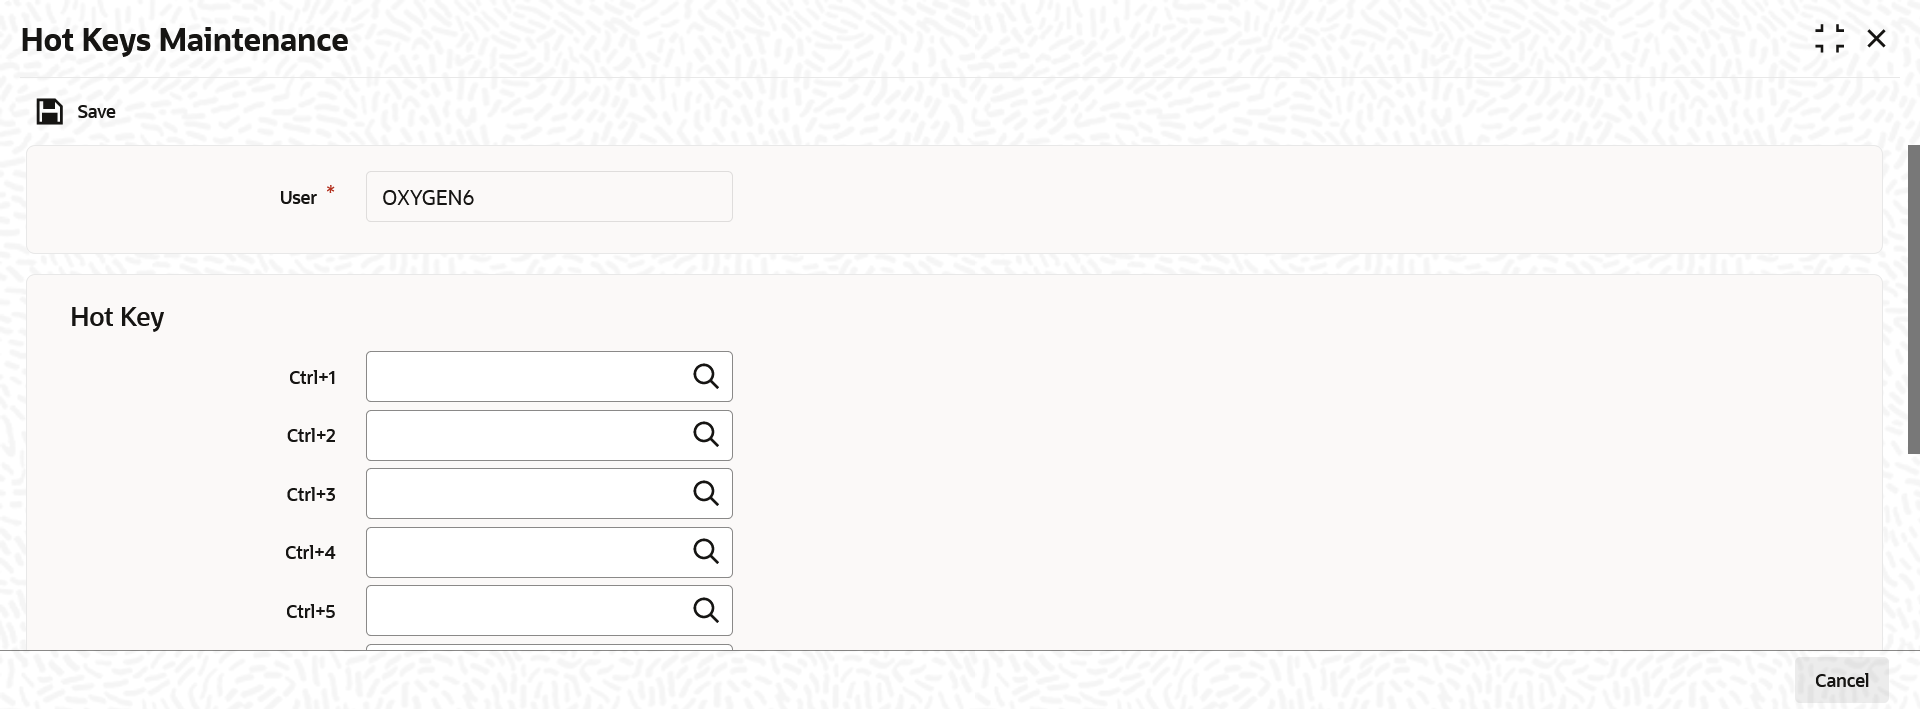
The following details are captured in this screen:
User ID
The system displays your user ID. The hotkeys configured using this screen will be applicable to the user ID displayed here.
Hot Key Details
You can map a function ID against each hotkey. The option list displays all valid function IDs available in Oracle FLEXCUBE. You can choose the appropriate one.
2.4.5.2 User Settings
Click the ‘User Setting’ button under ‘User Action’ to invoke ‘User Settings’ screen.
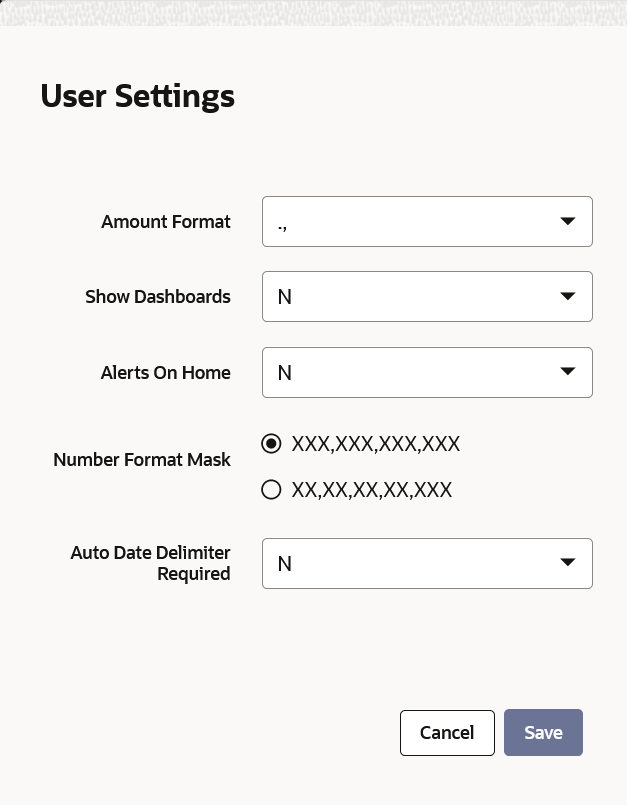
You can specify the following details:
Amount Format
Specify the amount format. Choose the appropriate one from the drop-down list.
Date Format
Specify the date format. Choose the appropriate one from the drop-down list.
Font Size
Select the font size from the drop-down list. The system displays the following values:
l Medium
l Small
l Large
Theme
Specify the theme. Choose the appropriate one from the drop-down list.
Show Dashboards
Select an appropriate option to view the Dashboards assigned to you on the landing page, from the adjoining drop-down list. This list displays the following values:
l N – Select if you do not want to view the Dashboards
l Y – Select if you want to view the Dashboards
Alerts On Home
Select an appropriate option to view the Alerts on the landing page, from the adjoining drop-down list. This list displays the following values:
l N – Select if you do not want to view the Alerts
l Y – Select if you want to view the Alerts
Screensaver Intervals (in seconds)
The system defualts the screensaver interval based on the value maintained at the ‘SMS Bank Parameters Maintenance’ screen. However, you can modify it.
Number Format Mask
Select the number field format of mask number either in Million or in / Lakh from the following options:
l XXX,XXX,XXX,XXX
l XX,XX,XX,XX,XXX
This option is applicable on number field only if FORMAT_REQD is enabled in ODT for the required field.
For further details on enabling the format in ODT refer ODT user manual.
Note
Once you have set your preferences, click ‘Save’ button to apply the changes. The changed value for the screensaver interval gets reflected in User creation screen. To exit the screen without changing the preferences, click ‘Cancel’ button.
The system does not support the screensaver functionality if SSO is enabled.
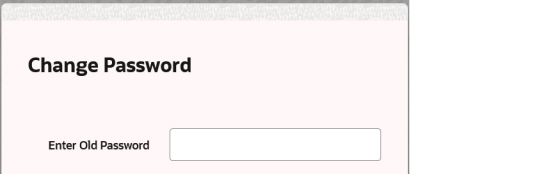
2.4.5.3 Changing Password
Oracle FLEXCUBE allows you to change the user password at will. Under ‘User Action’, click the link ‘Change Password’.
2.4.5.4 Unlocking Screen Lockout
You can unlock the locked-out screen by entering the user password again. The account is locked after a certain number of incorrect passwords.
2.4.5.5 Viewing Performance Statistics
You can view the performance statistics for function IDs and actions using ‘MBean’ screen. The ‘MBean’ screen displays the information available in the server (MBean) and the information from the database.
To invoke this screen, click the link ‘Performance Statistics’ under User Action. You can also invoke this screen by typing ‘SMDMBEAN’ in the field at the top right corner of the Application toolbar and clicking the adjoining arrow button.
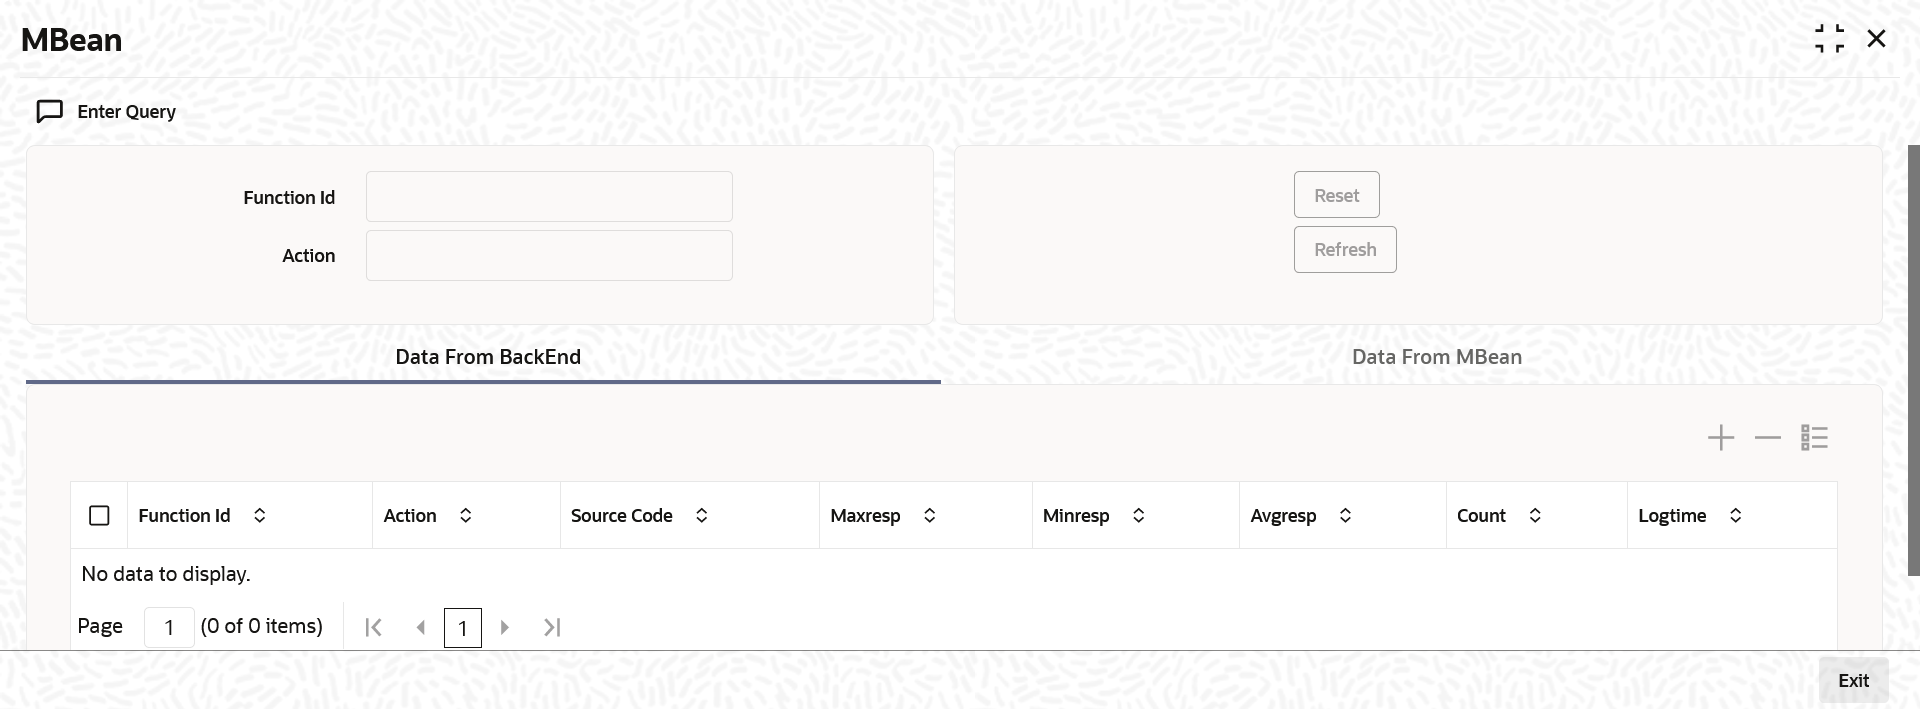
You can search for the details based on the following parameters:
Function ID
Specify the function ID of the screen whose performance you want to view. The system will display the performance statistics of the function ID specified here.
Action
Specify the action. The system will display the performance details of the above function ID for the action specified here.
The system displays the following details based on the specified values:
l Function ID – function ID of the screen
l Action – action performed for this function id.
l Source Code - FCUBS_UI_MBEAN
l Maxresp – maximum time taken for a particular action
l Minresp – minimum time taken for a particular action
l Avgresp – average time taken for a particular action
l Count – number of occurrences of a particular action
l Logtime – log time of the action
l Menu Options
2.4.5.6 Debug Window
Click ‘Debug Window’ under the user actions to invoke the debug window.
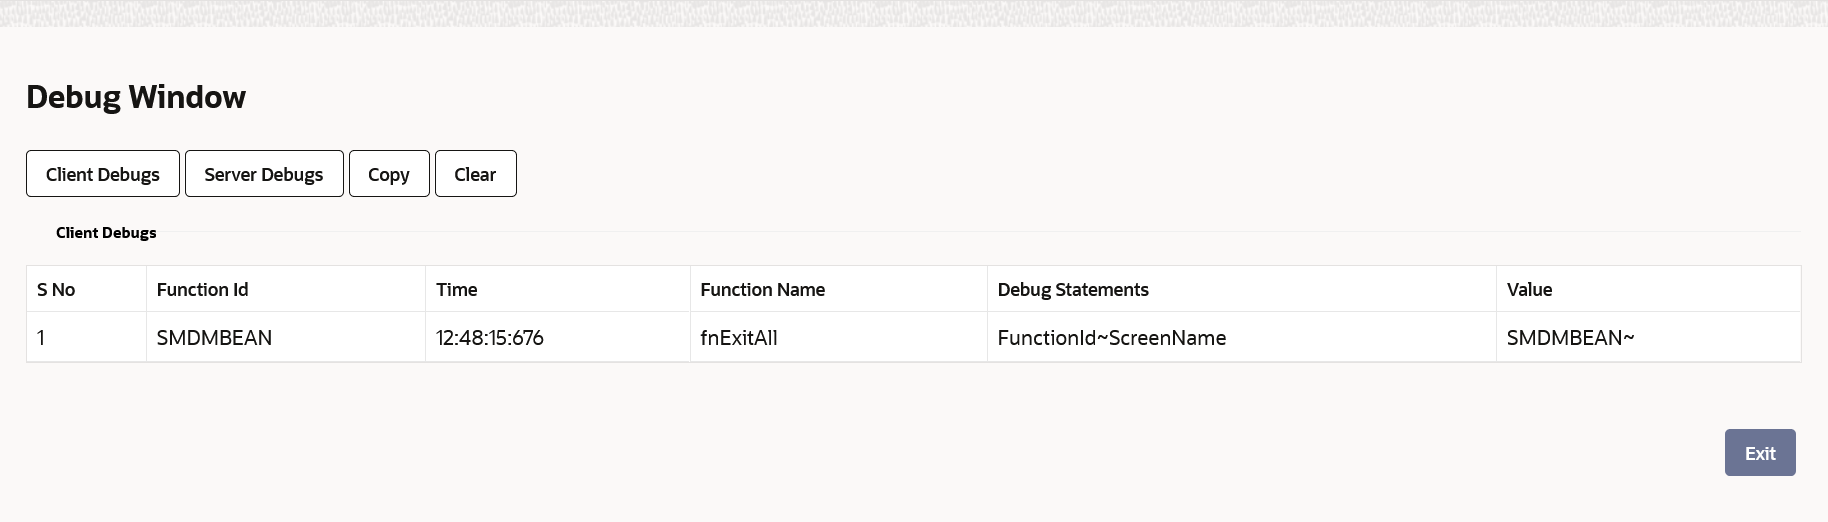
The Debug Window option will be visible only to users who will have front end debug rights maintained.
2.4.5.7 Clearing Users
You can clear the users who are logged into the system using the ‘Clear User’ screen. Under the ‘User Actions’, click ‘Clear User’ button to invoke the screen. You can also invoke this screen by typing ‘CLRU’ at the top right corner of the application toolbar and clicking the adjoining arrow button.
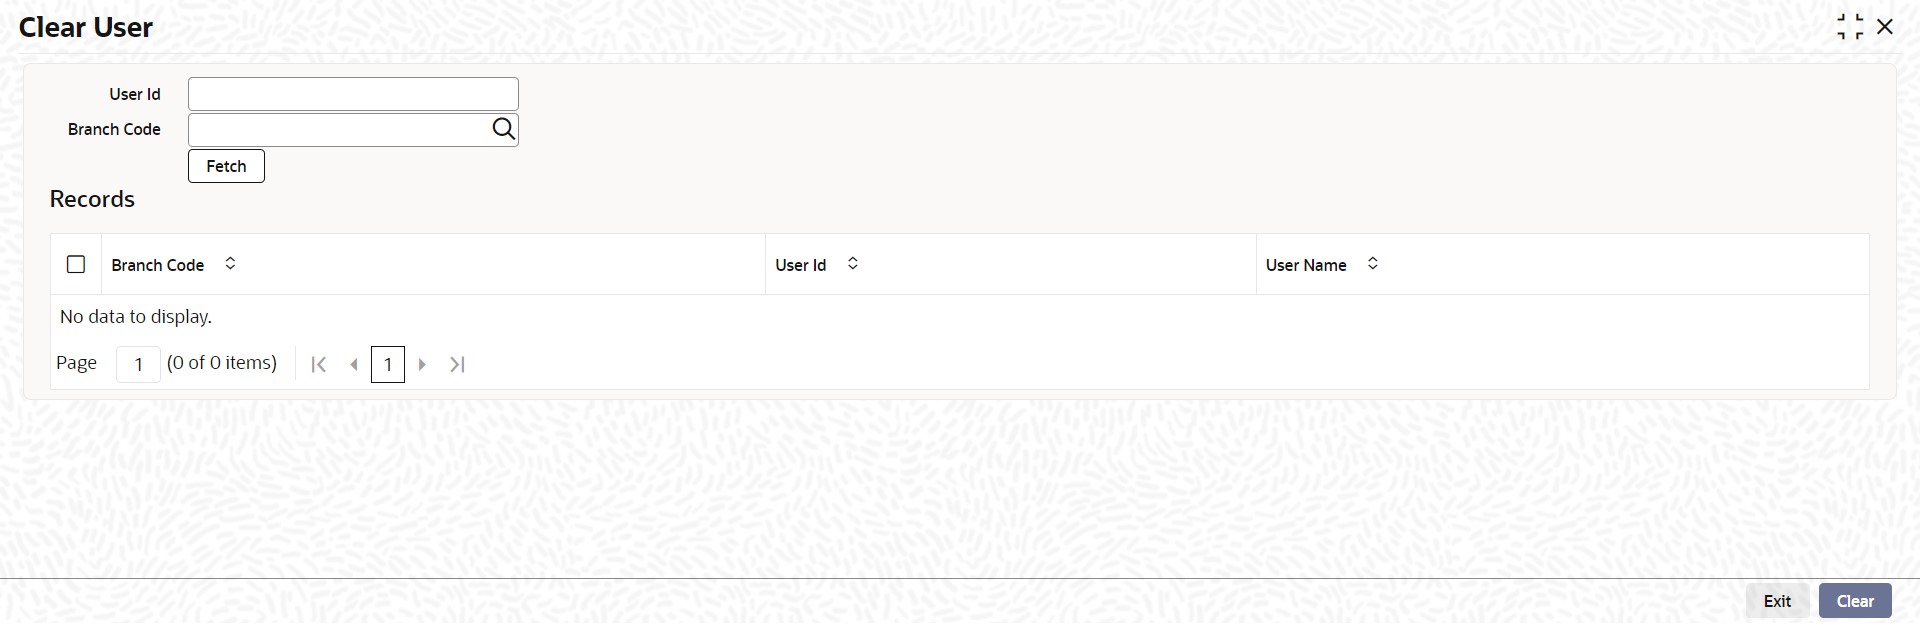
Check the checkbox adjacent to the User ID you need to clear and then click ‘Clear’ button to clear the User ID.
For further details on Clearing User ID, refer to the section ‘Clearing a User ID’ in ‘Associated Functions’ chapter of SMS User Manual.
Click ‘Sign off’ button on the Application toolbar to log out from the application.
This section contains the following topics
l Section 2.5.2, "Function Search"
Under ‘Menu’, you will be able to access the various Transaction screens, Queries, Maintenances etc. through this menu based on your user profile eligibility.
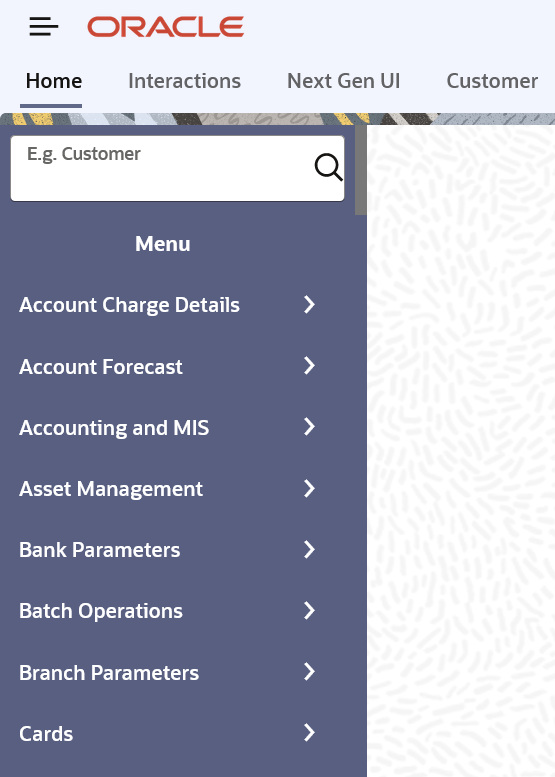
To begin with, only the names of the modules are displayed. To go to a particular screen, position your mouse pointer on the module and click on it. A list of functions available for that particular module will be displayed. Click on the particular function, a list of sub-functions or options available for that particular function will be displayed in an adjacent box.
Click on the option that you want to go to. The screen for the particular option will be displayed. If there are no options for a particular function, the function will be activated.
Only those functions to which you have access rights in a module are displayed. If you do not have access rights to the module then the module is not displayed.
When you invoke an existing record using the Application Browser, you cannot make modifications to it as the screen which you have invoked will be in the view mode. In case you want to make modifications to a record, you should click on unlock button to unlock this record. This will enable you to make the desired modifications.
When you click on the unlock button, you will observe all action buttons become disabled except the Save button. After you have made the required changes, click save icon to save your record. If you do not want to save the changes, click 'Exit' button and the messege “Do you want to cancel the operation?” gets displayed.
Click OK to save and you will be returned to the ‘Application Browser’ or the screen from where you invoked this action without saving the changes.
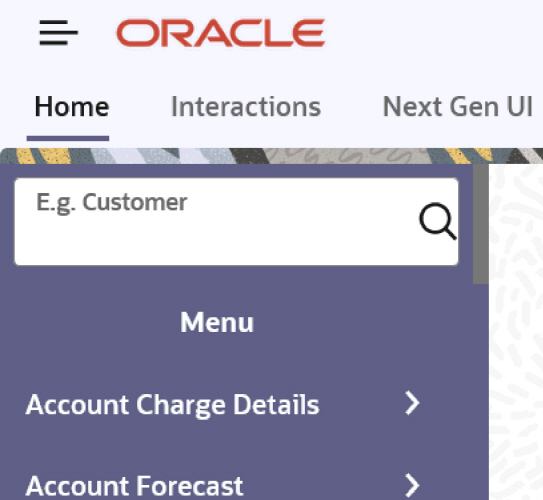
You can search for Oracle FLEXCUBE functions and screens using the search option provided in the left pane of the Home tab.
Enter the search phrase in the search box provided above the menu and click the adjoining arrow button. The system displays the search results in a separate window.
The system displays the function IDs whose descriptions match with the search term that you have entered. The results also displays the location of each function in the Oracle FLEXCUBE menu and the name of the function as available in the menu.
The number of total search results is displayed at the top of the screen on the right hand side. Each page on this screen displays ten results. You can navigate to the other pages using the ‘Next’ button, ‘Previous’ button and the page number links provided at the bottom of the screen.
Click a result to view the corresponding screen. The system will open the screen in a separate window. You may carry out the regular operations that you can perform on the particular function screen.
Click ‘Exit’ button to exit from the search results screen.
Landing page is designed to display six Dashboards distributed in three rows with two Dashboards per row, without vertical scroll bar. These Dashboards provide comprehensive and consolidated snapshot in tiny windows, to access information easily.
For further details about Dashboard, refer ‘Dashboard’ User Manual.
Under ‘Interactions’ tab, you can view the alerts, reminders and conversations that require your attention. Click ‘Interactions’ tab on the Application Browser.
This screen displays the details of the following user interactions:
l Alerts
l Reminders
l Conversations
These interactions are discussed in detail under the following headings.
This section contains the following topics
l Section 2.6.3, "Interactions"
Oracle FLEXCUBE allows you to define specific alerts for the users and bank customers. The ‘Alerts’ section of the ‘Interactions’ tab displays the alerts that require the user’s attention.
In this section, you can find the following details of the alert:
l Subject of the alert
l Message contained in the alert
l Effective date
Oracle FLEXCUBE allows you to define specific reminders for the users and bank customers. The ‘Reminders’ section of the ‘Interactions’ tab displays the reminder messages that require the user’s attention.
In this section, you can find the following details of the reminder:
l Subject of the reminder
l Message contained in the reminder
l Effective date
l Dismiss
Once you have taken required actions as mentioned in the reminder message, you may dismiss the message. To dismiss a reminder, check the ‘Dismiss’ checkbox against the respective reminder and click ‘Process’ button.
Oracle FLEXCUBE allows you to create customer interactions and assign them to specific users for further action. The ‘Interactions’ section of the ‘displays the conversations that require the user’s attention.
In this section, you can find the following details of the conversation:
l Interaction ID
l Subject of the interaction
l User to whom the conversation is assigned to
l Name of the customer
l Interaction Date
l Priority of the interaction
l Status of the interaction
Under Next Gen UI tab, you can view Next Gen UI dashboard. This tab will be visible to only those users who have access to atleast one Next Gen UI product. Click 'Next Gen UI' tab on the Application Browser.

This section contains the following topics
l Section 2.7.1, "Next Gen UI Dashboard"
Oracle FLEXCUBE allows you to view user specific Next Gen UI Products.

In this section, you can find the following details of the Next Gen UI Dashboard:
l Product Name on click of which the corresponding product will be launched in a new browser window
l Product Description
Under ‘Preferences’ tab, you can view the user details and dashboards. Click ‘Preferences’ tab on the Application Browser.
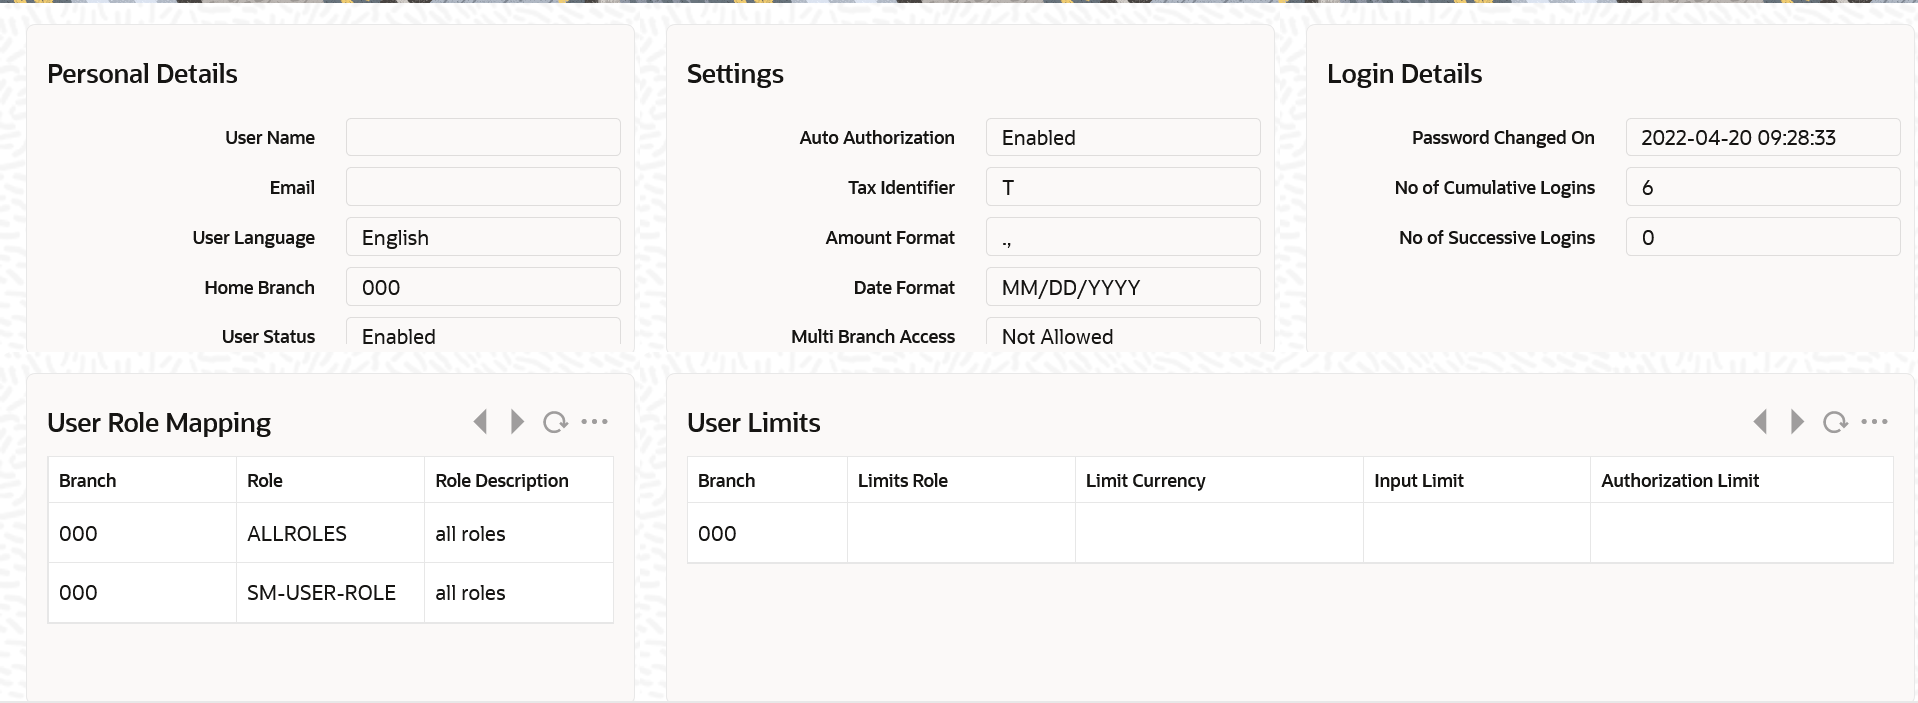
The ‘Preferences’ tab has two panes. The left pane displays the user details and user actions. The right pane displays the user dashboard and other relevant information based on the selections made on the left pane.
This section contains the following topics
l Section 2.8.1, "Viewing User Details"
l Section 2.8.2, "Viewing User Dashboard"
The ‘User Details’ frame is at the top of the ‘Preferences’ tab.
You can view the following user details.
l Personal Details
– User name
– Email ID of the user
– Home branch code of the user
– User status
– Classification
l Settings
– Auto authorization enabled or not
– Tax identifier
– Amount format
– Date format
– Multi branch access allowed or not
– Dashboard required or not
– Alerts on home
l Login Details
– Date of last password change
– Number of cumulative logins
– Number of successive logins
You can view the user dashboard on the right side of the ‘Preferences’ screen. This dashboard displays the details of role mapping, limits and branches pertaining to the selected user.
You can view the following details of the selected user:
Role Mapping Details
This section displays the user role mapping details. You can find the following details pertaining to the selected user:
l Branch code
l User role
l Description of the user role
User Limits
This section displays the user limits details. You can find the following details pertaining to the selected user:
l Branch code
l Limits role of the user
l Limit currency
l Input limit applicable to the user
l Authorization limit applicable to the user
Branch Details
This section displays the branches that are accessible by the user. You can find the following details pertaining to the selected user.
l Allowed Branches - Branch codes that are accessible by the user and the corresponding branch names
l Disallowed Branches - Branch codes that are not accessible by the user and the corresponding branch names
Note
This screen displays the first five records under each section. You can use the ‘Previous’ and ‘Next’ links provided in each section to view the remaining records.
2.9 Toolbar in Oracle FLEXCUBE Screens
All the maintenance and detailed screens in Oracle FLEXCUBE are facilitated with a unique toolbar. The toolbar displays the action icons along with their labels.
|
Icons |
Description |
|
New |
Displays a record with no data so that you can enter data to create a new record. As soon as you click on this button, the ‘Exit’ button on a screen changes to ‘Cancel’ button. |
|
Enter Query |
Enables you to enter query parameters |
|
Copy |
Copies the details of the record on display on to a new record |
|
Save |
Enables you to save the new record/changes you have made on the record on display |
|
Delete |
Deletes the details from the record on display |
|
Unlock |
Unlocks a record enabling you to make changes |
|
|
Prints details of the record on display |
|
Close |
Closes a contract |
|
Reopen |
Re-opens a closed contract |
|
Reverse |
Reverses an authorized contract |
|
Rollover |
Rolls over or renews a contract |
|
Hold |
Places a contract on hold. You can specify the reason for placing the contract on hold in the ‘Comment’ screen, which is invoked on clicking the ‘Hold’ button. |
|
Authorize |
Activates the authorization function. Authorization has to be done by a user other than the one who has created or modified a record. Authorization is normally done during End of Day processing. |
|
Liquidate |
Activates the liquidation function |
|
Confirm |
Confirms an action |
|
Execute |
Executes query operation based on entered query parameters |
|
Details |
After querying the records from summary screens, you can select one or more records and click ‘Details’ button to view the detailed screen for that record. If you select more than one records, then the system will display the detailed screen of the first record. You can click the Next and Previous buttons on the top right side of the screen to navigate to the other records. |
|
Export |
After querying the records from summary screens, click ‘Export All’ button to create a request to extract all the records summary to Excel format. You can query the status of the request using Export All Monitor screen (CSDXLMNT) with exact reference number. |
|
|
Click ‘Previous’ button to navigate to the previous record. This button is disabled when you are on the first record. |
|
|
Click ‘Next’ button to navigate to the next record. This button is disabled when you are on the last record. |


All the above actions are not displayed in the toolbar, only the ones that are allowed for a function ID at given point of time are displayed. For an instance;
Invoke a new screen:
The system displays,
l New - When you click ‘New’ to create a new account, contract or transaction, then the system shows actions ‘Save’ and ‘Hold’. When you click ‘New’ to create a new product or maintenance, system shows the action ‘Save’.
l Enter Query - When you click to enter a query, then the system replaces all actions with ‘Execute Query’
Invoke an authorized record which is open, from a summary screen
The system displays,
l New
l Copy - When you click to copy the details, then the system replaces all actions with ‘Save’
l Close - When you click to close the record, then the system replaces ‘Close’ and ‘Unlock’ with ‘Delete’ and ‘Authorize’
l Unlock - When you click to amending the details, then the system replaces all actions with ‘Save’
l Print
l Reverse - Displayed only for a transaction screen
l Rollover - Displayed only for a transaction screen
l Enter Query
Invoke an authorized record which is closed, from a summary screen
The system displays,
l New
l Copy
l Reopen - When you click to reopen the record, then the system replaces ‘Reopen’ with ‘Close’ and ‘Unlock’
l Enter Query
Invoke an authorized record which is closed, from a summary screen
The system displays,
l New
l Print
l Enter Query
Invoke an unauthorized record from a summary screen
The system displays,
l New
l Copy
l Delete
l Unlock
l Authorize
l Enter Query
A new record is not available for use till its creation is authorized by another user. Similarly, you cannot make any modification on a record till the previous modification, if any, has been authorized.
Note
‘Template’ function is not supported.
2.10 Some Common Icons and their Usage
There are some icons, which represent functions that are common across all modules of Oracle FLEXCUBE.
This section contains the following topics
l Section 2.10.1, "Adding and Deleting Rows"
l Section 2.10.2, "The Save and Exit Icons"
l Section 2.10.3, "Fetching Values from List of Values (LOV)"
2.10.1 Adding and Deleting Rows
The Add row and Delete row icons are used when you have to enter or fill up rows of data in a screen.
Let us take the example of the ‘CLS Currency Restrictions’ screen, which is invoked by clocking ‘CLS Restrictions’ button on the ‘Customer Maintenance’ (STDCIF) screen.
You have to add various currencies to the list of restricted currencies. To do this, you will first choose the Currency from the option list. Both currency and description will get populated.
Now the first row is complete. Click add icon. This will save the data in the first row and take you to the next row.
Suppose you realize that you have allotted the wrong currency and you do not want to save the data in the first row. Click delete icon. The data will not be saved in the row and you can fill it with the correct data.
2.10.2 The Save and Exit Icons
l After you have entered data in a screen you may want to save the data. Click ‘Ok’ button.
l If you do not want to save the data in a screen, click ‘Cancel’ button.
l To exit from a screen, click ‘Exit’ or ‘Cancel’ button which takes you to the Application Browser.
2.10.3 Fetching Values from List of Values (LOV)
You can fetch data from an option list or list of values (LOV – ), if the LOV value is keyed in and tabbed out in its input field.
System opens the LOV window in the following scenarios:
l If more than one value exists for the value keyed in the input field of LOV
l If no value exists for the value keyed in the input field of LOV
The number of values and the total pages displayed in the LOV screen is based on the number of records matching the search criteria. Hence,
l If the value that you have keyed in the input field has only one matching value in the LOV, then system will not open the LOV on tabbing out and all the return fields for that LOV will be automatically updated.
l If more than one record is available, then the system displays the first 10 pages of the records. Click ‘Next’, ‘Previous’, ‘Last’ and ‘First Page’ to view the next set of records, previous set of records, last set of records, and first set of records, respectively.
l If the total number of pages is less than 10, then the page count is displayed as ‘Current Page of Exact Total Page Count’. Else, the page count is displayed as ‘Current Page of 10’.
l For both extensible and non-extensible screens, you can also maintain a query; in addition to existing LOV, for a particular column.
Note
You can use wild card character (%) to search records in List of Values. If ‘Minimum Search Character Length’ is enabled for a List of Values field, then you need to enter the minimum number of search characters along with wild card character to get valid results.
If Exact Fetch is enabled for the field, then you must enter the exact text to get the value in the field.
For details on options to set Minimum Search Character Length or Exact Fetch for fields, refer to Open Development Tools User Guide.
The system displays the following messages at the bottom of the screens, at different scenarios:
l OK – if less than or equal to 10 records are fetched.
l Please reframe your Search criteria – if more than 10 records are fetched.
l No Records found – if no records are found matching the search criteria.
l Error message – if the query fails
Note
The LOV reduction field is case sensitive.
The following date formats are supported in Oracle FLEXCUBE:
l M/d/yyyy
l M/d/yy
l MM/dd/yy
l MM/dd/yyyy
l yy/MM/dd
l yyyy-MM-dd
l dd-MMM-yy
l dd-MMM-yyyy
The following amount formats are supported in Oracle FLEXCUBE:
(The first symbol is the decimal separator and the second one is for digit grouping)
l .,(Dot Comma)
l ,.(Comma Dot)
l , (Comma Space)
You can minimize main screens by clicking minimize button. The minimized screens reside in the provided taskbar. These minimized screens can be maximized either from the taskbar or from the windows menu option.
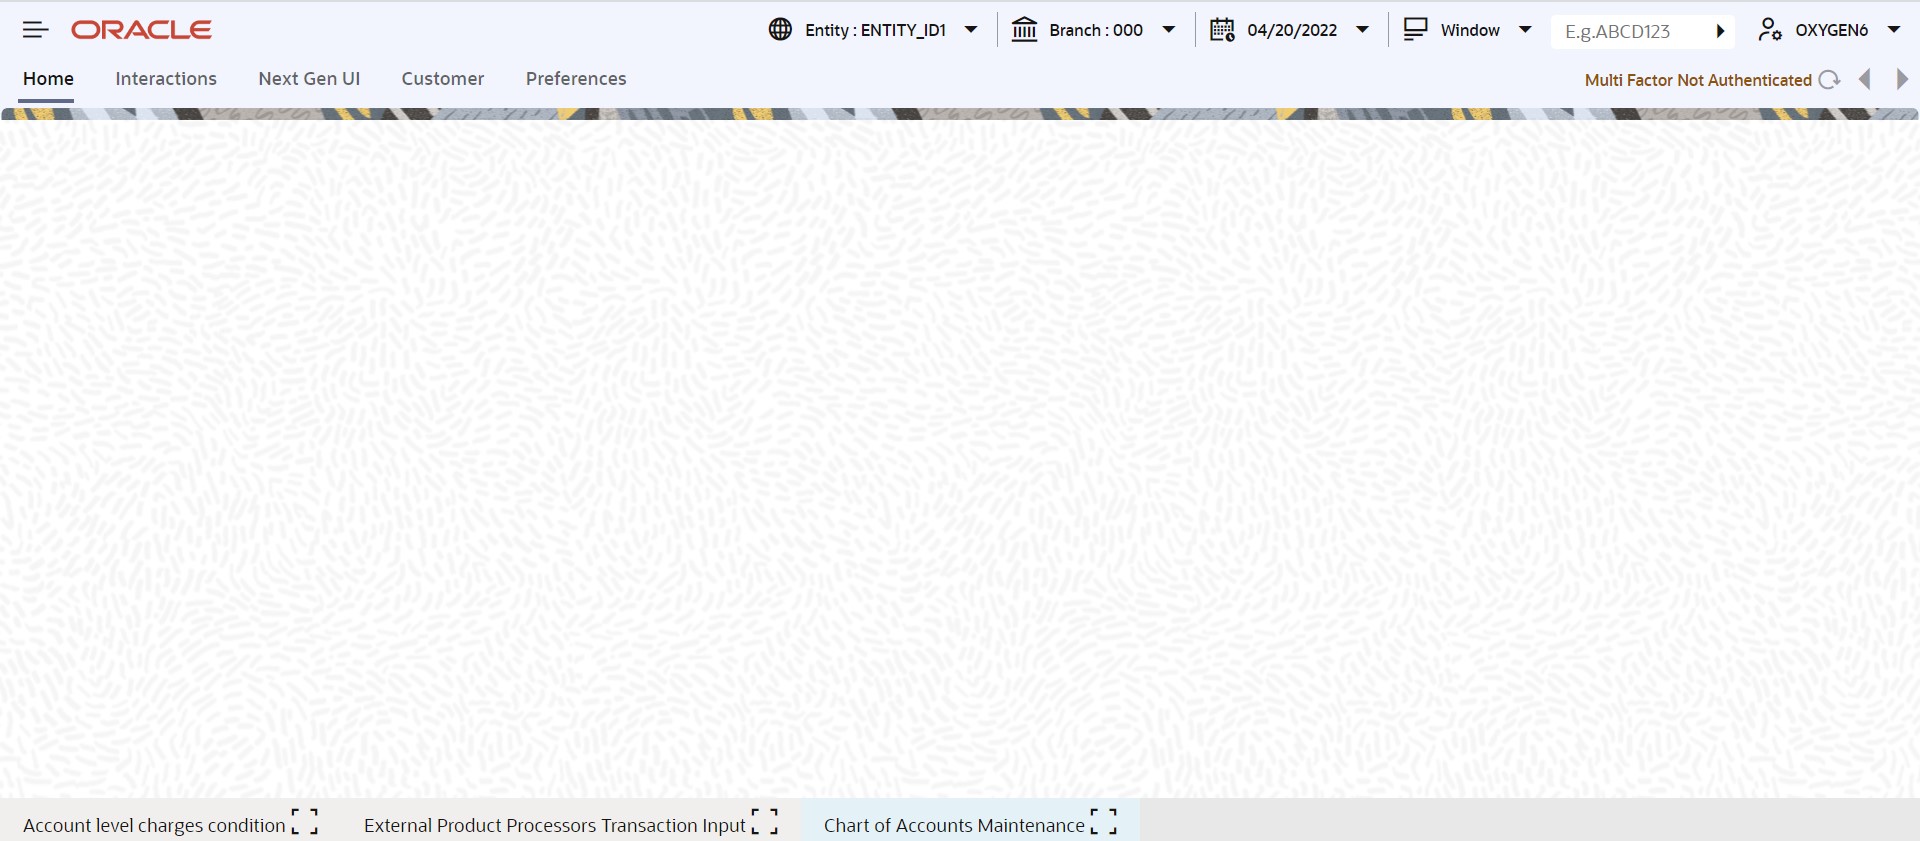
This section contains the following topics:
l Section 2.14.1, "Monitoring Excel Exports"
l Section 2.14.2, "Viewing Excel Export Summary"
2.14.1 Monitoring Excel Exports
You can monitor the status of ‘Export All’ actions you have performed on summary screens. To invoke Export Monitor, type ‘CSDXLMNT’ in the field at the top right corner of the application toolbar and click the adjoining arrow button.
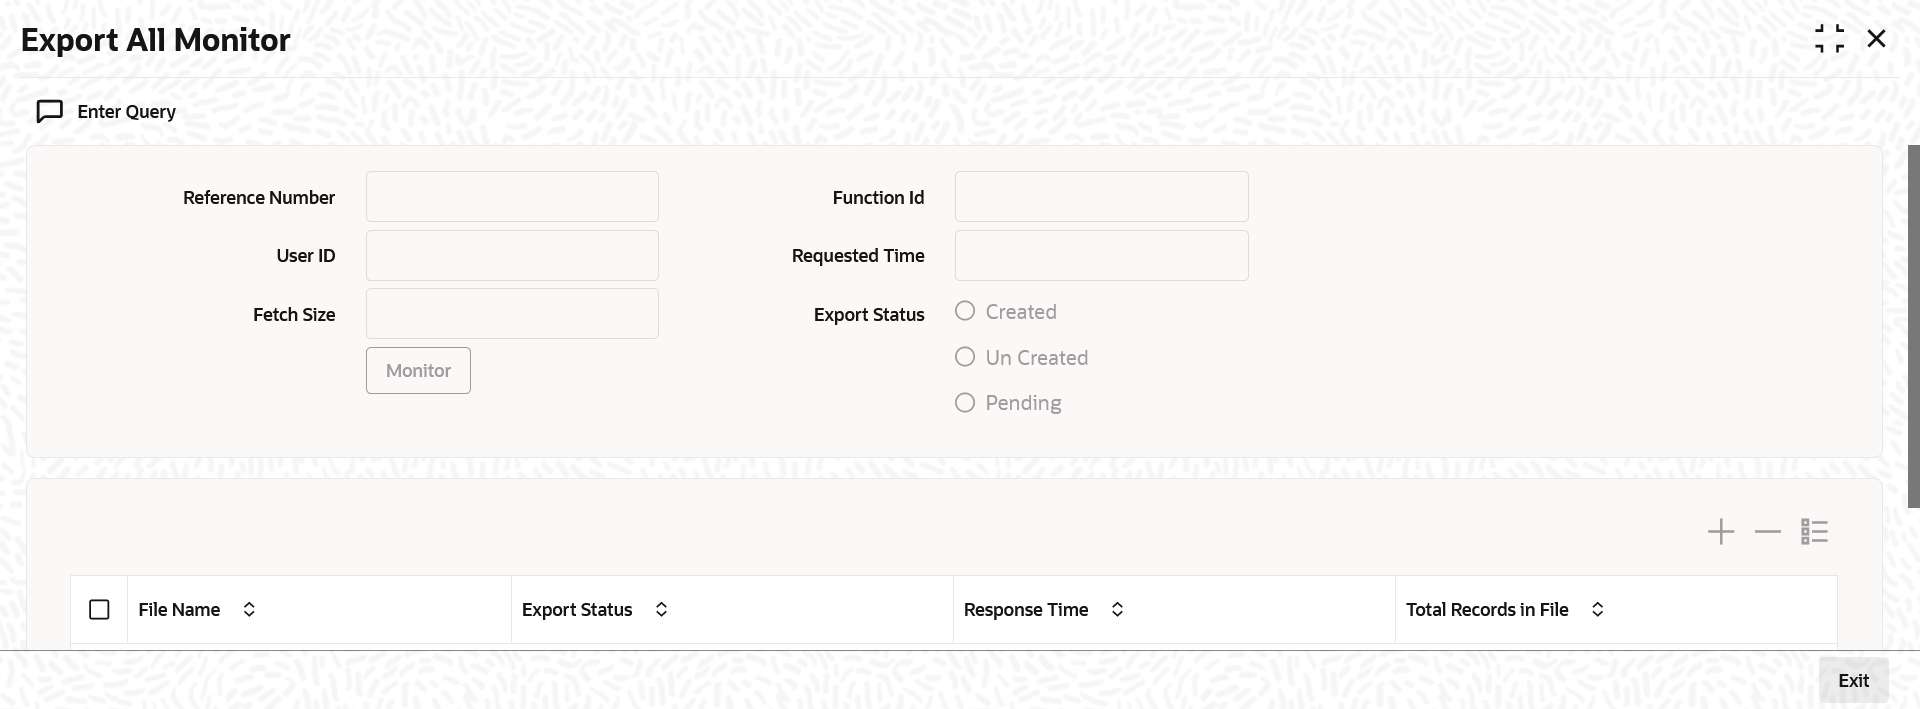
Specify the following details:
Reference Number
Specify the reference number of the export all request.
To view the status of the export request, it is essential for you to know the request reference number. This reference number is generated and displayed to you when you click ‘Export All’ button for a summary search.
Once you have specified the reference number, click ‘Execute Query’ button. The system the following details of the request.
l User ID
l Fetch size
l Function ID
l Requested time
l Export status, whether created, uncreated or pending
l File name
l Export status
l Response time
l Total records in file
Generated excel files will be available in the EXCEL_PATH maintained in the property file. The name of the folder, where the file is placed, will be the reference number of your equest.
2.14.2 Viewing Excel Export Summary
You can view a summary of export all requests using ‘Export All Summary’ screen. To invoke this screen, type ‘CSSXLMNT’ in the field at the top right corner of the application toolbar and click the adjoining arrow button,
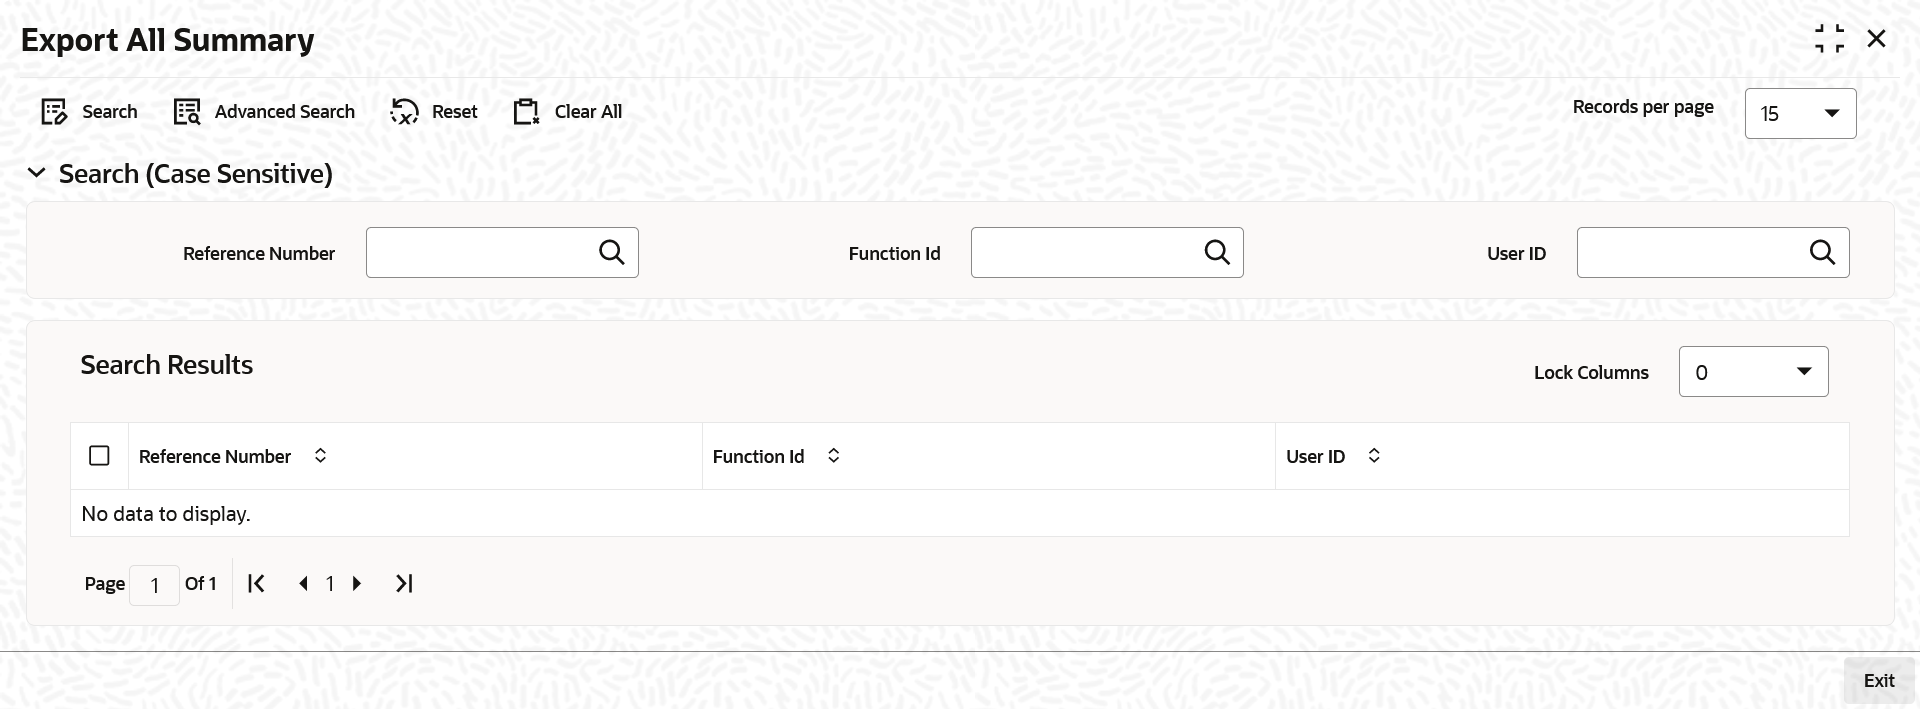
You can search for the records based on one or more of the following parameters:
l Reference number
l Function ID
l User ID
Once you have set the search parameters, click ‘Search’ button. The system displays all export all requests that match the search criteria.